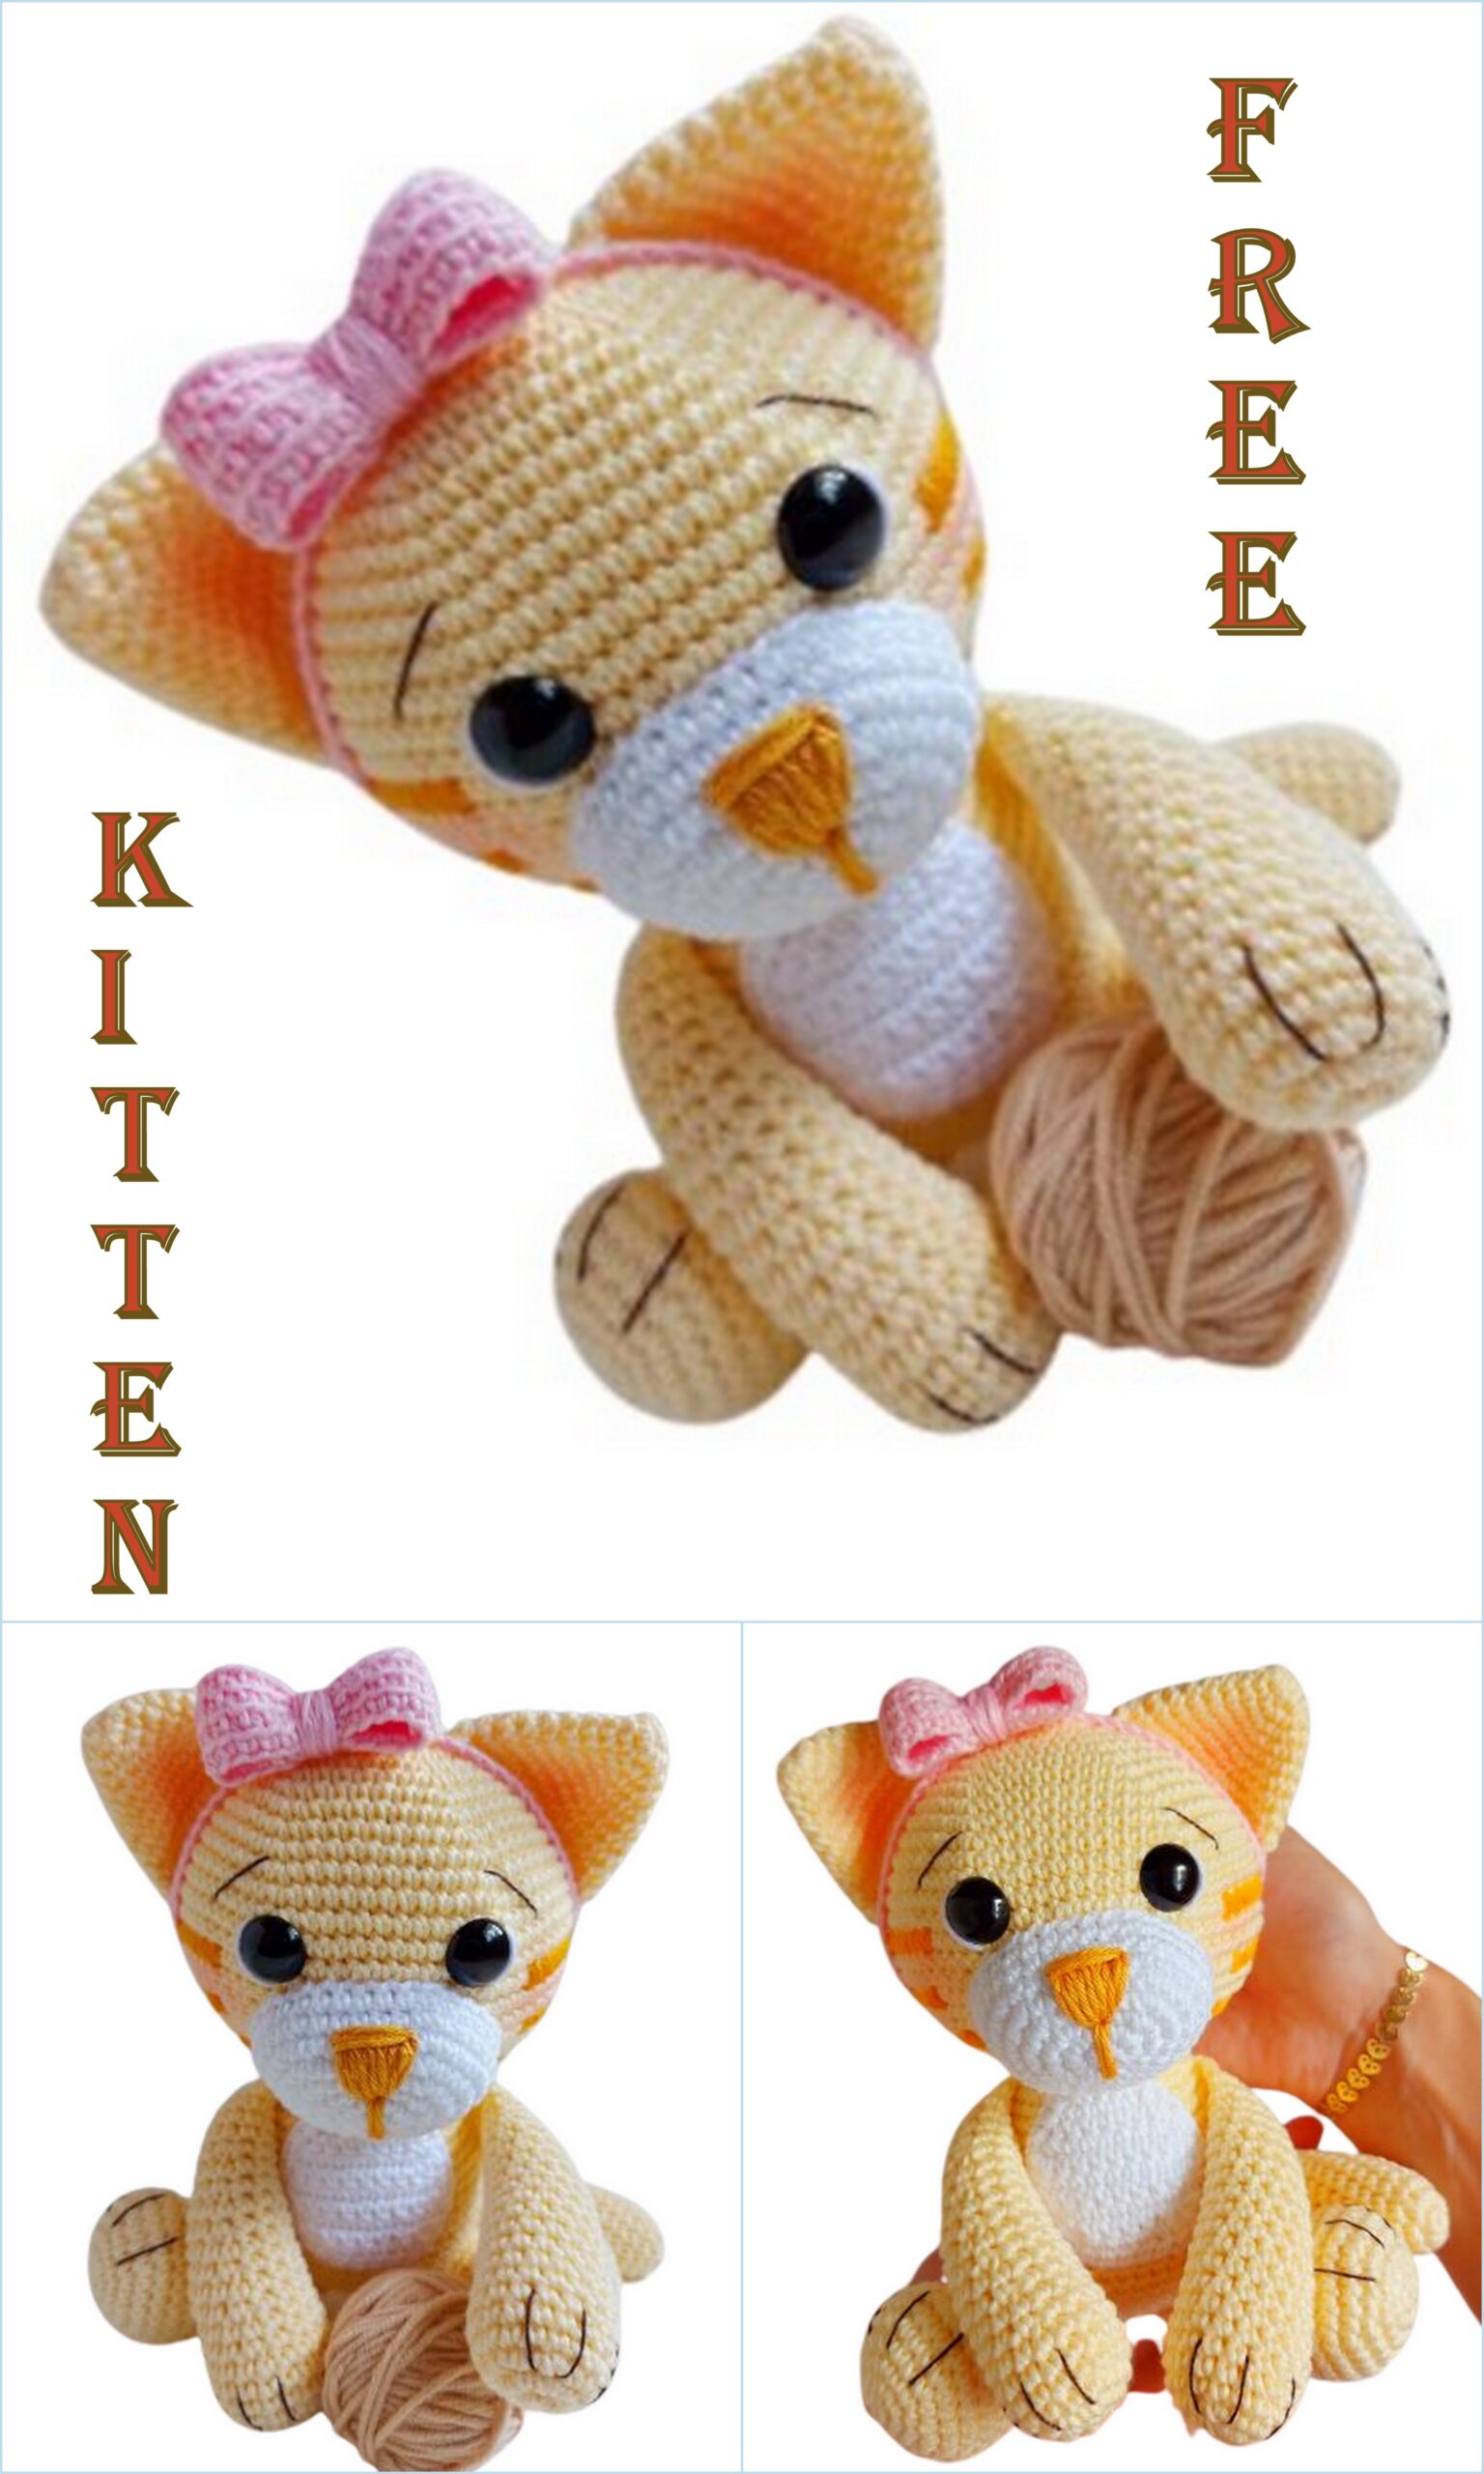
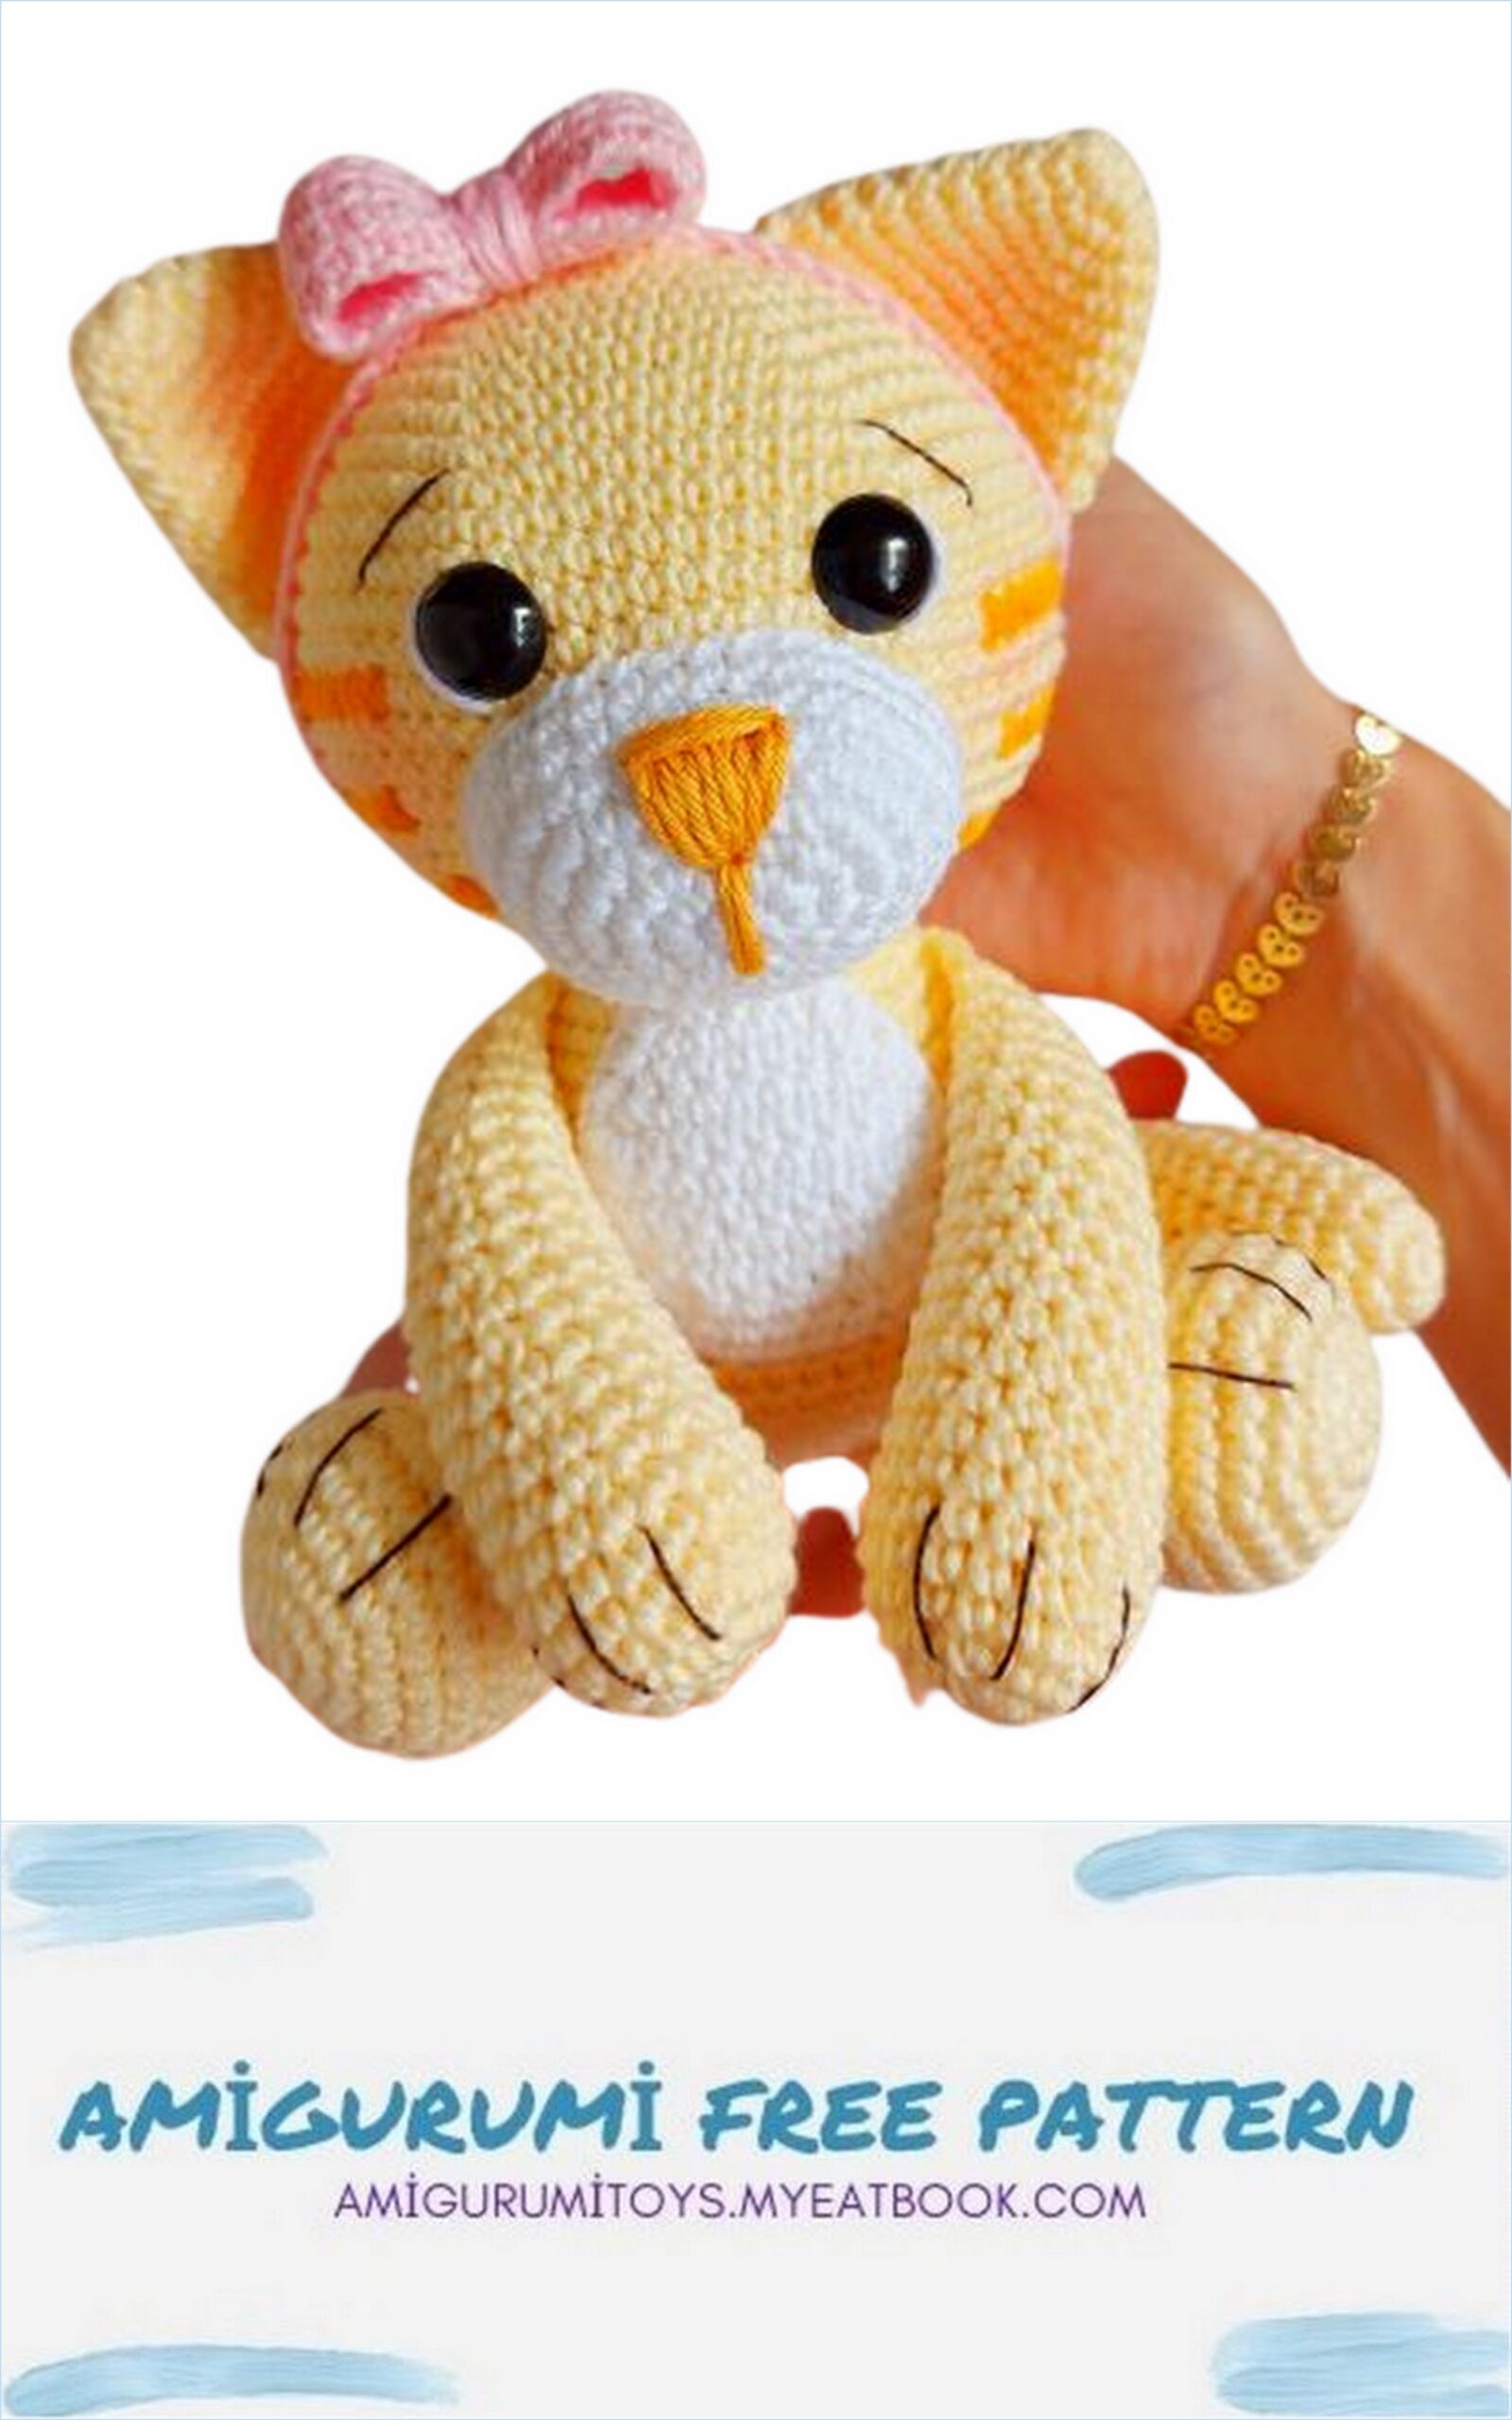
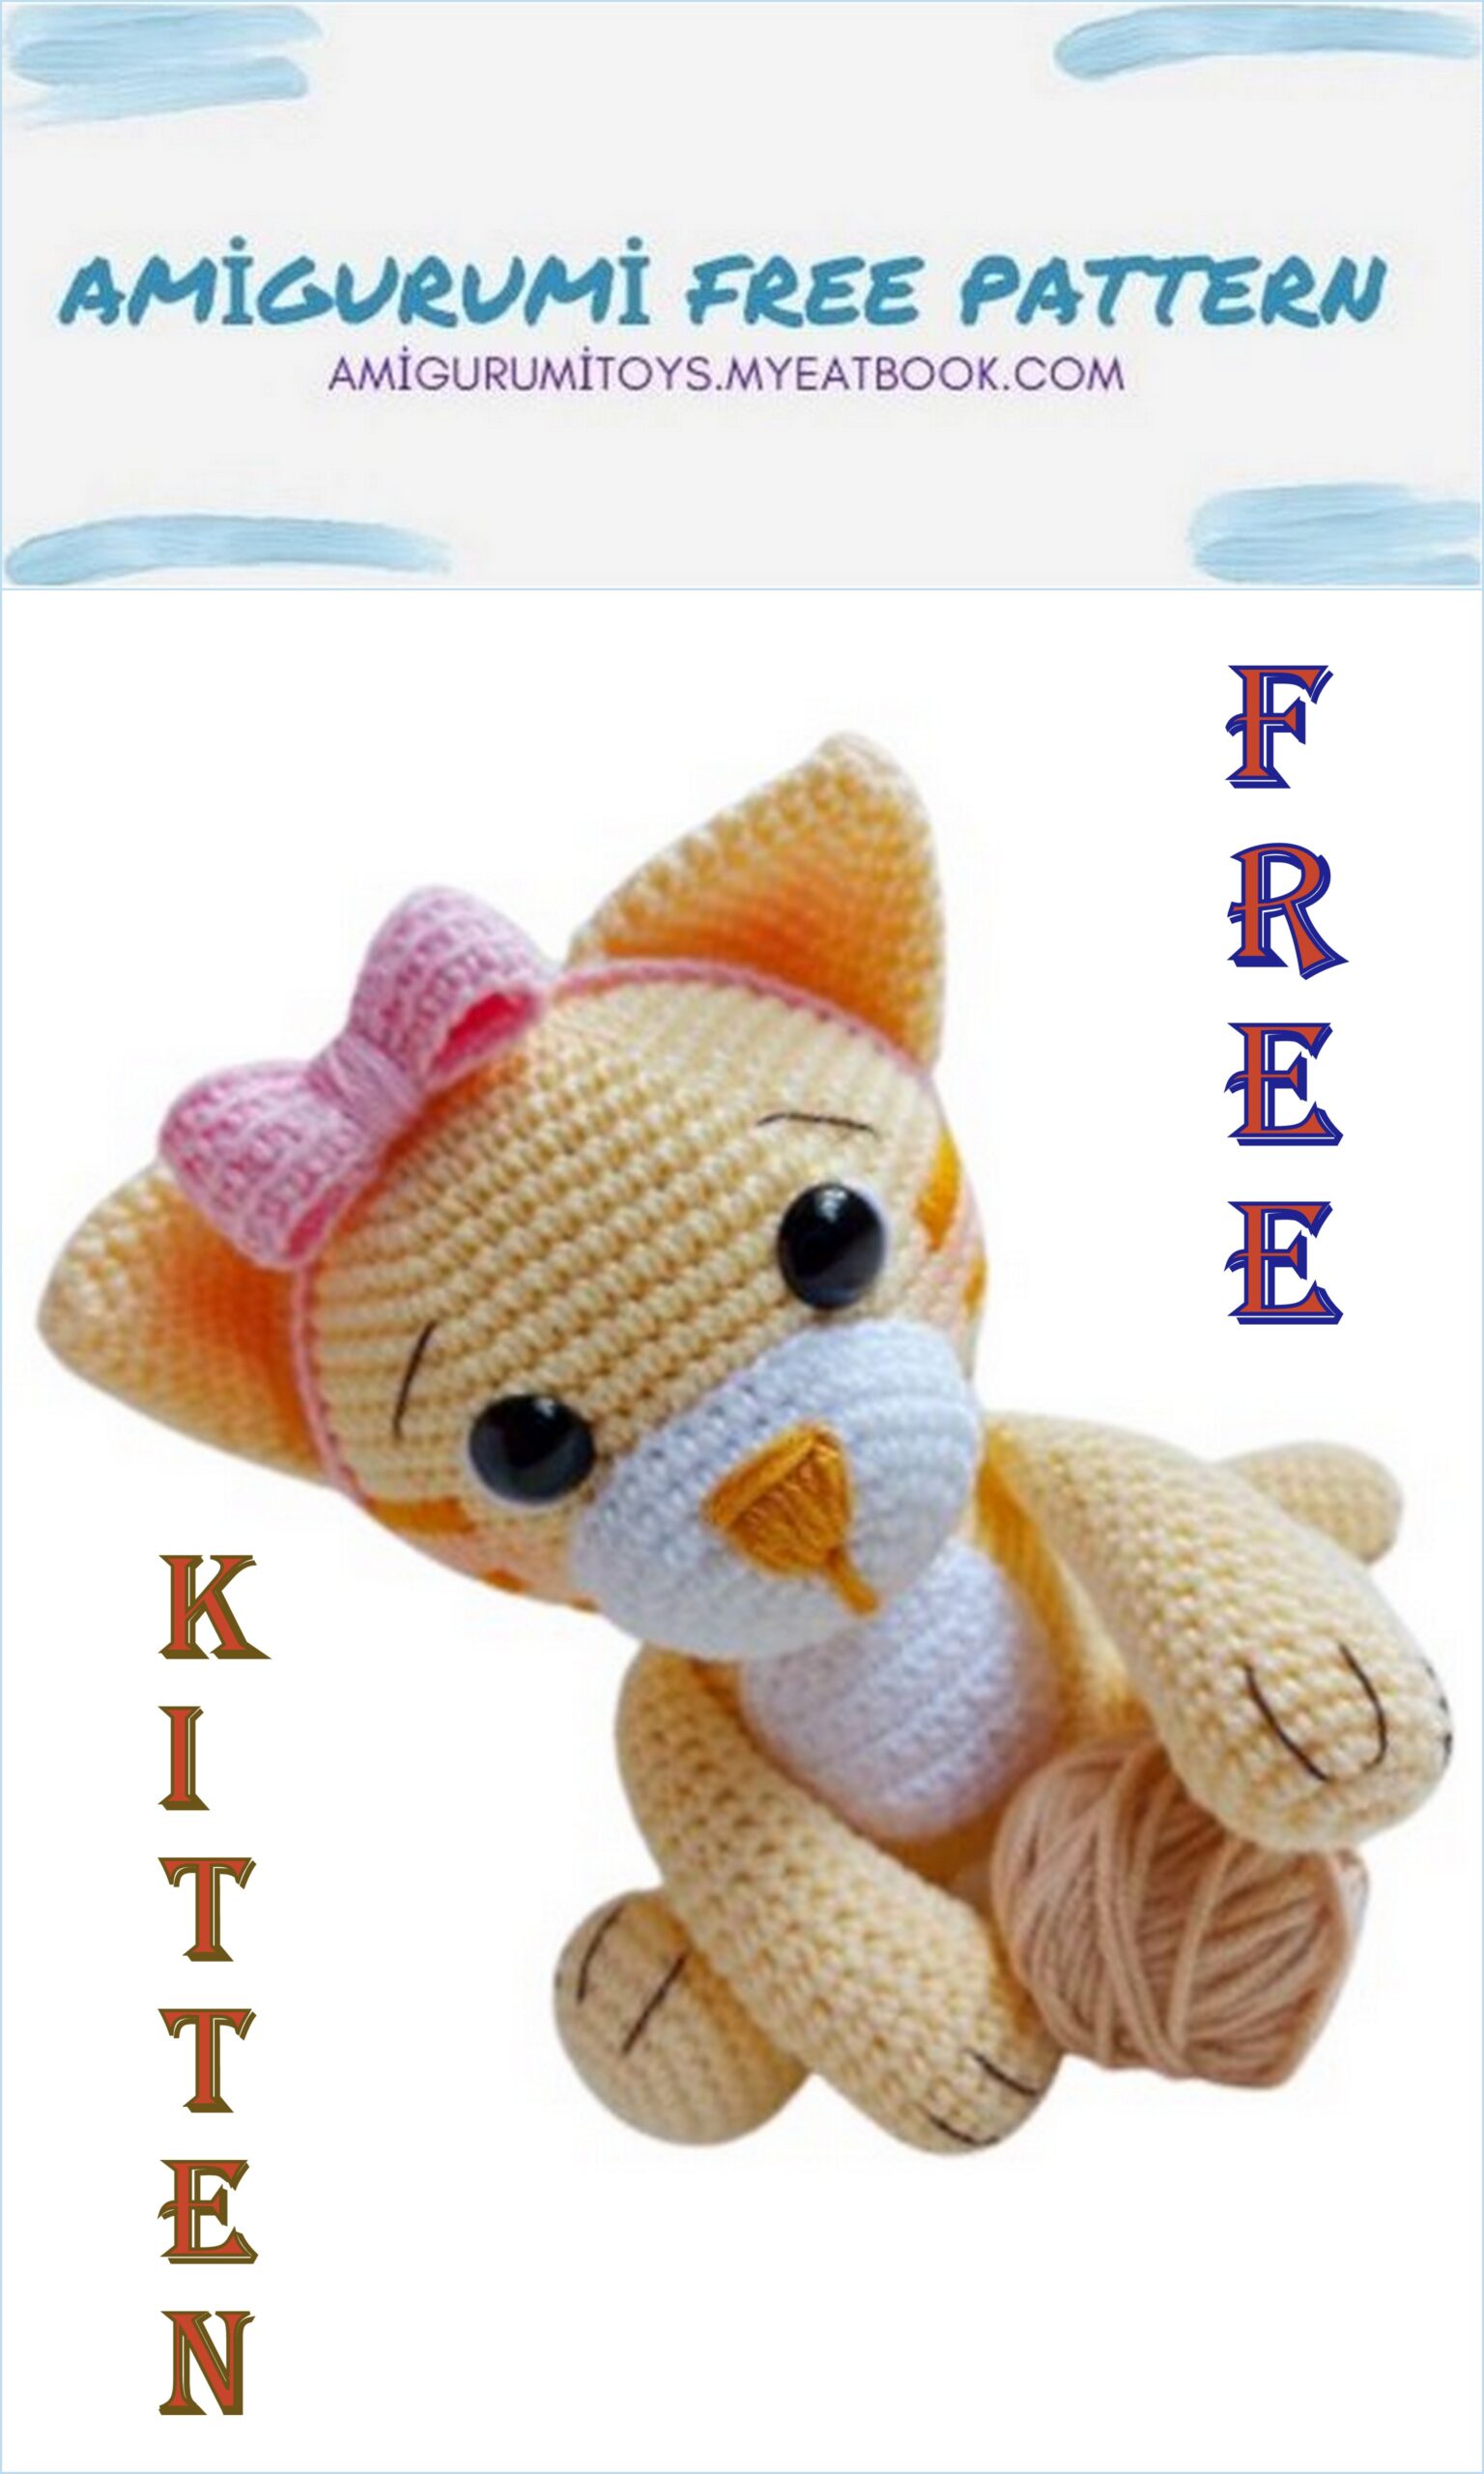
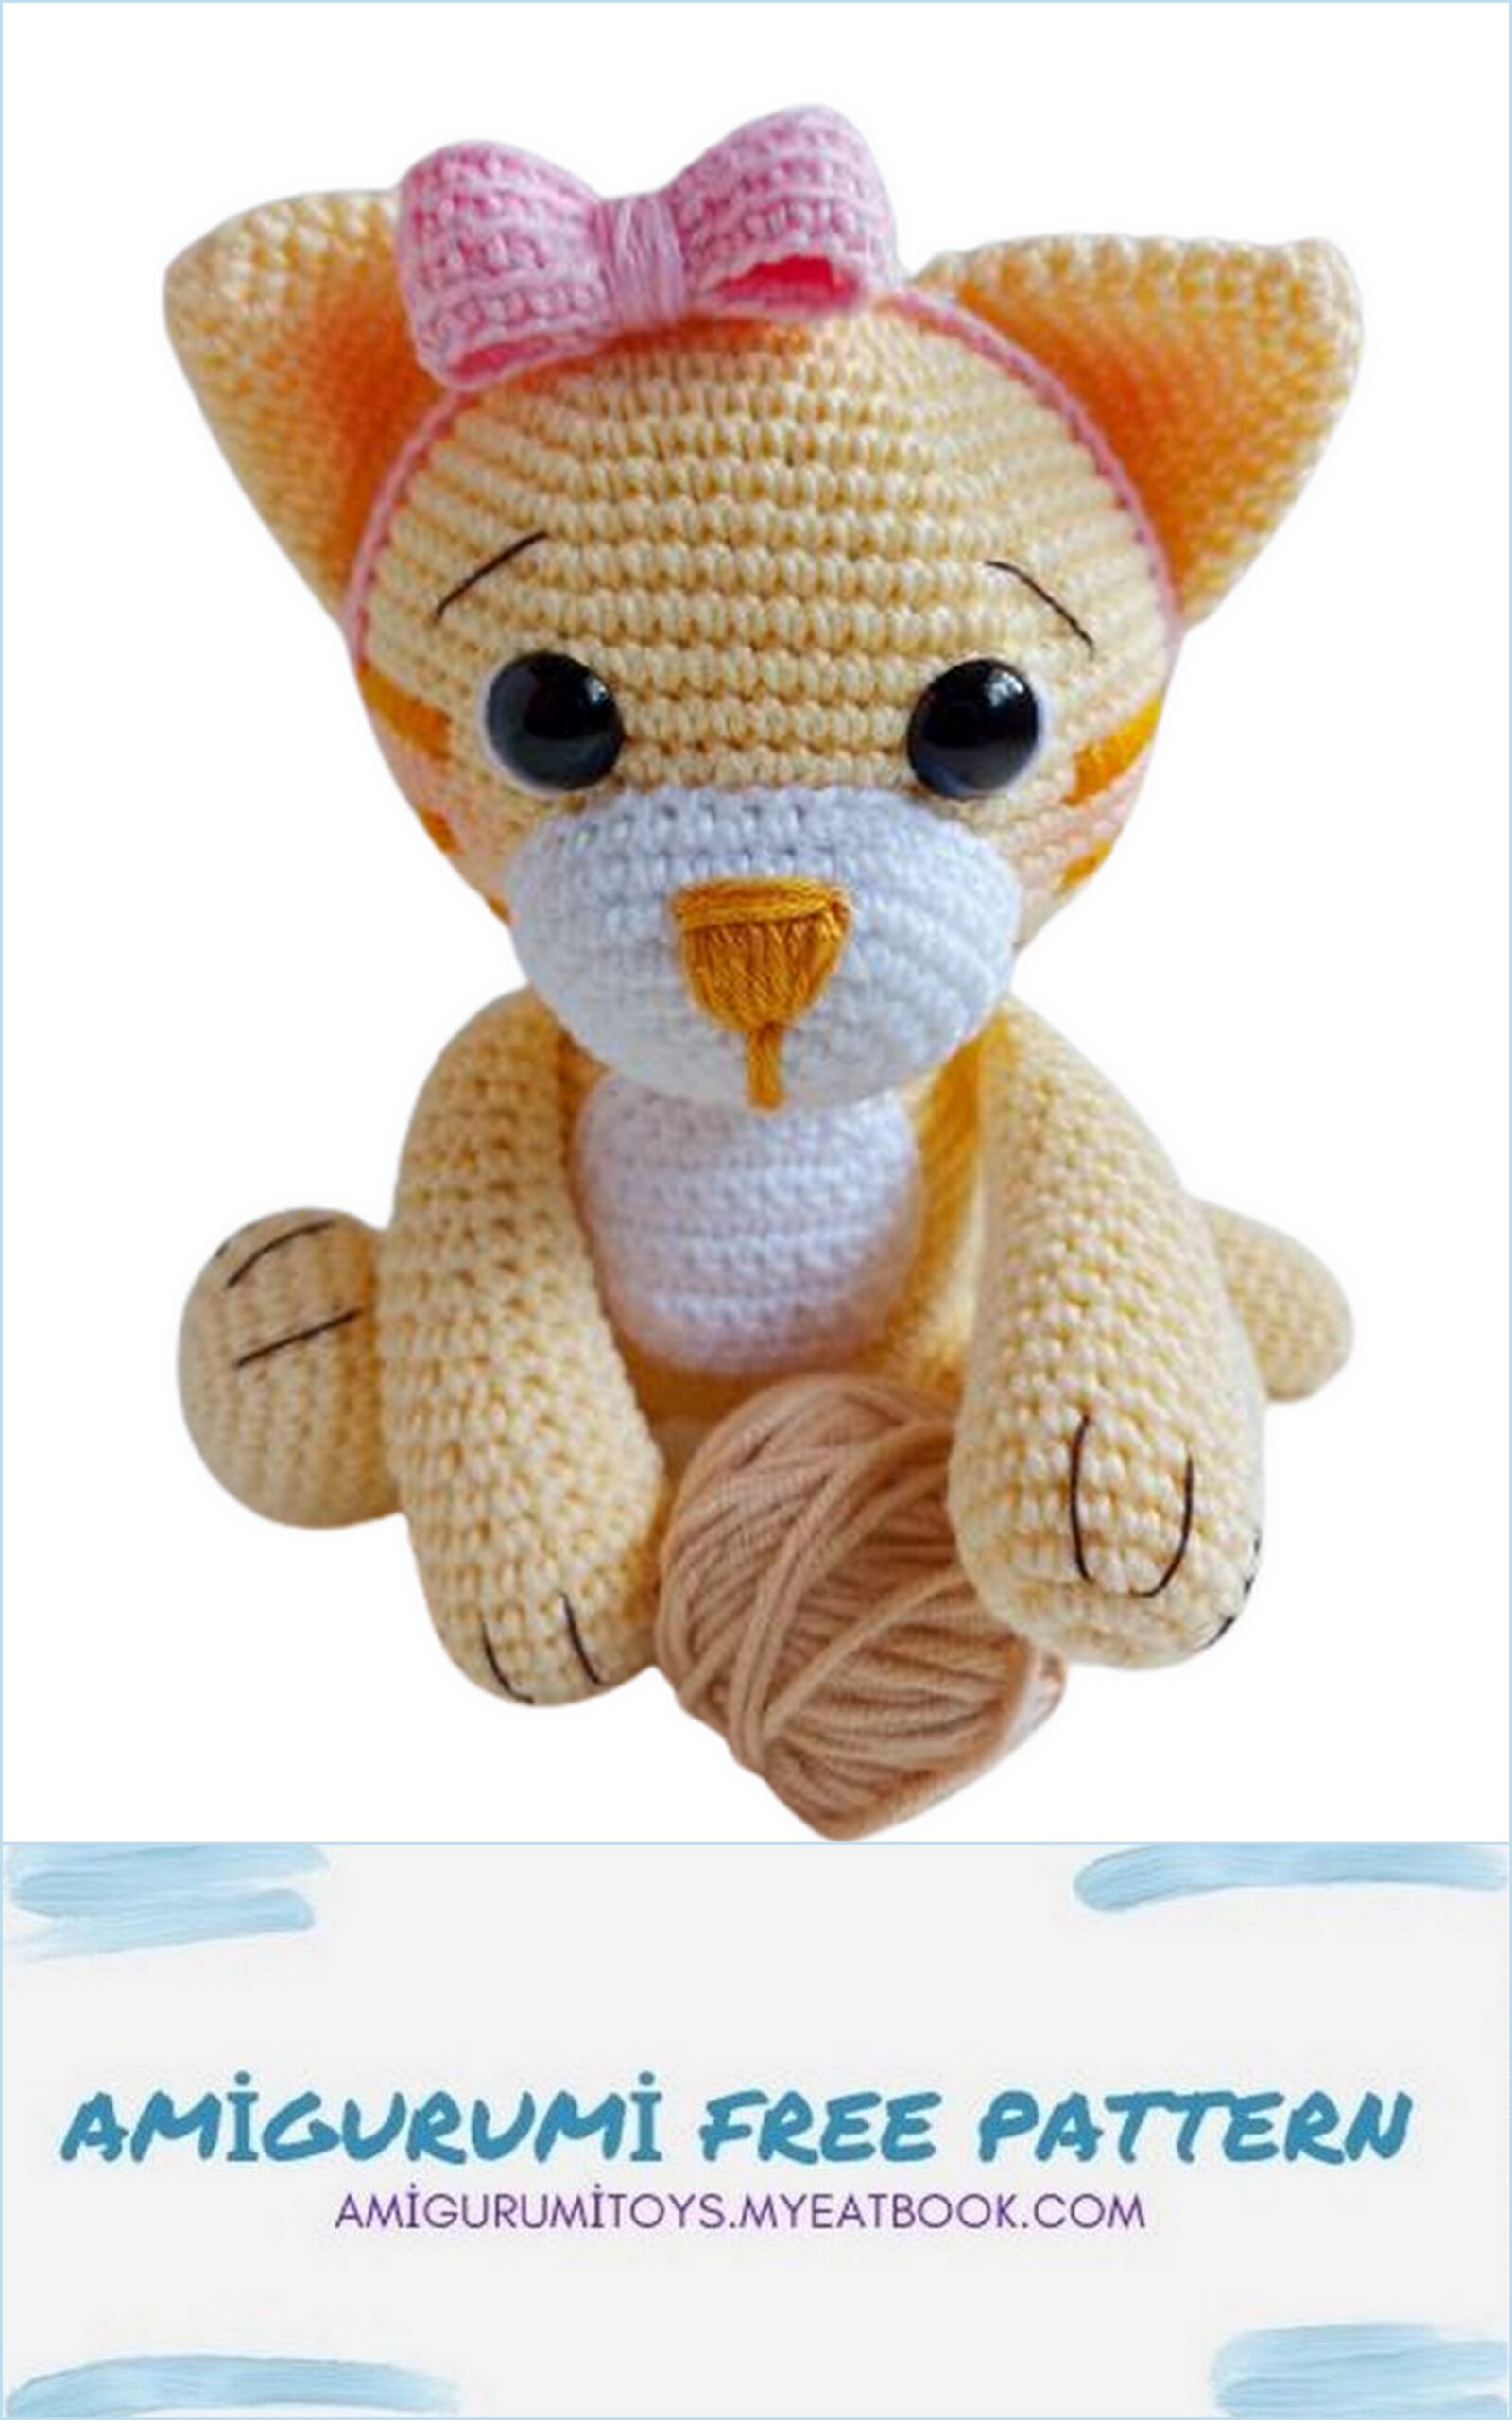
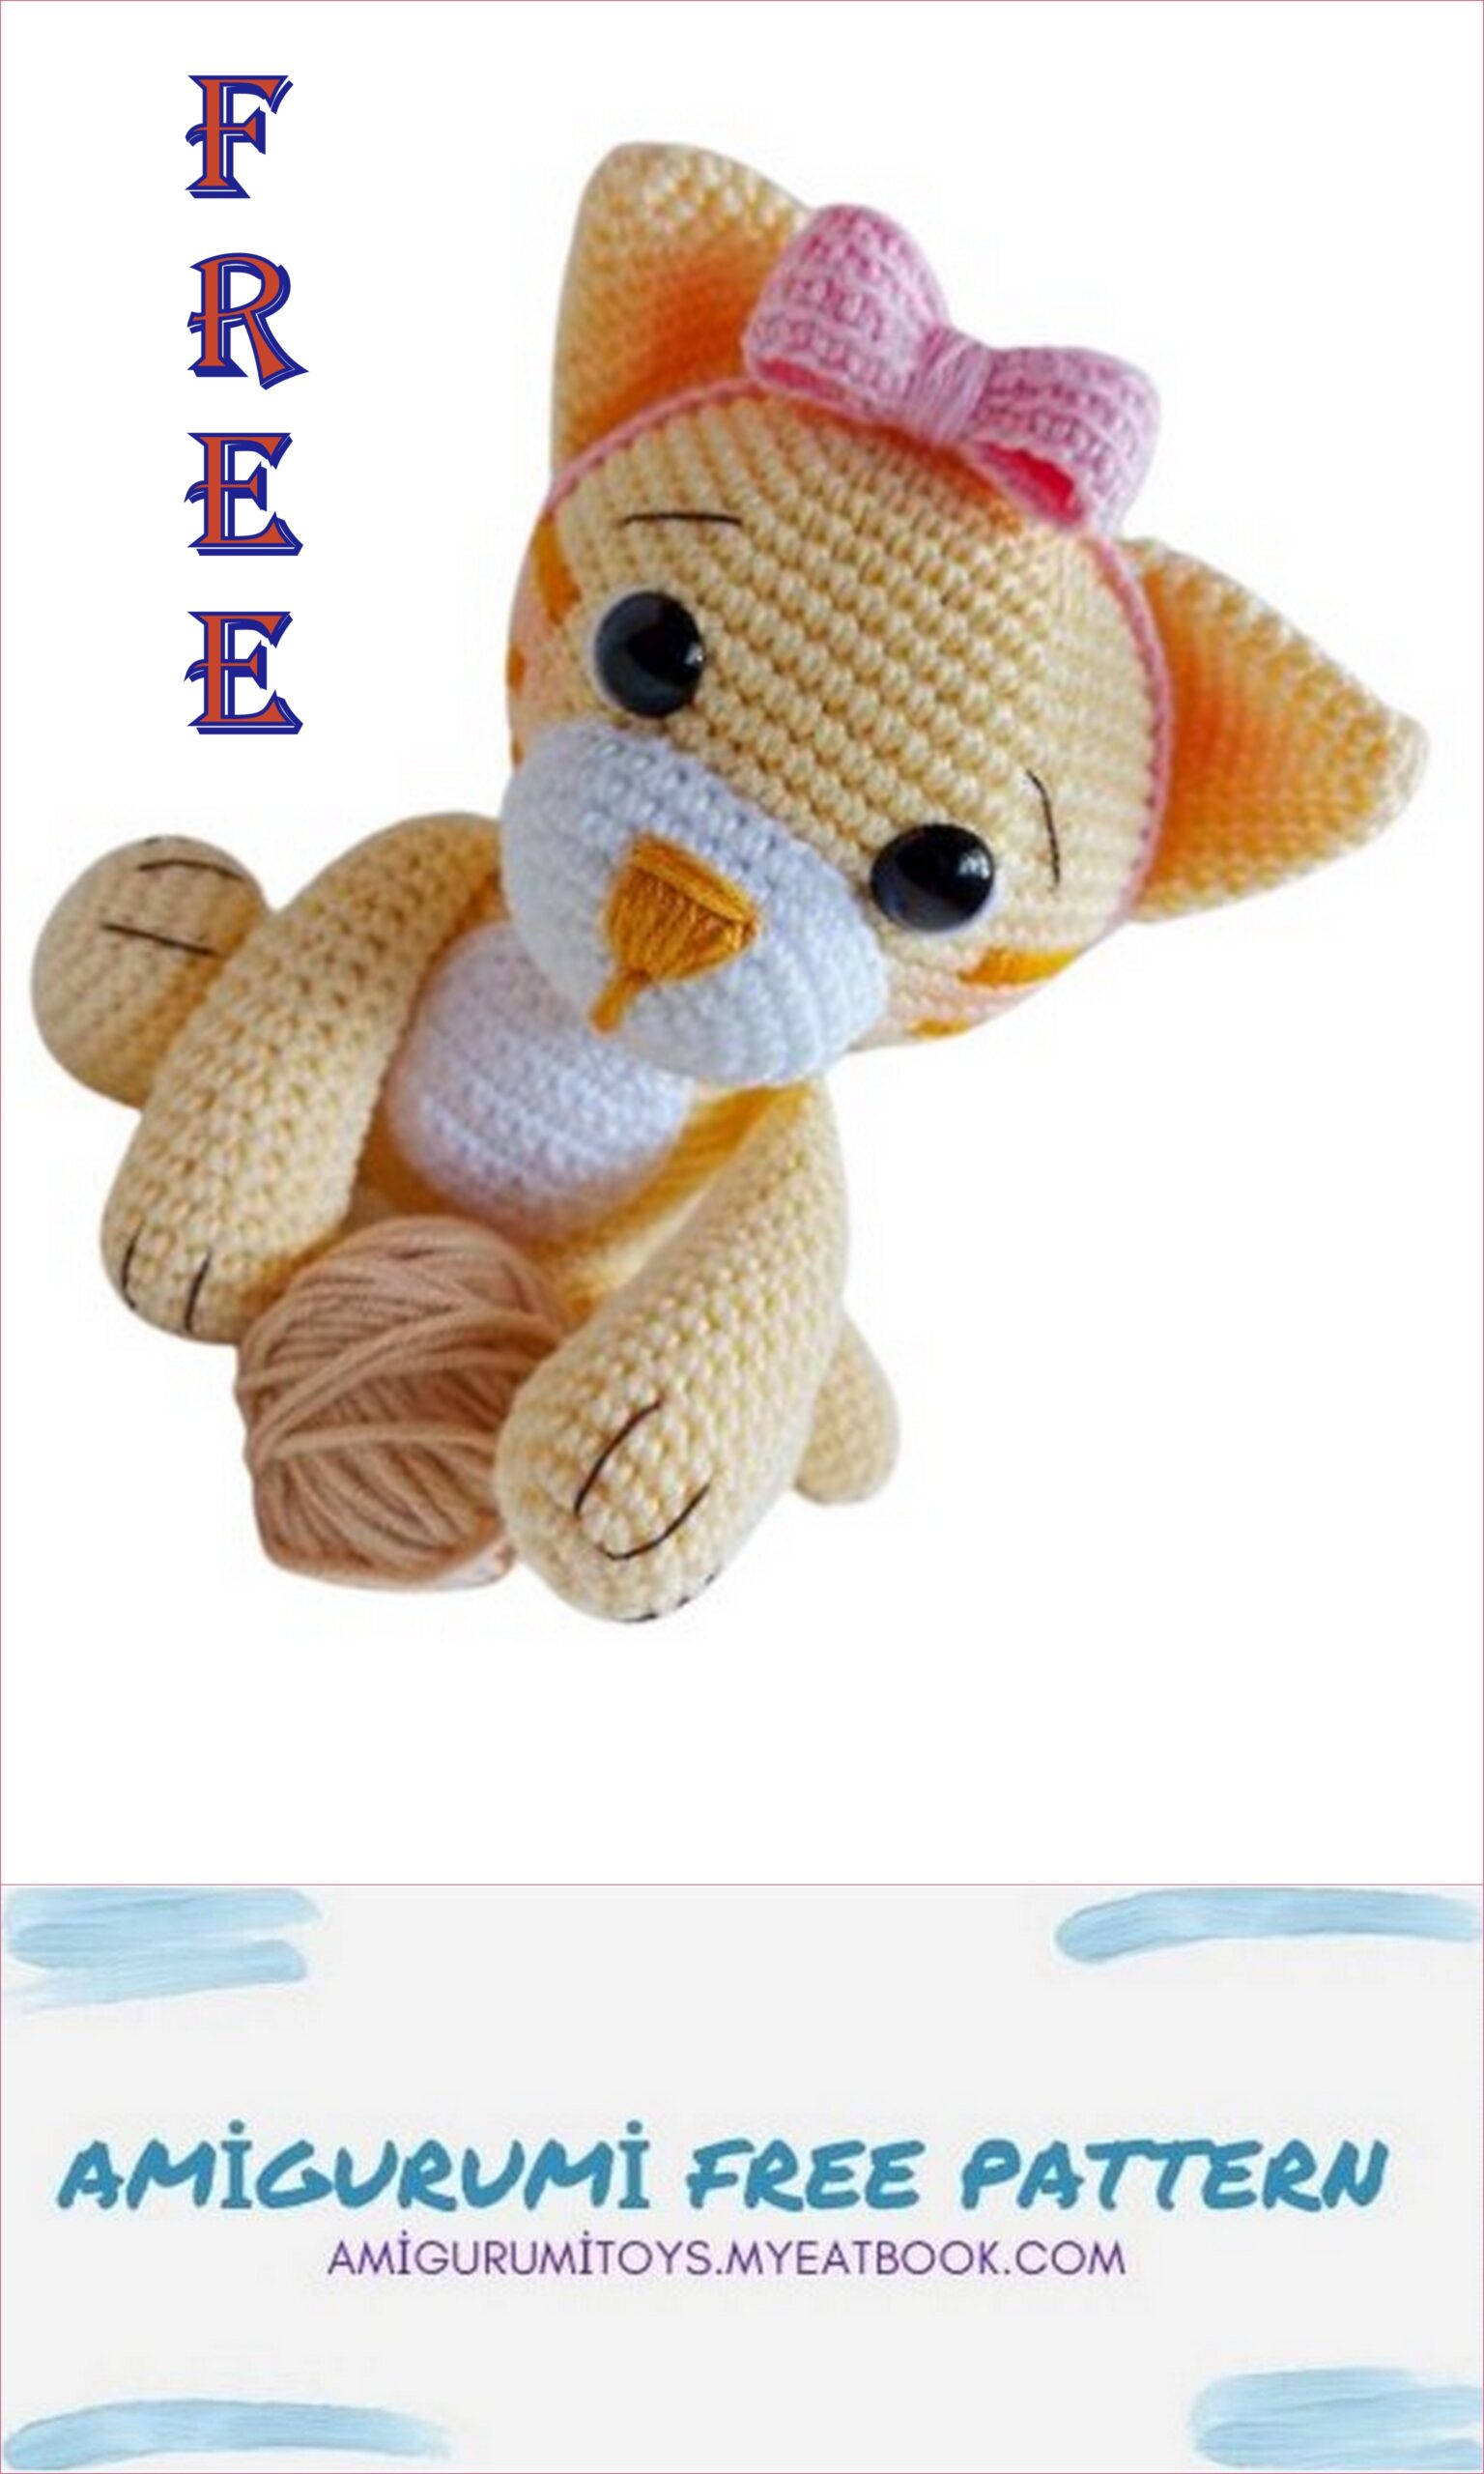
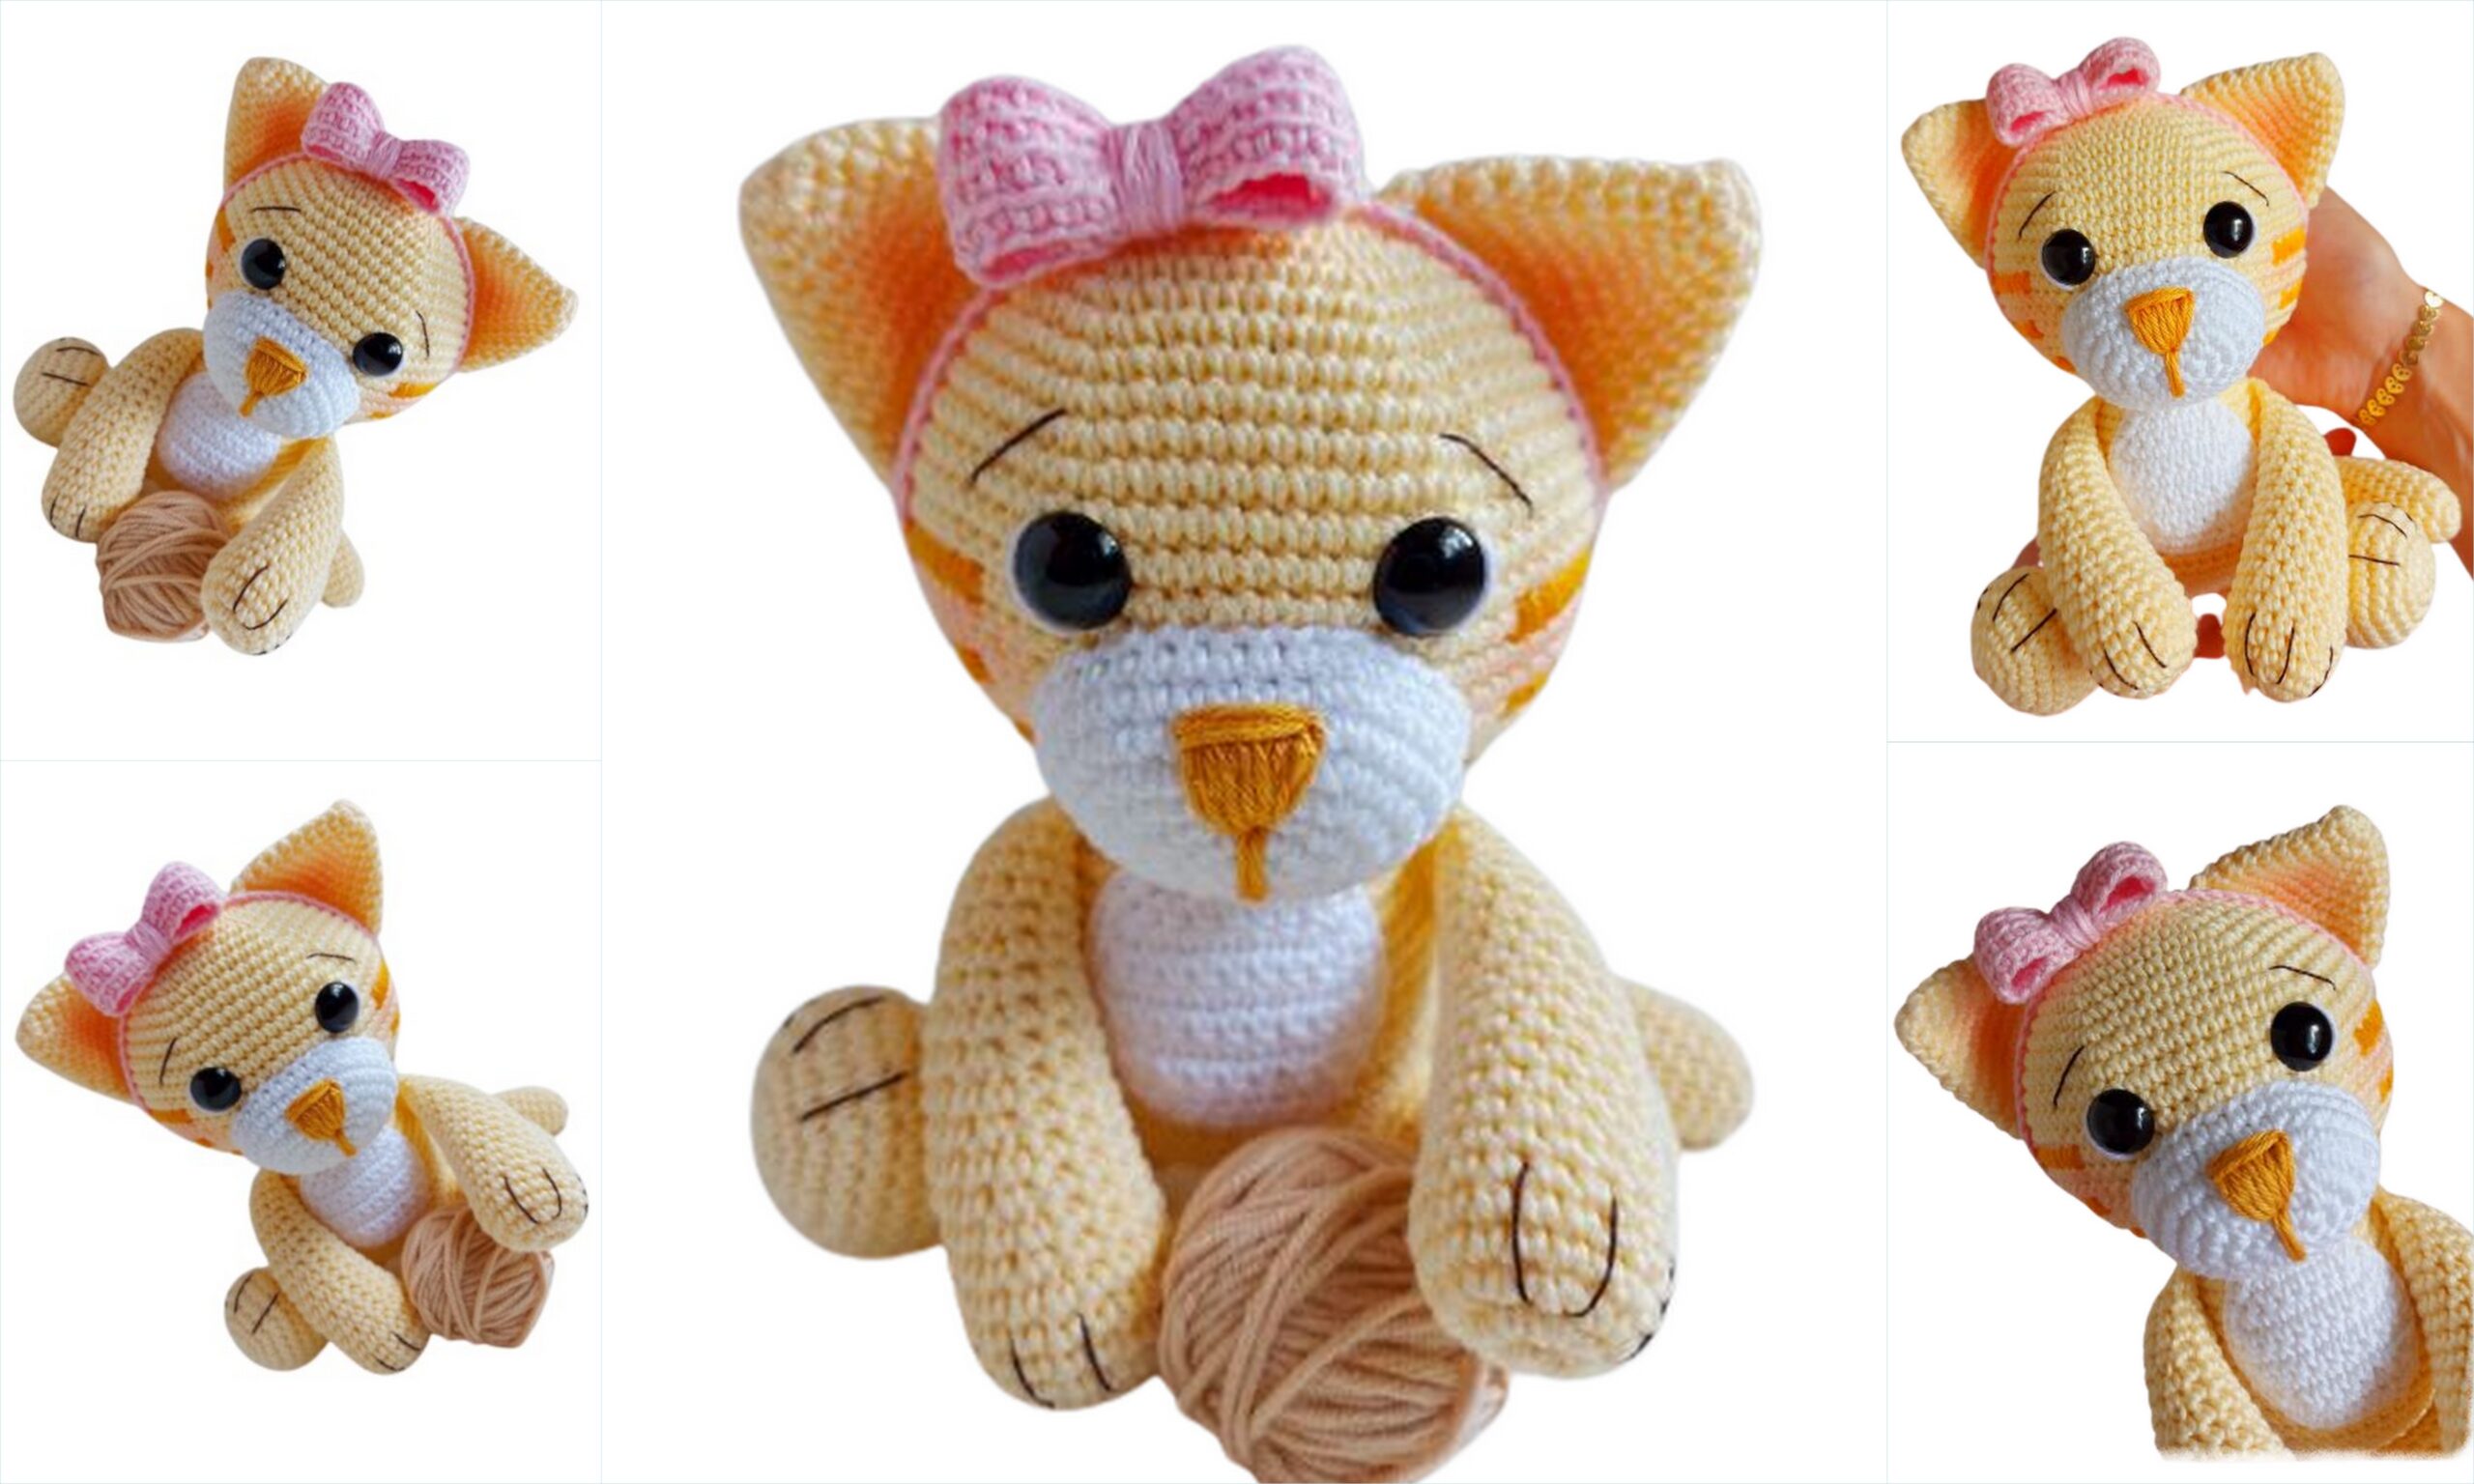
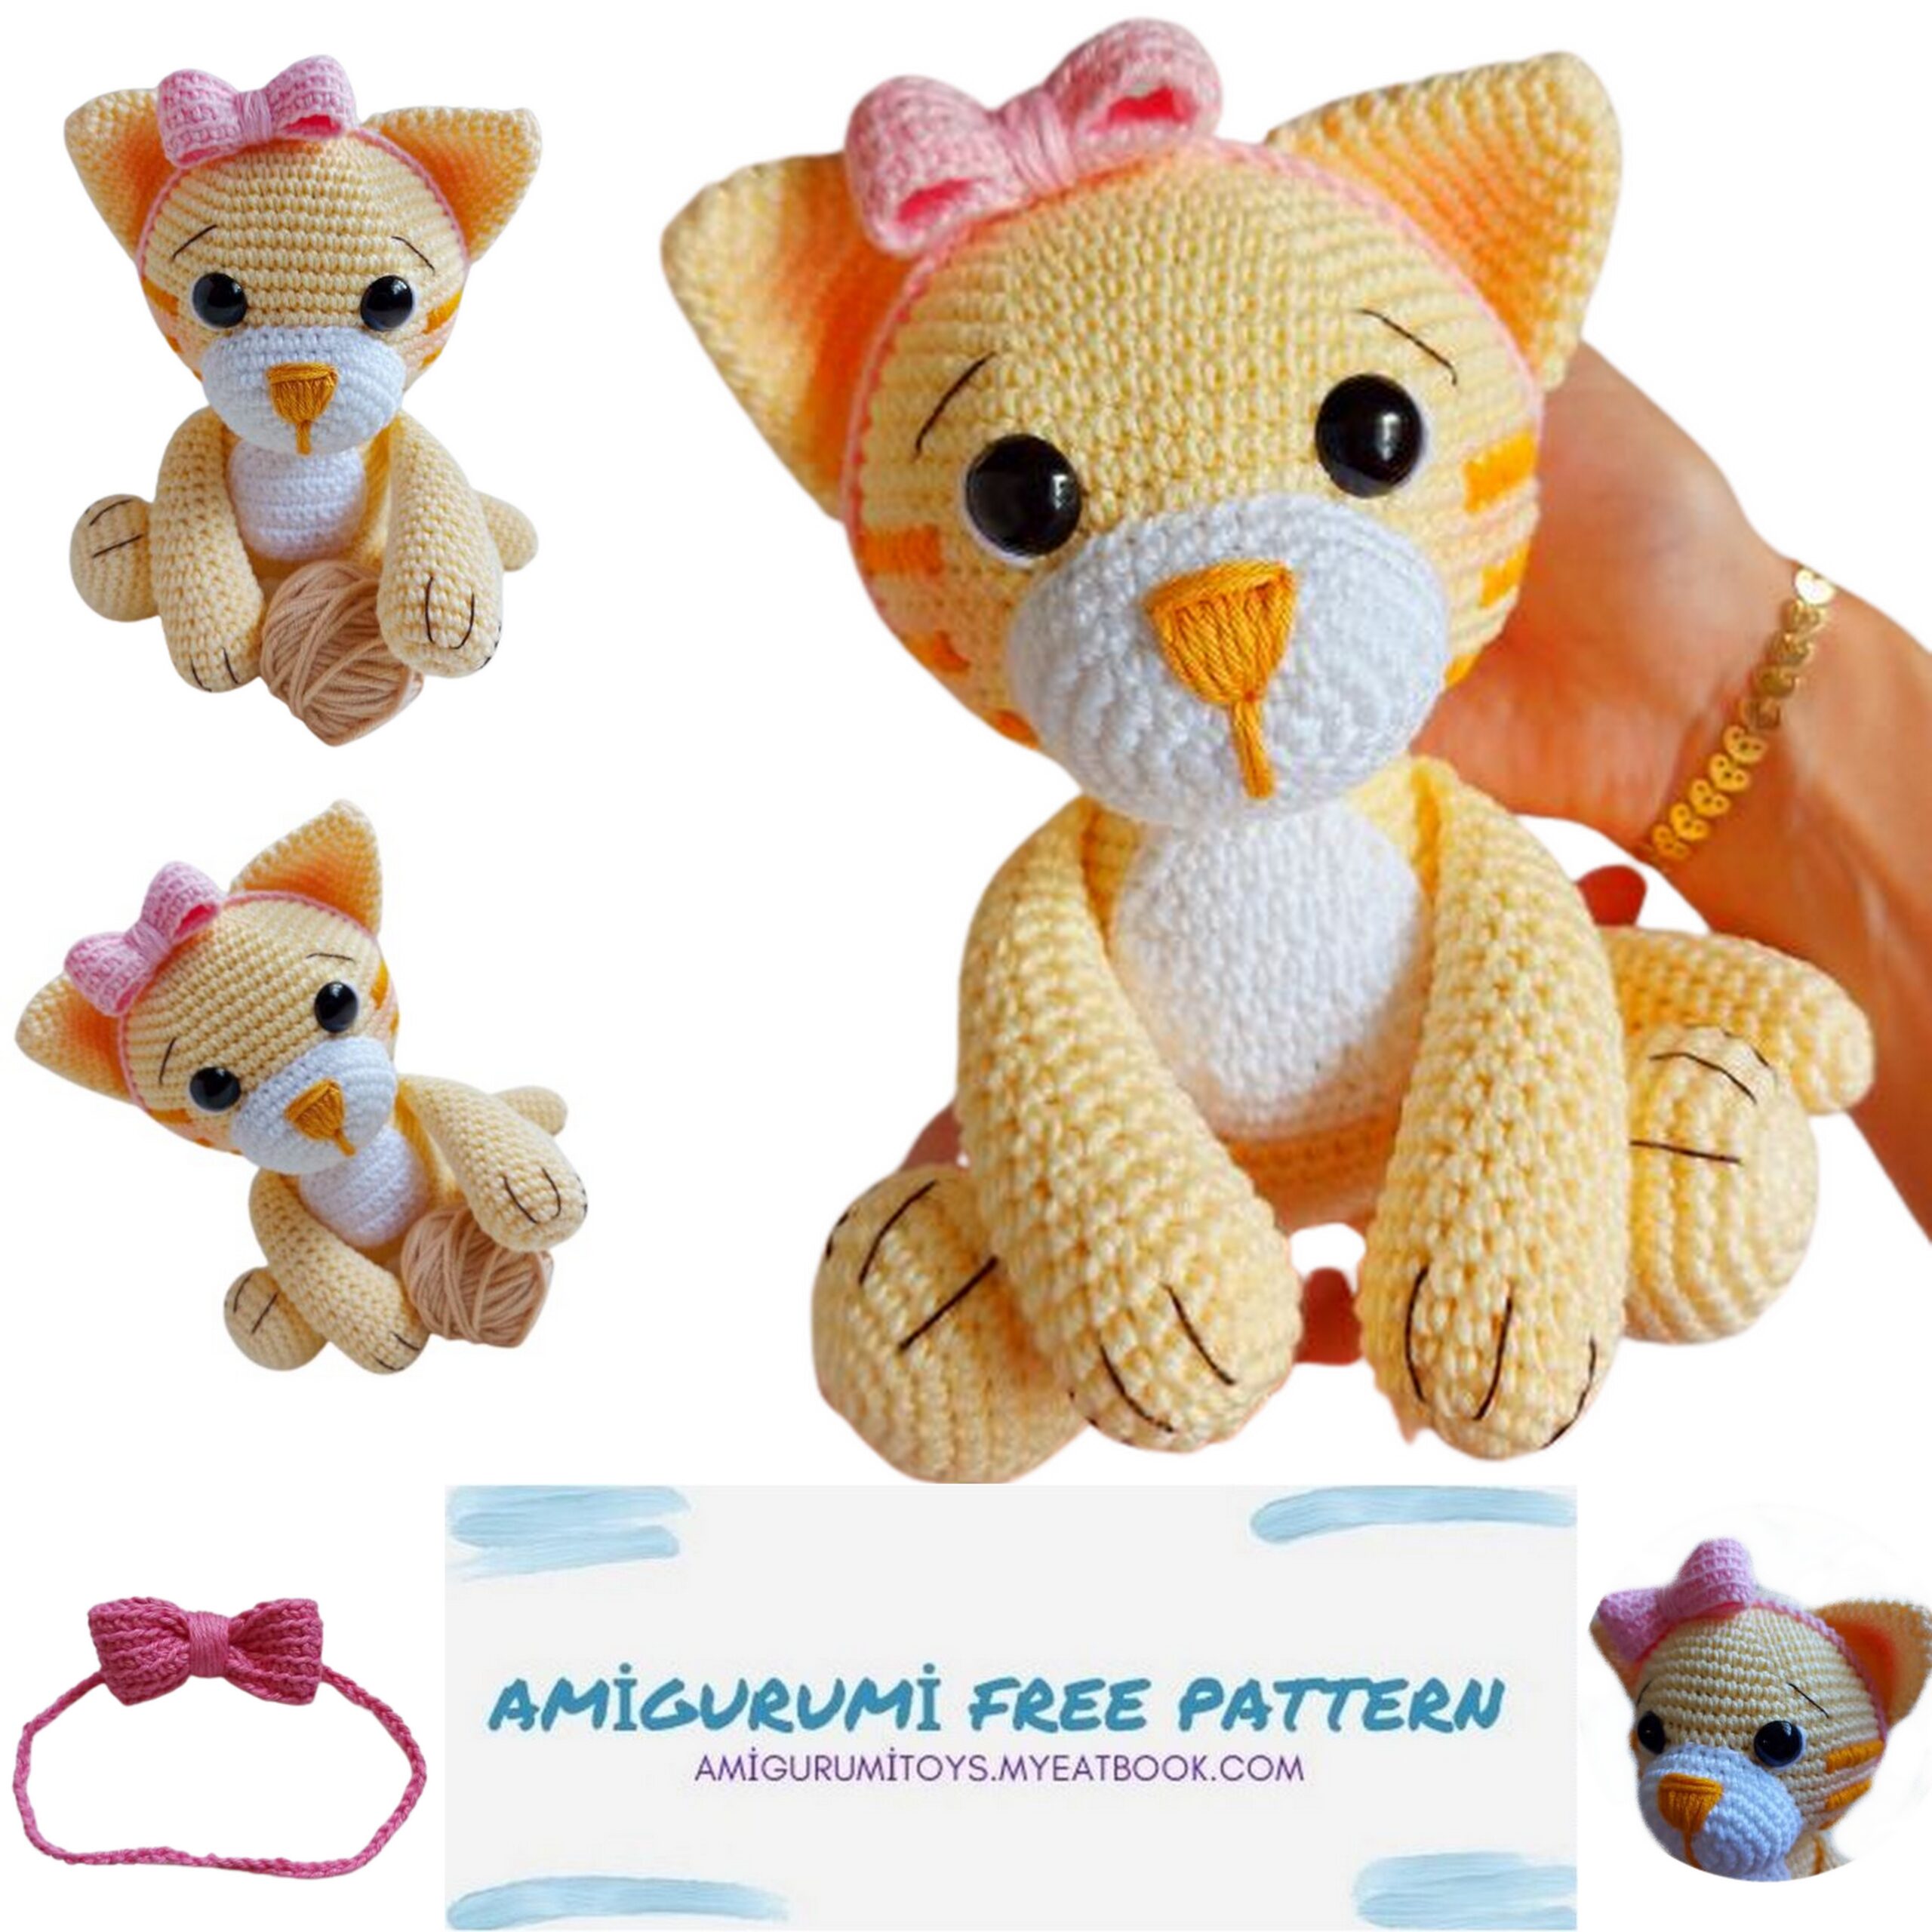
Luna kitten
The kitten Luna was 17cm tall. I used a Tulip Red 2.2mm needle.
Materials:
– Cream colored amigurumi yarn 1112 – 90 gr
– Amigurumi yarn white 8001 – 7 gr
– Rose quartz amigurumi thread – 7 gr
– Soft amigurumi yarn gem color 4146 – 5gr
– Silicone fiber filling – 100 gr
– Eyes with safety lock n°15mm
– Dark brown embroidery thread for the details.
– Crochet needle
– Tapestry needle
– Pins
– Scissors
Abbreviations:
SC: low point
İNC: increase
DEC: decrease
SL-ST: ultra low point
FLO: “front loop only” front loop only
BLO: “back loop only” back loop only
Technical information:
– The kitten Luna was 17cm tall. I used a Tulip Red 2.2mm needle
as it fits my traditional amigurumi stitch better. You
You can use the numbering that works best for you, however there may be
change in the final size of the amigurumi.
– There are some auxiliary videos to better demonstrate the positioning,
sewing and embroidery. Watch it calmly and as many times as you need. I did well explained so that we do not have any doubts.
– Basic to intermediate level.
– Execution time: from 4h to 5h to weave the piece and from 1h to 1:30h for the seams. Total of approximately 6:30h to make the kitten, but of course, everyone goes in their own time and this is an average.
– If you are a beginner, don’t be discouraged! I also made a playlist
with the basic stitches so you don’t miss a single stitch!
Head (cream color 1112)
1. 6SC magic ring
2. 6İNC (12)
3. (1SC, 1İNC) x6 (18)
4. (2SC, 1İNC) x6 (24)
5. (3SC, 1İNC) x6 (30)
6. 30SC
7. (4SC, 1İNC) x6 (36)
8. (5SC, 1İNC) x6 (42)
9. (6SC, 1İNC) x6 (48)
10. (7SC, 1İNC) x6 (54)
11. (8SC, 1İNC) x6 (60)
12. (9SC, 1İNC) x6 (66)
13. (10SC, 1İNC) x6 (72)
14 to 21. 72 SC (8 laps)
Place number 15mm eyes between the
rows 16 and 17 11SC apart
between them.
22. (10SC, 1DEC) x6 (66)
23. (9SC, 1DEC) x6 (60)
24. (8SC, 1DEC) x6 (54)
25. (7SC, 1DEC) x6 (48)
26. (6SC, 1DEC) x6 (42)
27. (5SC, 1DEC) x6 (36)
28. (4SC, 1DEC) x6 (30)
29. (3SC, 1DEC) x6 (24)
Put stuffing. paying attention to widest part at the bottom, go arranging and directing the filling with your fingers, placing the
fiber gradually. So you will get the most format rounded at the bottom and more pointy at the top.
Continue the body part
29. (3SC, 1İNC) x6 (30) FLO (front handles only)
30. (4SC, 1İNC) x6 (36)
31. 36SC
32. (5SC, 1İNC) x6 (42)
33. 42SC
34. (6SC, 1İNC) x6 (48)
35 to 44. 48SC (10 laps)
45. (6SC, 1DEC) x6 (42)
46. (5SC, 1DEC) x6 (36)
47. (4SC, 1DEC) x6 (30)
48. (3SC, 1DEC) x6 (24)
49. (2SC, 1DEC) x6 (18)
Put stuffing.
50. (1SC, 1DEC) x6 (12)
51. 6DEC
Finished off with an inverted magic ring.
Muzzle (white)
1. 6SC on the magic ring
2. (3SC together at the same point, 1İNC, 1SC) x2 (12)
3. 3İNC, 3SC, 3İNC, 3SC (18)
4. (1SC, 1İNC) x3, 3SC, (1SC, 1İNC) x3, 3SC (24)
5. (2SC, 1İNC) x3, 3SC, (2SC, 1İNC) x3, 3SC (30)
6. (3SC, 1İNC) x3, 3SC, (3SC, 1İNC) x3, 3SC (36)
7 and 8. 36SC
Finish off with SL-ST and leave a long thread for sewing
Belly spot (white)
linear crochet
1. Chain 7 and start with the 2nd chain from the needle. Make 6SC, 1 chain and turn the work. (6)
2. 1İNC, 4SC, 1İNC. Make a chain and turn the work. (8)
3. 1İNC, 6SC, 1İNC. Make a chain and turn the work. (10)
4 to 6. 10SC
7. 1DEC, 6SC, 1DEC. Make a chain and turn the work. (8)
8. 1DEC, 4SC, 1DEC. Make a chain and turn the work. (6)
9. 6SC. Make a chain and turn the work.
10. Now SC all around the part.
5SC at the top, 1 İNC at the corner, 8SC down the side, 6SC at the bottom,
8SC climbing on the side, 1SL-ST in 1st stitch of row.
Fasten off and leave a long thread for sewing.
Ears (cream color 1112)
1. 6SC magic ring
2. (1SC, 1İNC) x3 (9)
3. (2SC, 1İNC) x3 (12)
4. (3SC, 1İNC) x3 (15)
5. (4SC, 1İNC) x3 (18)
6. (5SC, 1İNC) x3 (21)
7. (6SC, 1İNC) x3 (24)
8. 24SC
9. (7SC, 1İNC) x3 (27)
10. (8SC, 1İNC) x3 (30)
No filling needed. Just cap off with SL-ST and leave a long thread for sewing. Fold the ears in half.
Front paws (Do 2x in cream color 1112)
1. 6SC on the magic ring
2. 6İNC (12)
3. (1SC, 1İNC) x6 (18)
4 to 7. 18SC
8. 8SC, 1DEC, 8SC (17)
9. 17SC
10. 1DEC, 15SC (16)
11. 16SC
12. 7SC, 1DEC, 7SC (15)
13. 15SC
Add stuffing as you weave.
14. 1DEC, 13SC (14)
15. 14SC
16. 6SC, 1DEC, 6SC (13)
17. 13SC
18. 1DEC, 11SC (12)
19 to 22. 12SC
Fold the piece in half and close with 6SC.
Fasten off and leave a long thread for sewing.
Hind legs (Do 2x in cream color 1112)
1. 6SC magic ring
2. 6İNC (12)
3. (1SC, 1İNC) x6 (18)
4. (2SC, 1İNC) x6 (24)
5. (3SC, 1İNC) x6 (30)
6 to 8. 30SC
9. 6SC, (1SC, 1DEC) x6, 6SC (24)
10. 6SC, (1SC, 1DEC) x4, 6SC (20)
11. 8SC, (1DEC) x2, 8SC (18)
12 to 16. 18SC
Add stuffing as you weave.
17. 4SC, 1DEC, 6SC, 1DEC, 4SC (16)
18. 16SC
19. 4SC, 1DEC, 6SC, 1DEC, 1SC (1SC will be missing to complete the row, so that when you fold the piece to close it won’t be crooked. If your stitch be a little more inclined, make more low points to be able to close the leg and so that the tip of the paw is not crooked).
Fold the piece in half and close with 7SC.
Fasten off and leave a long thread for sewing.
Tail (cream color 1112)
1. 6SC on the magic ring
2. 6İNC (12)
3. (3SC, 1İNC) x3 (15)
4 to 13. 15SC (10 laps)
14. 1DEC, 13SC (14)
15 and 16. 14SC
17. 6SC, 1DEC, 6SC (13)
18 and 19. 13SC
20. 1DEC, 11SC (12)
You add stuffing as you weave.
21 to 26. 12SC (5 laps)
Fold in half and close with 6SC.
Leave a long thread for sewing.
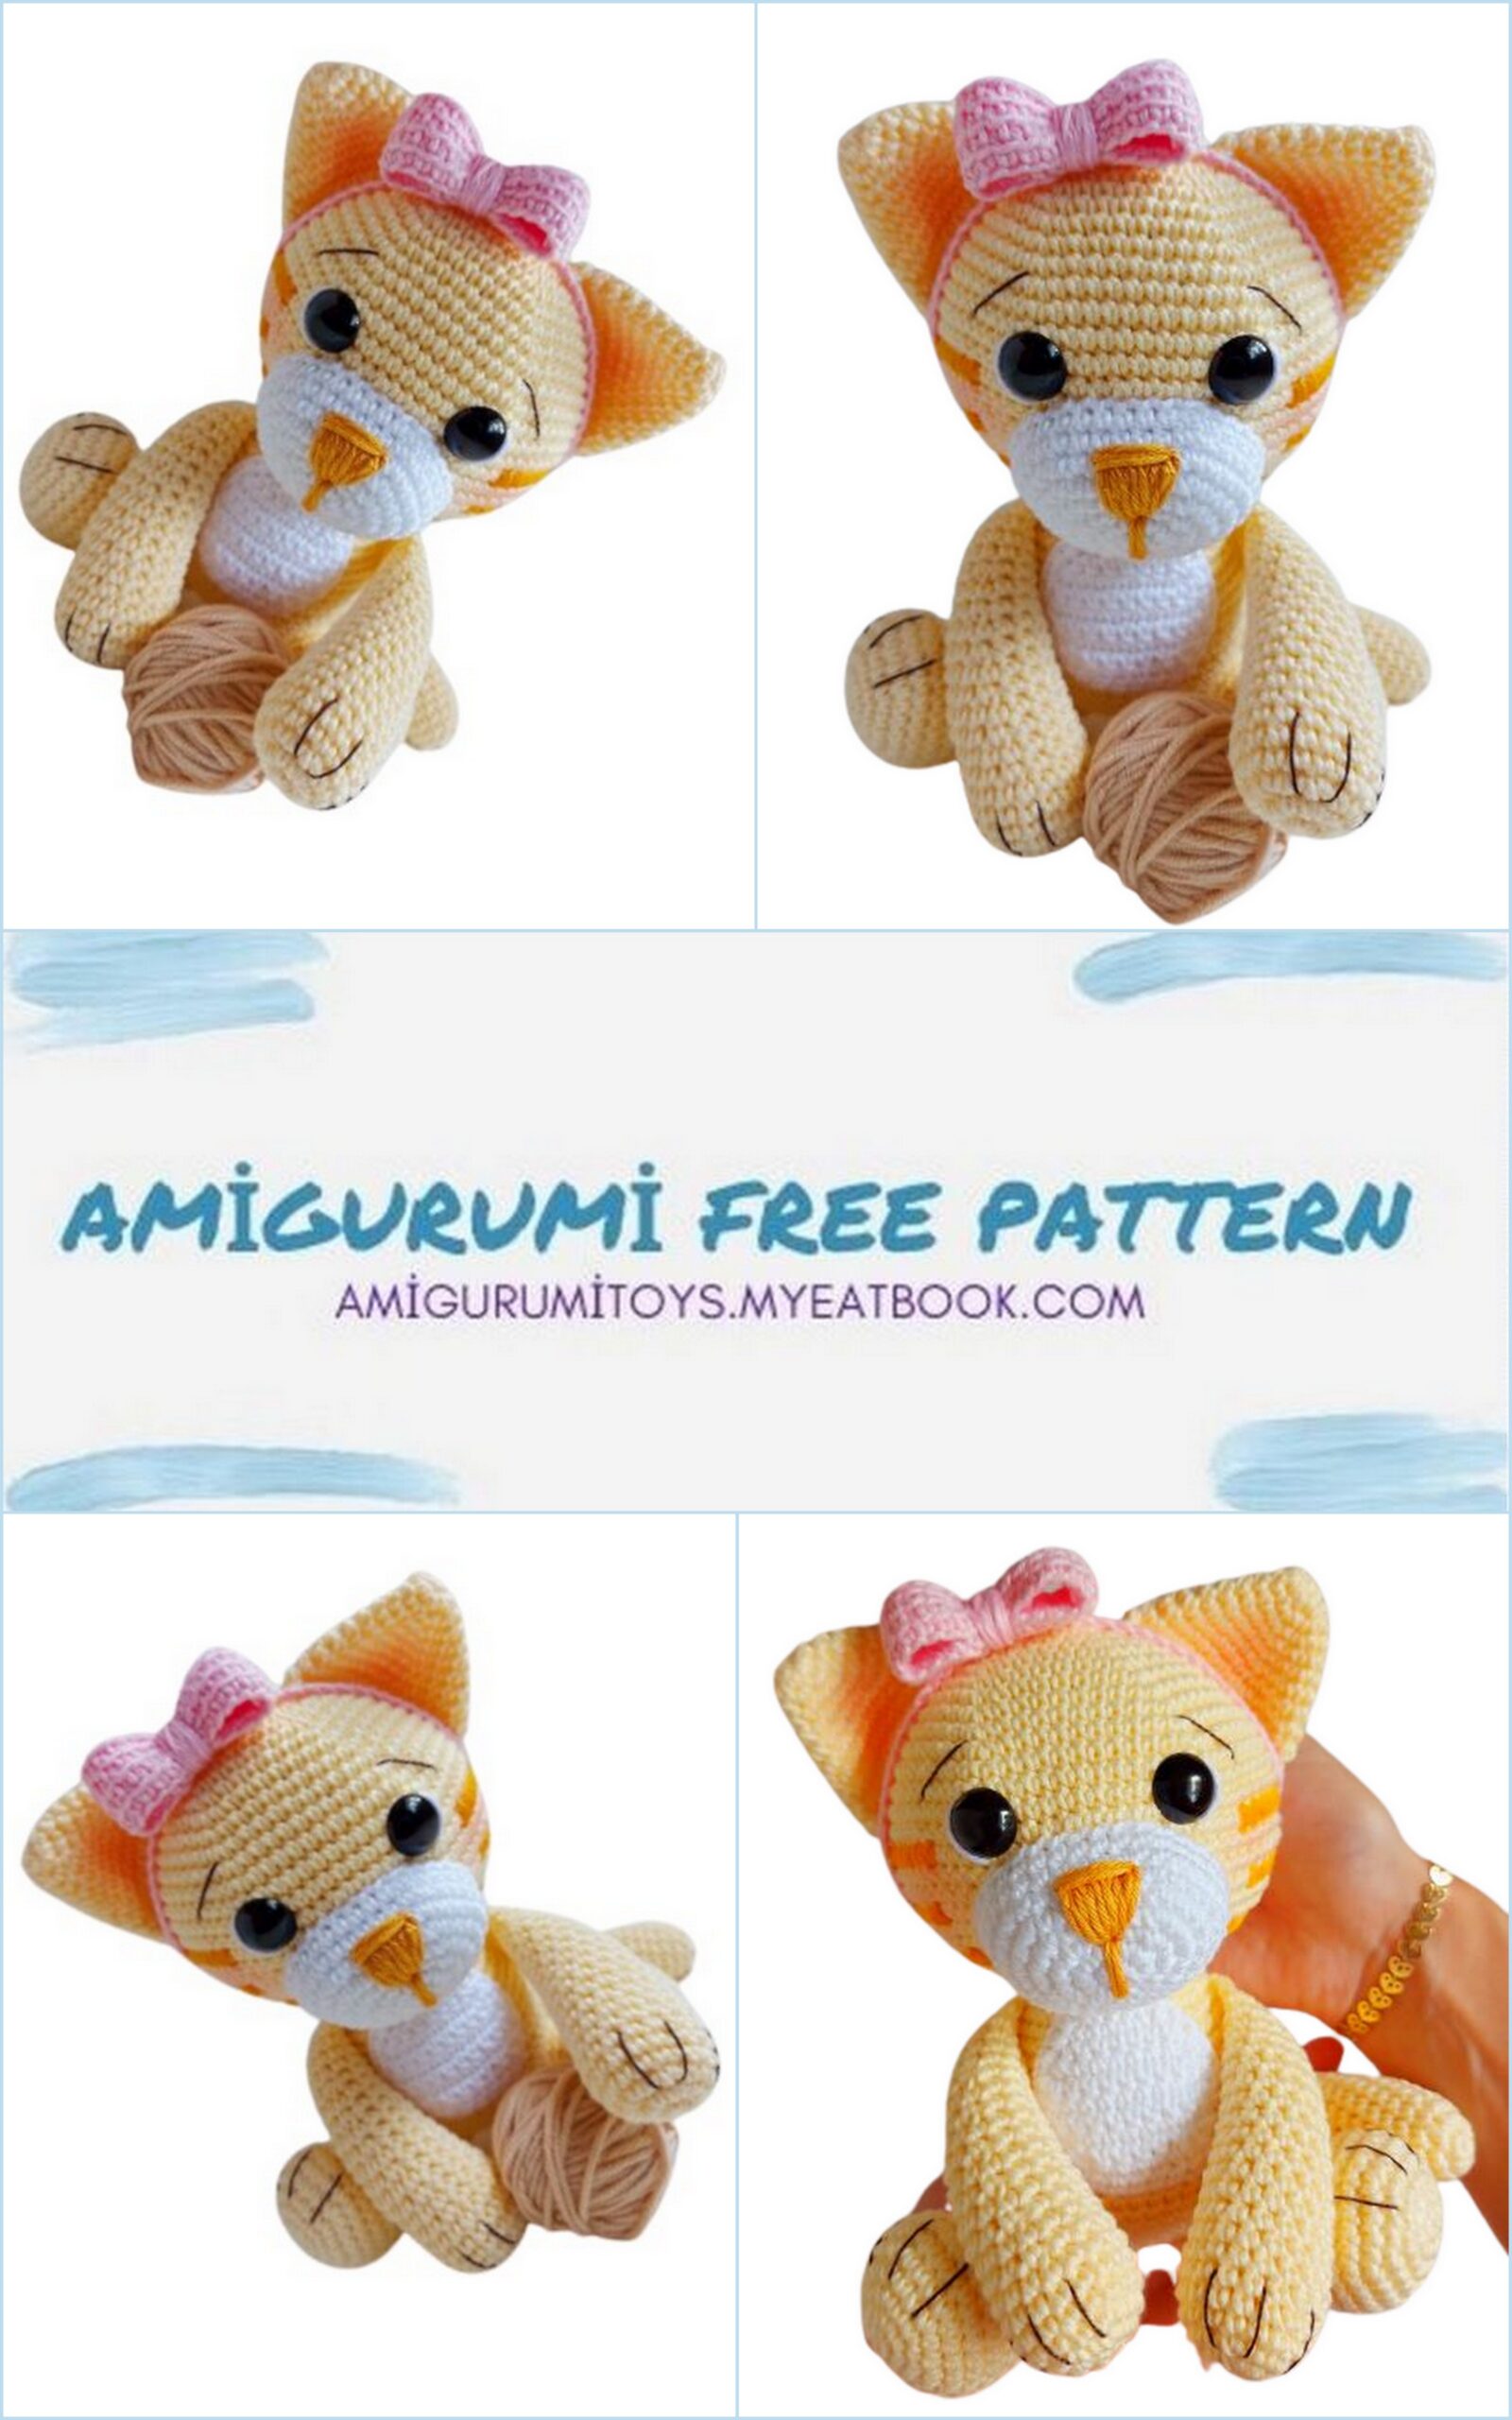
Mounting
Ears:
Make a smudge with fabric pen and a blush brush, as in the video, so it gets that darker effect inside the ear.
Position between rows 5 and 6 and rows 16 and 17. Making a slight curve in the back. With 9SC away from the eyes.
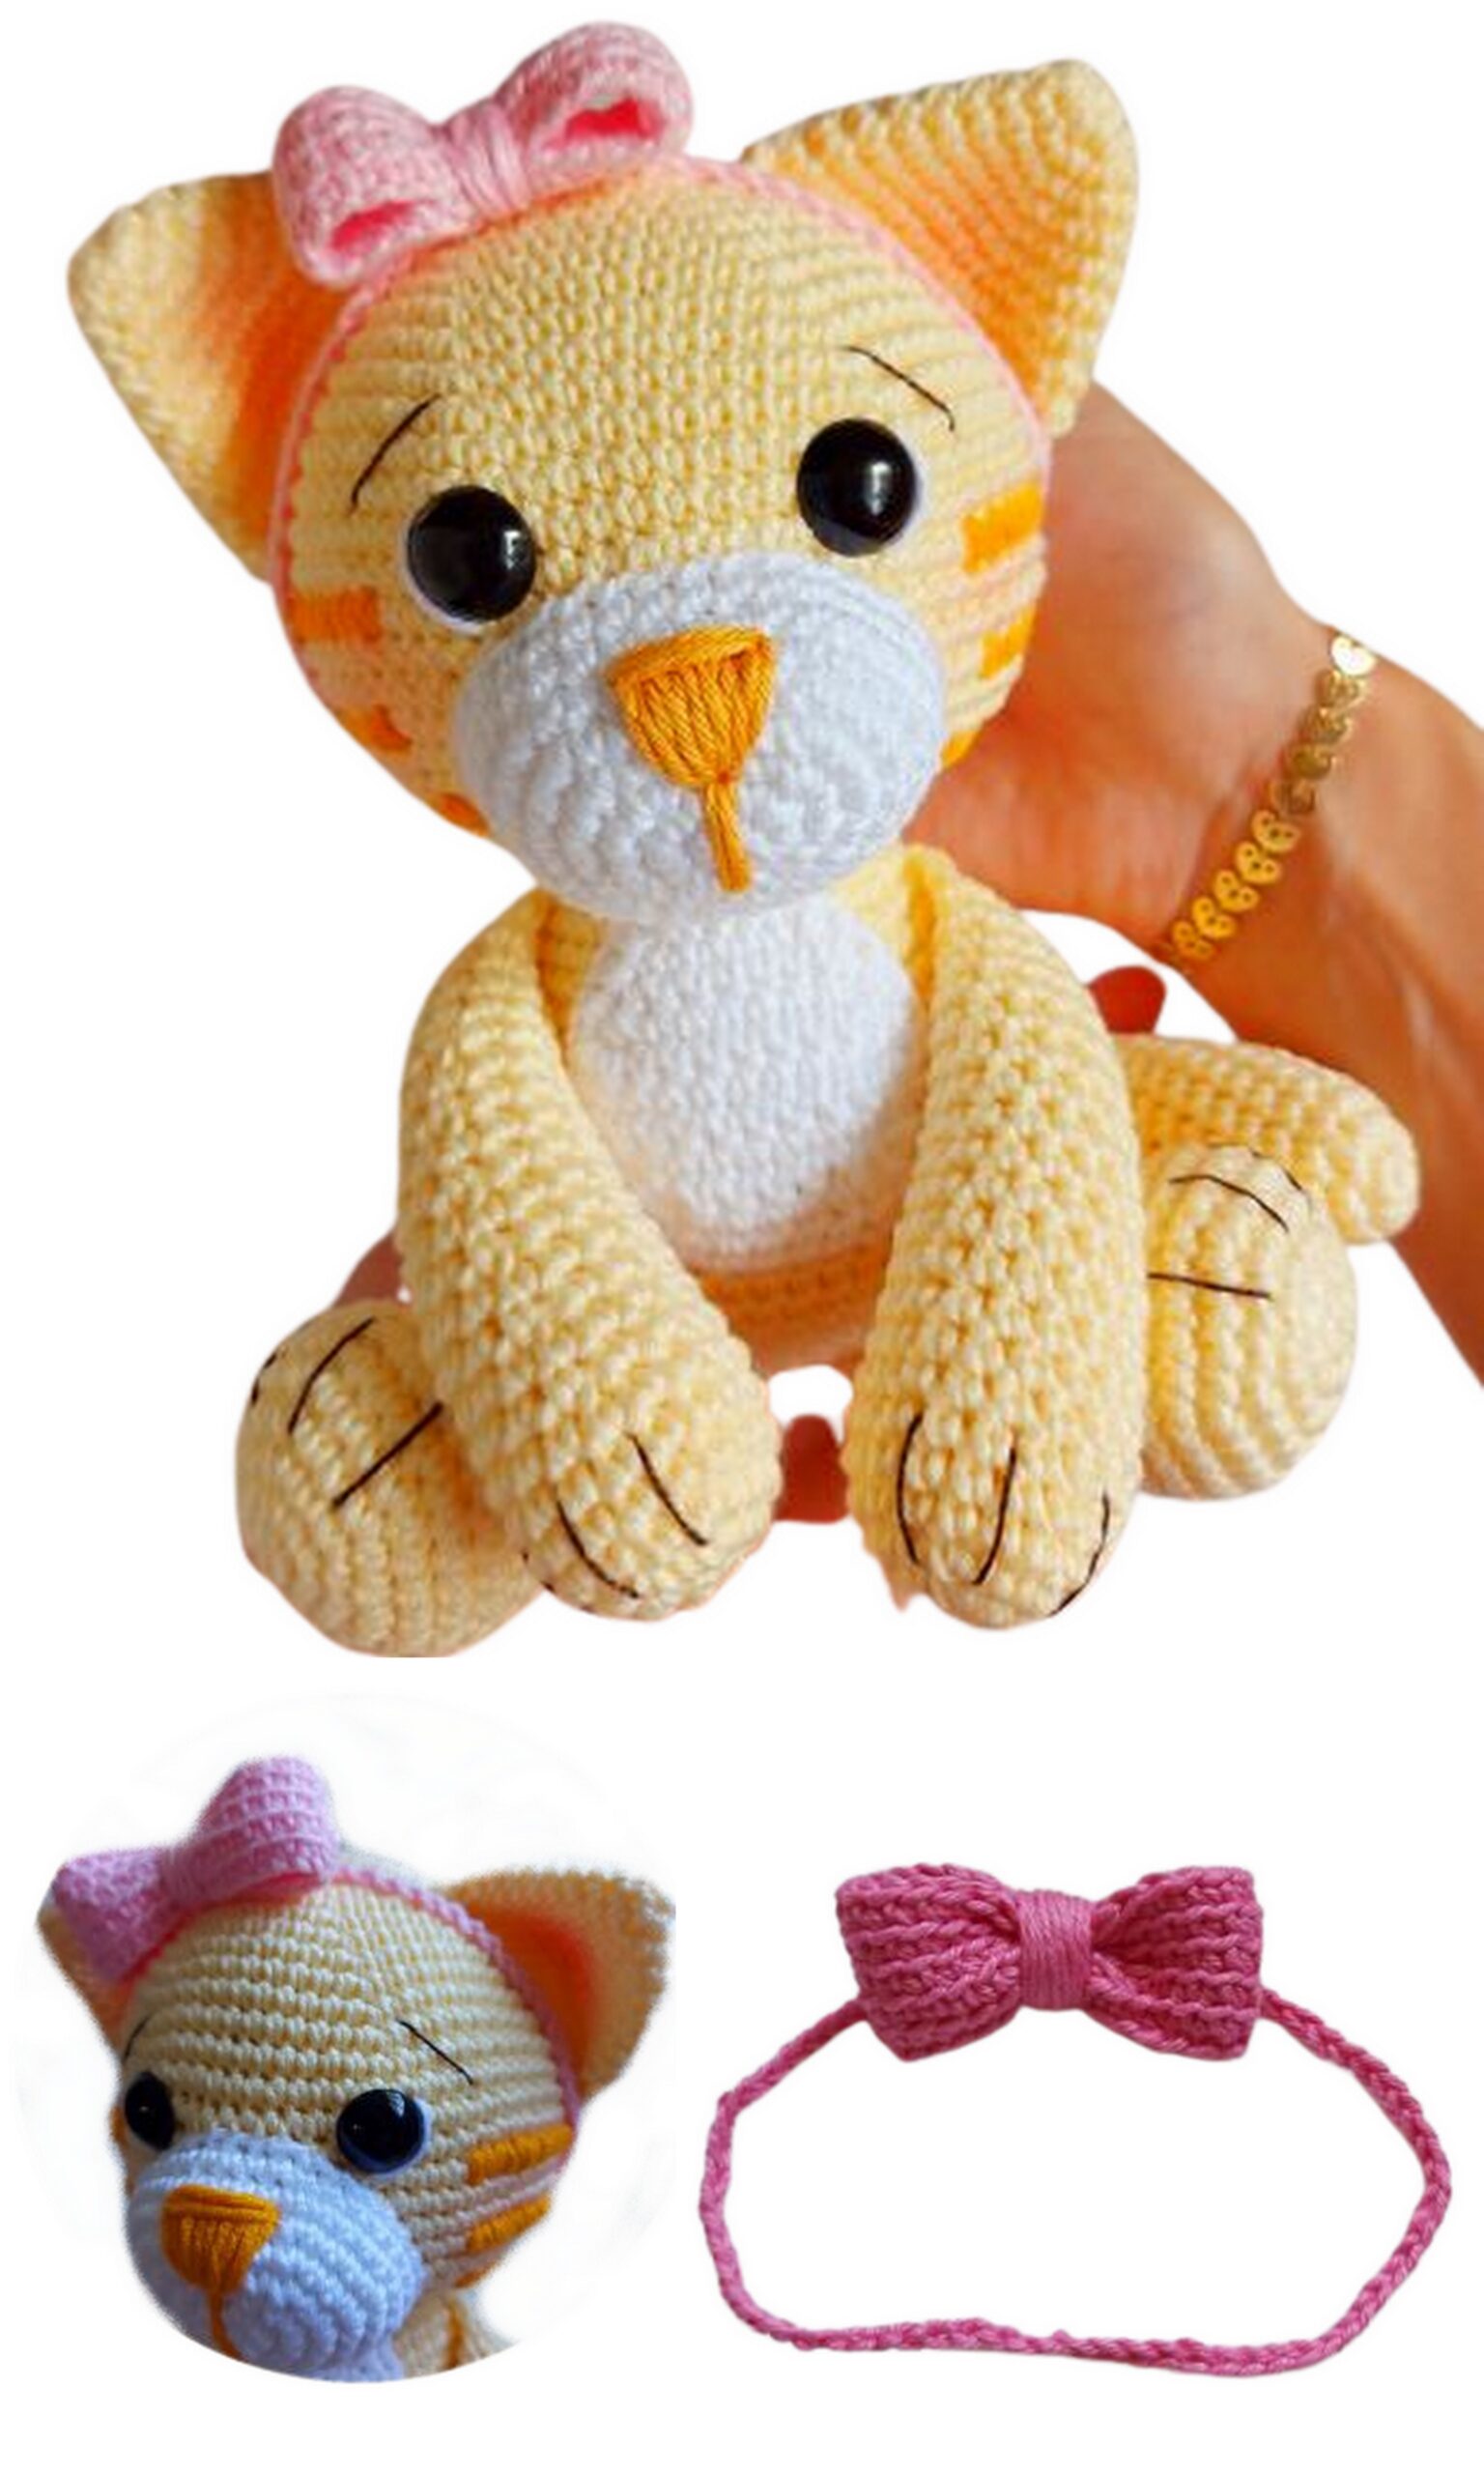
Snout:
Notice that it has a slightly oval shape.
Put some filling.
Insert pins first, to make sure it stays in place.
Then we are going to fit the top part between the eyes, between rows 17 and 18.
The sides of the muzzle are aligned with the eyes on the side, as shown in the photos.
And the bottom part is just above the neck.
For better understanding, watch the helper videos.
Front legs:
Position the sides just below the neckline, slightly
inclined.
Hind legs:
Position between rows 6 and 7 counting from the bottom. Leaning a little to the sides. Place pins to check if when you put the kitten in a sitting position it stays firm and if the paws are symmetrical.
Tail:
Position between rows 6 and 7 and rows 11 and 12. With the straight seam and the tail turned to the side.
To better understand, see the video on how to position members.
Tummy:
Position just below the neck.
Sew around.
To see how to sew, watch the helper video at the beginning of the recipe.
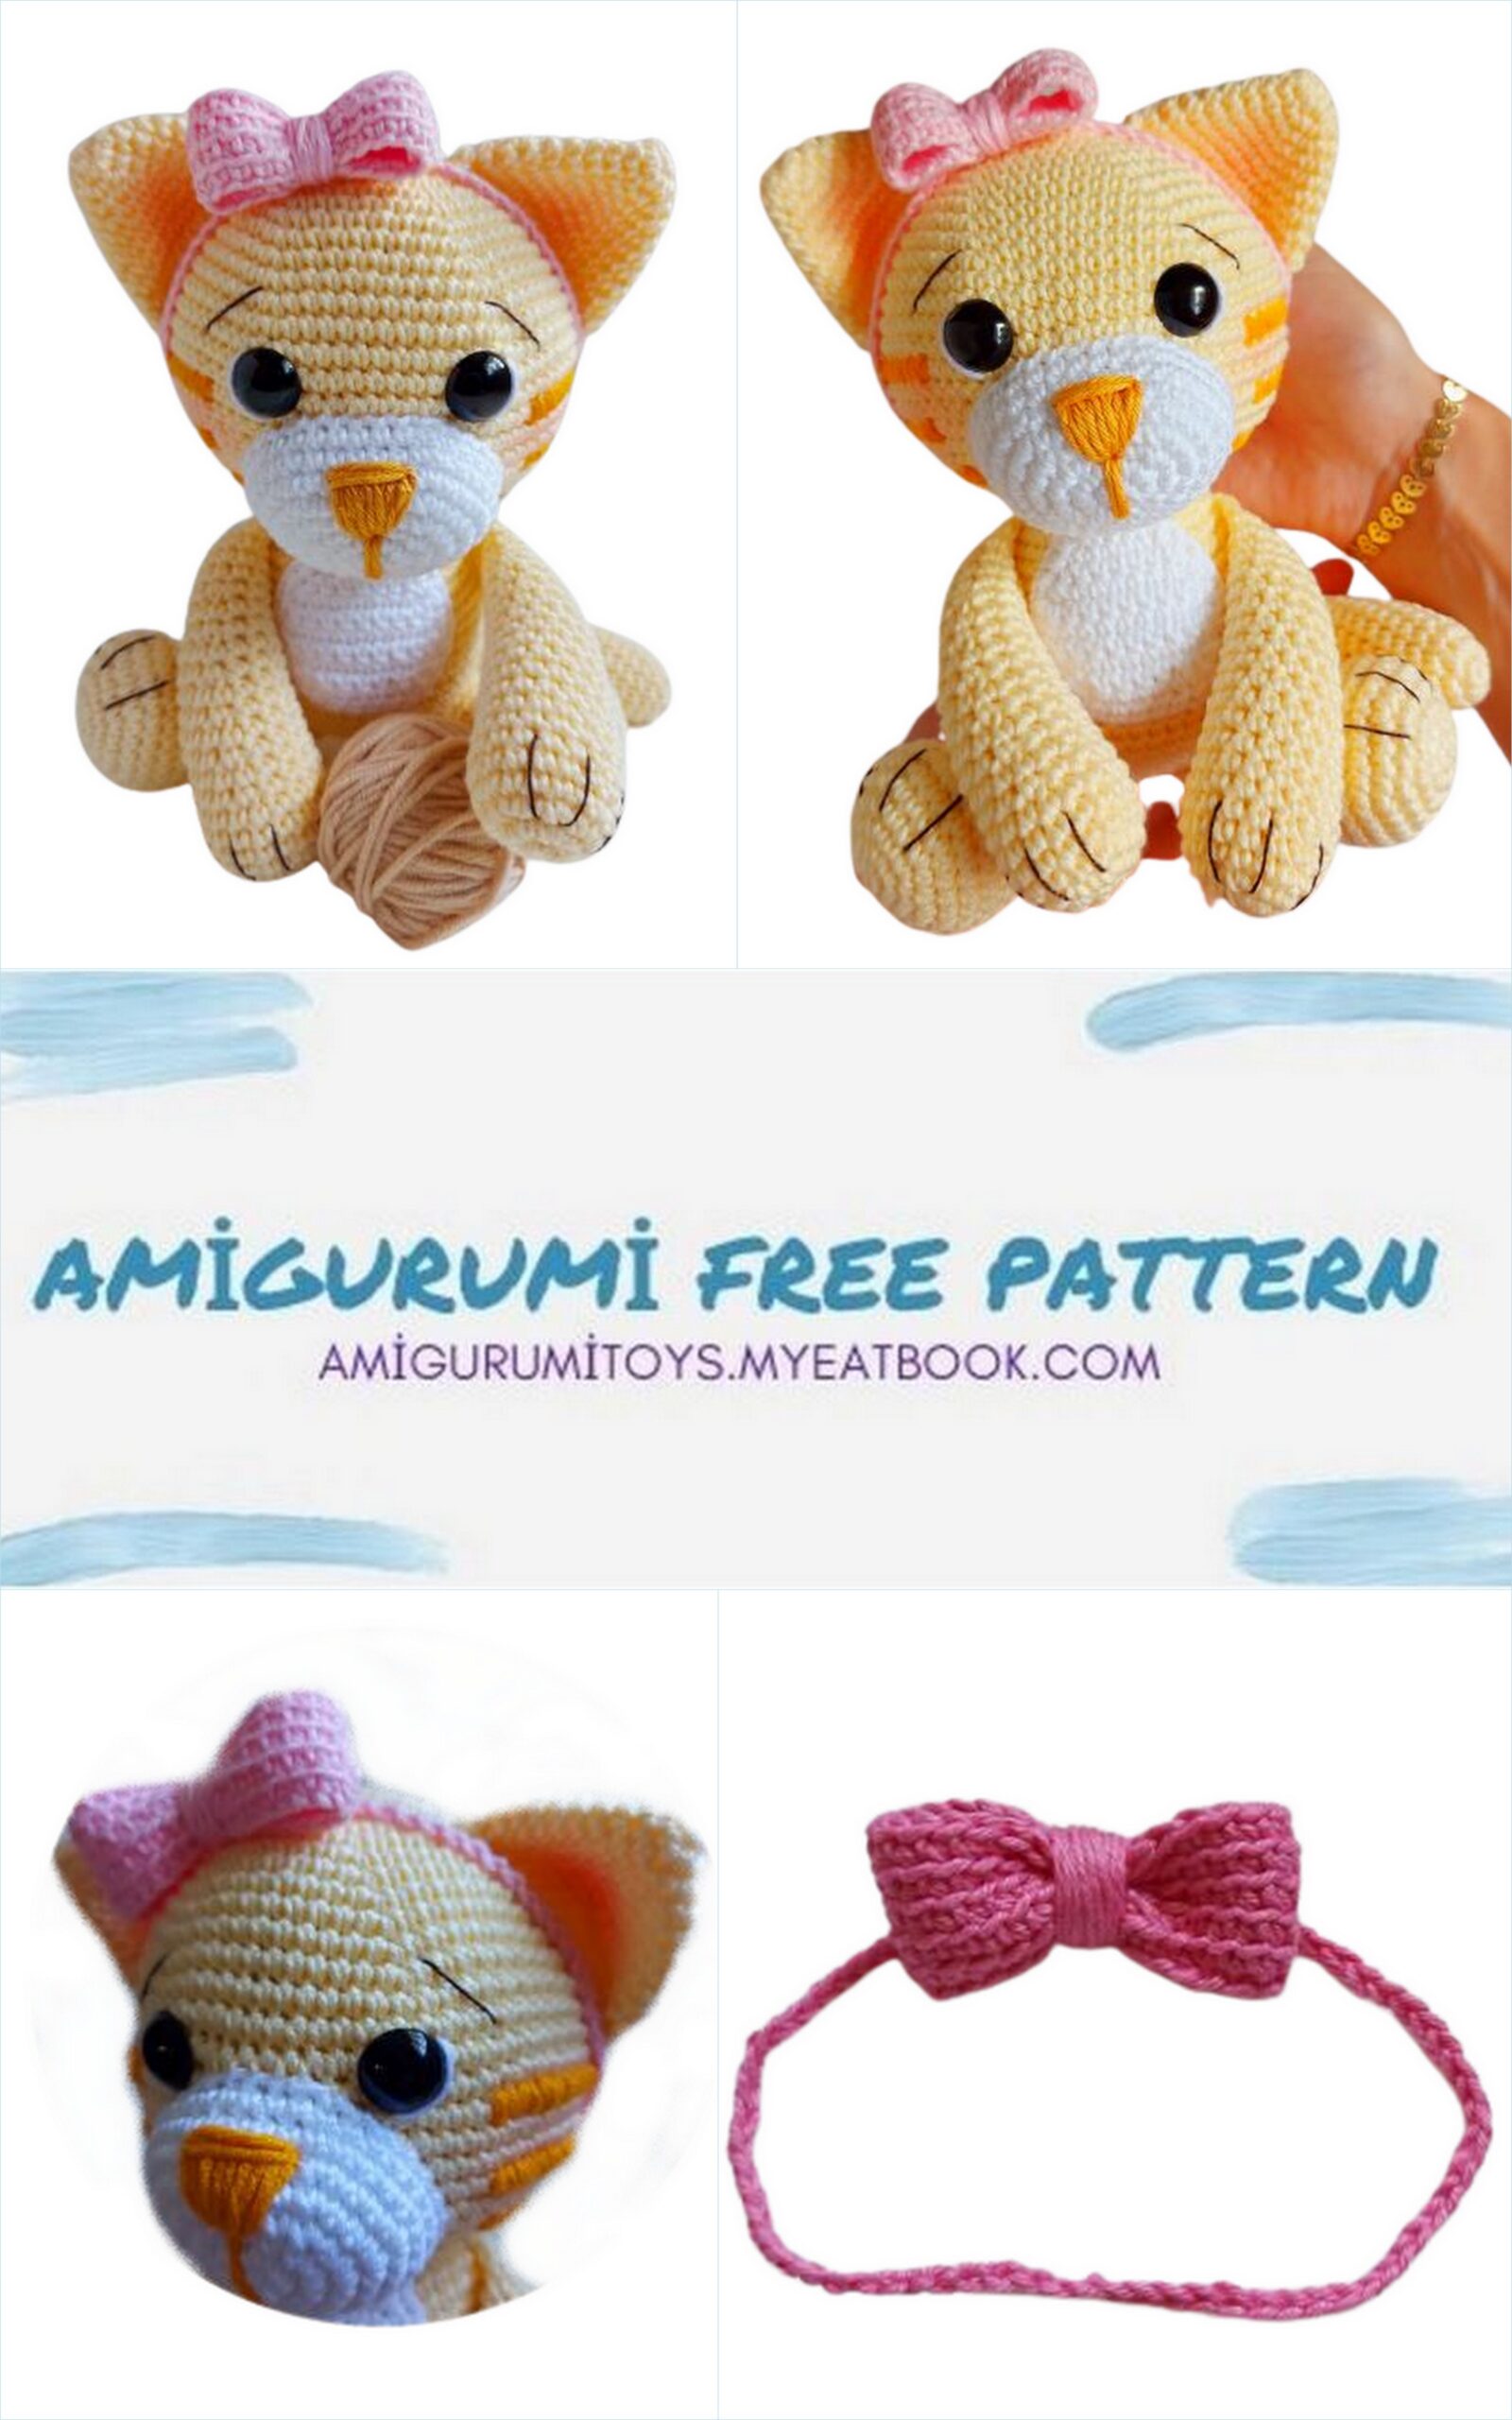
Face embroidery:
Eyes: Make the detail with white thread around the eyes.
Eyebrows: With a thinner brown line, embroider the eyebrows starting
2 rows above the eyes and sloping down, just like in the pictures.
Nose: With Soft amigurumi yarn (gem 4146) start by embroidering a triangle upside down, the top part 2 rows below the edge and the bottom end 3 rows above the center. Fill in the inner part of the triangle, then pass a few times with the horizontal line on top to finish. Finally, draw a line under the nose.
As per the photos.
Face stripes: With Soft amigurumi thread (gem 4146) we will make an embroidery over the stitches, following the “V” shape of the low points of the piece. Embroider twice at each point, as shown in the video.
Embroidery on the paws: With a thin brown thread, make small stripes on the tip of each paw. As per the photos.
For better understanding, watch the help video on embroidery
Link
Make 30 chains and join with an SL-ST in the first chain, forming
a circle.
Now do SC on each chain, total of 30 SC.
Continue SC BLO (back loops only) for 4 more rows.
Totaling 5 rows.
Finish off with SL-ST and leave a thread of approximately 40cm to finish in the middle of the bow.
Make several turns in the middle of the loop, when you finish tie a knot so it doesn’t come loose.
Now make a string with 68 chains. Thread the chain inside the middle part, behind the bow.
Finish off the cord by joining the ends with an SL-ST. Leave this part of the tailpiece hidden behind the bow
Your Luna Kitty is ready!
Hope you enjoyed making your Luna!