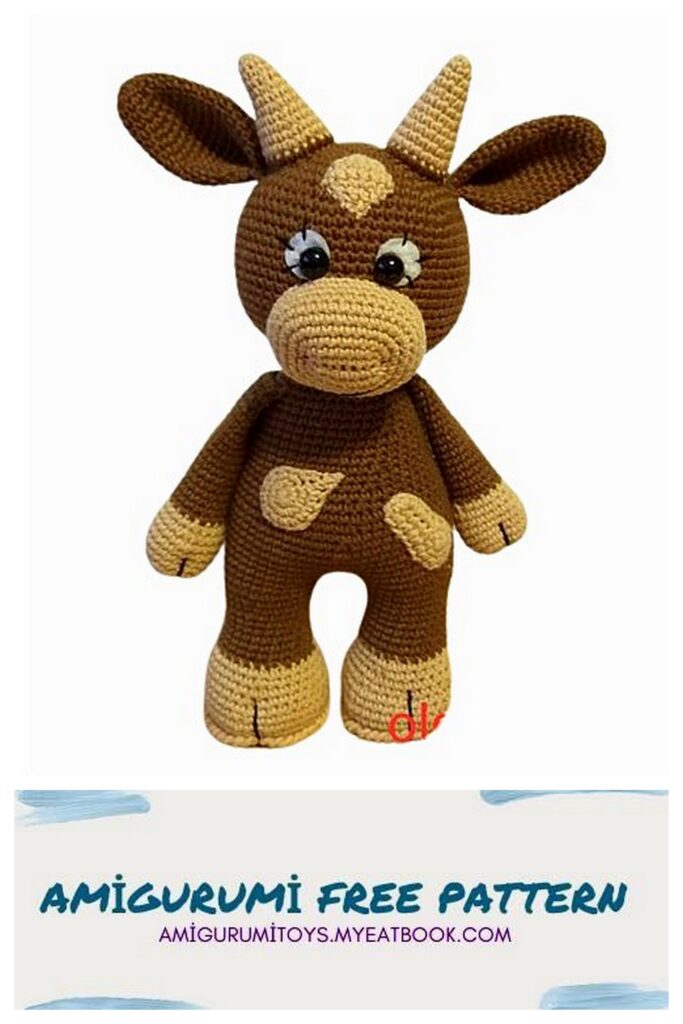
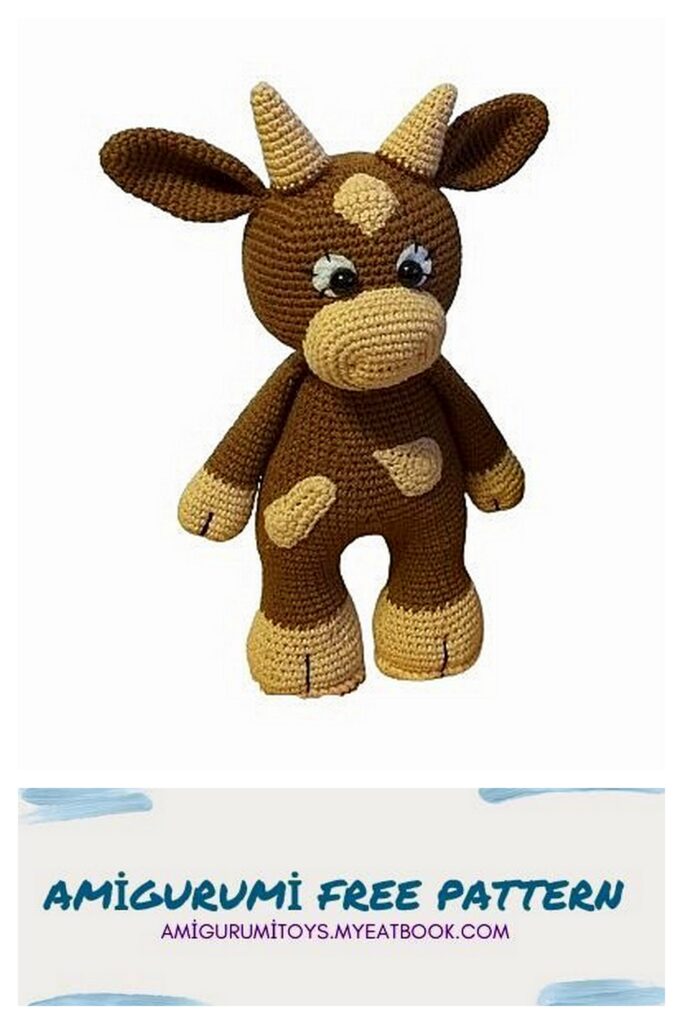
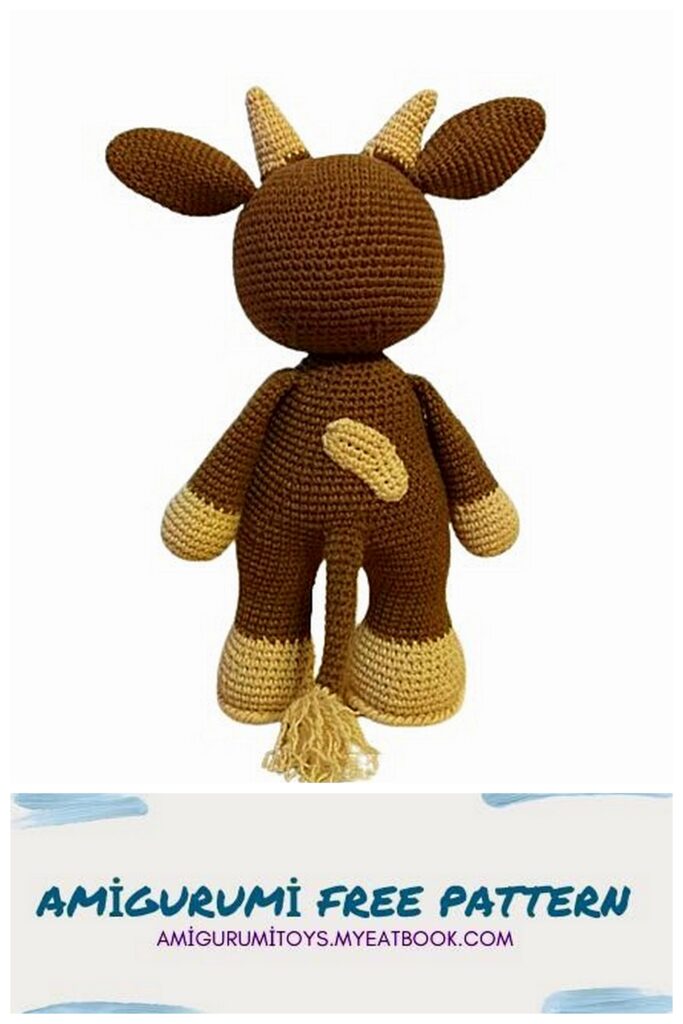
Amigurumi Big Bull: Craft Your Own Adorable and Majestic Bull Companion
Welcome to the world of amigurumi, where creativity and crochet come together to bring charming characters to life! Today, we’re excited to present to you the “Amigurumi Big Bull” free pattern, a delightful project that will allow you to crochet your very own majestic bull companion.
This big bull pattern combines cuteness with a touch of grandeur, making it a perfect addition to your amigurumi collection. Whether you’re an experienced crocheter or just starting out, crafting your own big bull is sure to bring joy and satisfaction as you watch this charming creature take shape under your hands.
MAKING big bull Materials:
1. Yarn Jeans 160m/50g, you will need one skein of the main color and a little for the horns, hooves and muzzle.
2. Eyes on a secure mount or black half-beads measuring 10 mm.
3. A piece of white felt to decorate the eyes.
4. A little black thread for embroidering eyelashes and hooves.
5. Filler for toys.
6. Hook No. 1.75 or 2.
7. Needle for stitching parts.
Designations:
Amigurumi MR ring
CH-air loop
SC-single crochet
SL-ST-connecting post
İNC-increase
DEC-decrease
P/P-half loop
All details are knitted in a spiral. We do not make offset loops unless indicated in the description.
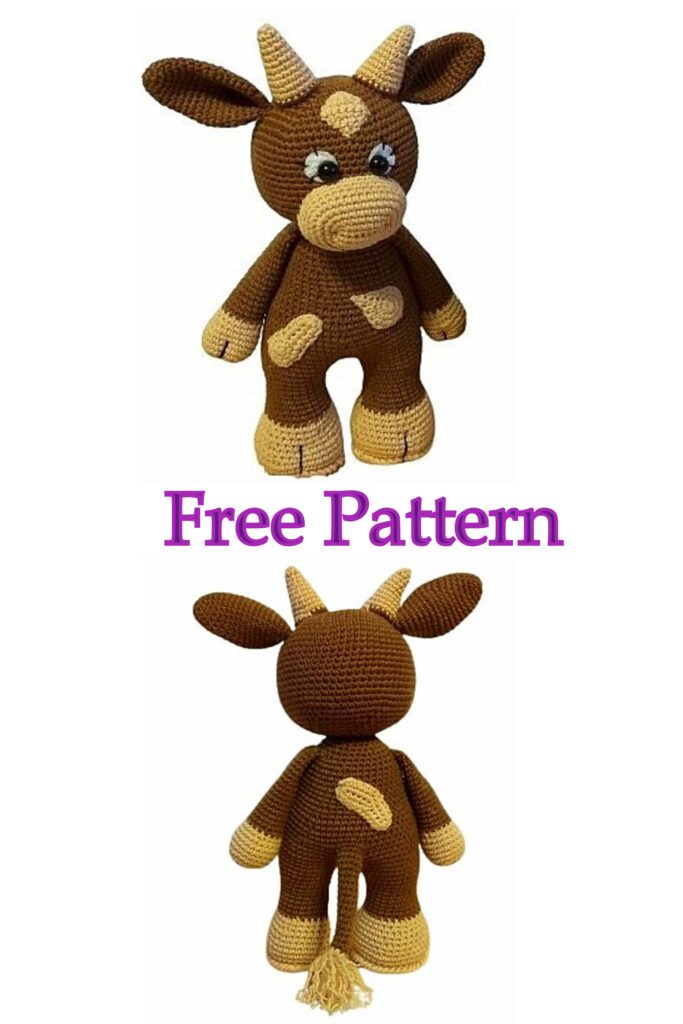
The toy stands on its own. With horns the goby is 25 cm, without horns 22 cm.
Fill in the details according to
progress of knitting.
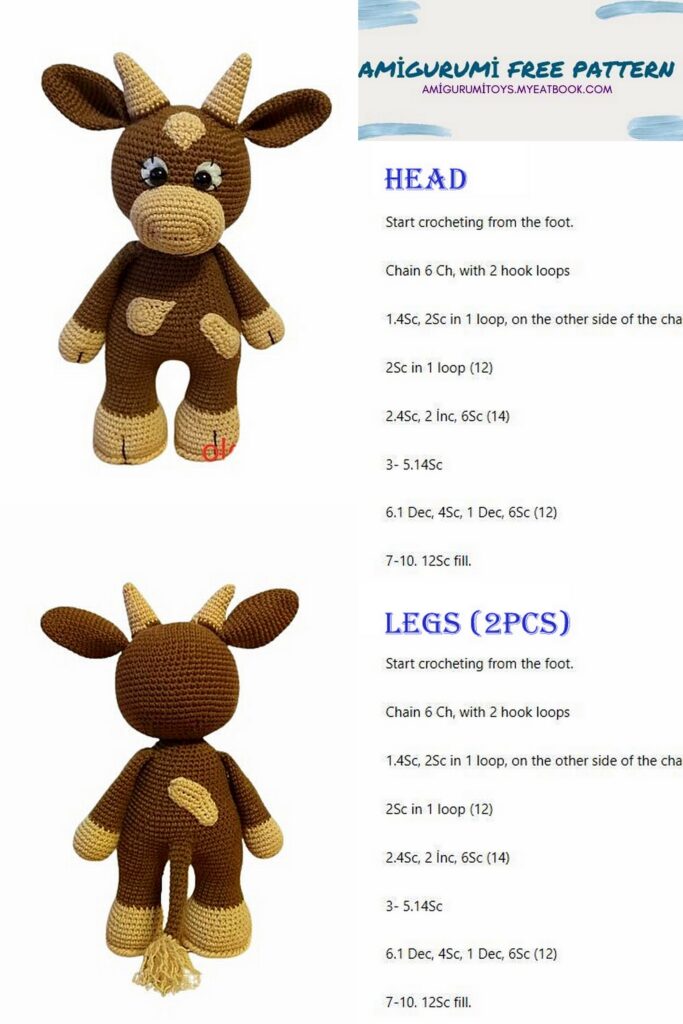
1. Head:
1. 6Sc in MR
2.6İNC (12)
3. (Sc,İNC)*6 (18)
4. (2Sc,İNC)*6 (24)
5. (3Sc,İNC)*6 (30)
6. (4Sc,İNC)*6 (36)
7. (5Sc,İNC)*6 (42)
8. (6Sc,İNC)*6 (48)
9. (7Sc,İNC)*6 (54)
10. (8Sc,İNC)*6 (60)
11. (9Sc,İNC)*6 (66)
12.-23. 66Sc (12 rows) Insert eyes between rows 16 and 17, 6 stitches apart. First cut out two round pieces from felt, make a small hole and put it on the stem of the eye, then insert the eyes.
24. (9Sc,DEC)* 6 (60)
25. (8Sc,DEC)*6 (54)
26. (7Sc,DEC)*6 (48)
27. (6Sc,DEC)*6 (42)
28. (5Sc,DEC)*6 (36)
29. (4Sc,DEC)*6 (30)
30. (3Sc,DEC)*6 (24)
31. (2Sc,DEC)*6 (18) Fill your head.
32. (Sc,DEC)*6 (12)
33. 6DEC Pull the hole, hide the thread, leaving the end for sewing.
If you use half beads for the eyes, then first knit the muzzle and sew it to the head.
Muzzle:
We knit in beige color (or the color you chose):
1. Cast on 8Ch, from the second loop from the hook: 6Sc, 3Sc in the last loop, 5Sc, İNC (16)
2. İNC, 5Sc, İNC, Sc, İNC, 5Sc, İNC, Sc (20)
3. İNC, 7Sc, İNC, Sc, İNC, 7Sc, İNC, Sc (24)
4. Sc, 2İNC, 6Sc, 2İNC, 2Sc, 2İNC, 6Sc, 2İNC, Sc (32)
5. 2Sc, 2İNC, 9Sc, 2İNC, 3Sc, 2İNC, 9Sc, 2İNC, Sc (40)
6.-9. 40Sc (4 rows) Leave thread for sewing.
Sew the muzzle to the head, filling it.
If you have eyes inserted on a secure mount, then sew the muzzle under the eyes. Using the same thread that was used to sew, we make a small tightening on the sides for the nostrils.
We focus on the beginning and end of the chain. After we have sewn the muzzle, we glue the round felt parts. We embroider the eyelashes with black thread, and draw all the threads down the head, where the body will be attached.
Glue the half beads and embroider the mouth with black thread.
Ears(2pcs):
1. 6Sc in MR
2.6İNC (12)
3. 12Sc
4. (İNC, 5Sc)*2 (14)
5. (İNC, 6Sc)*2 (16)
6. (İNC, 7Sc)*2 (18)
7. (İNC, 8Sc)*2 (20)
8. (İNC, 9Sc)*2 (22)
9. (İNC, 10Sc)*2 (24)
10. (İNC, 11Sc)*2 (26)
11. (İNC, 12Sc)*2 (28)
12.-16. 28Sc (5 rows)
17. (DEC, 12Sc)*2 (26)
18. (DEC, 11Sc)*2 (24)
19. (DEC, 10Sc)*2 (22) Fold the eyelet so that there are four layers and knit, pulling the hook through all layers of knitting:
Horns(2 pcs):
We knit with the same thread that we will use to knit the hooves (I have No. 7):
1. 6Sc in MR
2.6Sc
3. (Sc,İNC)*3 (12)
4.9Sc
5. (2Sc,İNC)*3 (12)
6. 12Sc
7. (3Sc.İNC)*3 (15)
8. 15Sc
9. (4Sc,İNC)*3 (18)
10.18Sc
11. (5Sc,İNC)*3 (21) Change the color of the thread to the main one:
12.21Sc
Sew ears and horns to the head.
Spot on forehead:
1. Dial 2Ch, from the second: İNC, turn
2. Ch, 2İNC, turn
3. Ch, İNC, 2Sc, İNC, turn
4. Ch, 5Sc, İNC, turn Next we don’t do Ch:
5. skip the first loop, 4Sc, DEC, turn
6. skip the first loop, 2Sc, DEC, turn
7. skip the first one, DEC Sew the spot to the forehead.
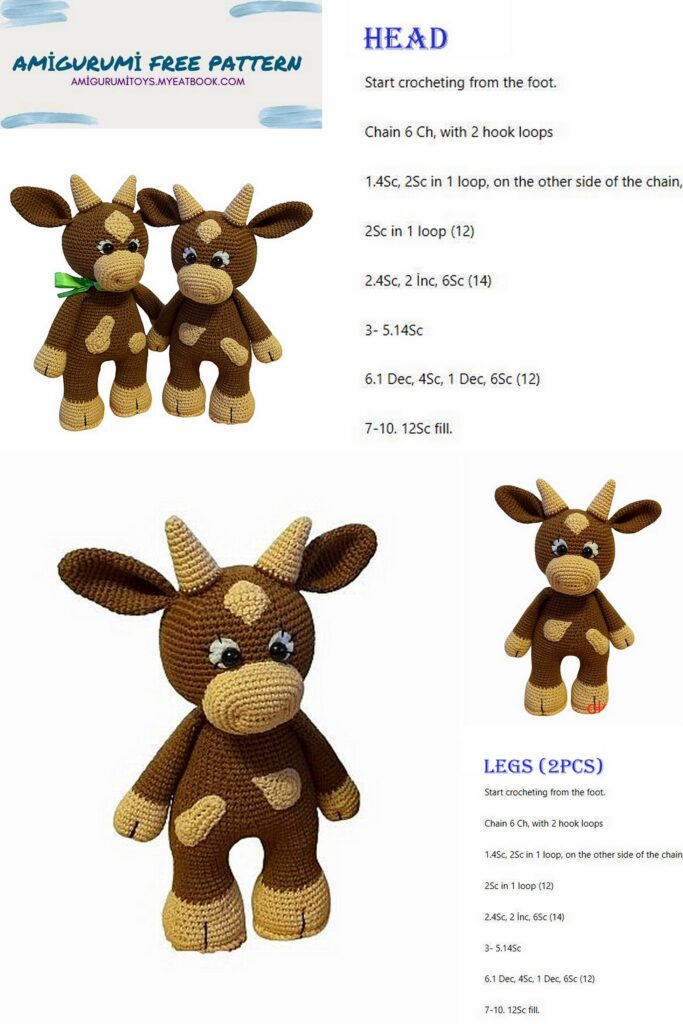
2. Front hooves (2 pieces):
We start knitting with the color of the hooves:
1. 6Sc in MR
2.6İNC(12)
3. (Sc,İNC)*6 (18)
4. (2Sc,İNC)*6 (24)
5.-8. 24Sc (4 rows)
9. (6Sc,DEC)*3 (21)
10. (5Sc,DEC)*3 (18) Change the color to the main one:
11.-25. 18Sc (15 rows)
26. (4Sc,DEC)*3 (15) We fill only the bottom of the leg (hoof).
27. 15Sc For both sides of knitting we knit:
28.7Sc
Use a black thread to make a slight tightening, forming a hoof. To do this, insert the needle into the MR and bring it three or four rows below the place where the color changes:
3.Hear hooves(2pcs):
1. We begin to knit with a beige thread:
1. 8Sc in MR
2.8İNC (16)
3. (Sc,İNC)*8 (24)
4. (2Sc,İNC)*8 (32)
5. (3Sc,İNC)*8 (40)
6. Blo or side: 40Sc
7.-8. 40Sc
9. (8Sc,DEC)*4 (36)
10.36Sc
11. (7Sc.DEC)*4 (32)
12.32Sc
13. (6Sc,DEC)*4 (28)
14. 28Sc Change the color of the thread to the main one:
15. (5Sc,DEC)*4 (24)
16.-19. 24Sc (4 rows)
20. (7Sc, İNC)*3 (27)
21.27Sc
22. (8Sc,İNC)*3 (30)
23. 30Sc Fasten and cut the thread.
Fill your legs very tightly. For those left in the 6th row, tie the hooves with a crawfish step.
Tail:
Main color thread:
1. 6Sc in MR
2.-5. 6Sc
6. (İNC, 2Sc)*2 (8)
7.-13. 8Sc (7 rows)
14. (İNC, 3Sc)*2 (10)
15.-16. 10Sc Use beige thread to make a tassel on the tail.
4.Body:
Having tied the second leg, we do not cut the thread. We make three Chs and join the second leg.
1. 30Sc on the leg, 3Sc on the chain from Ch, 30Sc on the second leg, 3Sc on the chain (66)
2.-5. 66Sc
6. (20Sc, DEC)*3 (63) In the next row we knit the tail:
7. 29Sc, 5Sc with tail, 29Sc (63)
8. 19Sc, DEC, 8Sc, 5Sc in tail, 6Sc, DEC, 19Sc, DEC (60)
9.60Sc
10. (8Sc,DEC)*6 (54)
11.54Sc
12. (16Sc,DEC)*3 (51)
13.51Sc
14. (15Sc, DEC)*3 (48)
15.48Sc
16 . (14Sc,DEC)*3 (45)
17.-19. 45Sc (3 rows)
20. (13Sc,DEC)*3 (42)
21.-22. 42Sc
23. (12Sc,DEC)*3 (39)
We align the knitting so that the front legs are exactly on the sides of the body. To do this, we knit the required number of Sc, the so-called displacement loops (I have 3 displacement loops).
The marker runs down the middle of the front chest.
24. 6Sc, 7Sc with hand, 13Sc, 7Sc with second hand, 6Sc.
25. (11Sc,DEC)*3 (36)
26. (4Sc,DEC)*6 (30)
27. (3Sc,DEC)*6 (24)
28. 24Sc Filling the torso.
The knitting can be closed to the end ((2,DEC)*6, etc.) so that the head fits better on the body.
We knit spots. The spots can be knitted as you please), I knitted them like this:
First spot:
1. 6Ch, from the second from the hook: 5Sc, 5Ch, from the second: 4Sc, 2Sc in the last loop, 3Sc, İNC
2. in a circle: İNC, 4Sc, along the second “tail”: 7Sc,İNC, 10Sc.
Second spot:
1. 6Sc in MR
2.6İNC (12)
3. 2Ch, 1Sc in chain, 14Sc
4.7Sc
Third spot:
1. 6Sc in MR
2. Sc,5Ch, from the second from the hook: 4Sc, 5th Sc to initial Sc, 5Sc
3. 4Sc,2İNC, 5Sc, 3Sc in one loop, 3Sc.
The spots are connected haphazardly), a sort of “scrawl-scribble”, you can tie them in your own way.
Sew the spots to the body.
Decor:
Sew the head to the body.
On the hind legs, use black thread to make a small tightening, forming a hoof (as on the front).
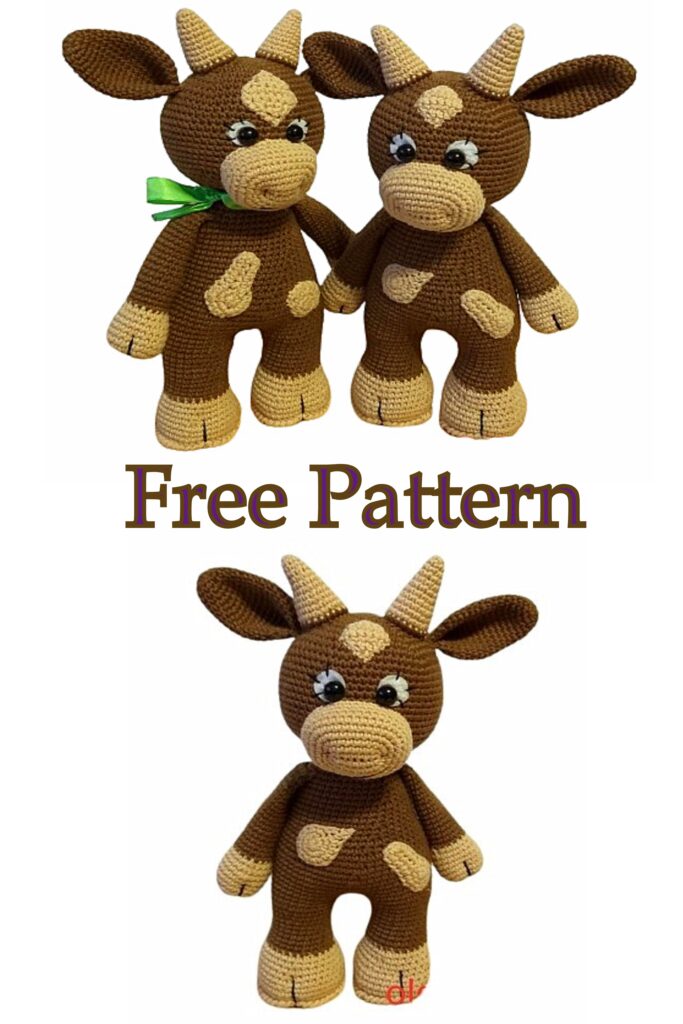
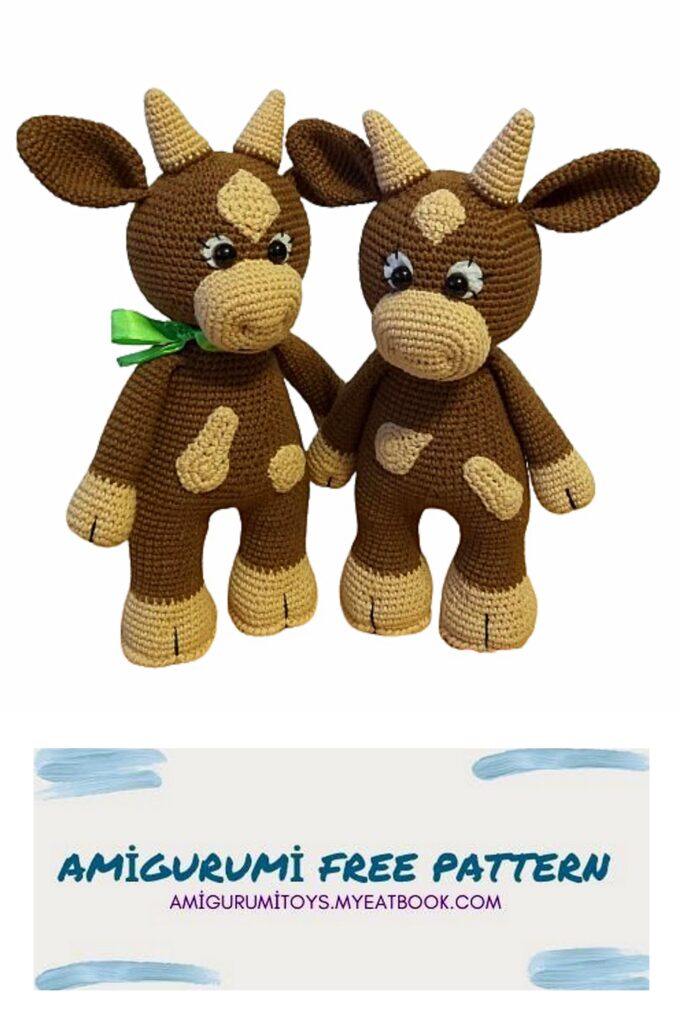
As you can see, the bull is knitted very simply!
You can decorate your bull the way you like!