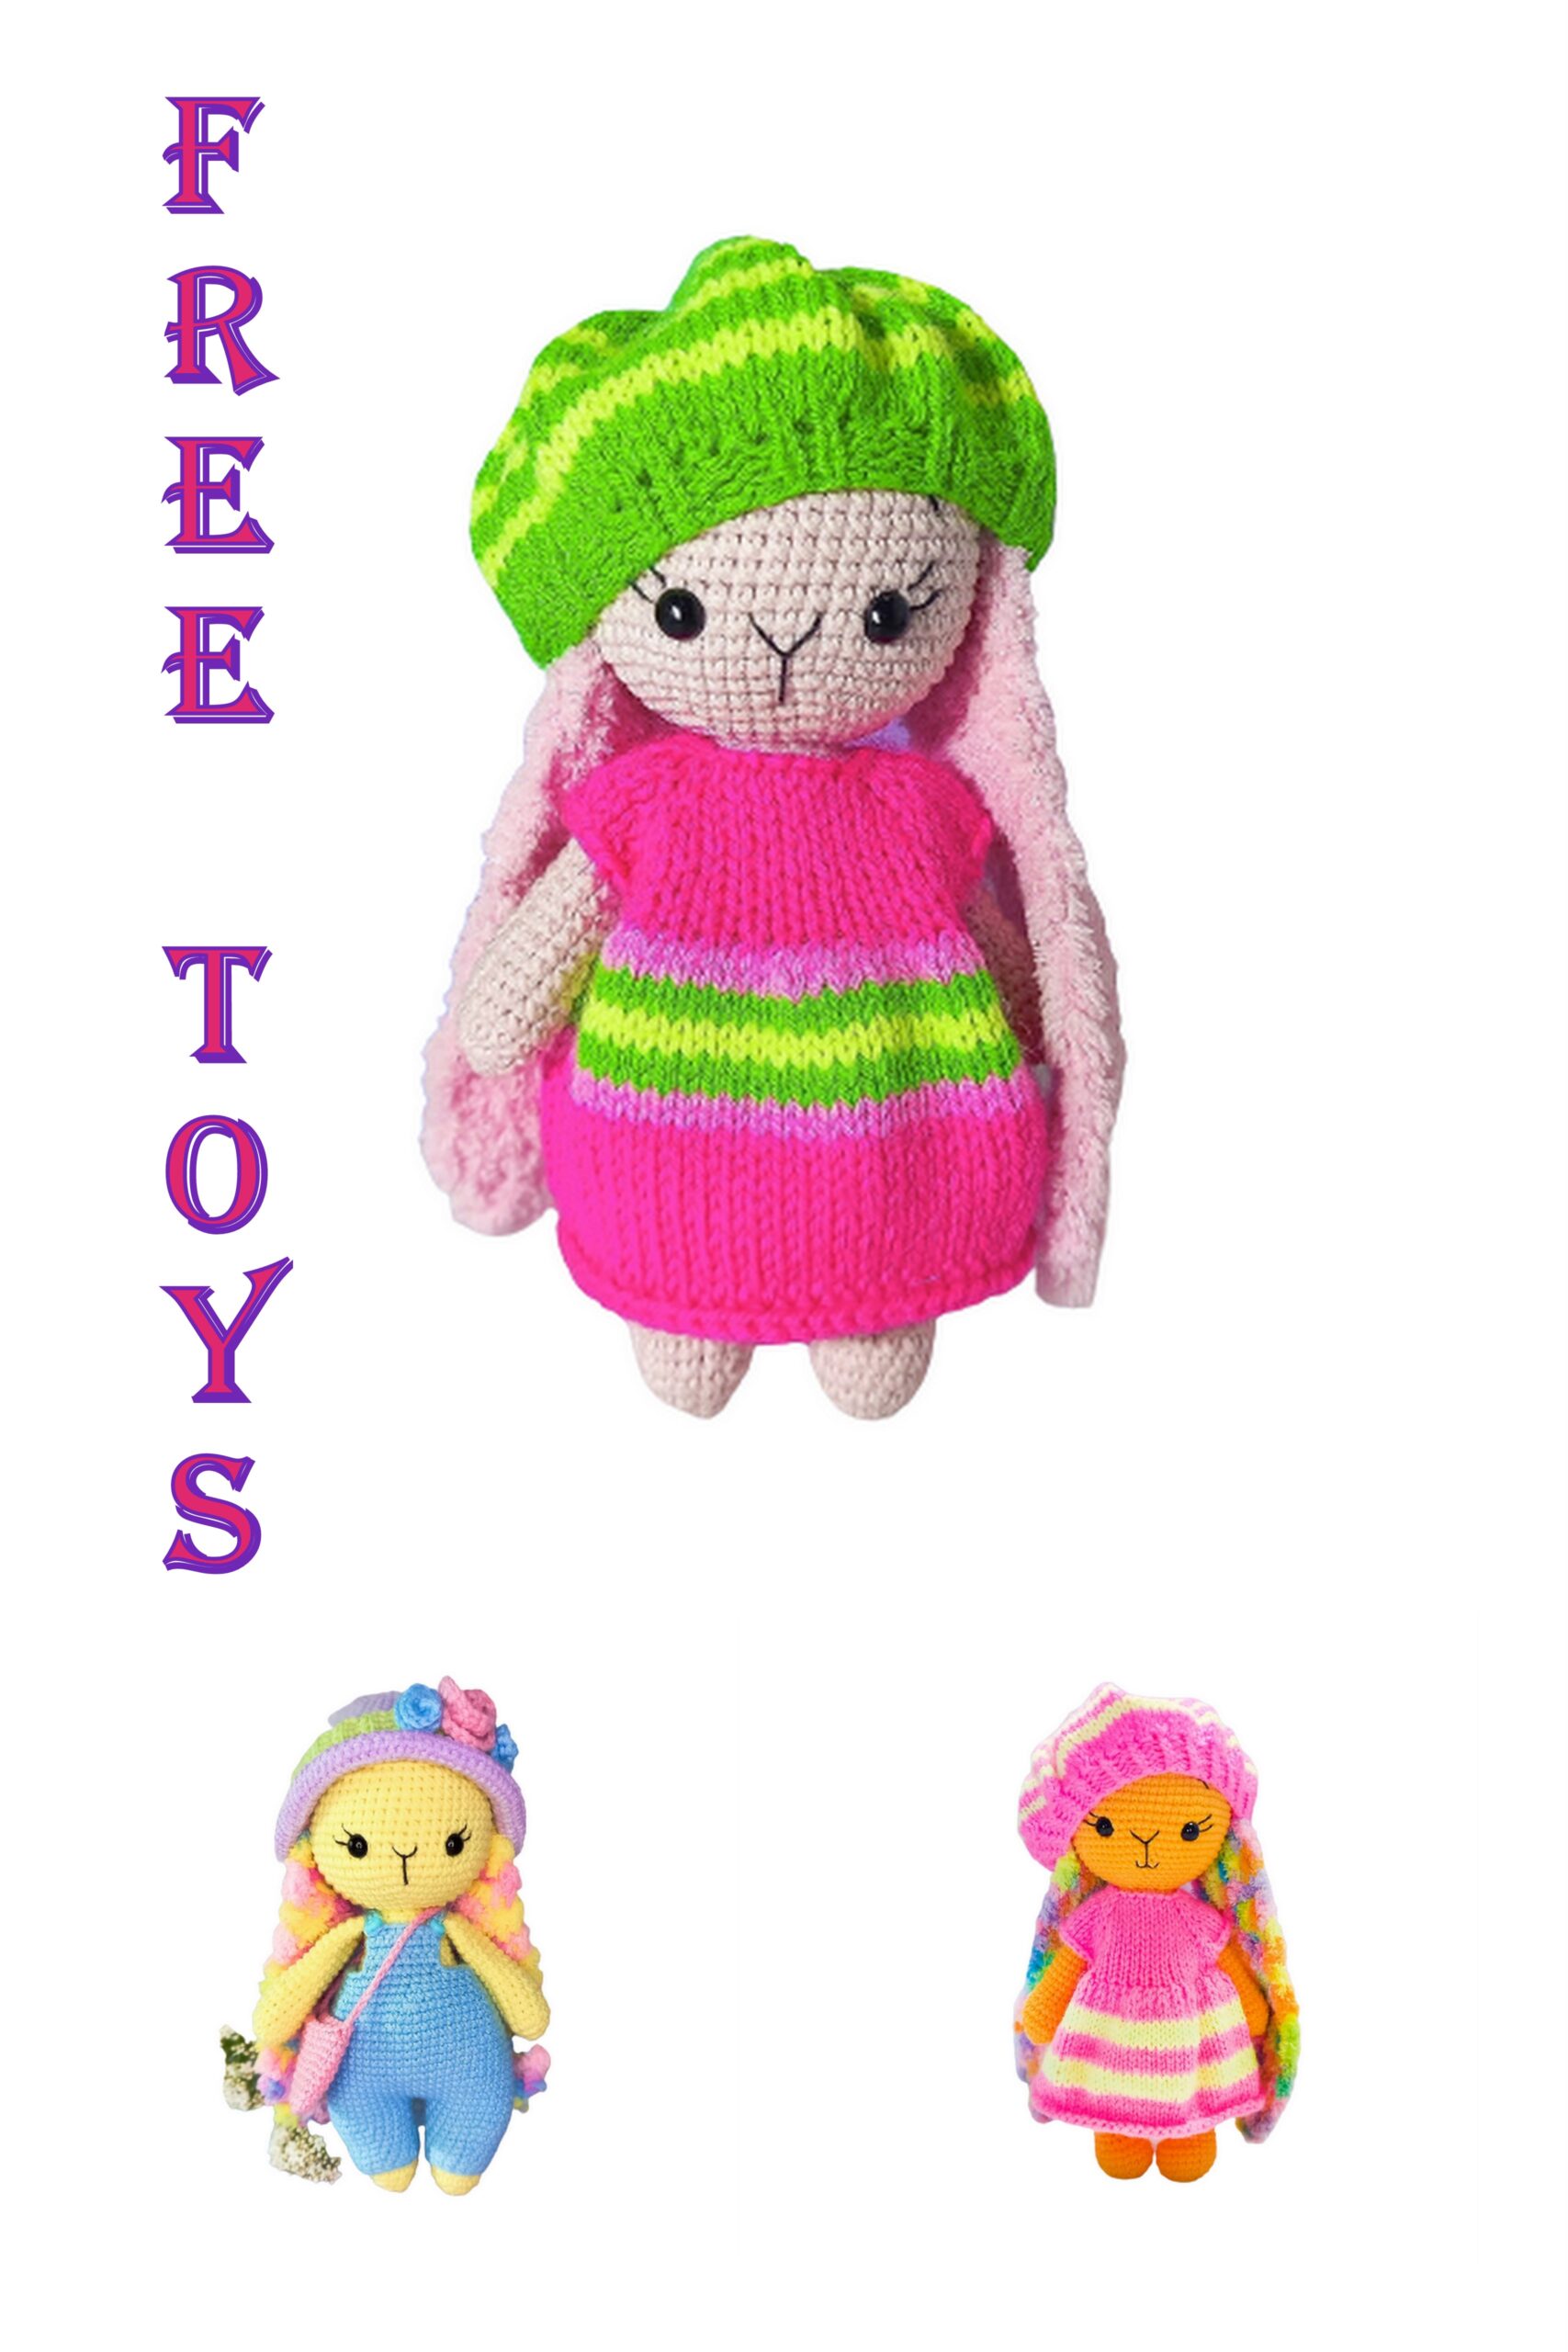
Amigurumi little bunny free We continue to share the most beautiful and free amigurumi patterns for you. You can visit our website for Amigurumi little bunny and more patterns.
LITTLE SIMPLE BUNNY WITH FLUFFY EARS
This description includes a complete description of the knitting process of the toy, intermediate photos of the details, a description of the panama hat and overalls, and the calculation of loops for the dress and beret with knitting needles.
The bunny is knitted in the spiral (unless otherwise stated), from bottom to top. The upper paws and ears are tied in, the head is tied out of the body.
When using these materials, the height of the finished toy is about 18 cm.
* To mark the beginning of the row, use a special marker or thread in a contrasting color.
* The description does not contain crochet tutorials and is intended for those who have basic crochet skills.
Required materials and tools:
Amigurumi little bunny free
1. Hook suitable for your yarn.
2. YarnArt JEANS yarn of any color of your choice for the body.
3. For ears, you can take any textured yarn suitable, or
contrasting color. I knitted bunny ears from cotton-grass from Camtex, from Alize Softy, Adelia Sofia
4. Filler.
5. Eyes on a secure mount (I used 8 mm) or sewn on, (beads, half beads – your choice)
6. A little black thread for embroidering the muzzle.
7. Stitching needle, scissors, pins, knitting marker.


Legend:
Amigurumi little bunny free
sc – single crochet
dc – single crochet
ch – air loop
inc – increase
dec – decrease
sl-st – connecting column
(…)*X – repeat X times indicated in brackets
the number after the = means
number of stitches in a row
EARS (2 parts)
Knit in swivel rows. From “Cotton Grass” from “Kamteks” and “Adelia Sofia” I knitted with single crochets. From “Alize Softy”, with single crochets. Different textured yarns are often of different thicknesses, make increments up to an eye width of about 3.5-4 cm according to this principle: Amigurumi little bunny free
Chain of 3 ch + 1 single crochet eye instep or 2 single crochet eye instep.
Next, we make in each row one increase on each side of the row to the width we need. I have either 7 or 9 columns (depending on the thickness of the thread).
We knit in turning rows until the length of the ear is 13.5-14 cm, we decrease 1 loop on each side of the row in each row until 5 columns remain.
UPPER LEGS 2 parts
We stuff only the bottom part a little
1 row: 6 sc into magic ring
2 row: 6 inc. = 12
3-17 rows: 12 sc
Fold in half and knit together 5 sc.
LEGS, BODY, HEAD
Amigurumi little bunny free
We stuff quite tightly, in the course of knitting.
We start with the LOWER LEGS:
1 row: 6 sc into magic ring
2 row: 6 inc. = 12
3 row: (3 sc, inc) * 3 = 15
4-12 rows: 15 sc.
At the first foot, knit the last column in the 12th row with a connecting one, fasten and cut the thread.
We do not cut the thread at the second foot, we continue knitting, connecting 5 sc with the first foot.
This is where the BODY begins.
13 row: 15 sc on the first leg, 5 sc on the chain, 15 sc on the second leg, 5 sc on the chain.
The total number of stobics in this row = 40
Next, visually determine the sides of the toy. Can be marked with markers. We will do in some rows one increase or decrease.
14 row: one inc on each side = 42
15 row: one inc on the belly and pope = 44
16-21 rows: 44 sc
22 row: one dec on each side = 42
23 row: 42 sc
24 row: one dec on each side = 40
25 row: one dec on each side = 38
26 row: one dec on each side = 36
27 row: one dec on each side = 34
28 row: one dec on each side = 32
29 row: one dec on each side = 30
30 row: (3 sc, dec) * 6 = 24
31-34 rows: 24 sc in the 34th row, the upper paws are knitted.
Paws are knitted parallel to the lower ones (5 sc each with paws, 7 sc between them)
35 row: (2 sc, dec) * 3 = 18
36 row: (1 sc, dec) * 3 = 12
HEAD starts
37 row: 12 increments for the front half loops = 24
This technique will give us a more rounded shape of the lower part of the head.
We put the eyes between 45 and 46 rows, between the eyes there are 9 columns
Page 7 of 12
38 row: (3 sc, inc) * 6 = 30
39 row: (4 sc, inc) * 6 = 36
40 row: (5 sc, inc) * 6 = 42
41 row: (6 sc, inc) * 6 = 48
42 row: (7 sc, inc) * 6 = 54
43-53 rows: 54 sc
54 row: knit ears
I mark the loops with pins parallel to the eyes and count from them to the back of the head the required number of columns, the same on both sides to the place where the ears will be located. I have it 8-9 sc. At the same time, do not forget about 5 columns of the ears themselves.
55 row: (7 sc, dec) * 6 = 48
56 row: (6 sc, dec) * 6 = 42
57 row: (5 sc, dec) * 6 = 36
58 row: (4 sc, dec) * 6 = 30
59 row: (3 sc, dec) * 6 = 24
60 row: (2 sc, dec) * 6 = 18
61 row: (1 sc, dec) * 6 = 12
62 row: 6 dec = 6
Close.
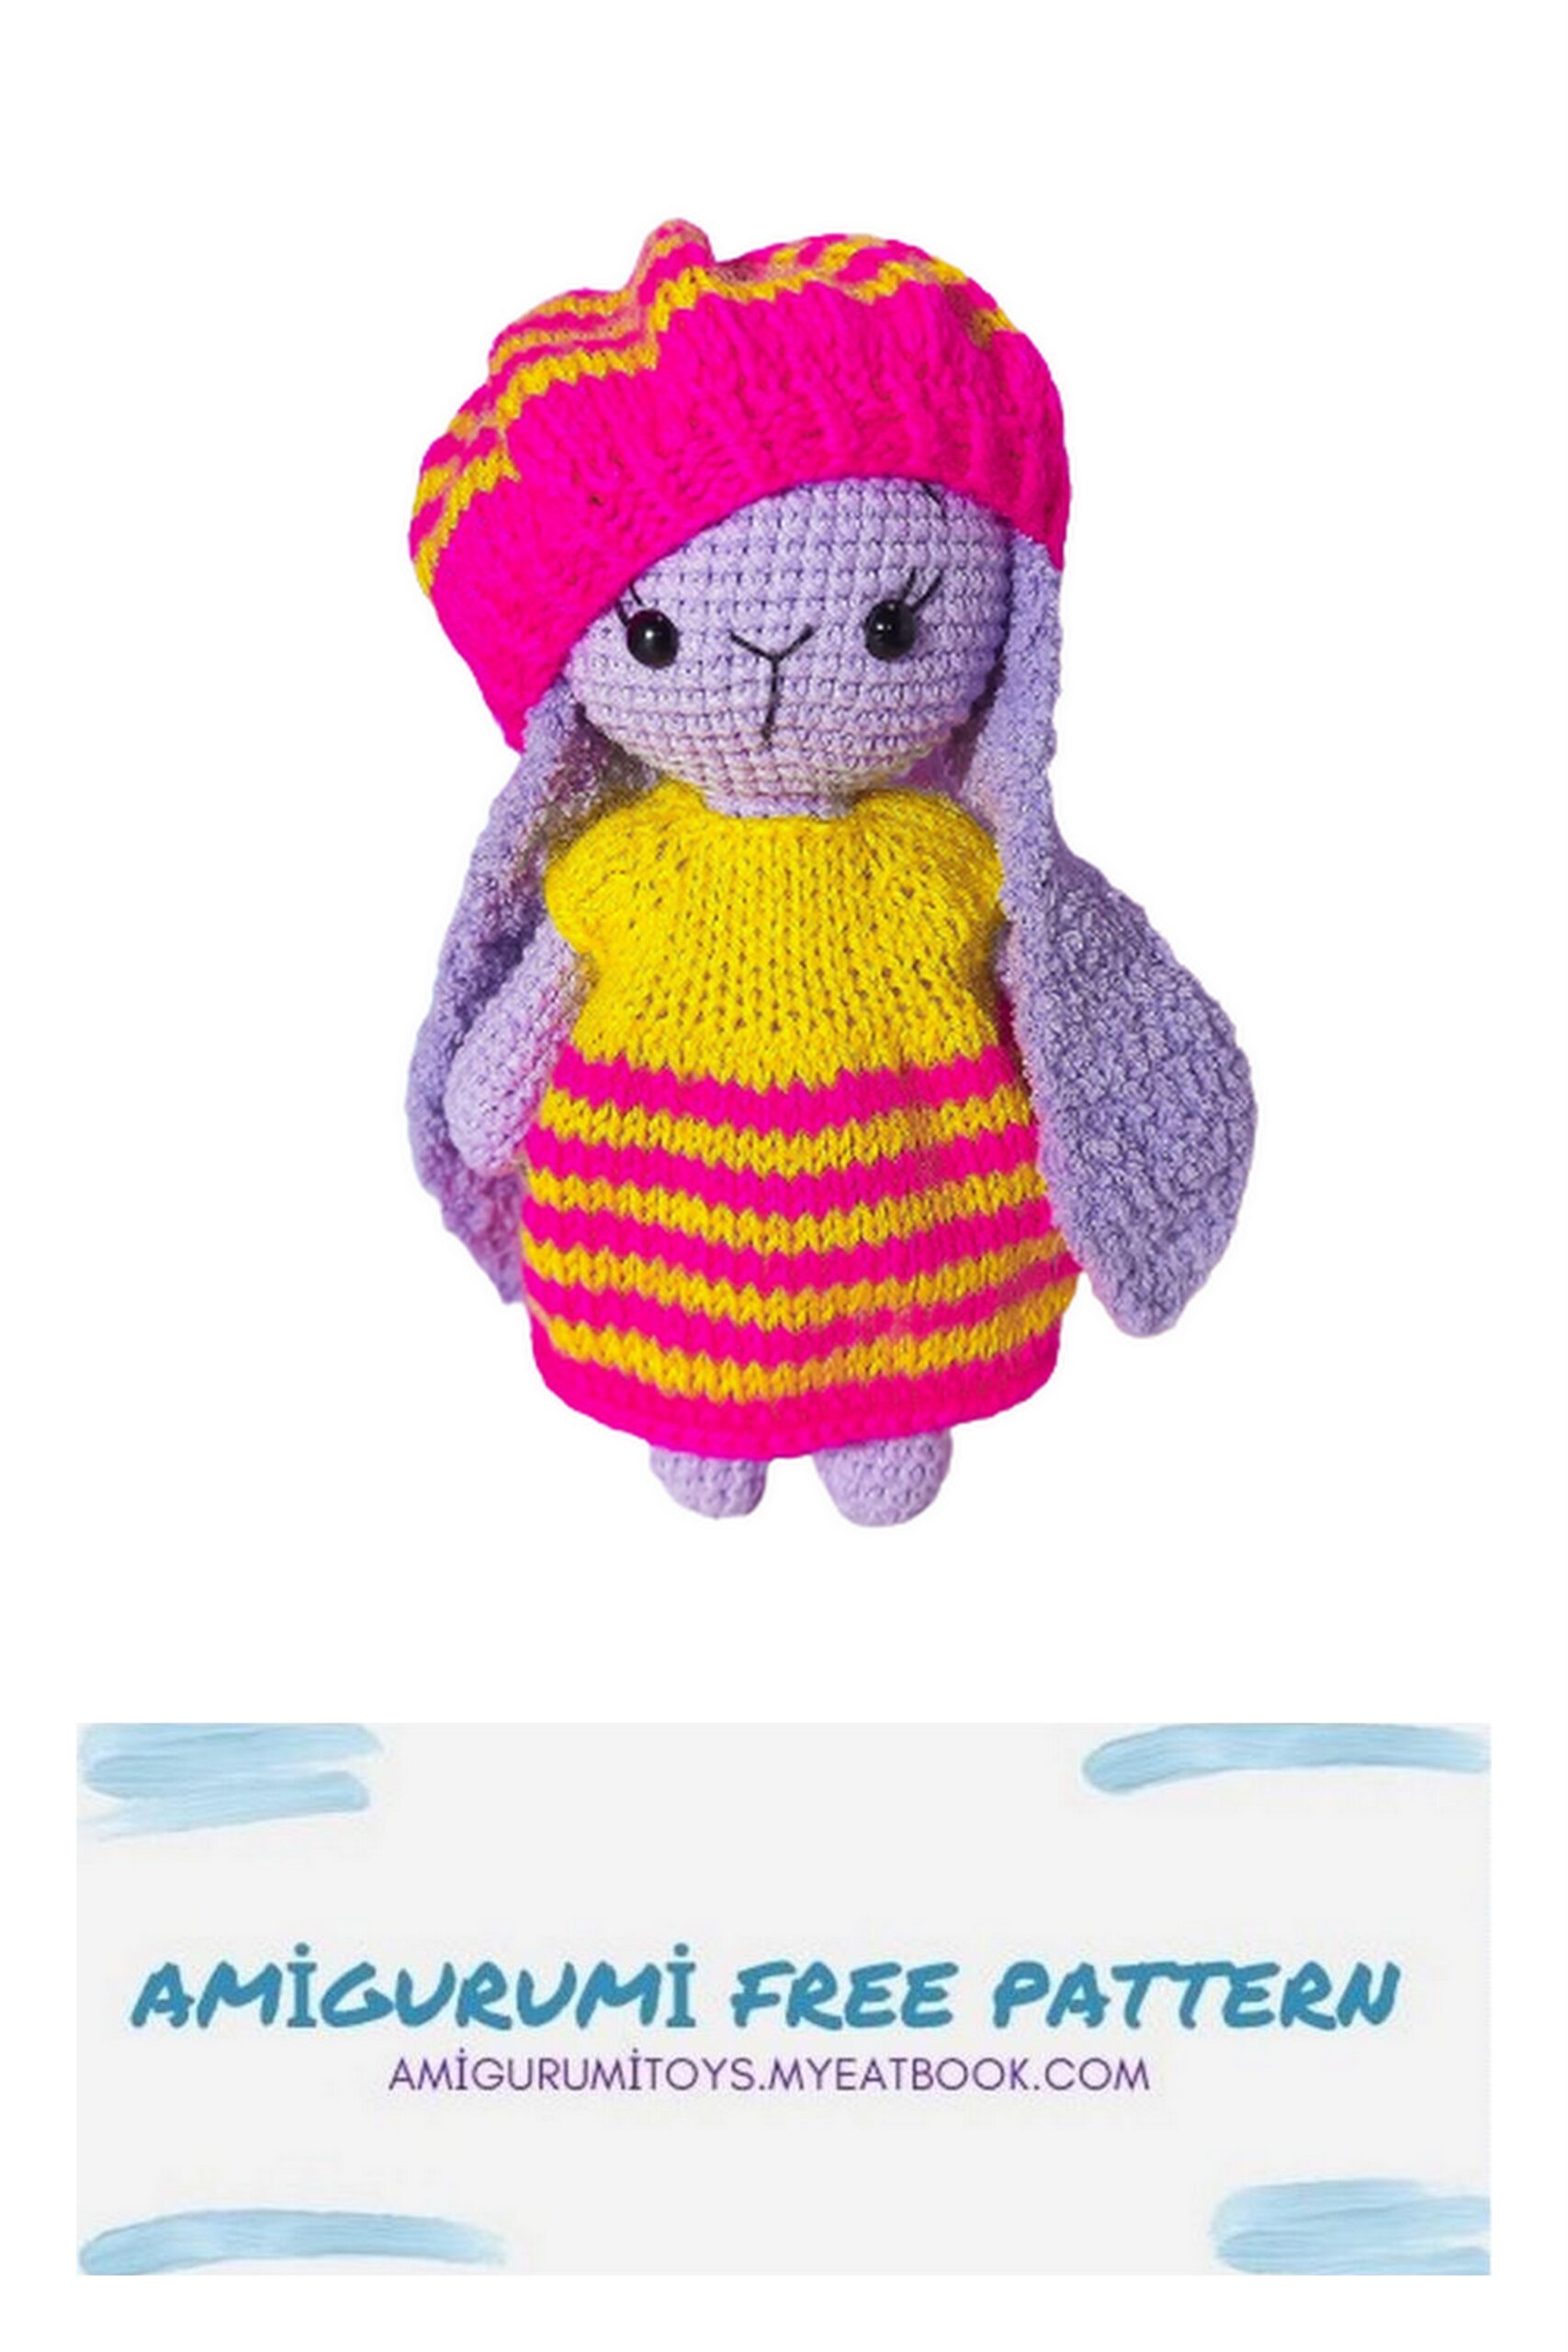
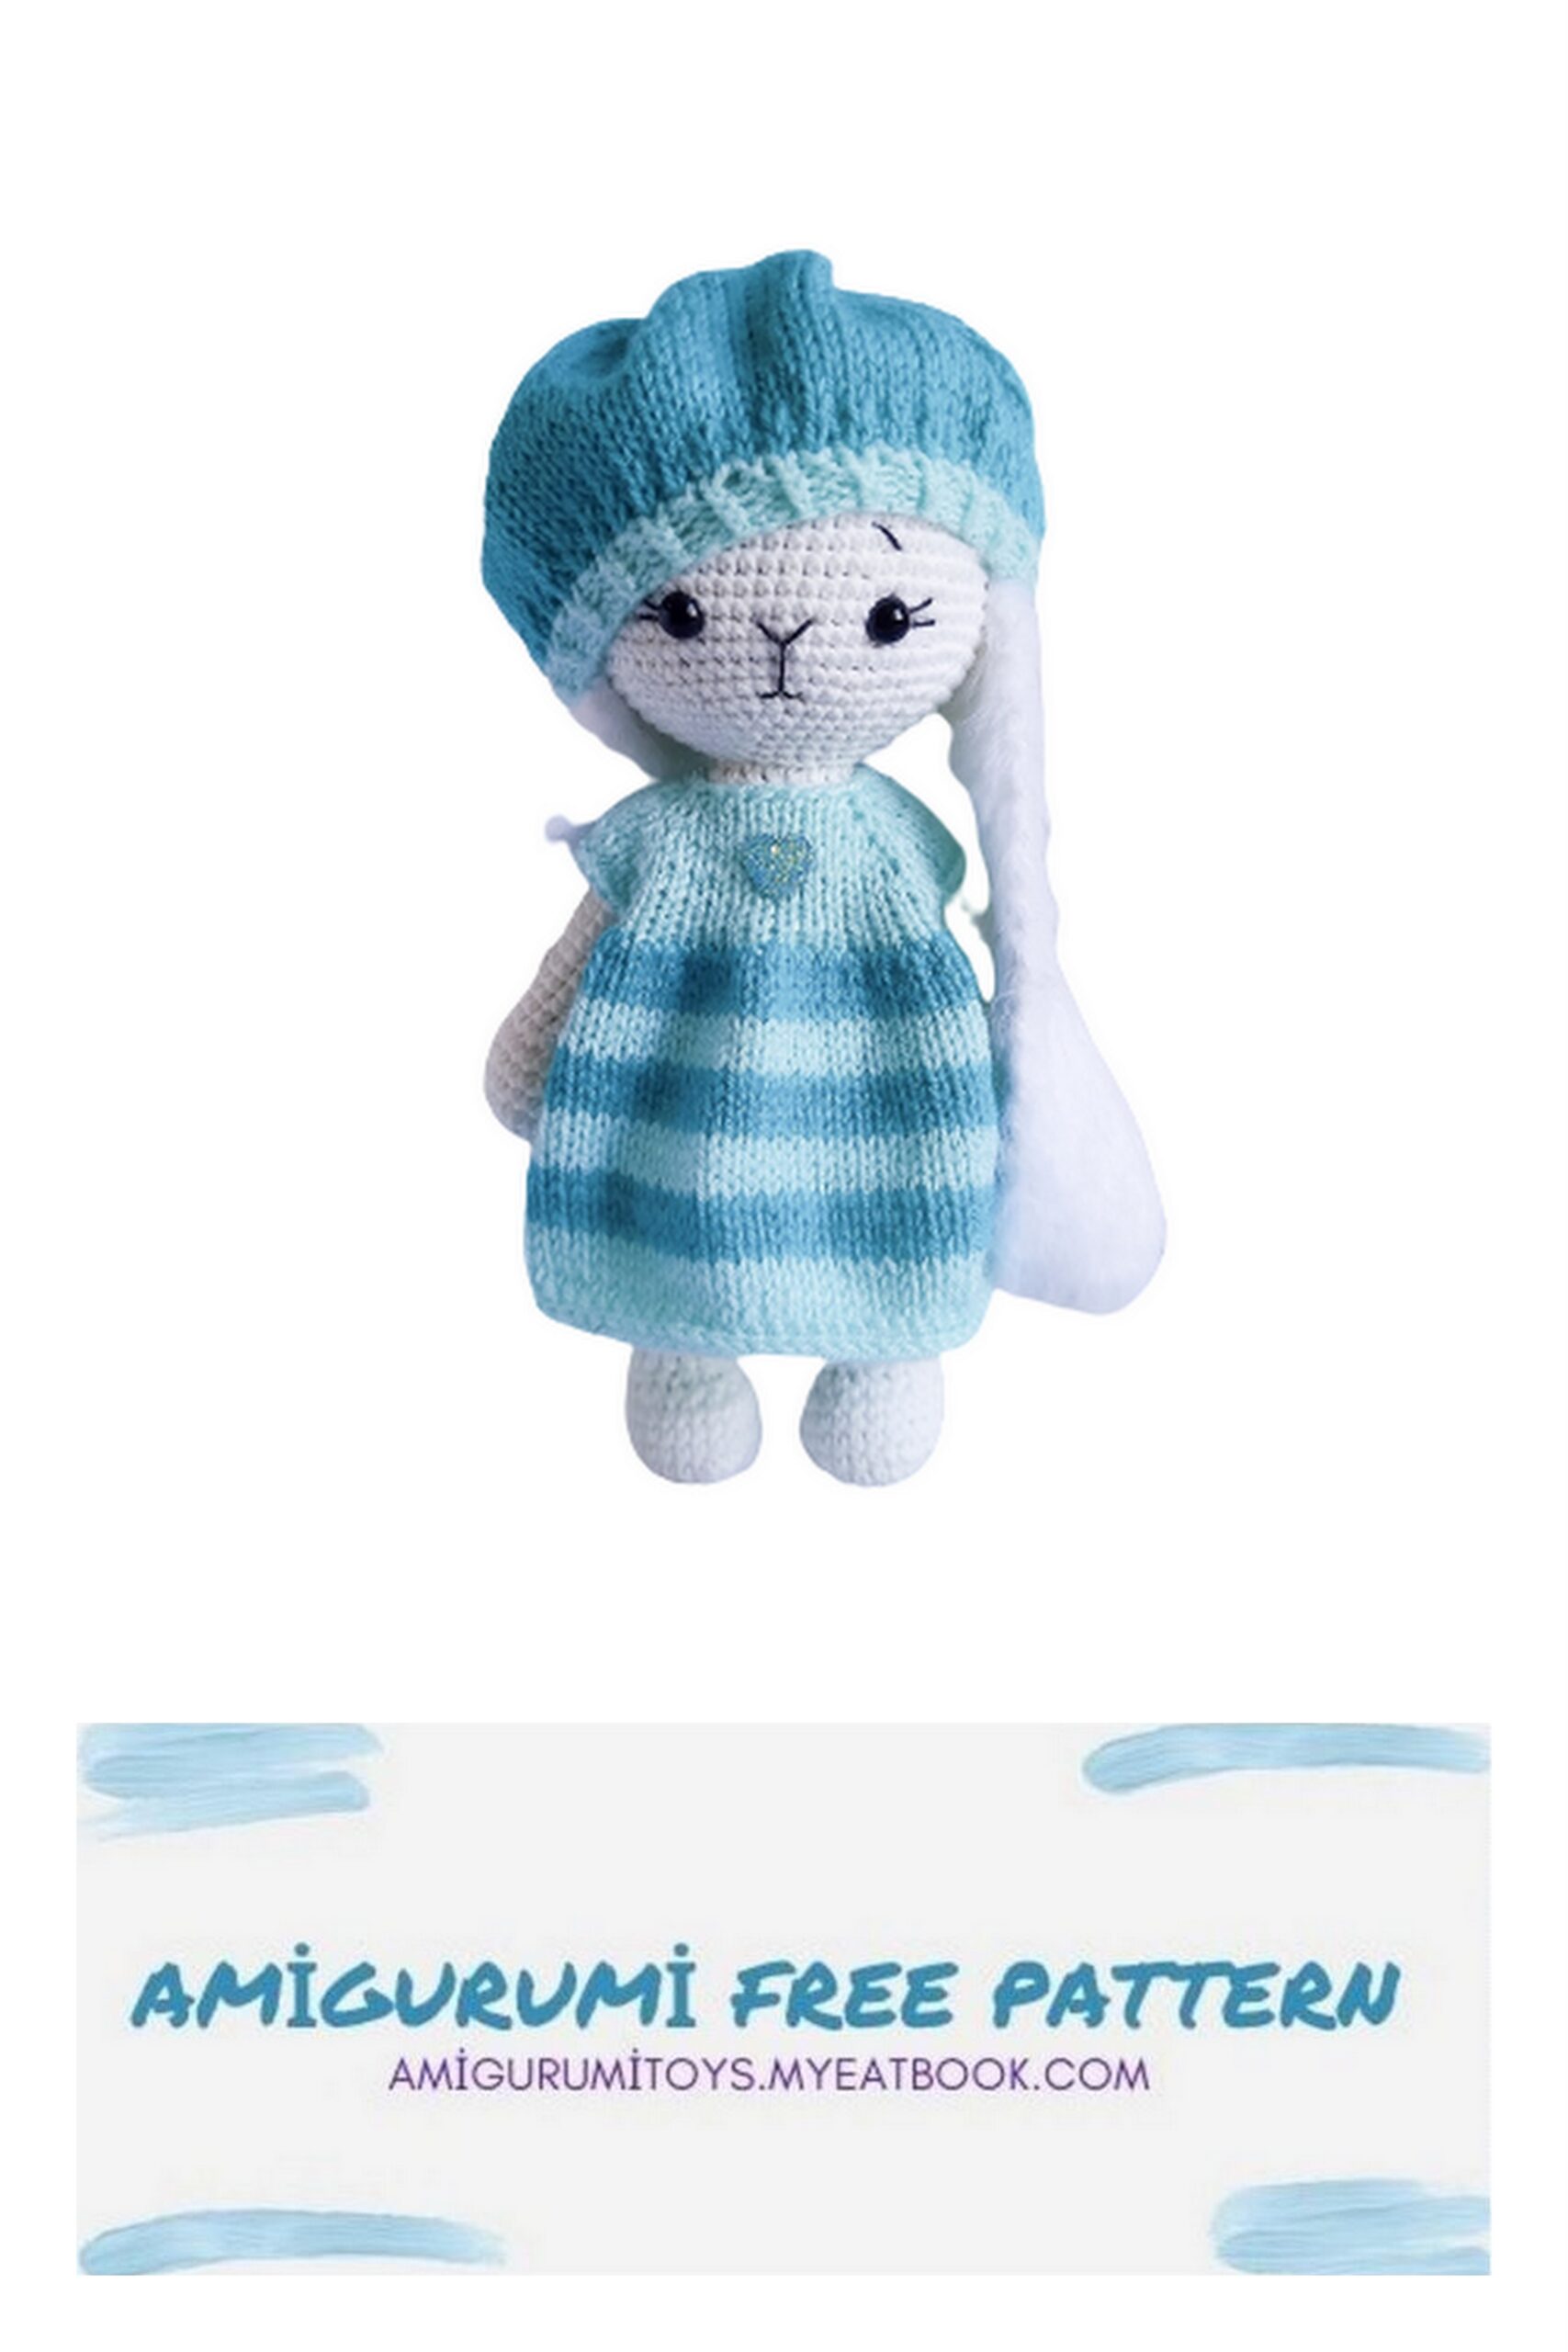
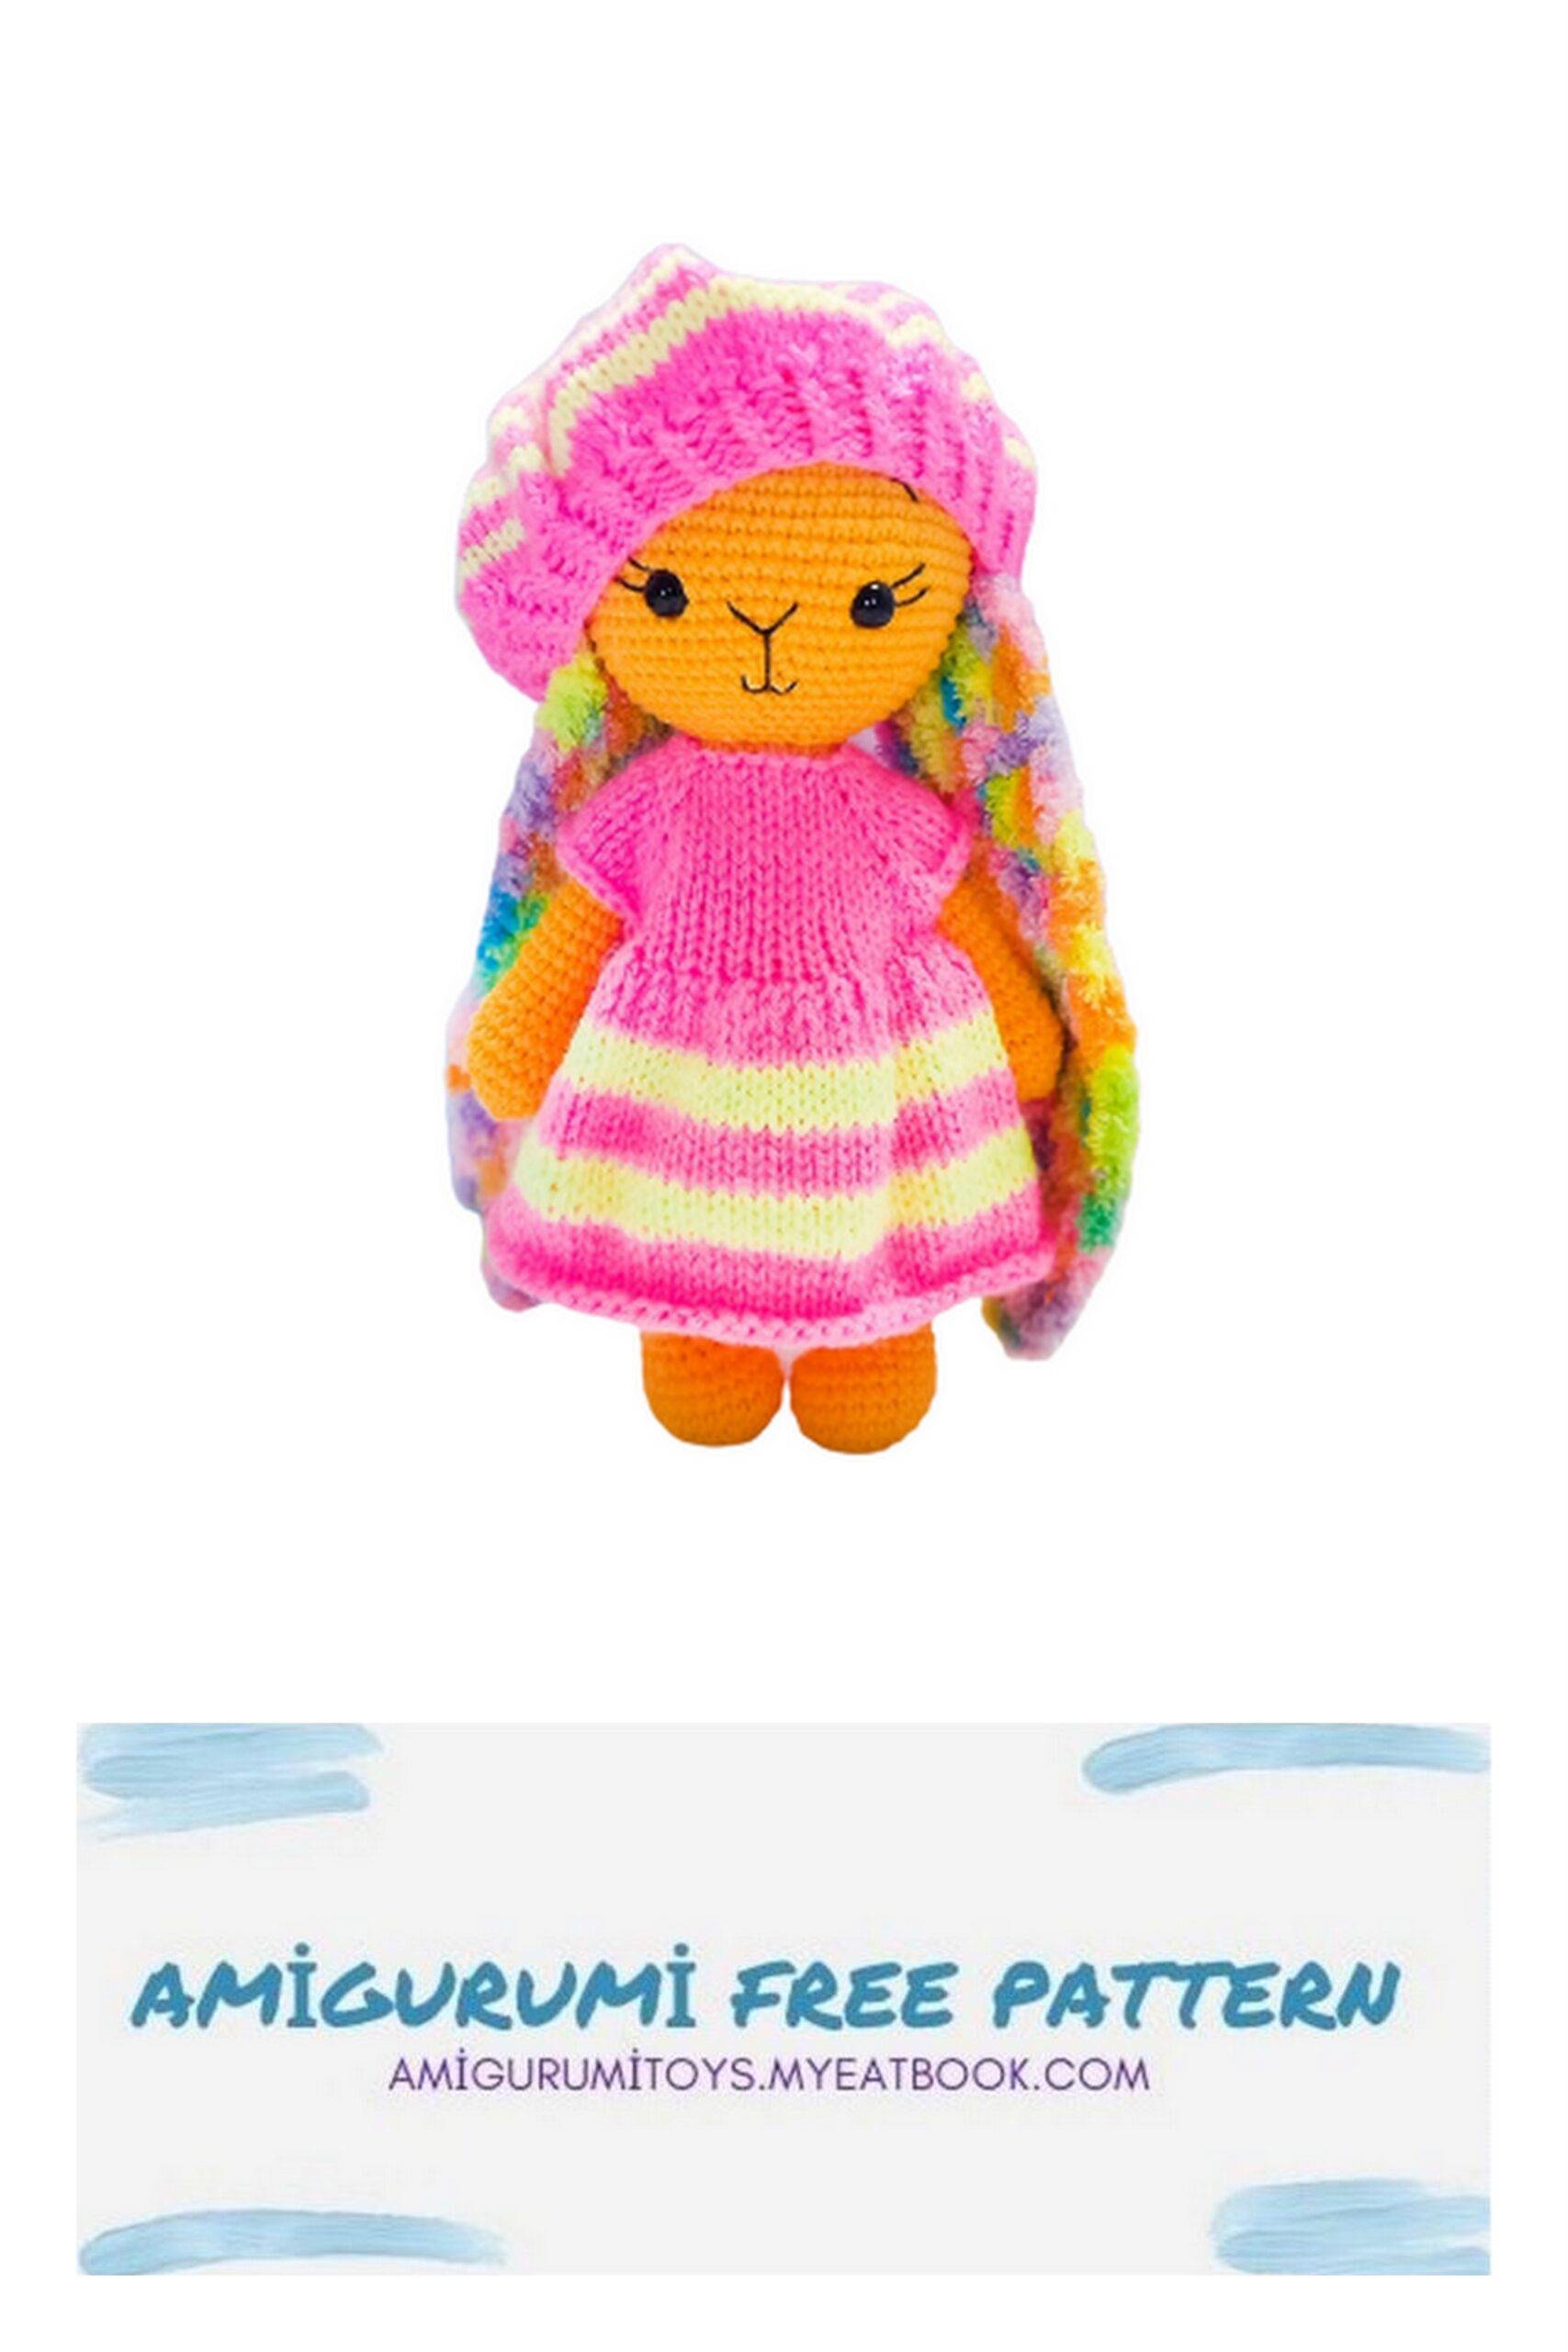
It remains to embroider the nose, eyelashes, mouth, eyebrows (to your taste) and dress the bunny at your discretion.
We knit the tail at will, from textured yarn or make a pompom.
I knit them dresses and berets ki knitting, panama and crochet jumpsuit.

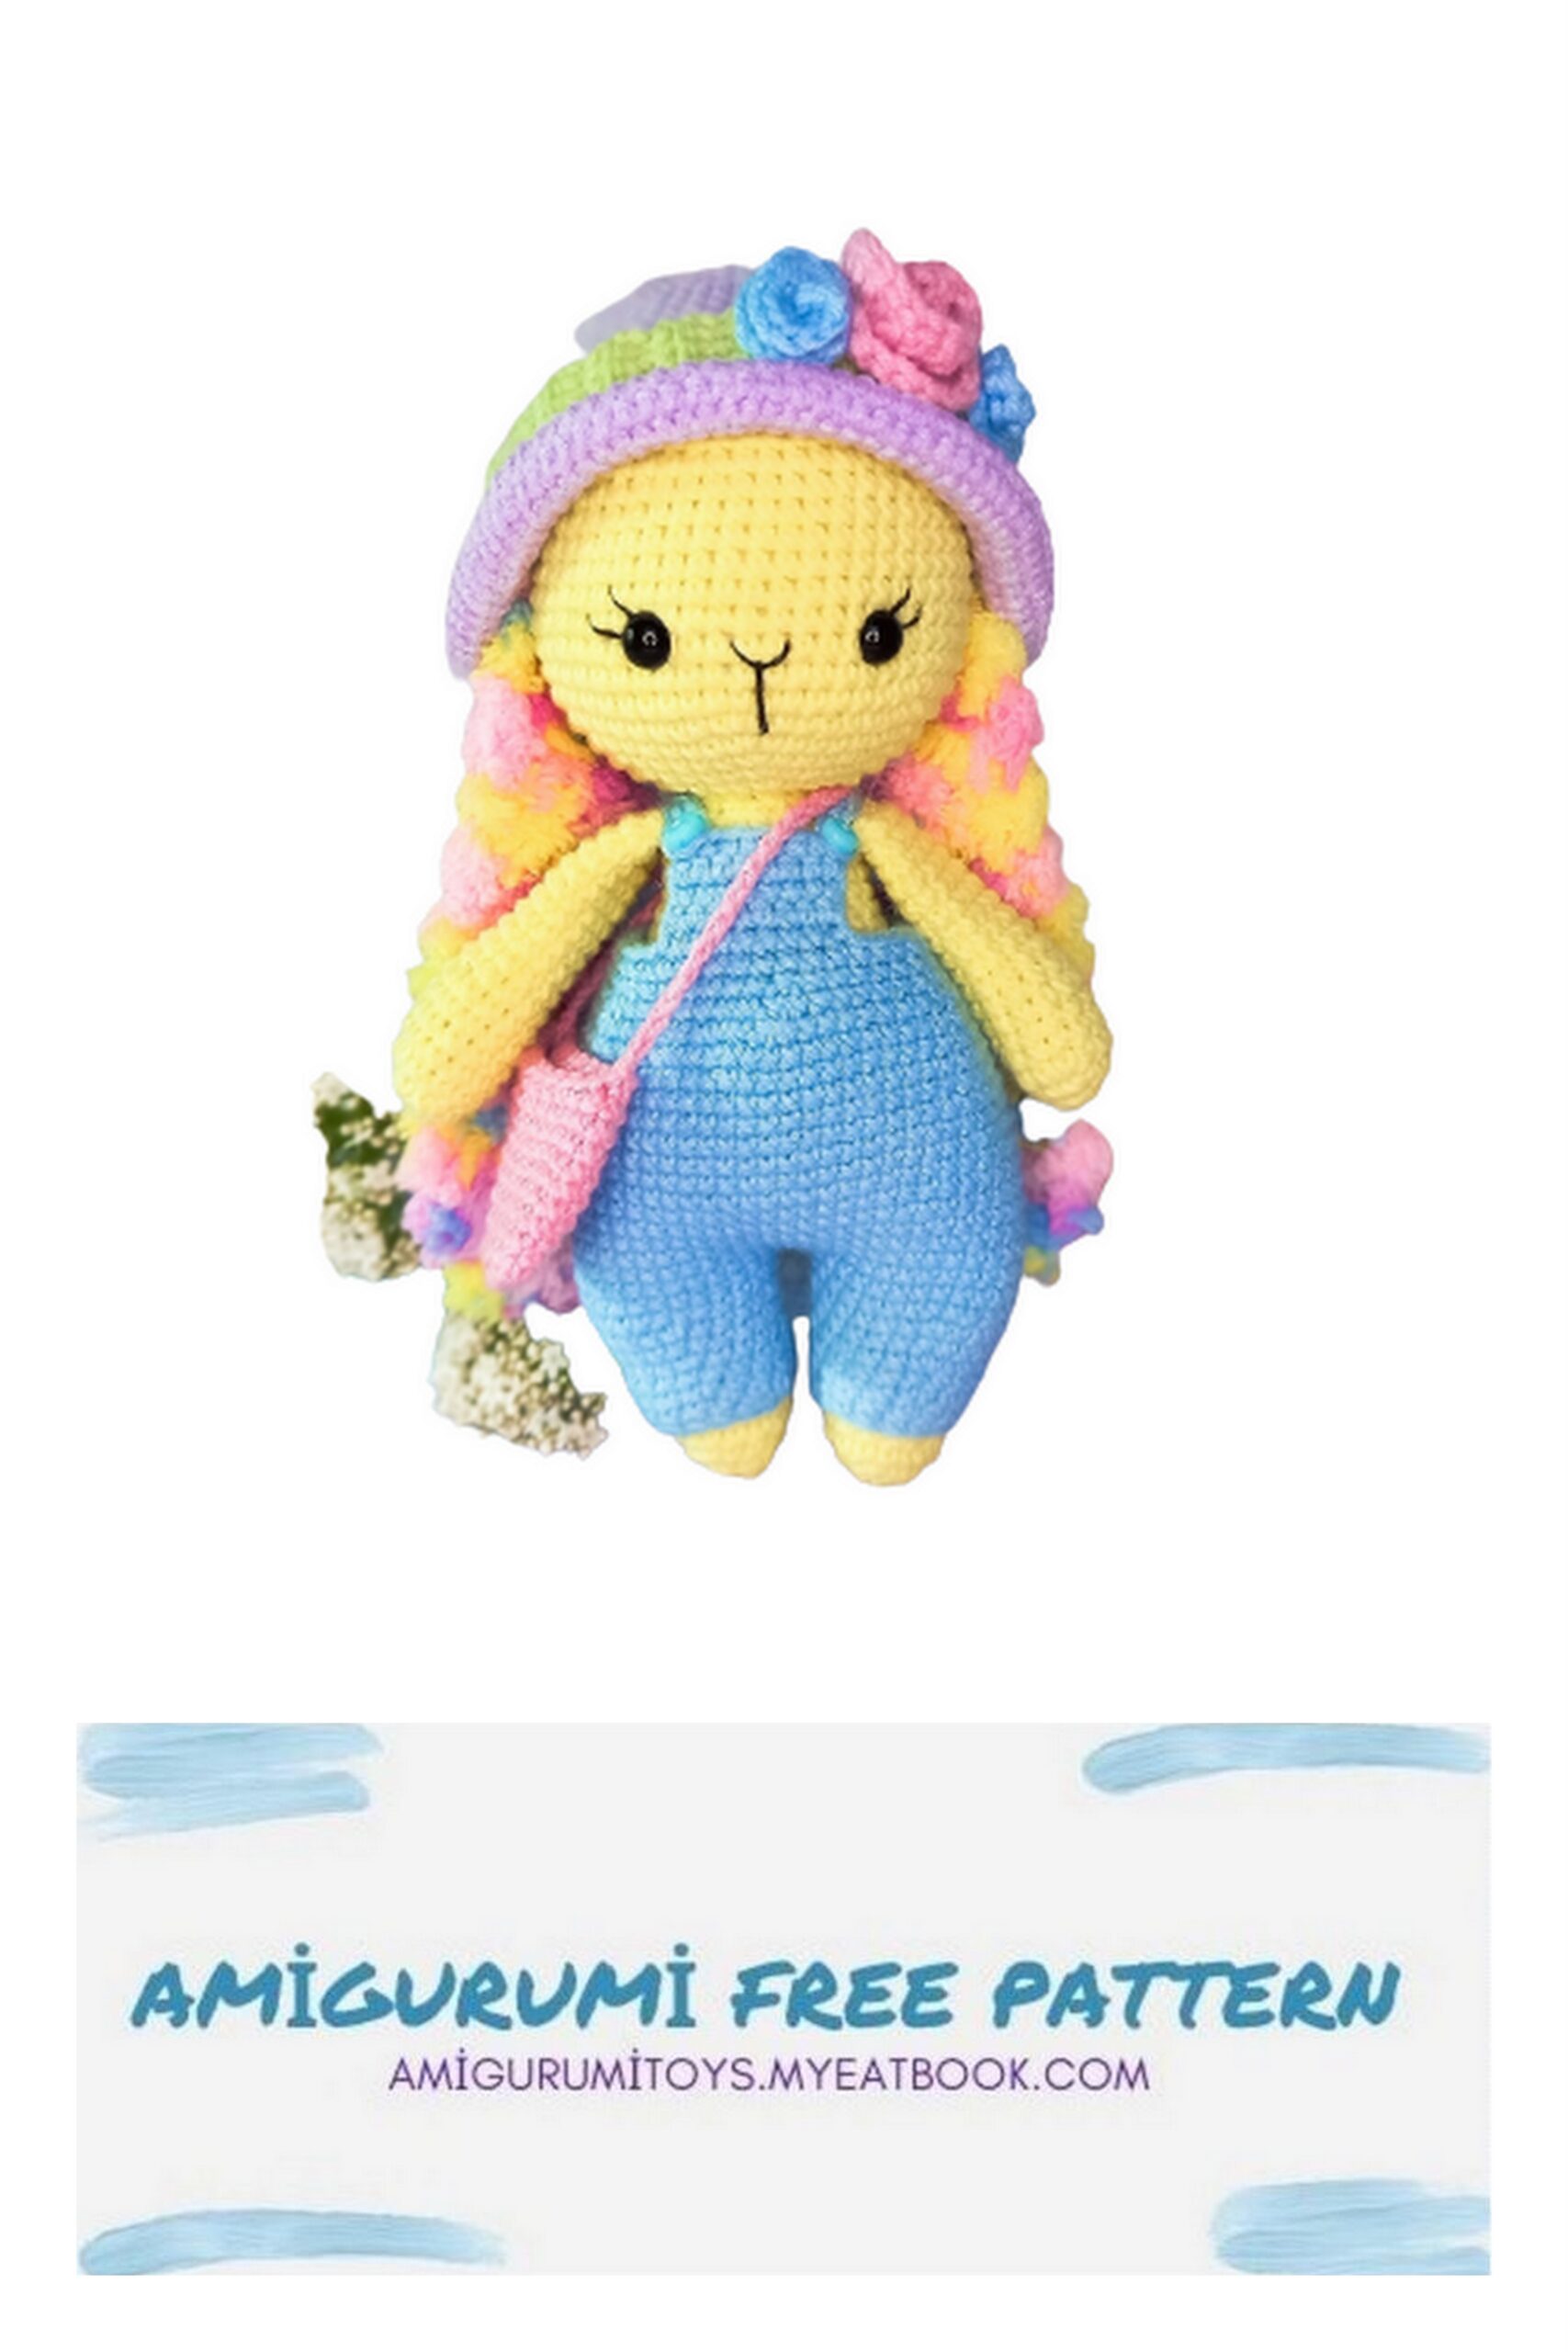
OVERALLS
I used ALIZE Cotton Gold yarn. We start knitting with trousers, then we connect them. We knit not tight, in a spiral, unless otherwise indicated. Amigurumi little bunny free
We collect a chain of 16 air loops, close in a ring.
1-2 rows: 16 sc
3 row: (3 sc, inc) * 4 = 20
4 row: 20 sc
5 row: (4 sc, inc) * 4 = 24
6 row: 24 sc
7 row: (5 sc, inc) * 4 = 28
8 row: 28 sc
Fasten the thread to the first leg, cut it off. We do not cut the thread at the second leg, we continue knitting, connecting with the first leg with 2 air loops.
9 row: 28 sc on the first leg, 2 sc on the chain 28 sc on the second leg, 2 sc on the second side of the chain.
The total number of loops in this row = 60
10-23 rows: 60 sc
24 row: (8 sc, dec) * 6 = 54
25 row: (7 sc, dec) * 6 = 48
26 row: (6 sc, dec) * 6 = 42
27 row: 42 sc
Knit straps as desired.
For my bunny, it turned out from 20 air loops.
She returned along the chain to the back, leaving a few loops for the buttons untied. The second knitted in the same way.
The breast was knitted with a width of 9 sc, turning rows to the desired height.
PANAMA
I used YarnArt Jeans. We start knitting from the crown, then in a spiral. We knit not tight or take a hook a little more. Focus on your toy, try on panama in the process of knitting, increase (or decrease) the number of increases to your liking.
1 row: 6 sc into magic ring = 6
2 row: inc * 6 = 12
3 row: (inc., 1 sc.) * 6 = 18
4 row: (2 sc., inc.) * 6 = 24
5 row: (inc., 3 sc) * 6 = 30
6 row: (2 sc., inc., 2 sc) * 6 = 36
7 row: (4 sc, inc., 1 sc.) * 6 = 42
8 row: (6 sc, inc.) * 6 = 48
9 row: (inc., 7 sc) * 6 = 54
10 row: (2 sc, inc., 6 sc) * 6 = 60
11-22 rows: 60 sc.
23 row: (4 sc, inc., 5 sc) * 6 = 66
24 row: (6 sc, inc., 4 sc) * 6 = 72
25 row: (8 sc, inc., 3 sc) * 6 = 78
26 row: (10 sc, inc., 2 sc) * 6 = 84
We form the folding edge of the panama:
27-28 rows: 84 sc
Finish knitting, fasten, cut and hide the thread. Decorate to your taste. I decorated it with roses.
The rim was knitted in rotary rows of 6 sc for the back half loops, closed in a ring. The junction was closed with roses.
For the big rose cast on 12 ch, chain back 3 dc in each st.
For a small rose, dialed 10 ch, returned along the chain 3 sc in each loop.
The flowers were folded, sewn with a needle and attached to the rim. I did not sew the rim to panama.
For the handbag I dialed 10 ch, in the first row in the extreme loops of 3 sc, then knitted in a spiral to the size I needed. The handle is from a regular ch chain, I tried on the length.
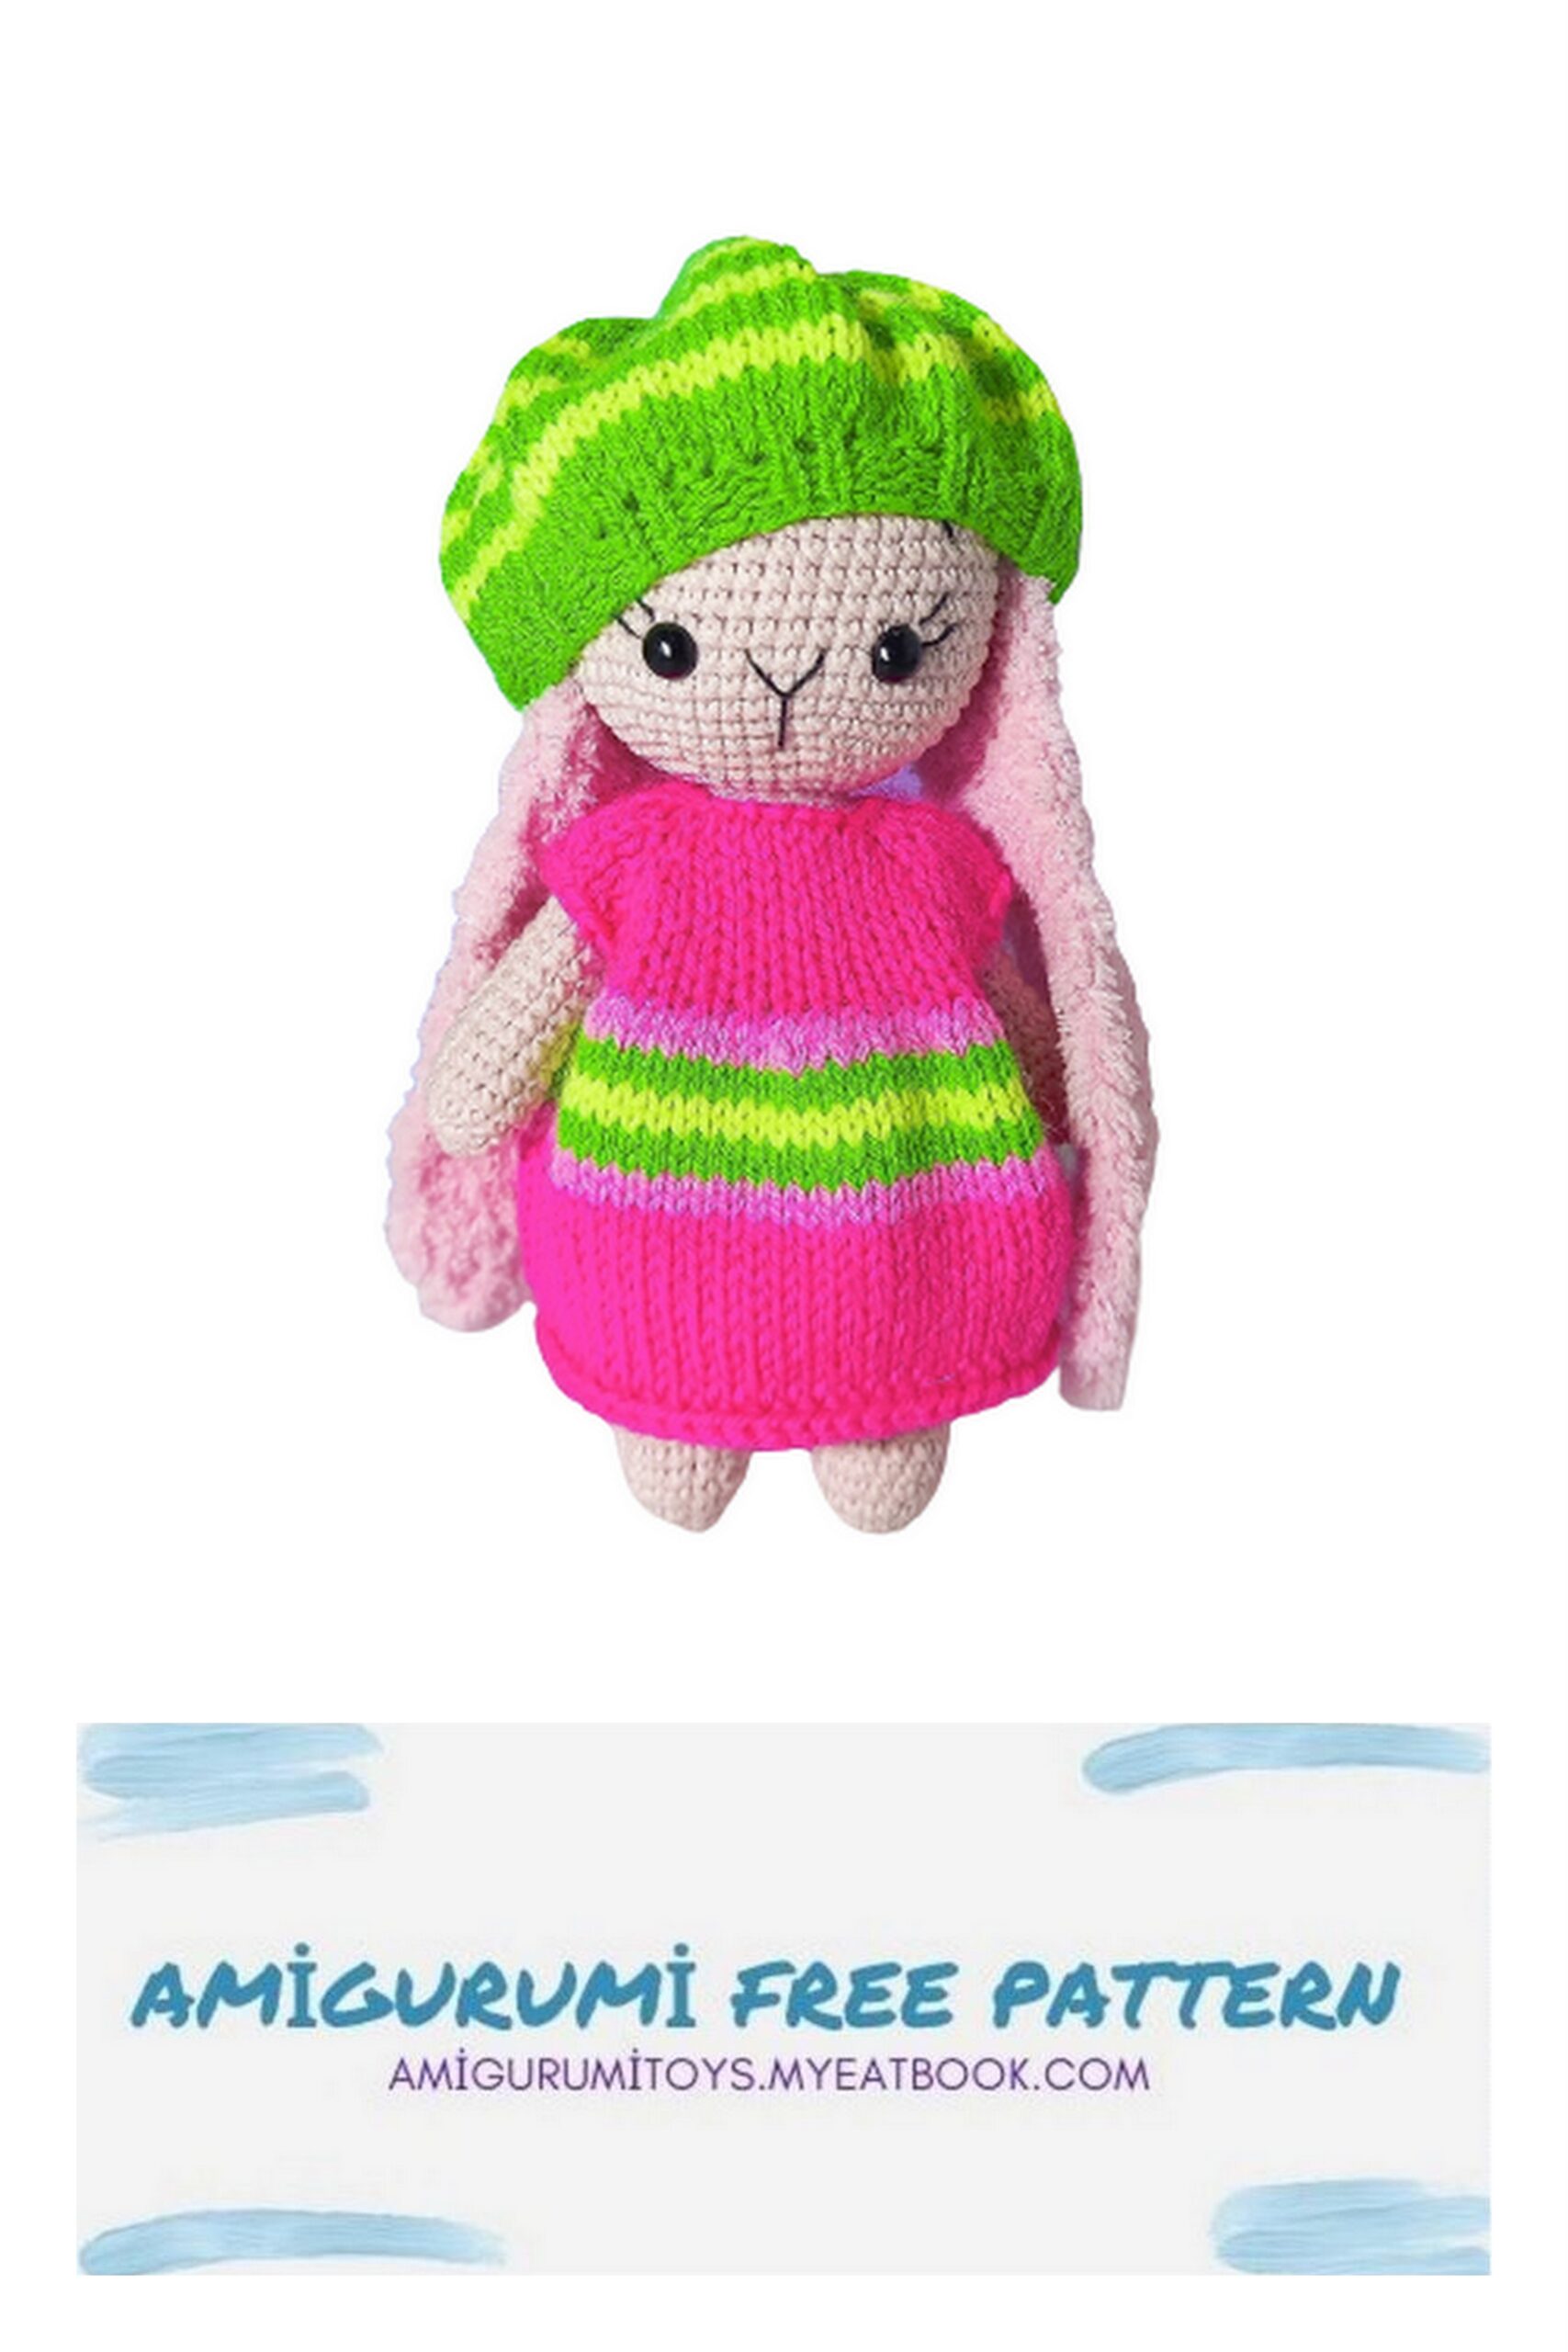
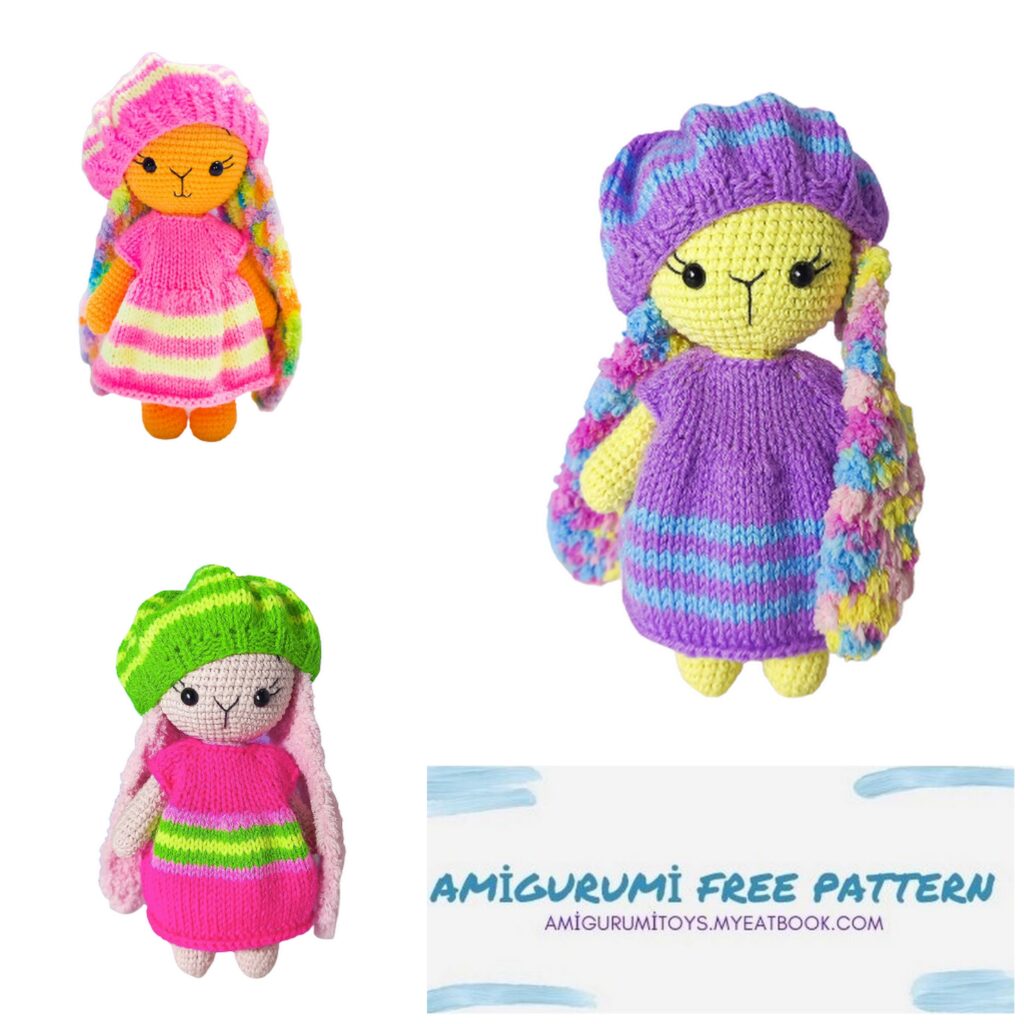
I knit a dress and a beret in stocking knitting, from “Children’s novelty” from “Pekhorka” or “Caramelka” from “Kamteks”
Dress: spokes No. 2 raglan on top of 22 loops on the neck
(edge, 2 loops on the shelves, 3 on the sleeves and 6 on the front)
Rows with increments up to 54 loops. I knit the middle loops between increments in front and back. On the skirt, increase in each loop and turn to 5 knitting needles in a circle and knit to the desired length.
Beretik: with an elastic band (1×1 or 2×2) of 40 loops, round, on stocking needles No. 2. Then stocking knit, increase in each loop. After a row with increments, to the desired depth. In the last 2 rows, decrease every 2 loops, tighten, fasten.