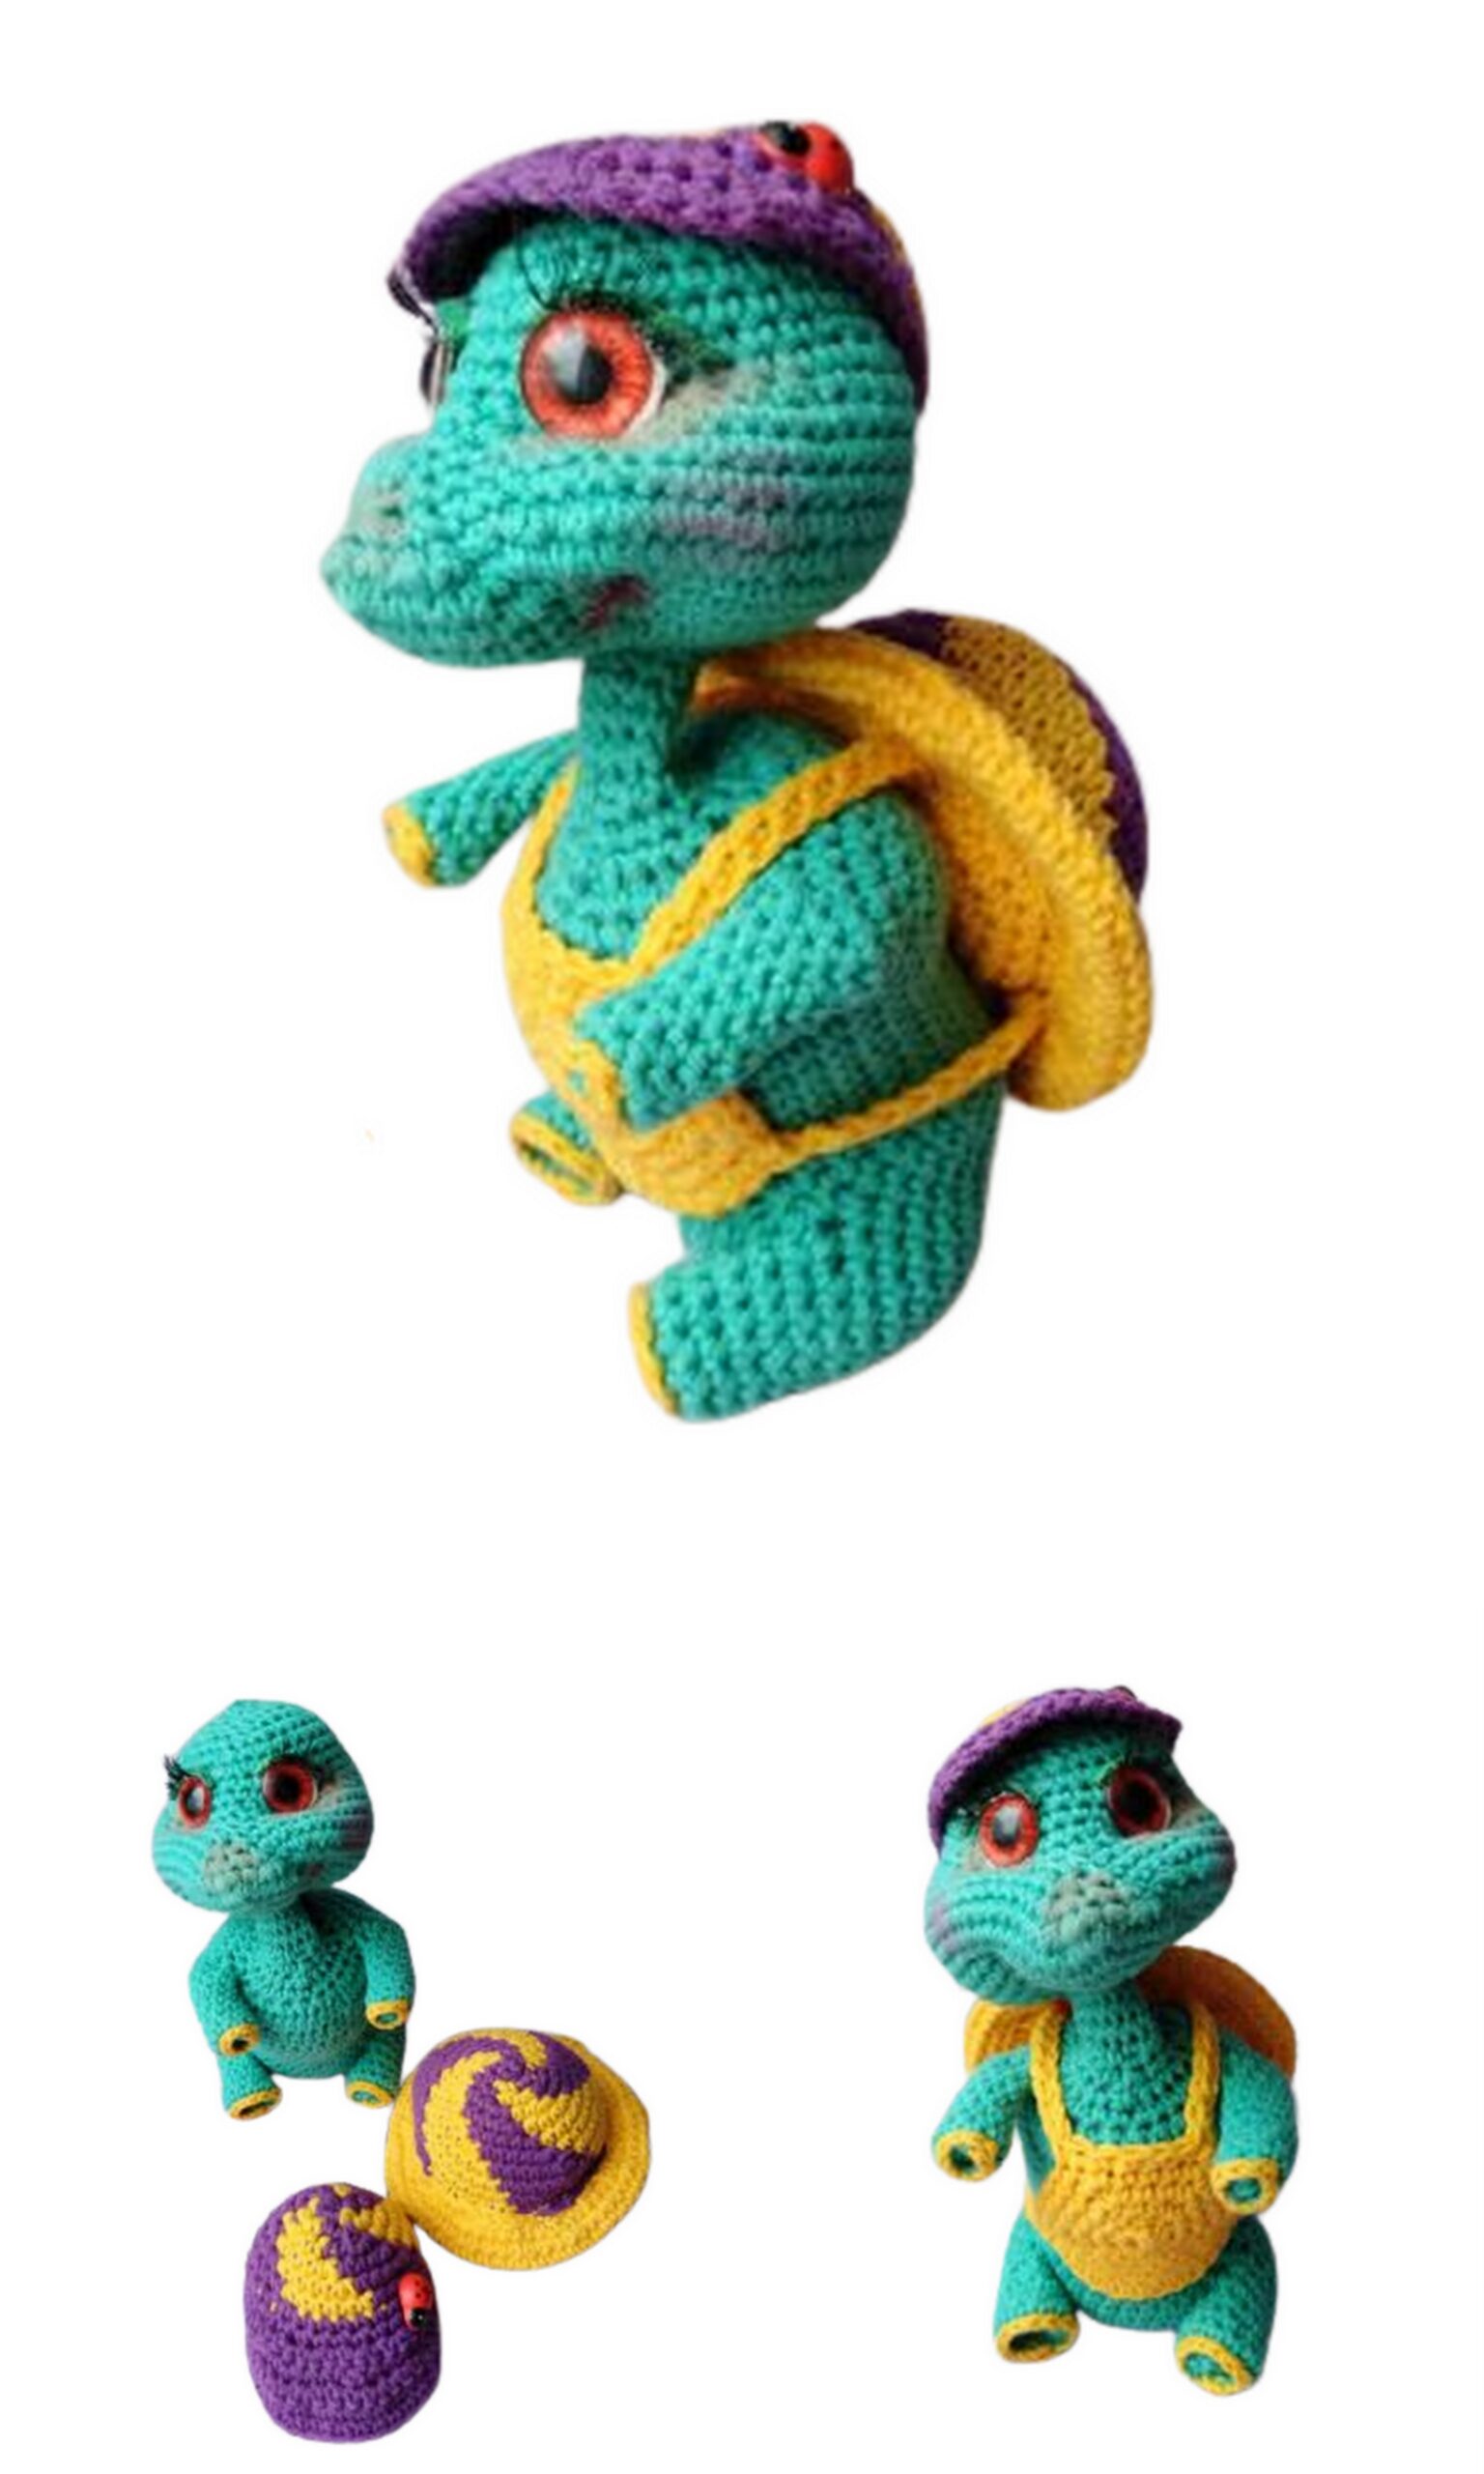
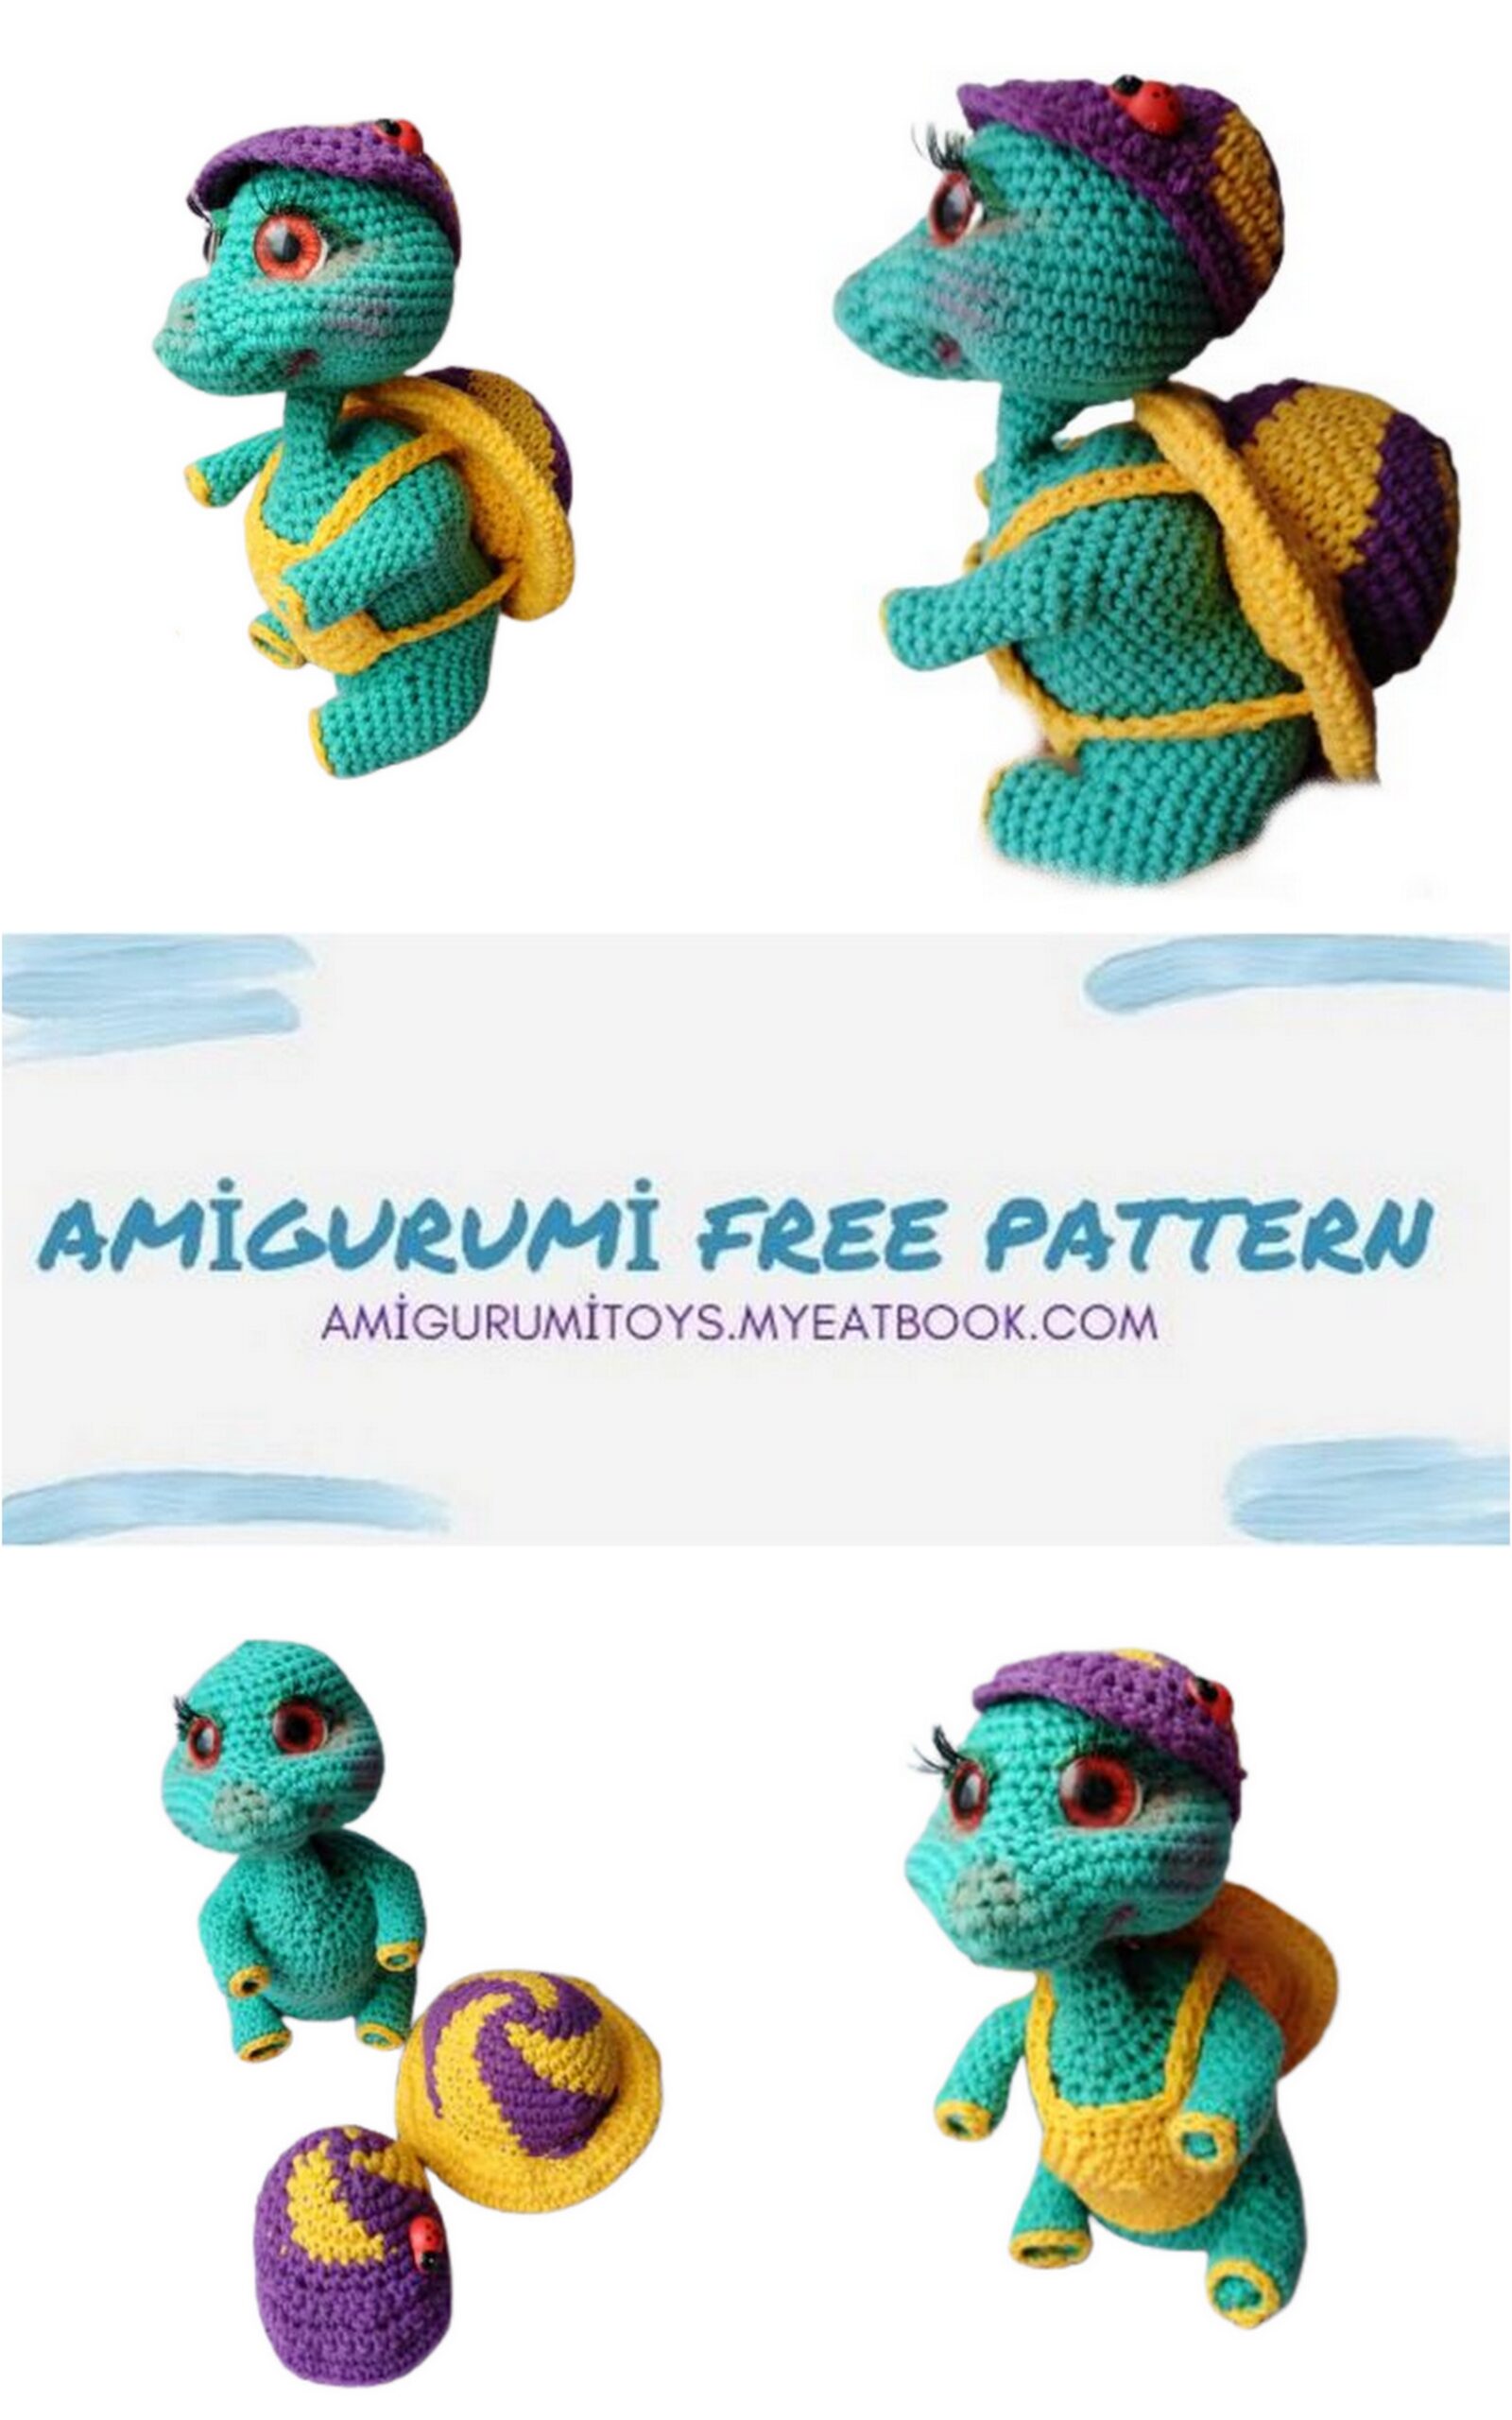
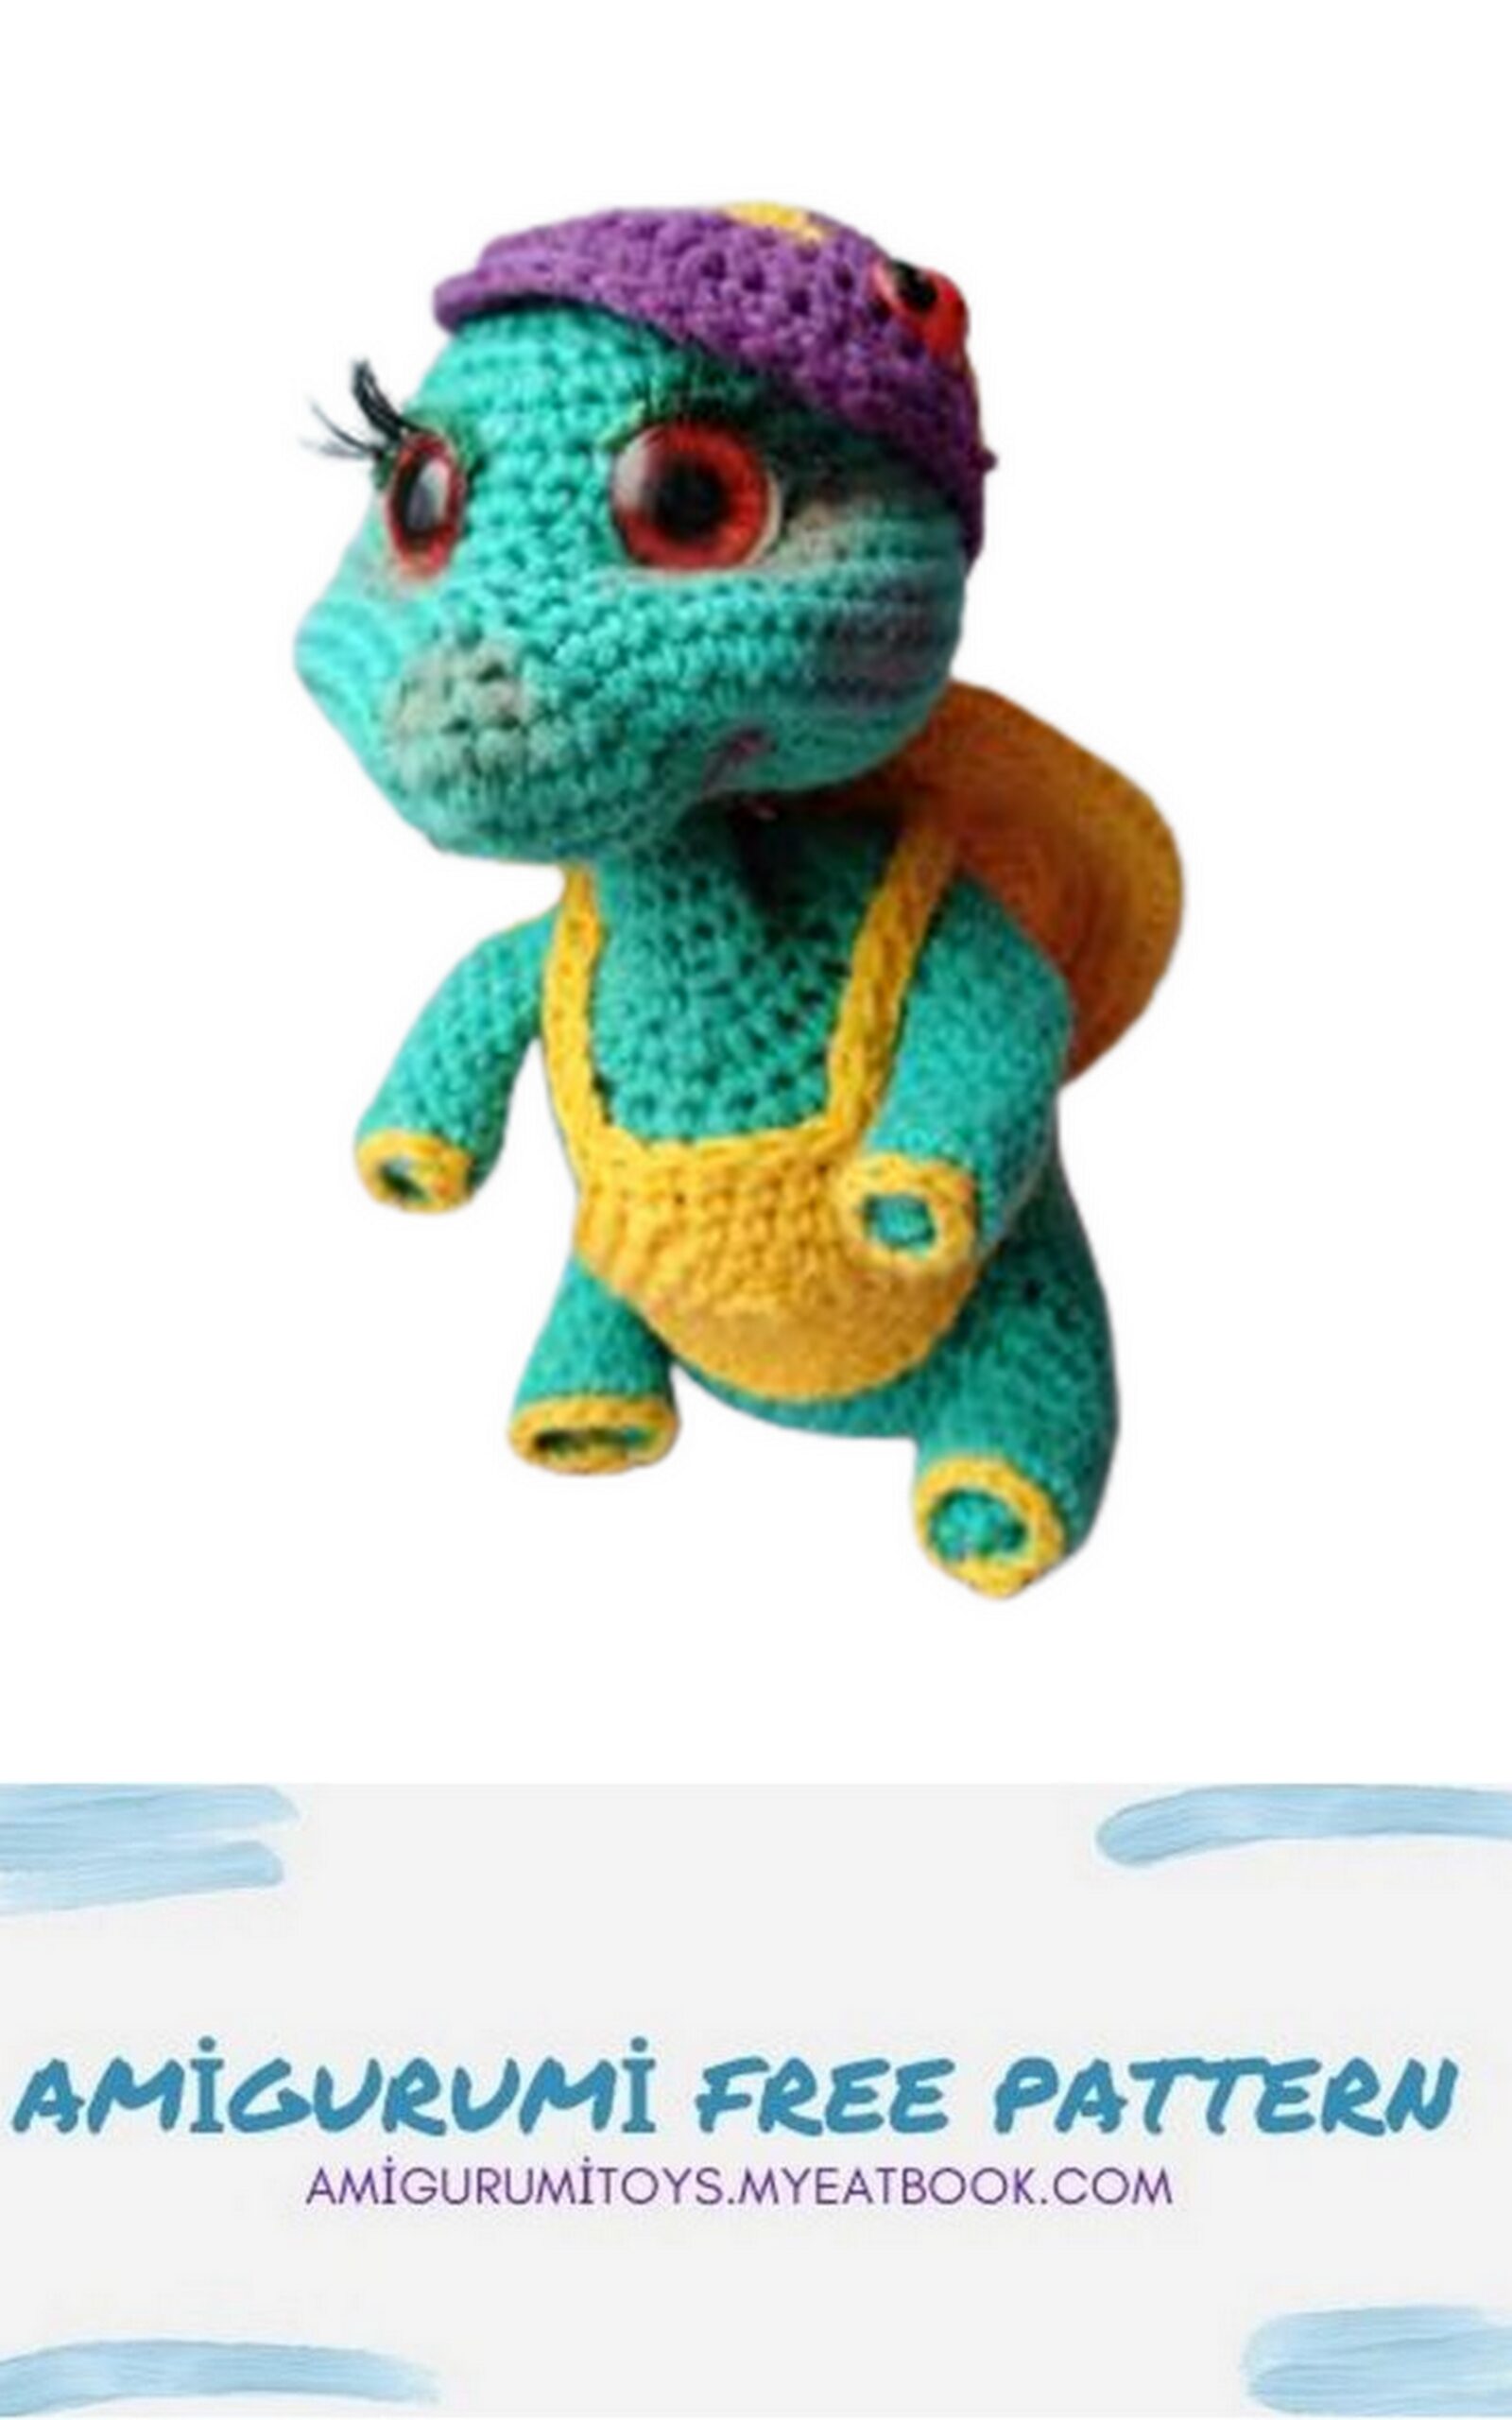
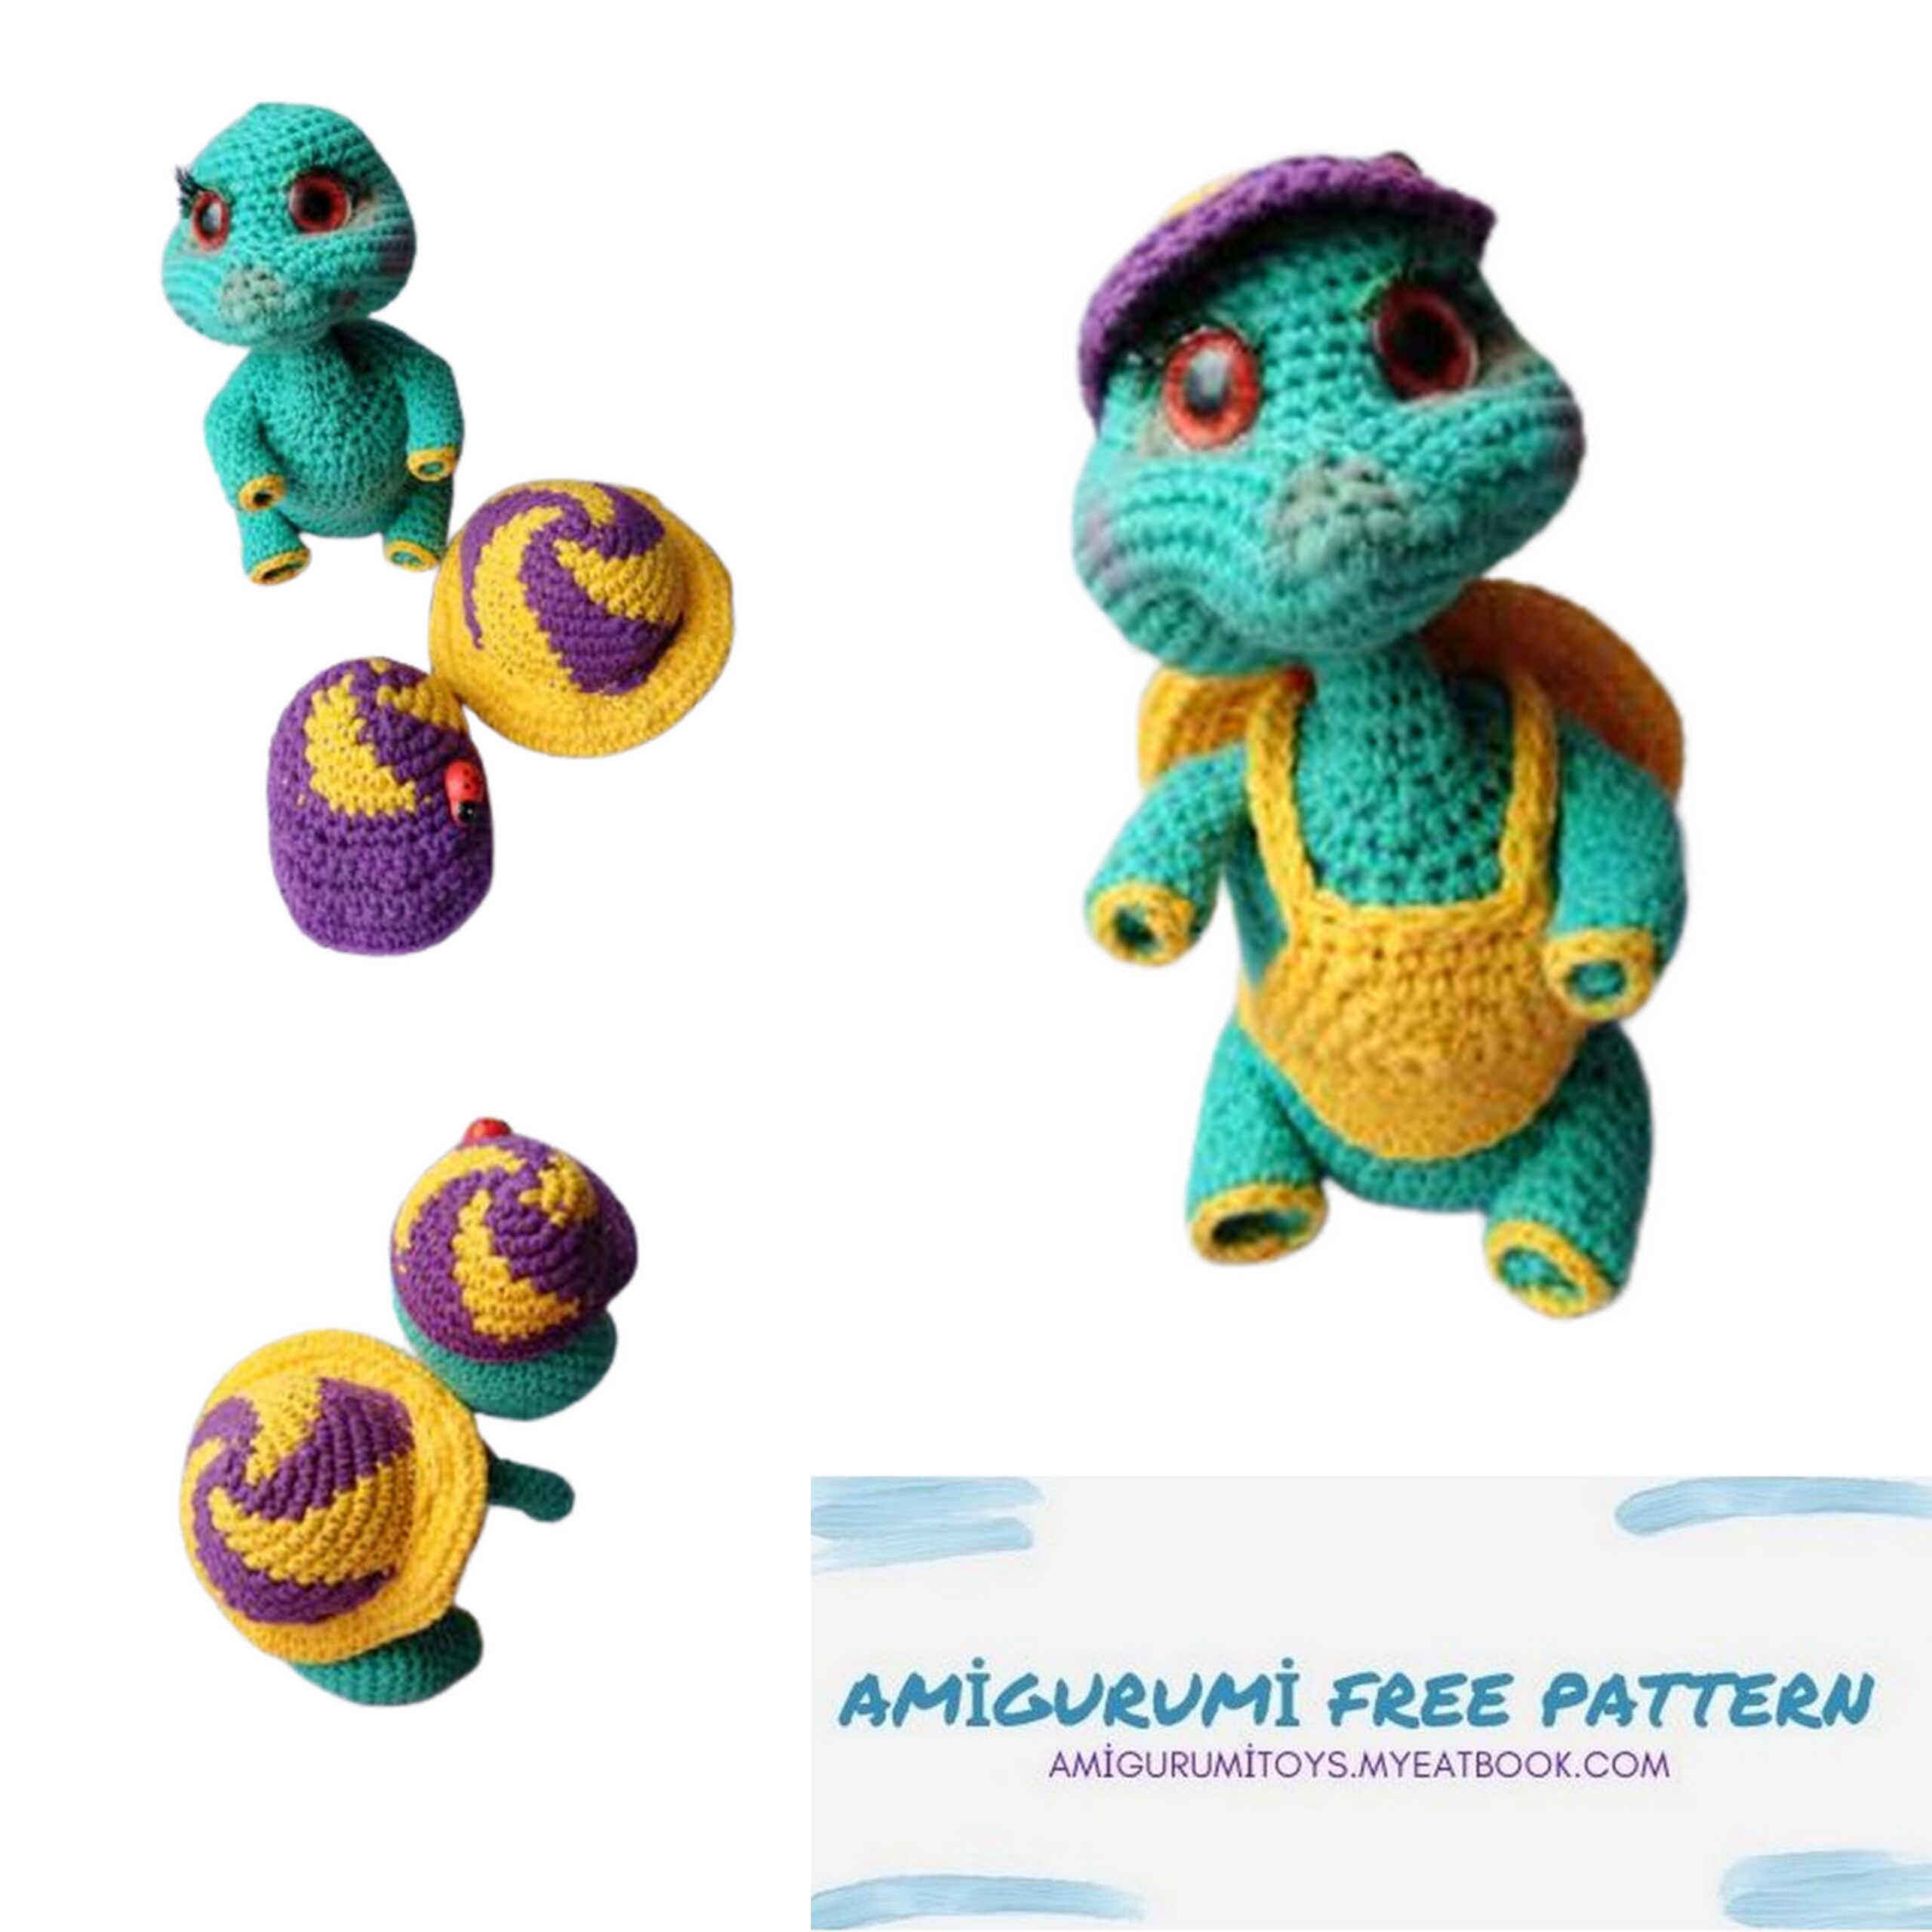
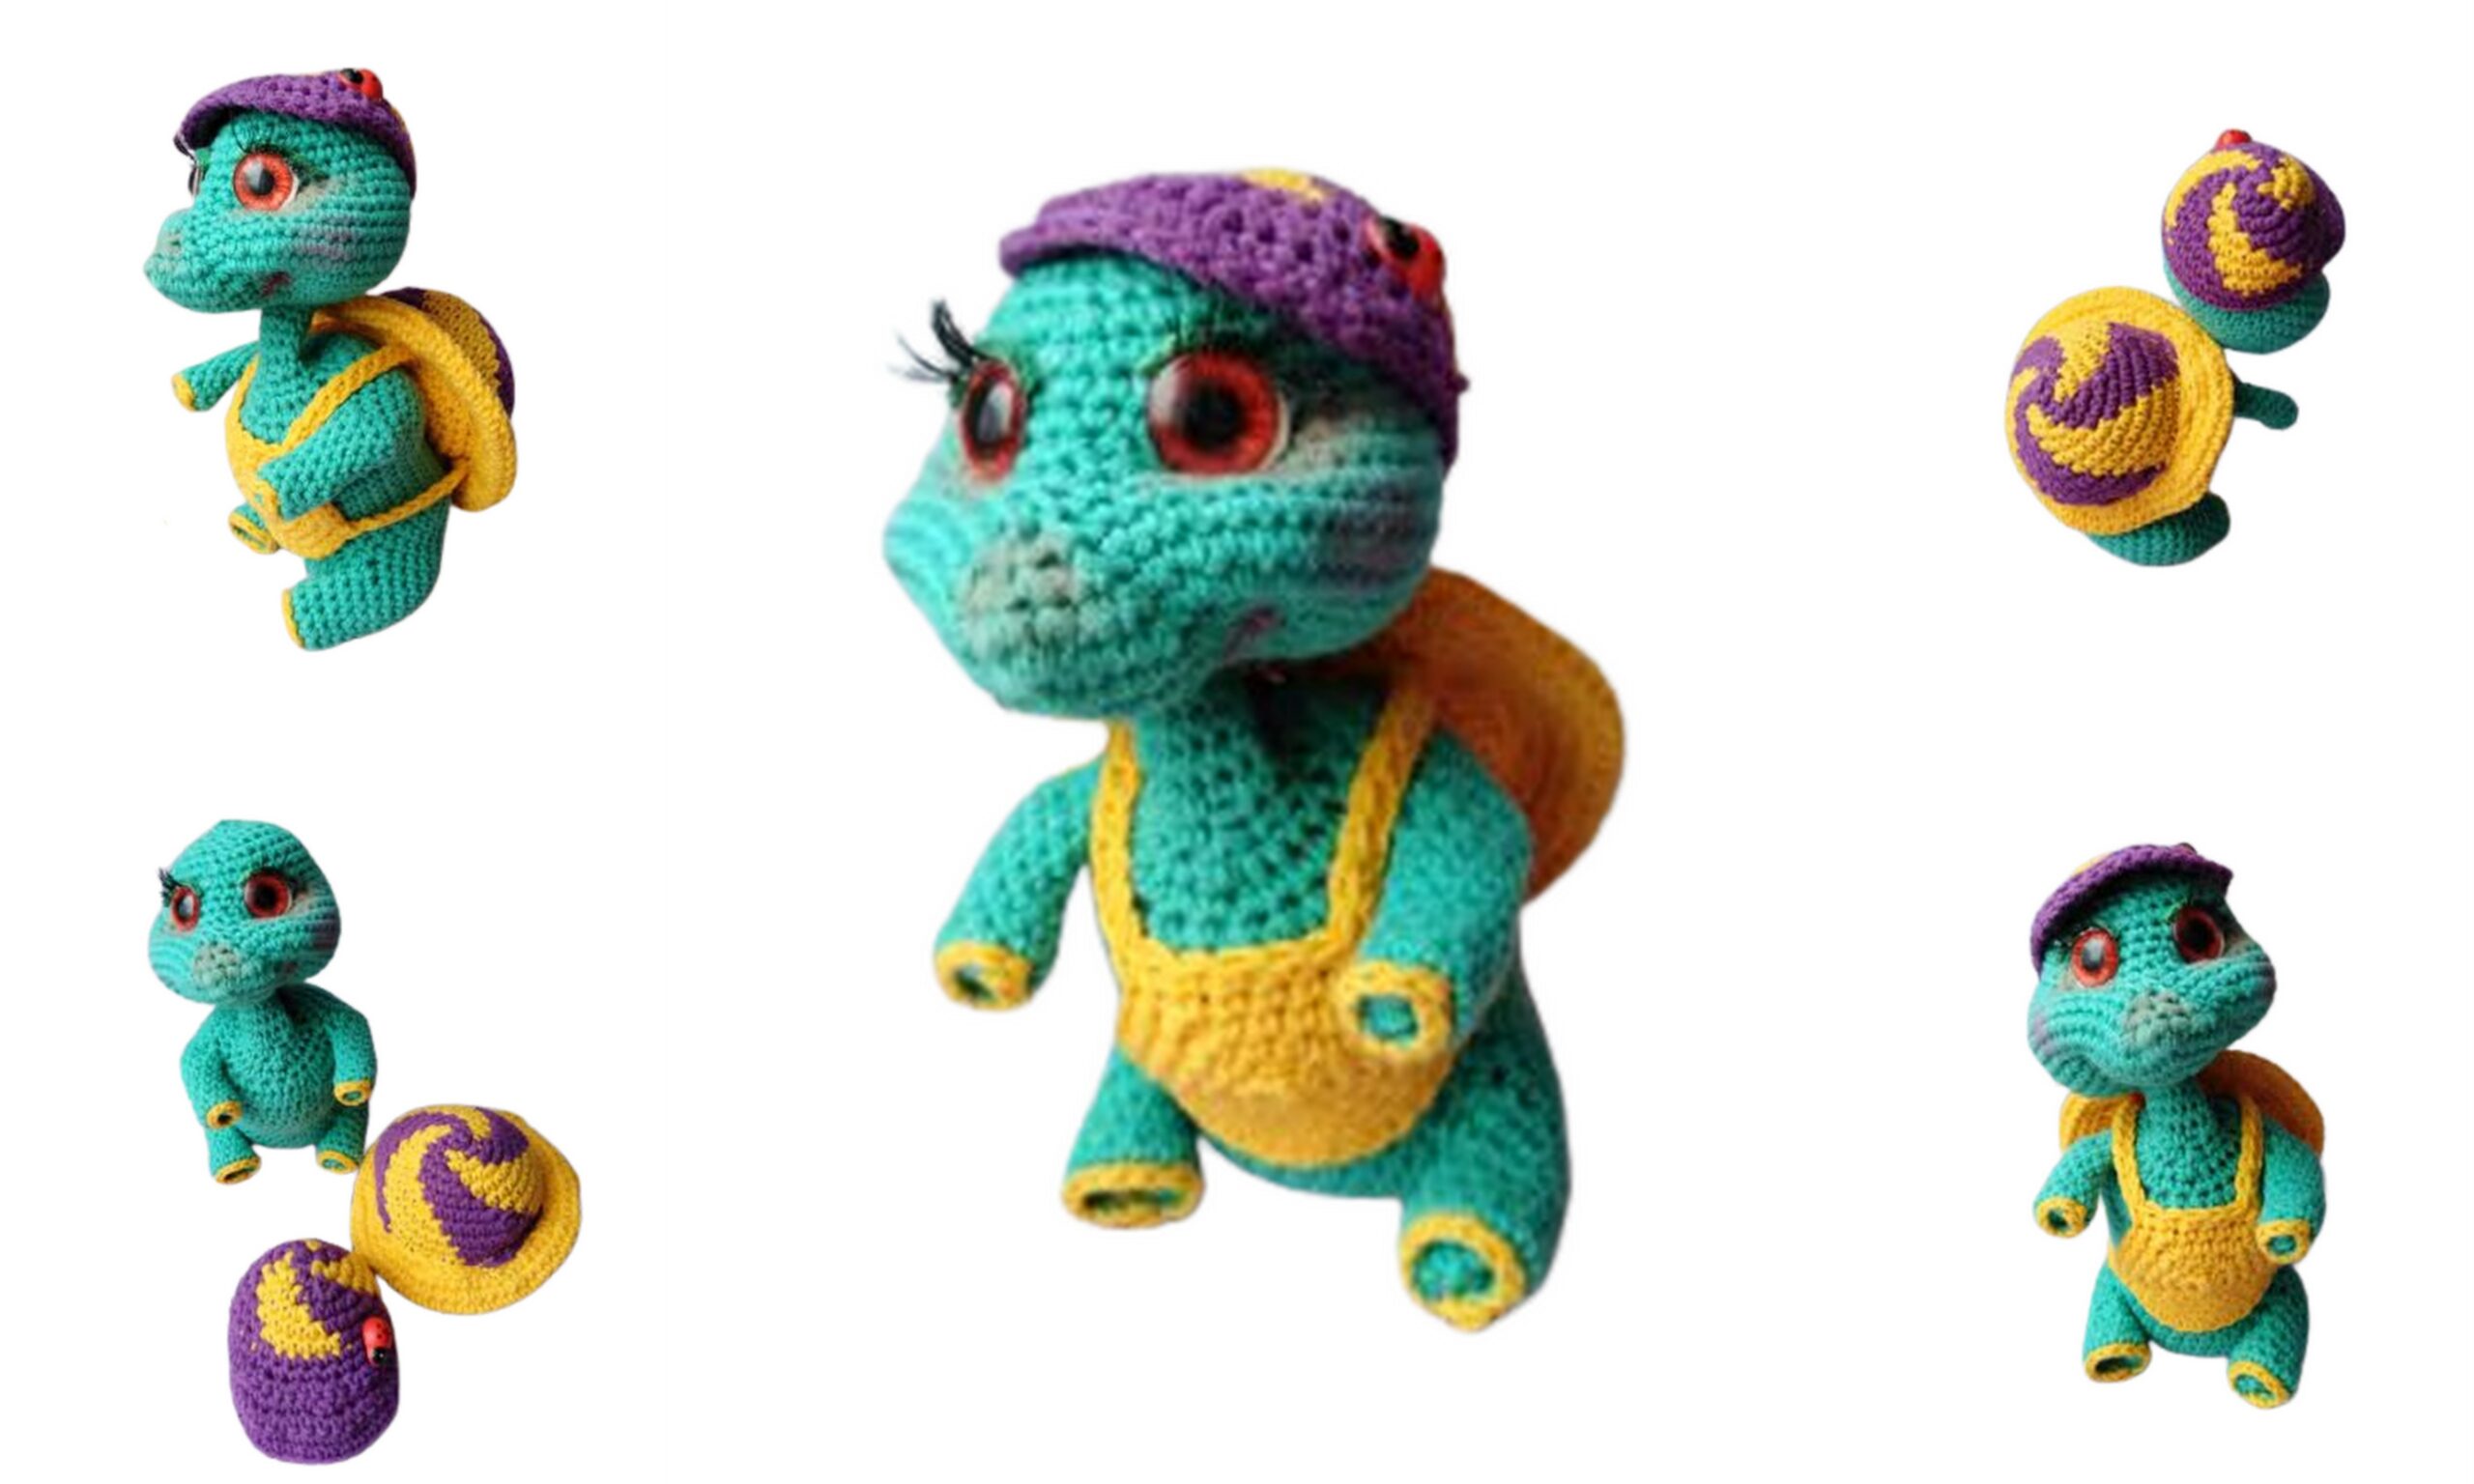
TURTLE YASHKA
Legend:
sl-st – connecting post
ch – air loop
ch – lifting air loop
sc – single crochet
dc – double crochet
hdc – double crochet
inc – increase
dec. – decrease
Materials for creation:
Yarn Alize Cotton Gold Hobby (50g/165m) color 610
(jade) – turtle
Yarn YARNART JEANS (50g/160m) color: yellow,
lilac (clothing) and a little white for proteins
eye
Hook 1.5 mm
Eyelets 14 mm
Filler
Stitching needle
Cilia
Wire for the frame with a section of 1.5 mm
Suede strip 2 mm wide (for eyelids)
Dry pastel for toning
Glue gun or glue Moment “crystal”
embellishments
How to knit an inconspicuous decrease, we insert the hook behind the front wall of the base loop and immediately behind the front wall of the next base loop, there are 3 loops on the hook – one main + two half loops (the front walls of the base loops), pick up the working thread and pull it through two half loops, on 2 loops on the hook, pick up the working thread and knit it through both loops.
With this method, knitting is denser and there are no gaps.
Body
We knit with jade color, stuff it in the process of knitting, the marker goes along the back ….
1 row: 6 sc into magic ring
2 row: 6 inc = 12
3 row: (1 sc, inc) x 6 = 18
4 row: (2 sc, inc) x 6 = 24
5 row: (3 sc, inc) x 6 = 30
6 row: (4 sc, inc) x 6 = 36
7 row: (5 sc, inc) x 6 = 42
8 row: (6 sc, inc) x 6 = 48
9-13 row: 48 sc
14 row: 12 sc, 8 loops skip, 10 sc, 8 loops skip, 10 sc = 32
15 row: 3 inc, 8 sc, 10 hdc, 8 sc, 3 inc = 38
16 row: (sc, inc) x 3, 8 sc, 10 hdc, 8 sc, (inc, sc) x 3 = 44
17 row: 44 sc
18 row: 17 sc, 10 hdc, 17 sc = 44
19 row: 44 sc
20 row: 17 sc, 10 hdc, 17 sc = 44
21 row: 7 sc, 3 inc, 7 sc, 10 hdc, 7 sc, 3 inc, 7 sc = 50
22 row: 20 sc, 10 hdc, 20 sc = 50
23 row: 8 sc, 8 sts skip, 9 dec, 8 sts skip, 8 sc = 25
24 row: 3 dec, 13 sc, 3 dec = 19
Now let’s finish with the torso and first we will tie the paws and put the frame.

Hind legs (2 parts)
We collect 12 loops along the edge of the hole (make
increase evenly) and knit:
1-6 row: 12 sc
7 row: behind the back p / loops 12 sc
8 row: 6 dec = 6
We tighten the loops and cut the thread, fasten.
For the front p / loops of the 7th row we knit with yellow yarn 12 sl-st.
Front legs (2 parts)
We collect 10 loops along the edge of the hole and knit:
1-8 row: 10 sc
9 row: behind the back p / loops 10 sc
10 row: 5 dec = 5
We tighten the loops and cut the thread, fasten.
For the front p / loops of the 9th row we knit with yellow yarn
10 sl-st.
We form the frame
We take a piece of wire 25 cm long, at one end we make a loop along the diameter of the back leg, wrap it with adhesive tape. Make for two legs. Then connect them and insert into the body. Fill the body to half.
Do the same for the two upper legs, halve the length of the wire. Attach to the spine. Fill.
Now we will continue to knit the neck …
25 row: (2 sc, dec) x 4, sc, dec = 14
26 row: (5 sc, dec) x 2 = 12
27-31 row: 12 sc
Knit additional bias stitches to the middle of the neck in front, place a new marker …
We knit the head
32 row: 12 inc = 24
33 row: (sc, inc) x 12 = 36
34 row: (2 sc, inc) x 12 = 48
35 row: 3 sc in one loop, 47 sc = 50
36 row: sc, 3 sc in one loop, 48 sc = 52
37 row: 2 sc, 3 sc in one loop, 49 sc = 54
38 row: 3 sc, 3 sc in one loop, (22 sc, dec) x 2, 2 sc = 54
We wrap the ends of the wire with adhesive tape …
39 row: 4 sc, 3 sc in one loop, 5 sc, 5 increases, 33 sc, 5 increases, sc = 66
40 row: 5 sc, 3 sc in one loop, 60 sc = 68
41 row: 6 dec, 56 sc = 62
42 row: 4 dec, 54 sc = 58
43 row: 2 dec, 54 sc = 56
44 row: 3rd dec, 4 sc, 5 dec, 25 sc, 5 dec, 4 sc = 44
45 row: (9 sc, dec) x 4 = 40
46 row: (8 sc, dec) x 4 = 36
47-50 row: 36 sc
51 row: (4 sc, dec) x 6 = 30
52 row: (3 sc, dec) x 6 = 24
Stuff the head and then add in the process of knitting …
53 row: (2 sc, dec) x 6 = 18
54 row: (sc, dec) x 6 = 12
55 row: 6 dec = 6
Pull off the loops, cut the thread and fasten off.
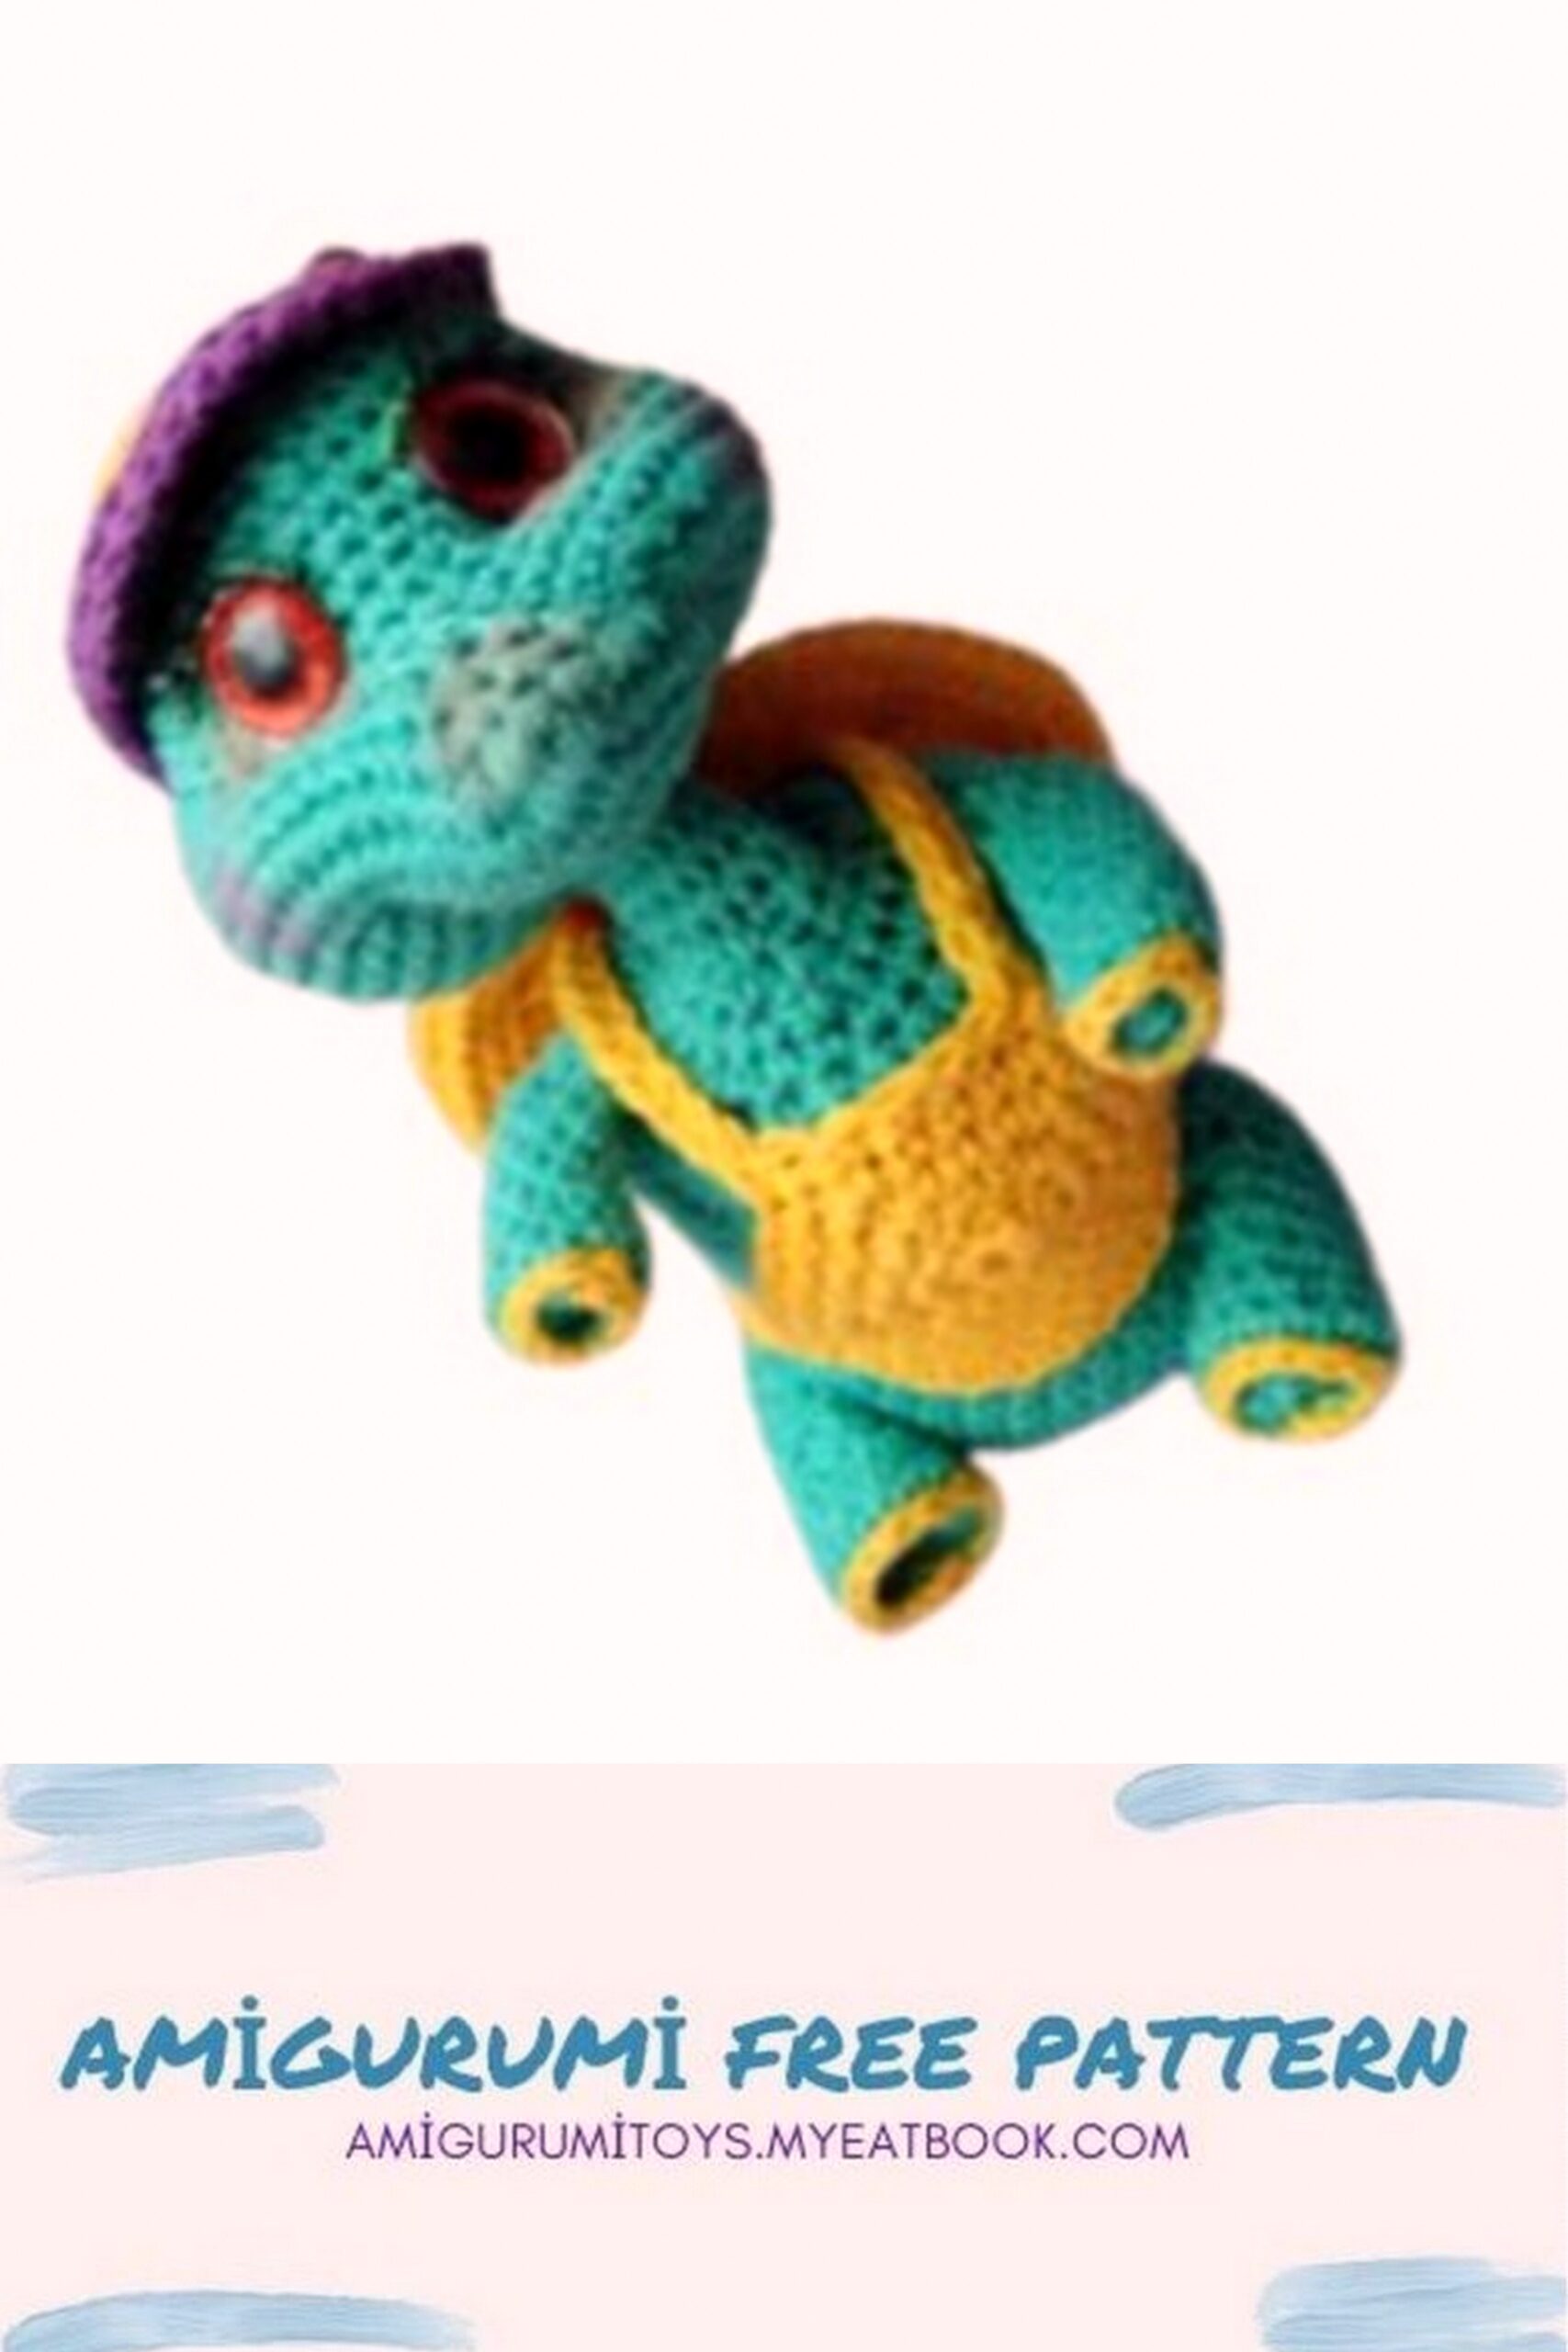
Making a muzzle
We make tightenings for the eyes: we insert the needle at the base of the neck, immediately under the head (see photo on the next page) and bring it out in the place of the left eye (between 44 and 45 rows), grab a couple of loops and bring it out in the place of the right eye, again grab a couple of loops and return to the neck, tighten, cut the thread and fasten. Now we form the mouth: we insert the needle from below (the left corner of the mouth is about 36-37 rows) and bring it out in the place of the left eye, grabbing one loop, go back, tighten it.
Similarly, we drag the left corner of the mouth.
Glue eyes, embroider squirrels with white yarn from the outside
side of the eye
I used a suede strip for the eyelids.
We glue cilia
We tint the places around the eyes, cheeks, nose and mouth.
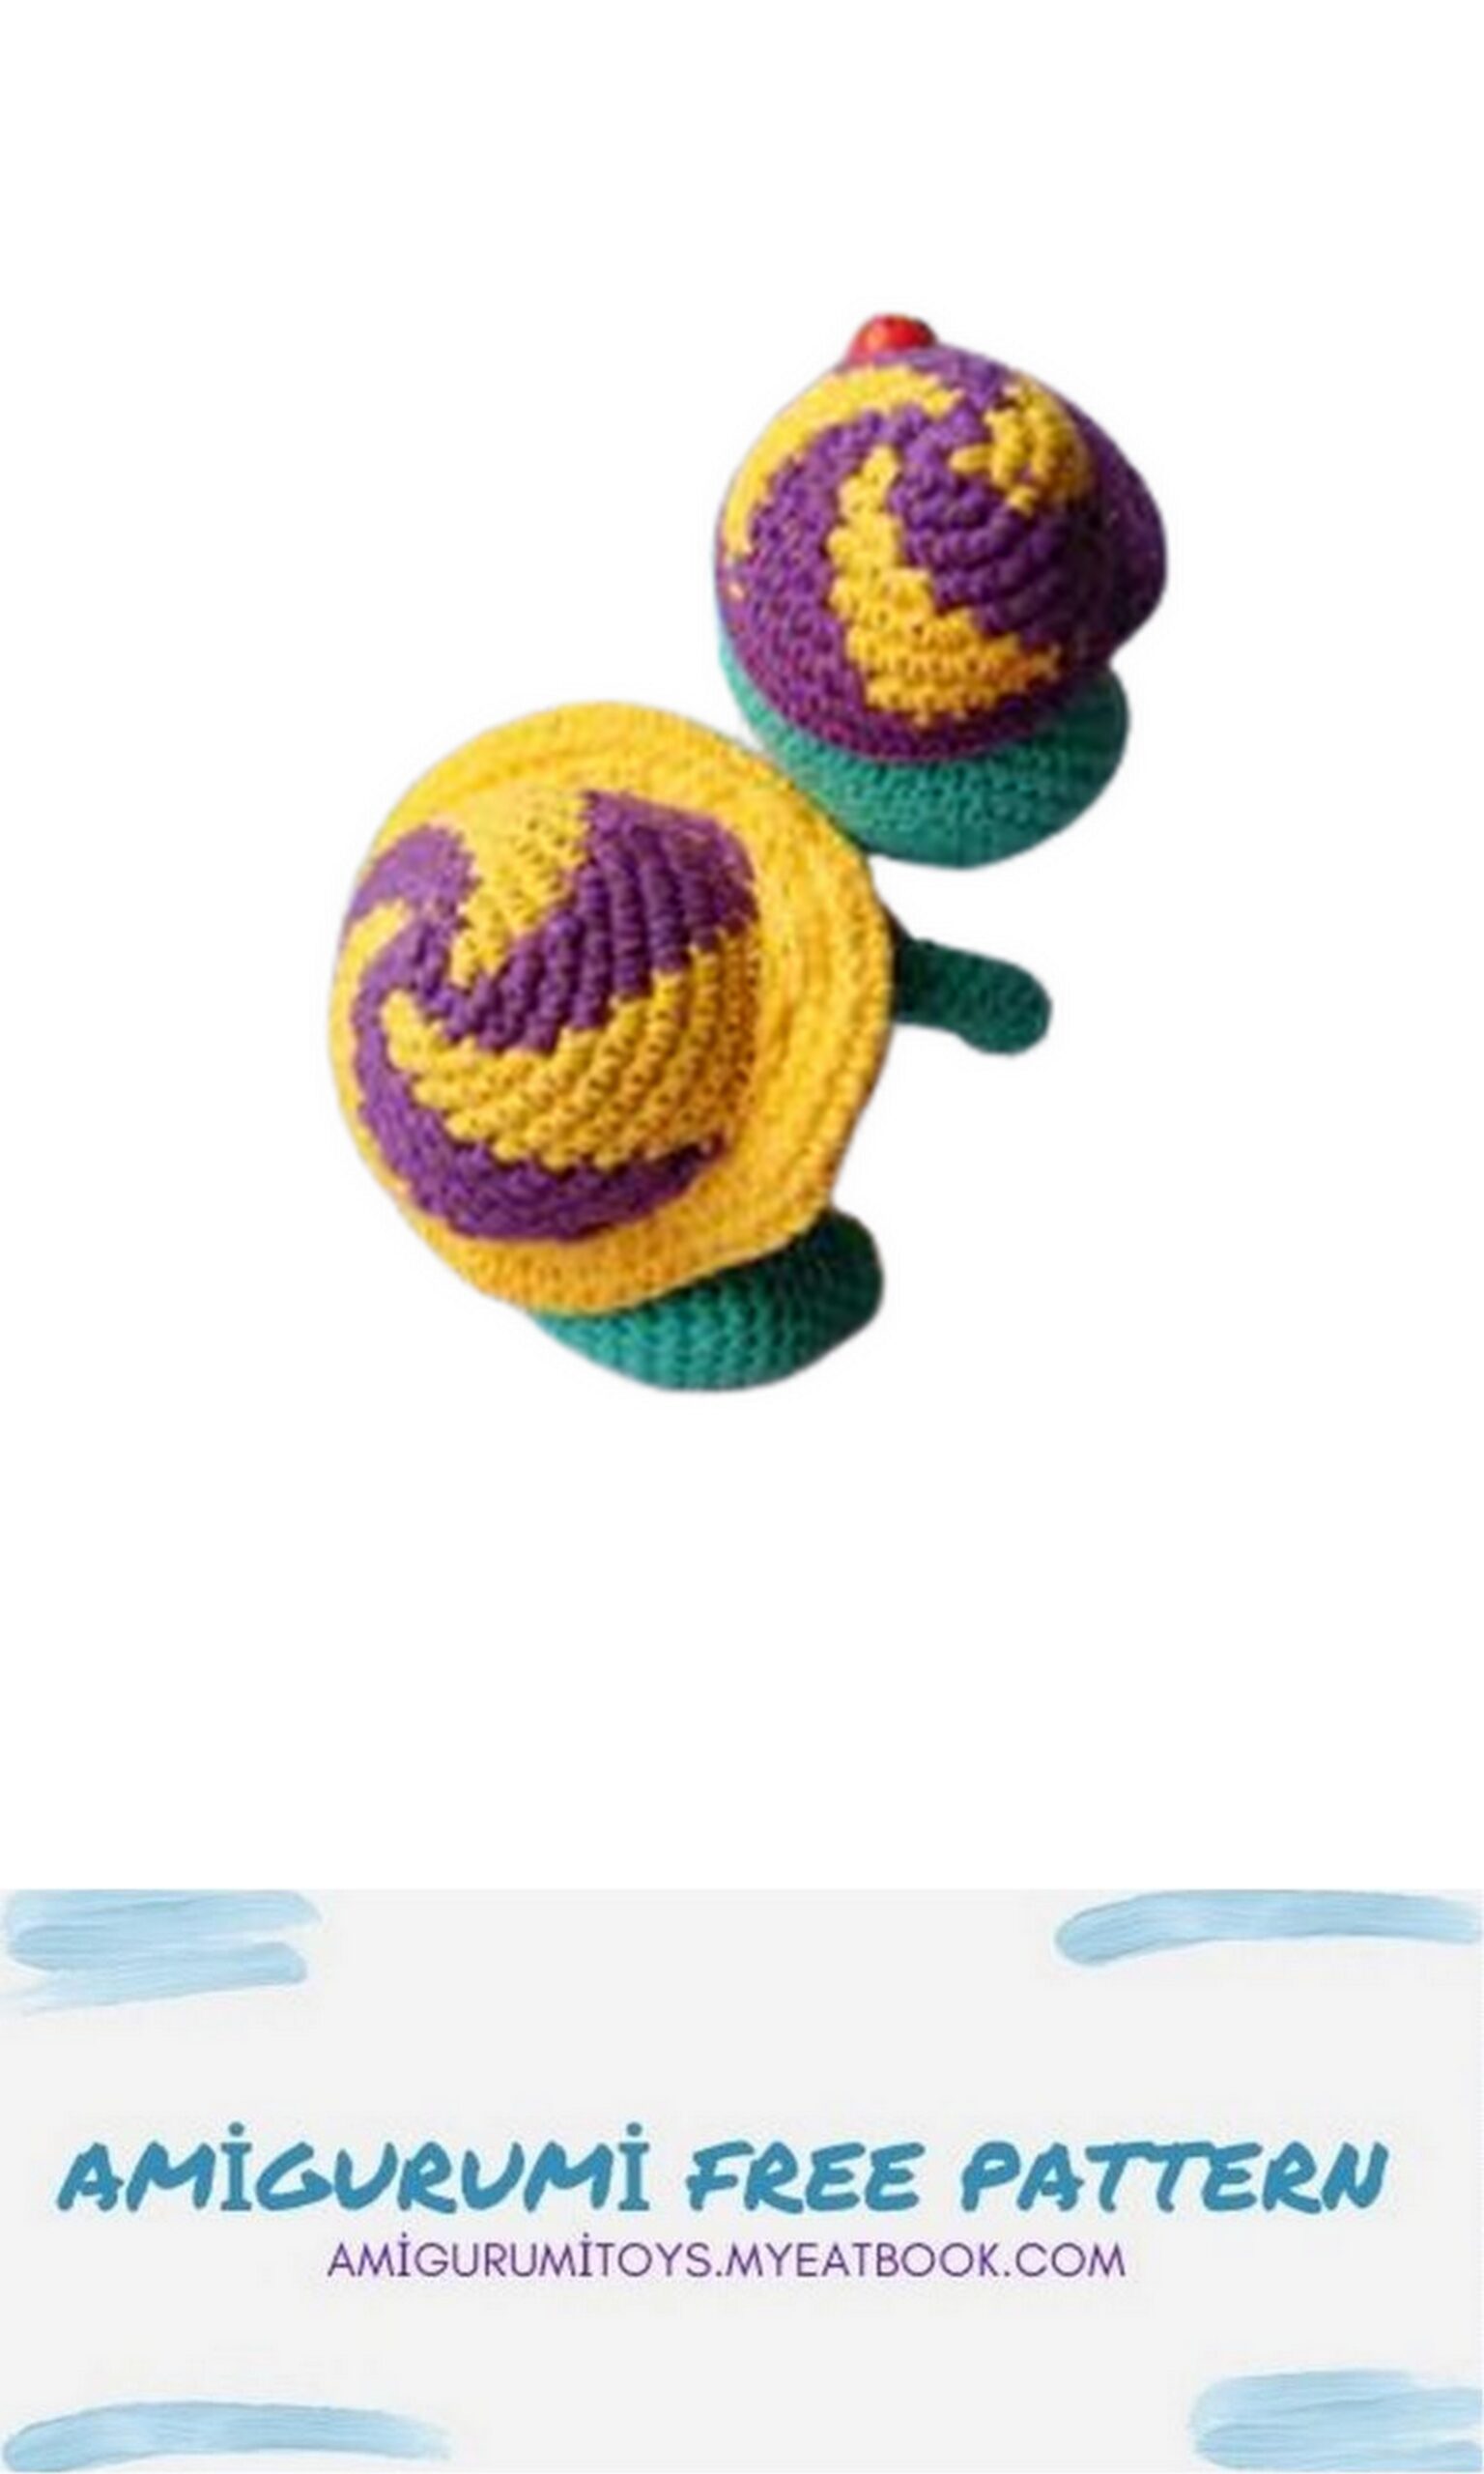
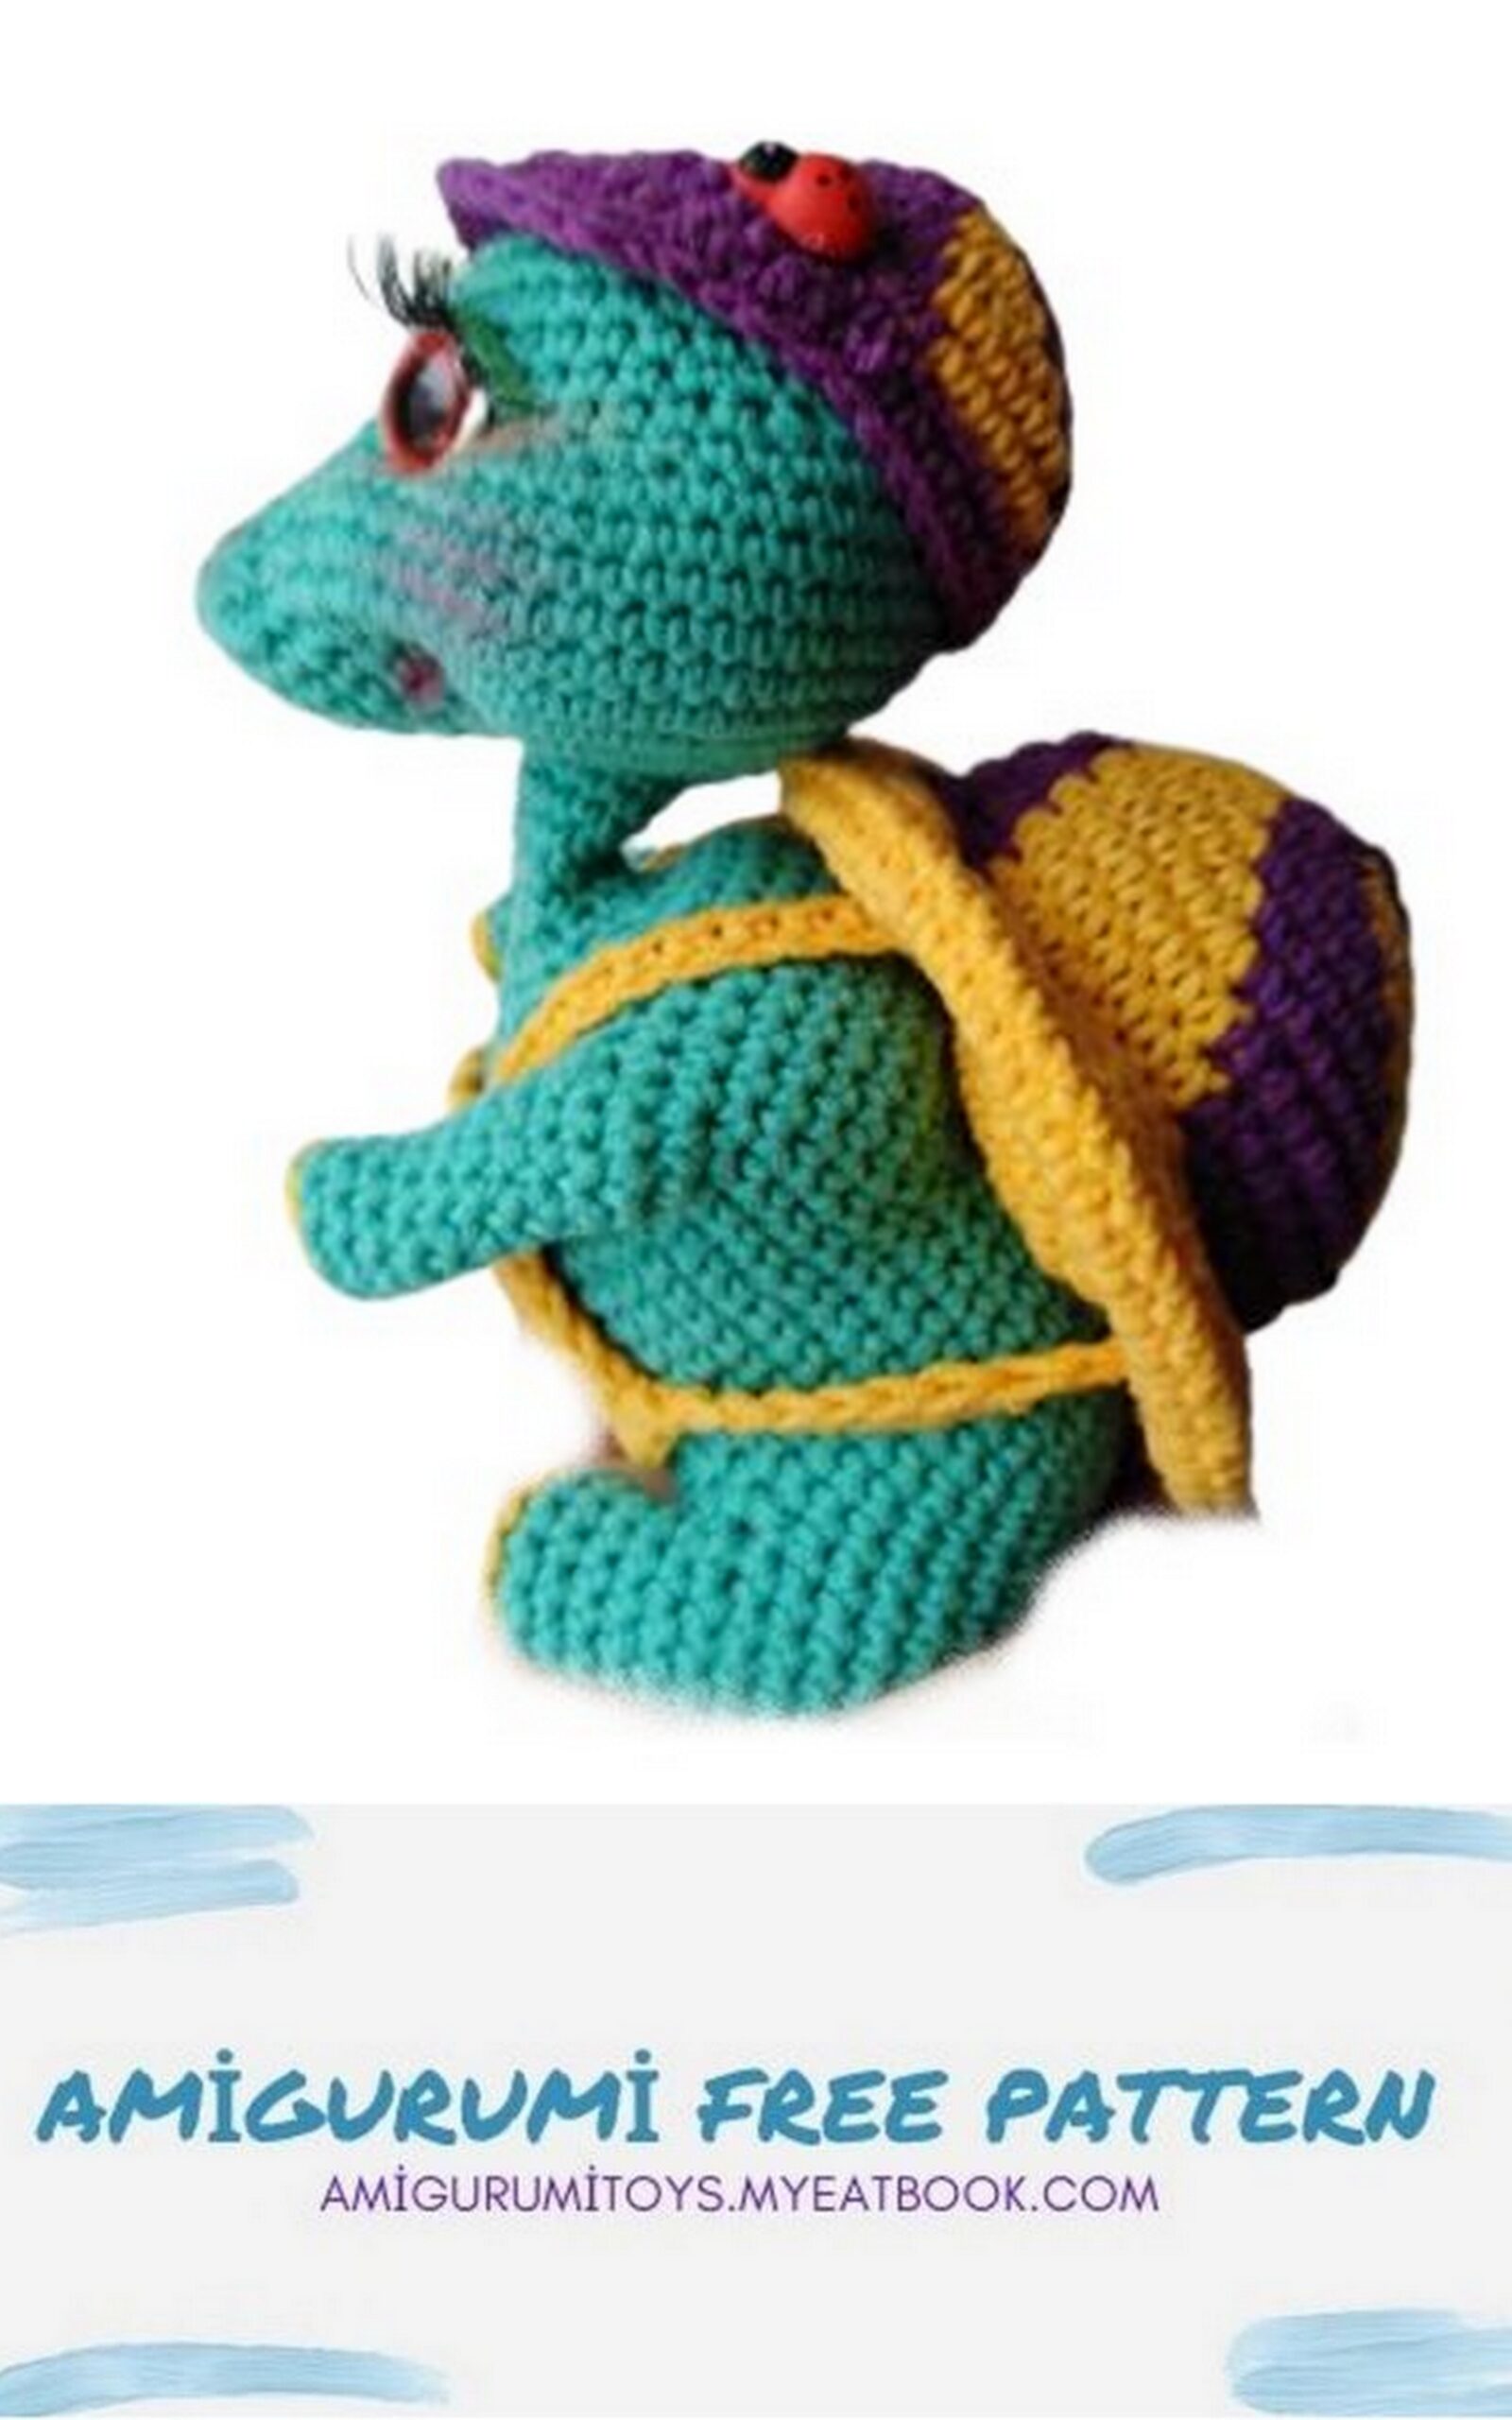
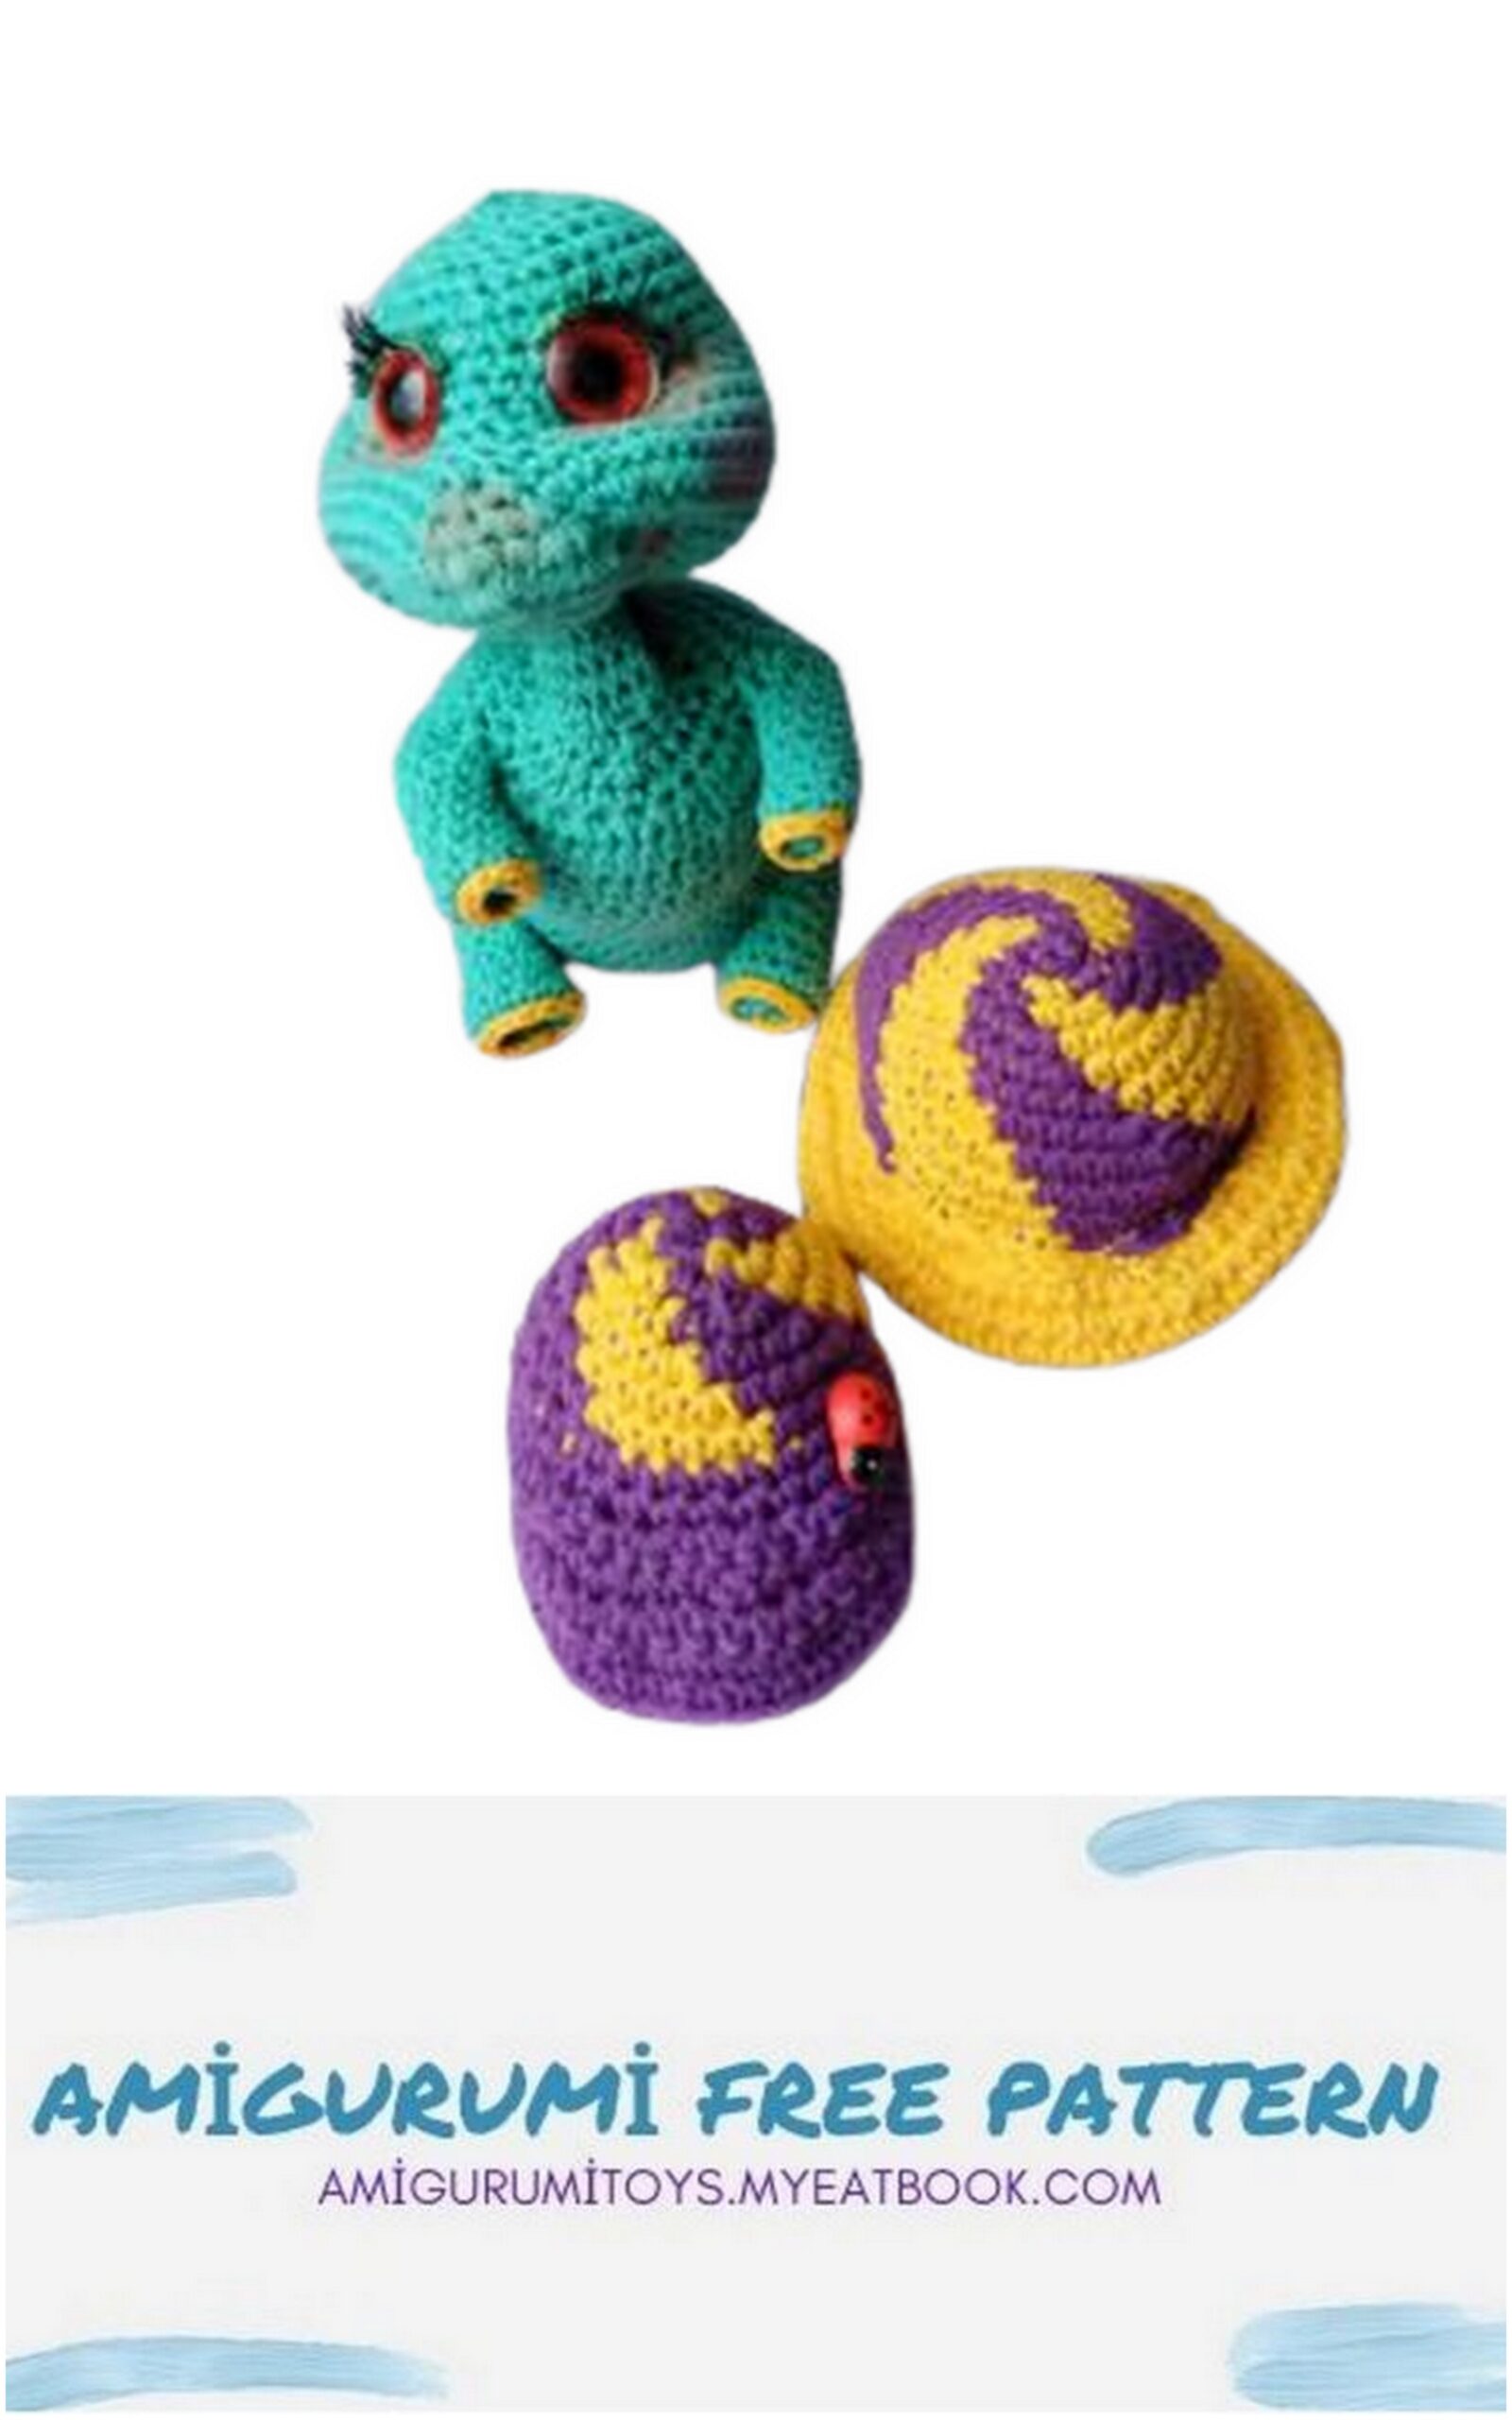
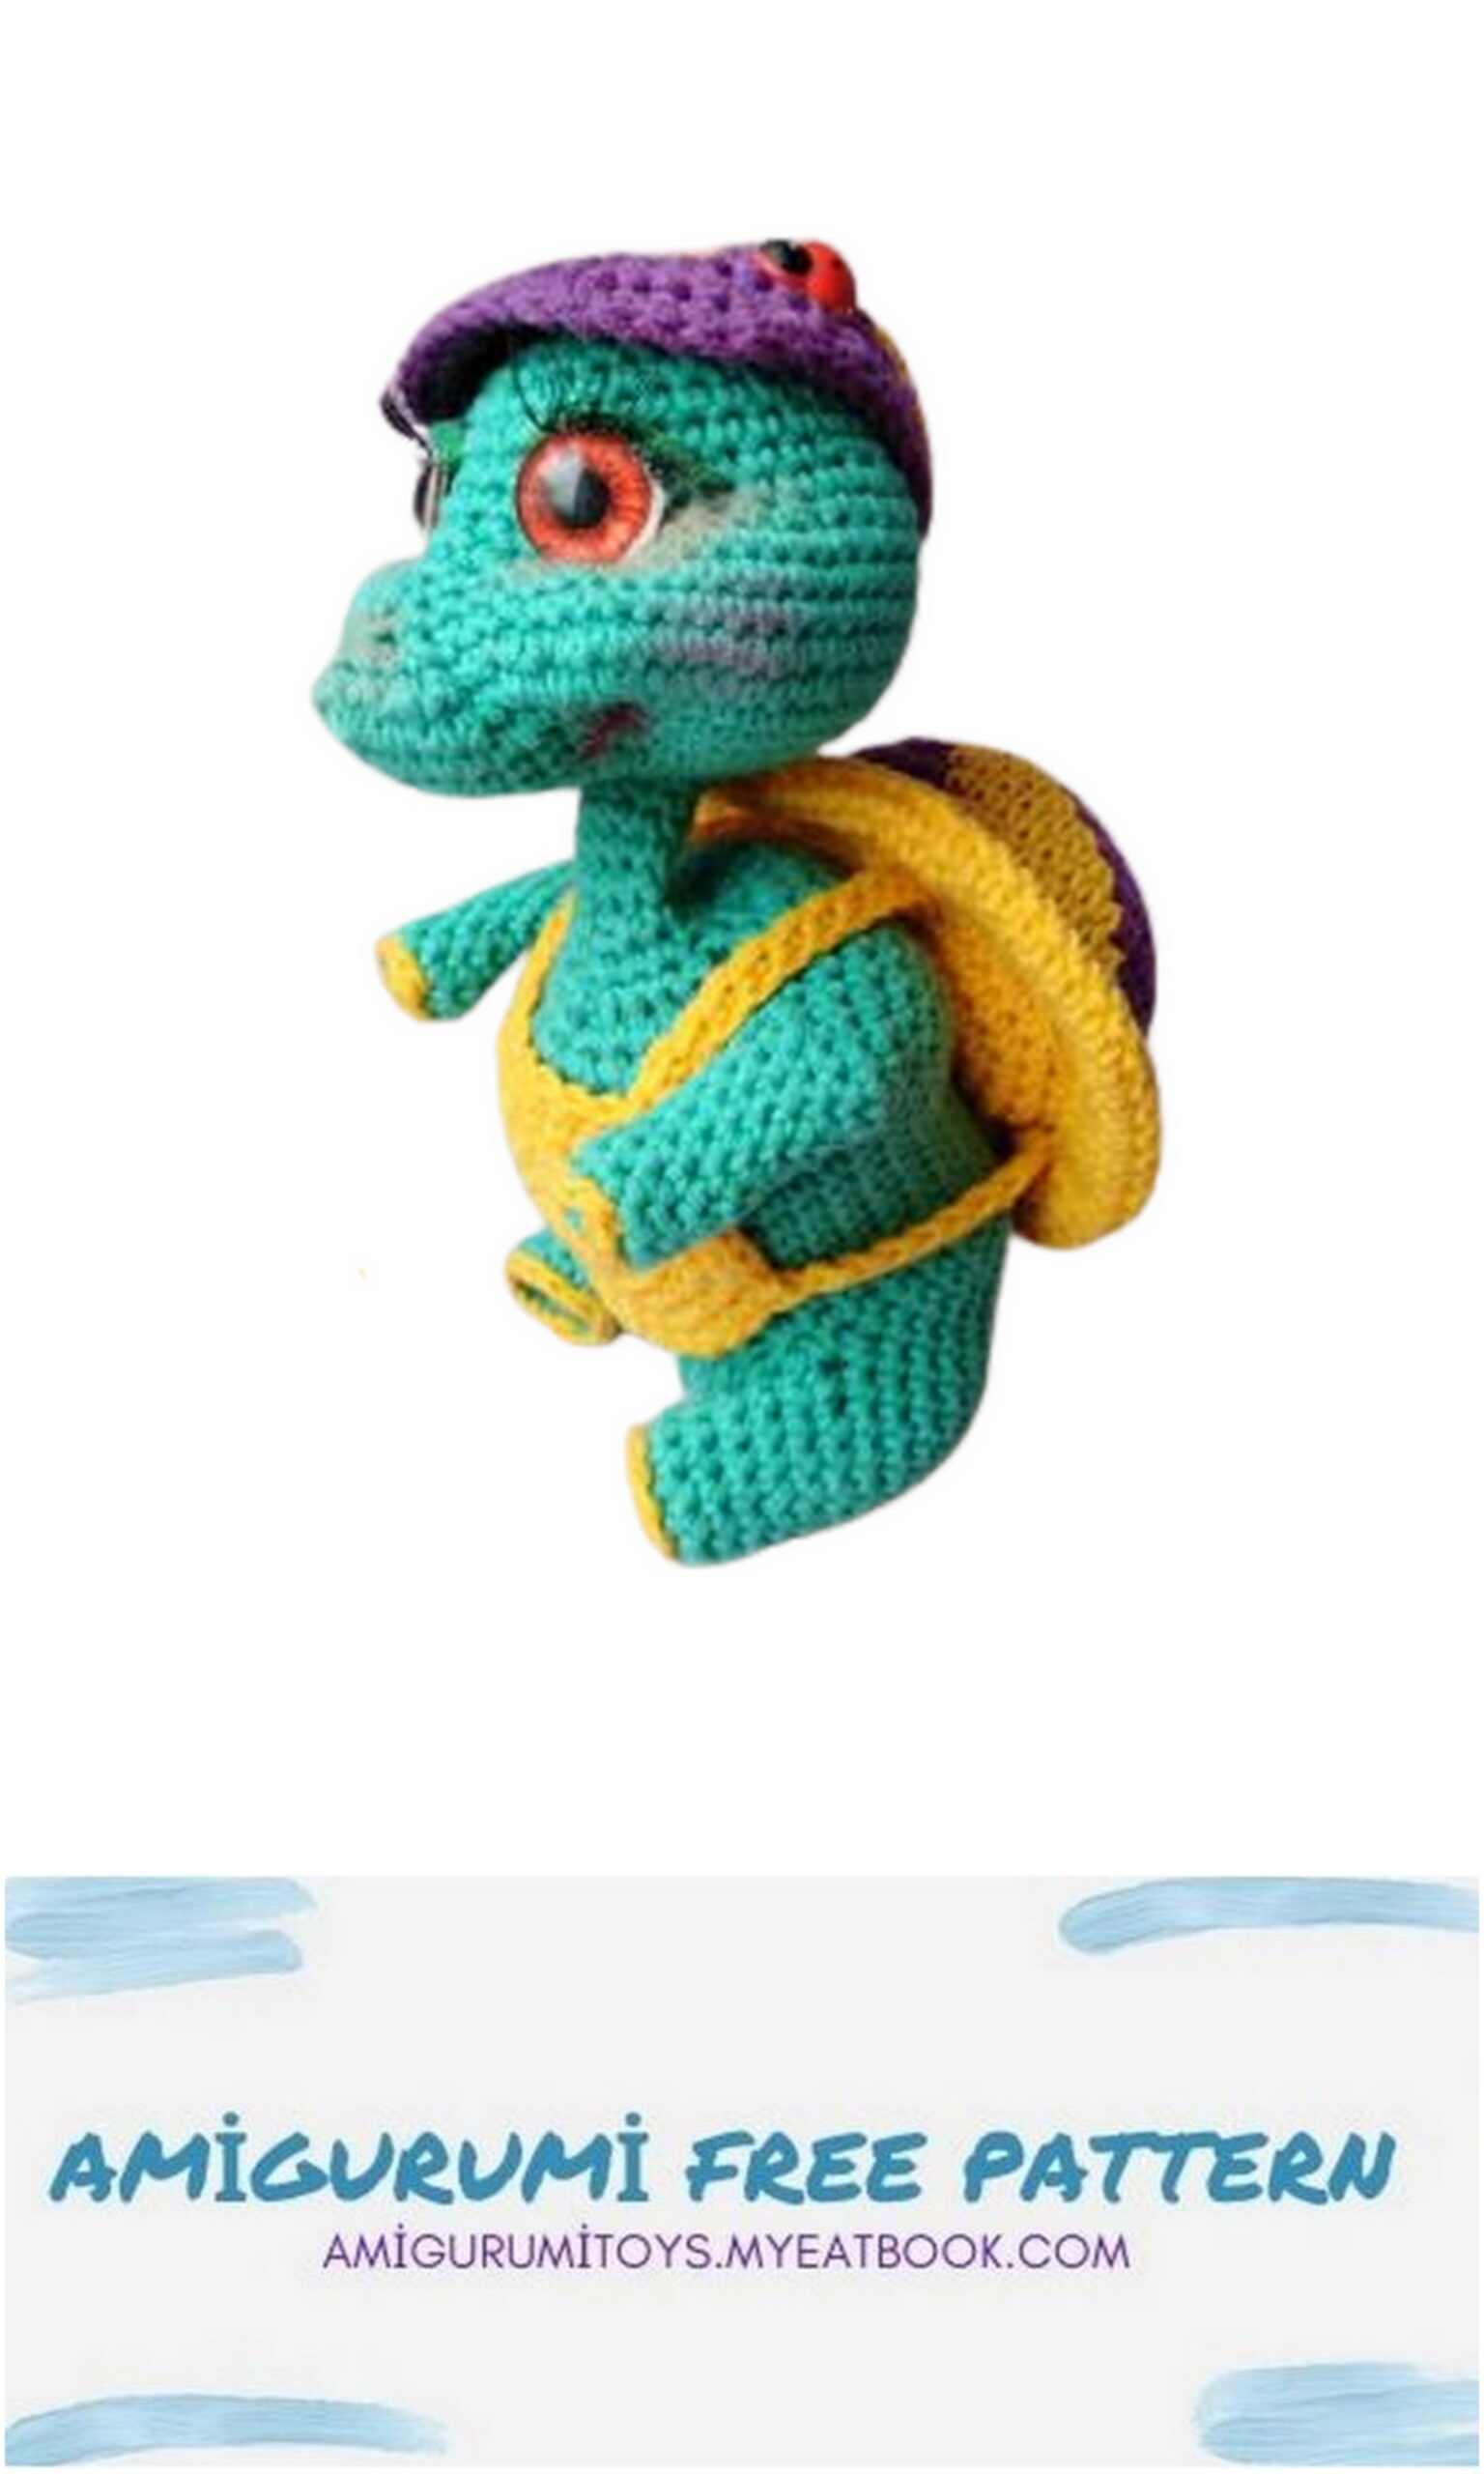
Shell (upper part)
We start knitting in lilac color, then we switch to yellow yarn, we skip the second thread between knitting …
1 row: 6 sc into magic ring
2 row: alternate increases in yellow and lilac, total 6 inc = 12
We continue to knit, alternating colors, that is, 1 sc and knit an increase first in lilac, then in yellow, and so on in all rows …
3 row: (1 sc, inc) x 6 = 18
4 row: (2 sc, inc) x 6 = 24
5 row: (3 sc, inc) x 6 = 30
6 row: (4 sc, inc) x 6 = 36
7 row: (5 sc, inc) x 6 = 42
8 row: (6 sc, inc) x 6 = 48
Continue alternating colors by 8 sc….
9-11 row: 48 sc
Cut the thread and fasten off.
in the photo the shell is already with the lower part …
Carapace (lower part)
Knit with yellow yarn
1 row: 6 sc into magic ring
2 row: 6 inc = 12
3 row: (1 sc, inc) x 6 = 18
4 row: (2 sc, inc) x 6 = 24
5 row: (3 sc, inc) x 6 = 30
6 row: (4 sc, inc) x 6 = 36
7 row: (5 sc, inc) x 6 = 42
8 row: (6 sc, inc) x 6 = 48
9 row: (7 sc, inc) x 6 = 54
10 row: behind the front p / loops (8 sc, inc) x 6 = 60
11-16 row: 60 sc
We knit together p / loops of the 9th row, cut the thread, leave the tail for sewing.
Connecting both sides together:
We sew the upper part to the lower remaining yellow thread (wrong sides inward), gradually adding the filler.
Breast
1 row: 6 sc into magic ring
2 row: 6 inc = 12
3 row: (1 sc, inc) x 6 = 18
4 row: (2 sc, inc) x 6 = 24
5 row: (3 sc, inc) x 6 = 30
Cast on 11 ch, from 2 loops 10 sc, sl-st into the first loop, then we knit 5 sc, again dial a chain from 11 ch, and from 2 loops another 10 sc, sl-st into the first loop. On the side we knit 6 sc, again a chain of 11 ch, from 2 loops of 10 sc, sl-st into the first loop. On the lower part 12 sc, and the last chain of them is 11 ch, from 2 loops 10 sc, sl-st. Cut the thread. Sew the straps to the shell (I glued).
We put on the shell from below, through the ass 🙂
Cap
We start knitting in lilac color, then we switch to yellow yarn, we skip the second thread between knitting …
1 row: 6 sc into magic ring
2 row: alternate increases in yellow and lilac, total 6 inc = 12
We continue to knit, alternating colors, that is, 1 sc and knit an increase first in lilac, then in yellow, and so on in all rows …
3 row: (1 sc, inc) x 6 = 18
4 row: (2 sc, inc) x 6 = 24
5 row: (3 sc, inc) x 6 = 30
6 row: (4 sc, inc) x 6 = 36
7 row: 36 sc
We cut the yellow thread, knit with lilac yarn
8 row: 36 sc, sl-st and now we knit in turning rows, we don’t do ch …
9 row: 16 sc, turn
10 row: skip the first loop, from 2 loops 3 sc, inc, sc, inc, sc, 2 inc, 3 sc, dec, turn
11 row: from 2 loops- 4 sc, inc, 3 sc, inc, 4 sc, dec, turn
12 row: from 2 loops – 3 sc, inc, 3 sc, inc, 3 sc, dec, turn
13 row: from 2 loops -12 sc, dec
Now we tie around the sc cap.
Cut the thread and fasten off.
Dress up … and our little turtle Yashka is ready!