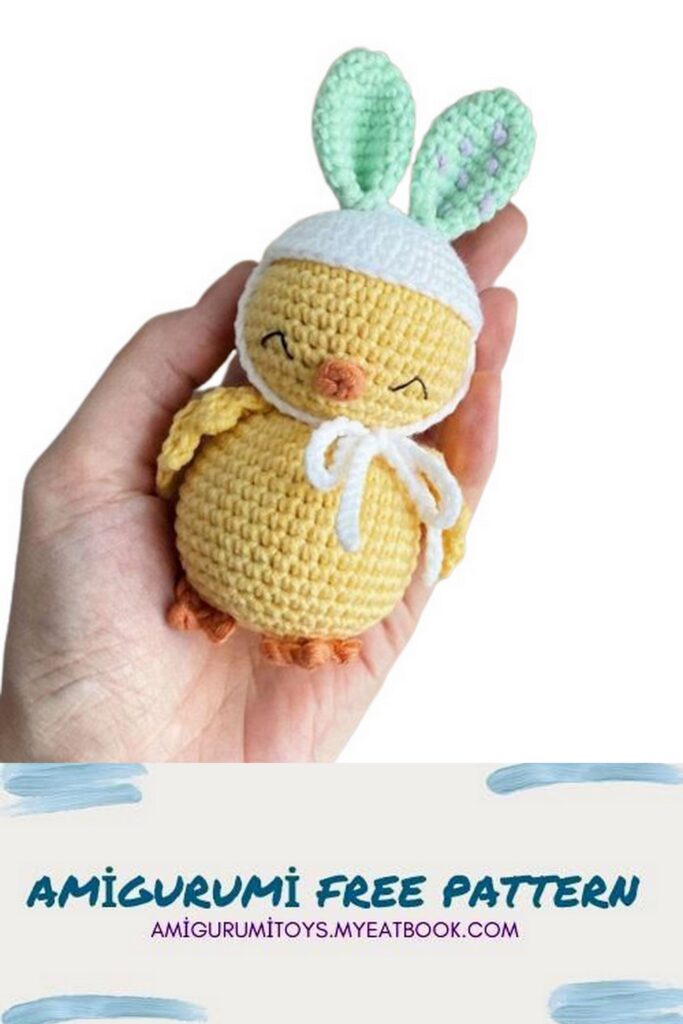
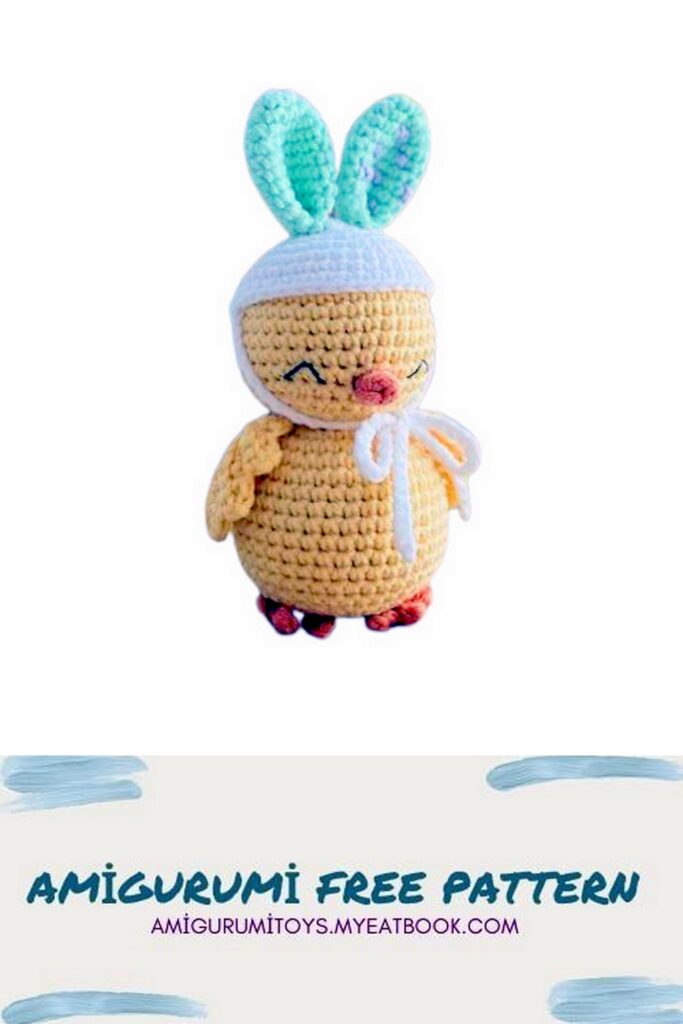
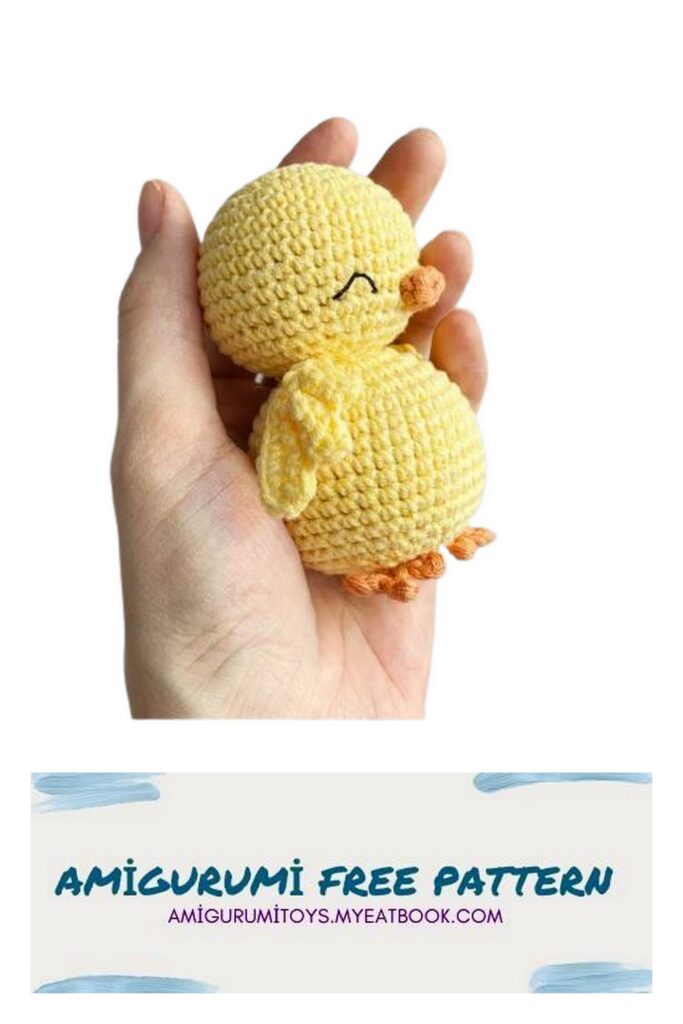
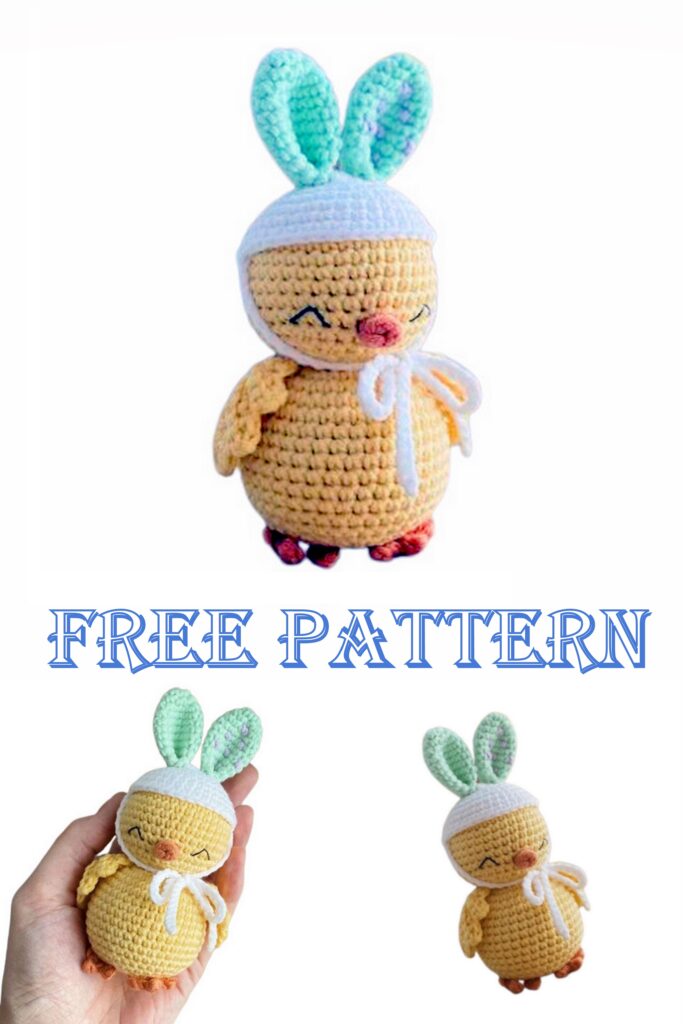
Easter Chick
Abbreviations
MR – amigurumi ring;
SC – single crochet;
SL-ST – connecting post;
İNC – increase (two single crochet in one loop);
DEC – decrease (two columns connected together);
CH – air loop;
(…) * x – what is in brackets, knit x times;
(…) – the numbers in brackets indicate the number of loops in a particular row.
Tools and materials:
1. Yarn:
– Yarn Art Jeans (50 g / 160 m), color No. 88 – for head and body
– Yarn Art Jeans (50 g / 160 m) color No. 01 – for a hat
– Yarn Art Jeans (50 g / 160 m) color No. 79 – for ears on a cap
– Yarn Art Jeans (50 g / 160 m) color No. 19 – for spot embroidery
– Gazzal Organic Baby Cotton (50 g / 115 m) color No. 418 – beak and paws;
2. Hook number 2;
3. Filler – holofiber;
4. Black thread for embroidery eyes;
5. Thick needle for stitching details;
6. Scissors, pins.
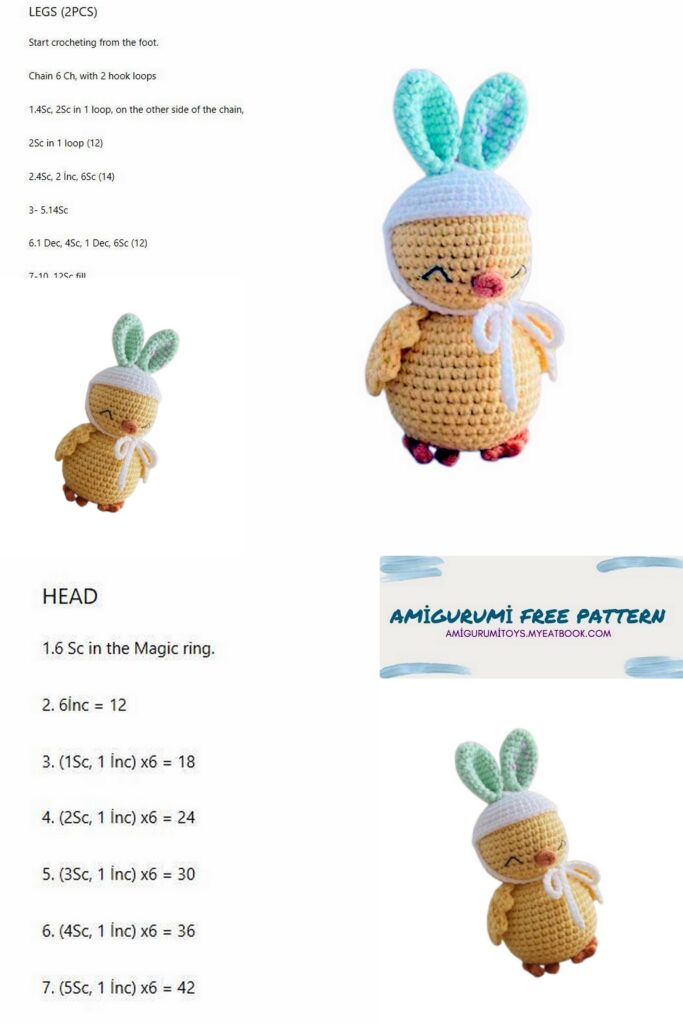
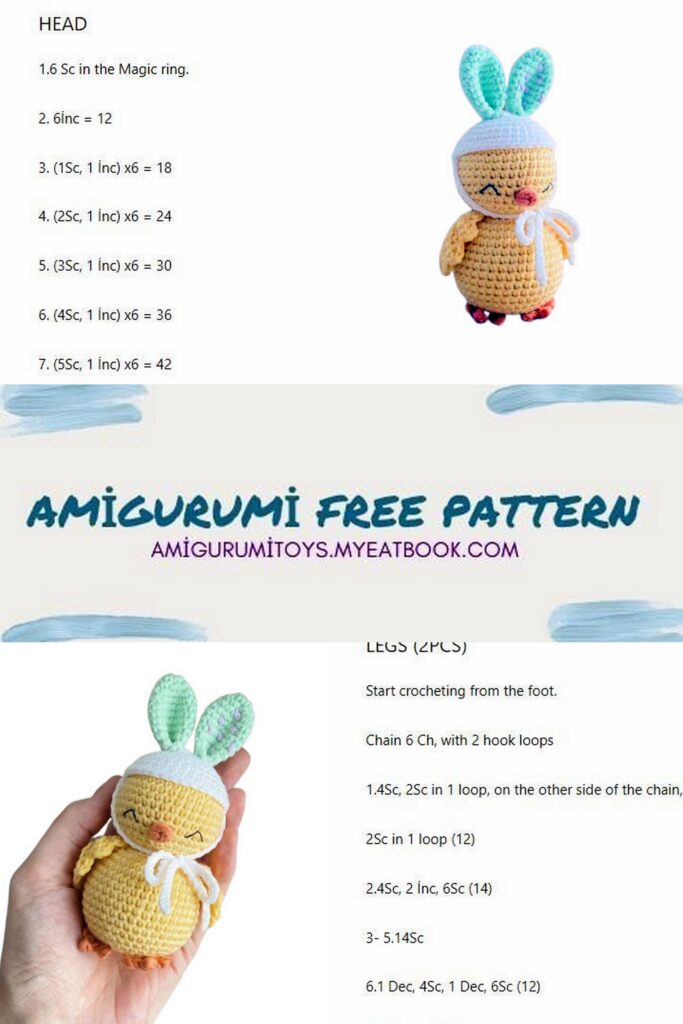
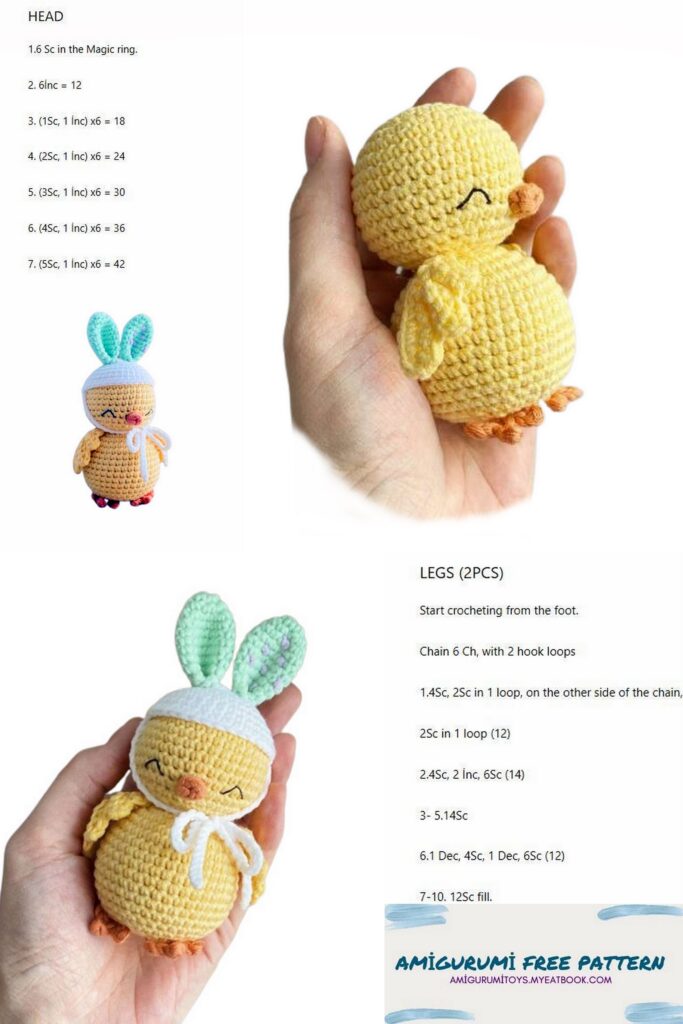
Head-body:
Knit in yellow.
1 row. 6 SC to MR
2 row. 6 inc (12)
3 row. (1 SC, İNC) * 6 (18)
4 row. (2 SC, İNC) *6 (24)
5 row. (3 SC, İNC) *6 (30)
6 row. (4 SC, İNC) *6 (36)
7 – 13 rows. 36 SC (7 rows)
14 row. (4SC, DEC) *6 (30)
15 row. (3SC, DEC) *6 (24)
16 row. (2SC, DEC) *6 (18)
17 row. (1SC, DEC) *6 (12)
Fill your head tightly with holofiber.
18 row. 12 inc (24)
19 row. (3 SC, İNC) *6 (30)
20 row. (4 SC, İNC) *6 (36)
21 row. (11 SC, İNC) *3 (39)
22-29 rows. 39 SC (8 rows)
30 row. (11SC, DEC) *3 (36)
31 row. (4SC, DEC) *6 (30)
32 row. (3SC, DEC) *6 (24)
33 row. (2SC, DEC) *6 (18)
Fill your body tightly with holofiber
34 row. (1SC, DEC) *6 (12)
35 row. 6 DEC
Fill the body to the end. Fasten and cut the thread, hide the tip of the thread inside the part. Embroider the eyes in the 12th row as in the photo, the distance between them is 6 SC (count between the lower corners of the eyes, located closer to the center).
Wings:
Knit two pieces in yellow. At the beginning, leave the tip of the thread about 15 cm for sewing.
1 row. 10CH
2 row. From the second loop from the hook 6 SC, CH, turn (we do not knit the row to the end)
All subsequent rows knit behind the back wall of the loops.
3 row. 4 SC, CH, turn
4 row. 4 SC, 1 SC on CH 1 row, CH, turn
5 row. 3 SC, CH, turn
6 row. 3 SC, 1 SC on CH 1 row, CH, turn
7 row. 2 SC, CH, turn
8 row. 2 SC, 1 SC on CH 1 row
9 row. On the reverse side of the CH chain of row 1, knit 8 SC Thread fasten and cut, hide the tip of the thread.
Beak:
Knit in orange.
1 row. 5 CH, with SL-ST close in a circle
2 row. 5 sc
Fasten the thread and cut, leaving a long end for sewing.
details.
Knit two in orange
1 row. 5CH
2 row. From the second loop from the hook 2 SL-ST, 3 CH (we do not knit the row to the end)
3 row. From the second loop from the hook (we knit in CH, which were knitted in the 2nd row) 2 SL-ST, 1 SL-ST in CH 1 row, 3 CH
4 row. From the second loop from the hook (we knit in CH, which were knitted in the 3rd row) 2 SL-ST, 1 SL-ST in CH 1 of the row.
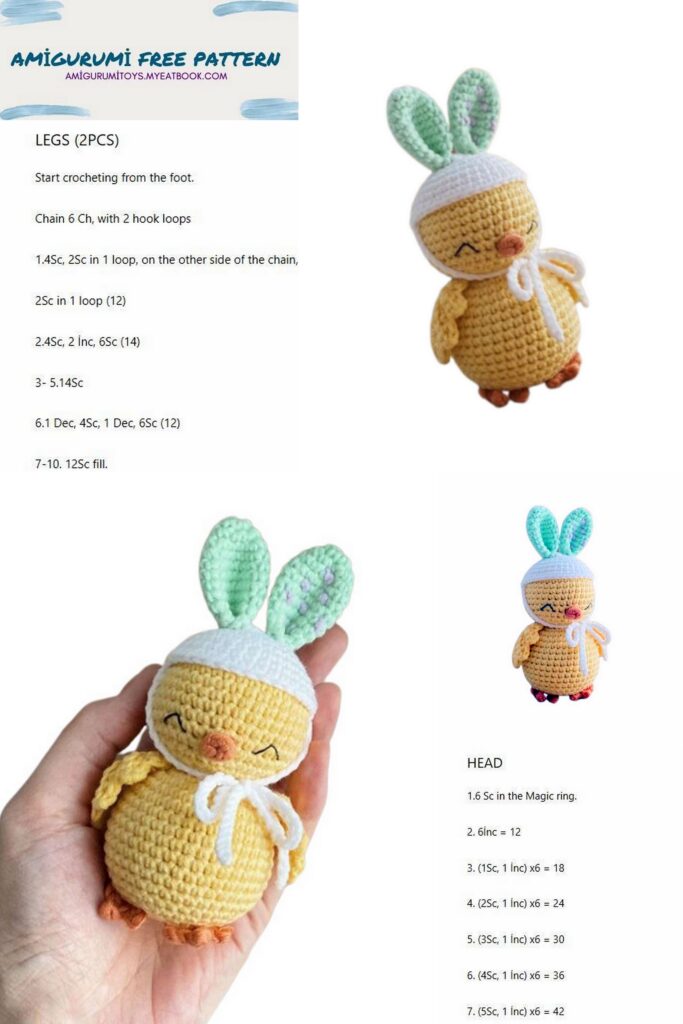
Paws:
Fasten and cut the thread, leaving a long tail for sewing.
Knit in white.
1 row. 6 SC to MR
2 row. 6 inc (12)
3 row. (1 SC, İNC) *6 (18)
4 row. (2 SC, İNC) *6 (24)
5 row. (3 SC, İNC) *6 (30)
6 row. (4 SC, İNC) *6 (36)
7 – 9 rows. 36 SC (3 rows)
Without cutting the thread, make a tie. Dial a chain of 40 ch, thread fasten and cut.
Step back from the first tie 18 sc, attach the thread and knit a chain of 40 ch, fasten the thread and cut
Ears for a hat
Knit two pieces in mint color.
1 row. 6 SC to MR
2 row. (1 SC, İNC) *3 (9)
3 row. (2 SC, İNC) *3 (12)
4 row. (3 SC, İNC) *3 (15)
5 – 9 rows. 15 SC (5 rows)
10 row. (3 SC, DEC) *3 (12)
Fold the edges of the piece together and work 6 SC. Fasten and cut the thread, leaving a long tail for sewing. On one ear, embroider spots in purple. Then fold the piece in half and sew the edges of the ears together.
Design and assembly:
• Sew the beak between rows 12 and 14, in the middle between the eyes.
• Pin the wings with pins on the sides of the body and sew. Make sure they are symmetrical.
• Sew the paws at the bottom, between 32 and 34 rows.
Beanie:
Sew the ears to the hat between rows 1 and 4, as shown in the photo.
Fasten the end of the thread inside the part and cut off.
Hooray! Your Easter Chicken is ready!