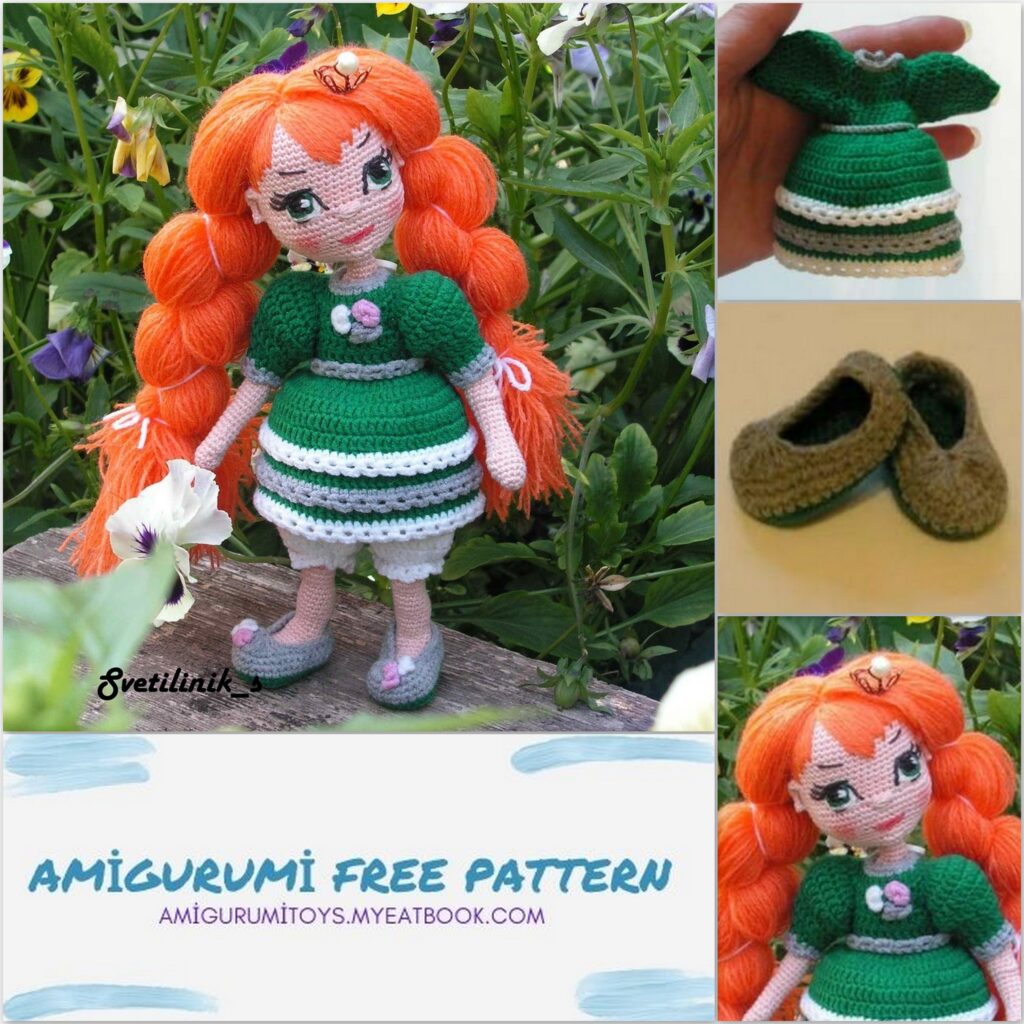
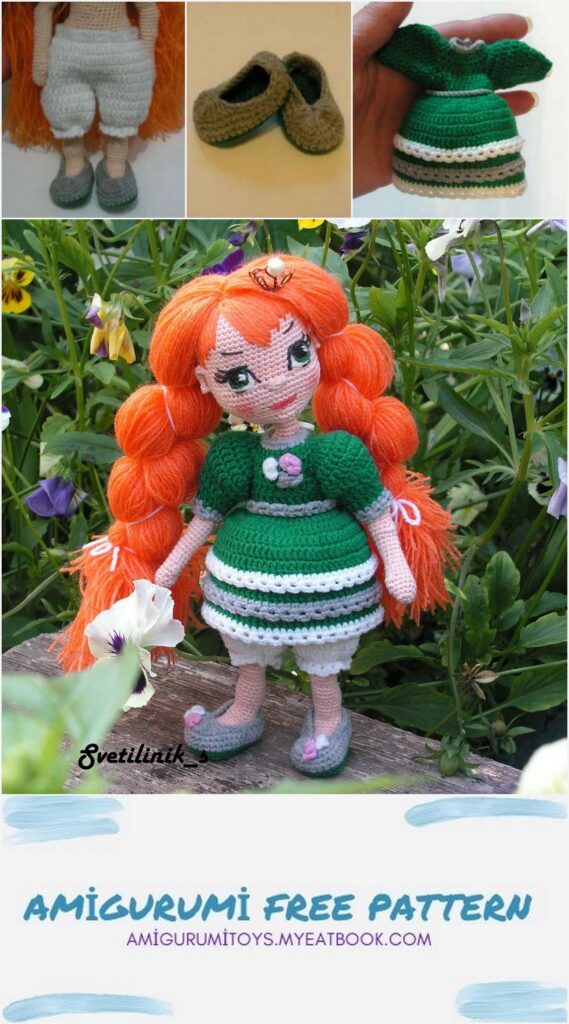
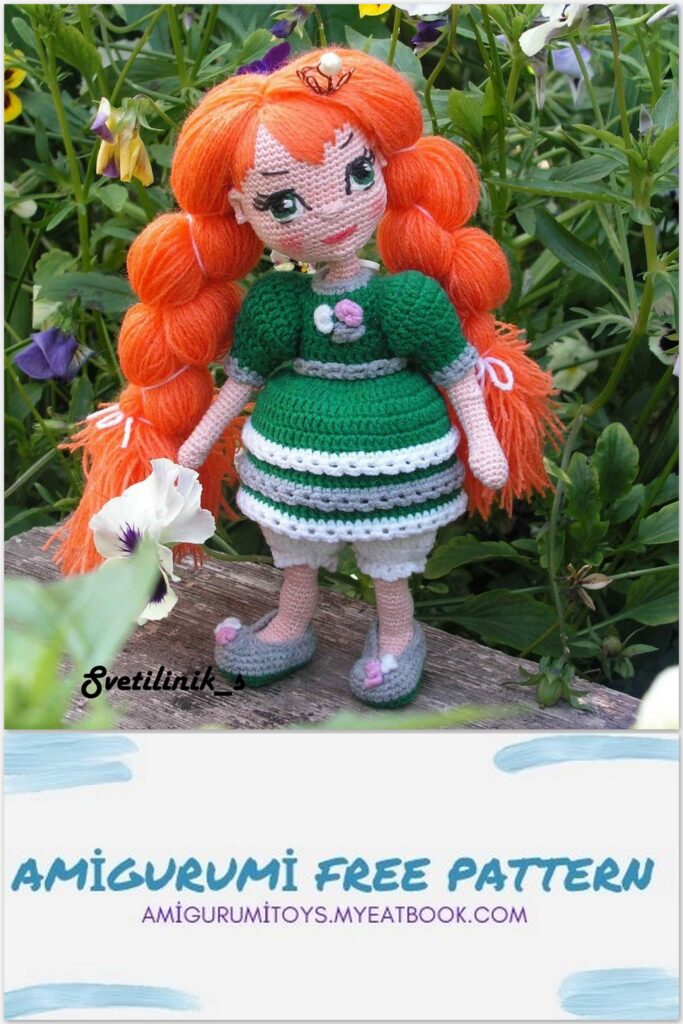
Amigurumi Princess Free Pattern
Princess in the palm of your hand
Materials used
-yarn for the body Semenovskaya Lydia (in 3 additions) or Openwork pekhorka (the growth is about 16-18 cm) flesh-colored
-hook No. 1 or No. 1.25
– synthetic winterizer for stuffing
– wire for the frame
-mouline for embroidery eyes (white, black, green)
-mouline for embroidery of a pink mouth
-hair yarn
-yarn for clothes of any colors
-PVA glue
-boom.scotch
-shales for tinting
– fading fabric marker
– elastic thread (for beading)
-beads, rhinestones and other decorations
Legend
MR – amigurumi ring
Sc – single crochet
Ch – air loop
İnc – knit 2 loops from one loop
Dec – knit 2 stitches together
c1n – column with 1 crochet
We monitor the position of the marker, in case of its deviation, we make offset loops, in they are not specified in the description.
Head:
6 Sc in MR
1st row: 6İnc = 12 Sc
2nd row: (İnc, Sc) * 6 = 18 Sc
3rd row: (İnc, 2 Sc) * 6 = 24 Sc
4th row: (İnc, 3 Sc) * 6 = 30 Sc
5 row: (İnc, 4 Sc) * 6 = 36 Sc
6 row: (İnc, 5 Sc) * 6 = 42 Sc
7 row: 42 Sc
8 row: (İnc, 6 Sc) * 6 = 48 Sc
9 row: (İnc, 7 Sc) * 6 = 54 Sc
10-15 row: 54 Sc (6 rows)
16 row: 21 Sc, Dec, 8 Sc, Dec, 21 Sc = 52 Sc
17-20 row: 52 Sc (4 rows)
21 row: 19 Sc, (İnc, Sc) * 3, 2 Sc, (Sc, İnc) * 3, 19 Sc = 58 Sc
Row 22-24: 58 Sc (3 rows)
25 row: 10 Sc, Dec, 7 Sc, (Dec, Sc) * 3, 2 Sc, (Sc, Dec) * 3, 7 Sc, Dec, 10 Sc = 50 Sc
26 row: 50 Sc
27 row: (3 Sc, Dec) * 10 = 40 Sc
28 row: 19 Sc, 2 İnc, 19 Sc = 42 Sc
Row 29: 3 Sc, Dec, 6 Sc, Dec, 16 Sc, Dec, 6 Sc, Dec, 3 Sc = 38 Sc
30 row: 4 Sc, Dec, 26 Sc, Dec, 4 Sc = 36 Sc
31 rows: 6 Sc, Dec, 7 Sc, 3 Sc together, 3 Sc together, 7 Sc, Dec, 6 Sc = 30 Sc
32 row: (3 Sc, Dec) * 6 = 24 Sc
33 row: (2 Sc, Dec) * 6 = 18 Sc
34 row: (Sc, Dec) * 6 = 12 Sc, fasten the thread and leave the tip about 25 cm for spout embroidery.
Hands (2 pcs)
6 Sc in MR
1st row: (İnc, Sc) * 3 = 9 Sc
2nd row: İnc, 3 Sc, İnc, 4 Sc = 11 Sc
3rd row: 11 Sc
4th row: 3 Sc in one Sc, 10 Sc = 13 Sc
5 row: Sc, İnc, Sc, 10 Sc = 14 Sc
6 row: 14 Sc
7 row: 2 Dec, 10 Sc = 12 Sc
8 row: 12 Sc
9th row: Dec, 10 Sc = 11 Sc
10-12 row: 11 Sc (3 rows)
We take a wire, the length of the palm multiplied by 9. In my case, the palm is 1 cm, which means wire 9 cm.We make a small loop, wrap with tape, palm slightly we stuff, then stuffing along the way of knitting.
13 row: 5 Sc, İnc, 5 Sc = 12 Sc
14 row: 12 Sc
15 row: 3 Sc, İnc, 4 Sc, İnc, 3 Sc = 14 Sc
16 row: 14 Sc
17 row: 3 Sc, Dec, 4 Sc, Dec, 3 Sc = 12 Sc
Row 18-19: 12 Sc (2 rows)
20 row: 5 Sc, 2 İnc (elbow), 5 Sc = 14 Sc
Rows 21-22: 14 Sc (2 rows)
23 row: 5 Sc, 2 Dec, 5 Sc = 12 Sc
24 row: 12 Sc
25 row: İnc, 11 Sc = 13 Sc
26 row: 6 Sc, İnc, 6 Sc = 14 Sc
27 row: 14 Sc
28 row: İnc, 13 Sc = 15 Sc
Row 29: 15 Sc
30 row: 7 Sc, İnc, 7 Sc = 16 Sc
Row 31-35: 16 Sc (5 rows)
36 row: For the right hand 14 Sc, bend the wire, 1Ch, skip 1 Sc, 1 Sc = 16 Sc
For the left hand: 1 Sc, bend the wire, 1 Ch, 1 Sc skip, 14 Sc = 16 Sc
37 row: (Dec, 6 Sc) * 2 = 14 Sc
38 row: 3 Sc, Dec, 4 Sc, Dec, 3 Sc = 12 Sc
Row 39: 6 Dec = 6 Sc
Pull off the remaining loops, leave the thread for sewing on one hand.
Cast on 11 Ch and knit around the chain starting from the second loop from the hook
Legs (2 pcs):
1st row: 9 Sc, İnc, on the second side of the chain 9 Sc = 20 Sc
2-3 row: 20 Sc (2 rows)
4th row: Dec, 18 Sc = 19 Sc
5 row: 8 Sc, Dec, 9 Sc = 18 Sc
6 row: 18 Sc
7 row: (Dec, 7 Sc) * 2 = 16 Sc
8-9 row: 16 Sc (2 rows)
Then we knit in rotary rows
10 row: turn knitting, Ch, 8 Sc turn knit, Ch, 8 Sc turn, Ch, Dec, 4 Sc, Dec turn knitting Ch, Dec, 2 Sc, Dec turn Ch, 2 Dec, turn, Ch, 2 together
11 row: continue knitting, cast on the first side 5 Sc, 8 Sc for the front loops column on the front, we collect on the second side 5 Sc, 1 Sc = 19 Sc, put a new one marker
12 row: 19 Sc
13 Sc: 4 Sc, Dec, 6 Sc, Dec, 2 Sc, Dec, 1 Sc = 16 Sc
14 Sc: Dec, 2 Sc, Dec, 4 Sc, Dec, 4 Sc = 13 Sc
15 Sc: 13 Sc
16 row: İnc, 10 Sc, İnc, 1 Sc = 15 Sc
17 row: İnc, 12 Sc, İnc, 1 Sc = 17 Sc
18 row: 17 Sc
We put the wire, in one leg, the length of the foot multiplied by 4, I have a foot length of 2.5 cm, then the wire is 10 cm, we make a small loop, wrap with tape.
The second wire is the length of the foot times 6.
We do not stuff the feet too much, then the stuffing as we knit.
19-20 row: 17 Sc (2 rows)
Row 21: Dec, 12 Sc, Dec, 1 Sc = 15 Sc
22 row: 15 Sc
23rd row: Dec, 10 Sc, Dec, 1 Sc = 13 Sc
24 row: 13 Sc
25 row: 5 Sc, 3 İnc (knee), 5 Sc = 16 Sc
Row 26-27: 16 Sc (2 rows)
28 row: 5 Sc, 3 Dec, 5 Sc = 13 Sc
29 row: 3 Sc, İnc, 5 Sc, İnc, 3 Sc = 15 Sc
30 row: 15 Sc
31 row: İnc, 14 Sc = 16 Sc
32 row: 4 Sc, İnc, 6 Sc, İnc, 4 Sc = 18 Sc
33 row: 18 Sc
34 row: (İnc, 8 Sc) * 2 = 20 Sc
35-40 row: 20 Sc (6 rows)
On one leg we tie 5 Sc, fasten the thread and cut it off, on the other we do not tie 5 Sc, leave the thread.
Torso:
We connect the legs. Cast on 5 Ch with the thread on the remaining leg, connect with the second leg (we keep them with their socks to ourselves) check that they are parallel to each other and knit on the front. In the first row, if something goes wrong, immediately correct. We fill in the course of knitting tightly, but not to a stone state.
1 row: (19 Sc, 5 Sc in Ch) * 2 = 48 Sc
2nd row: 22 Sc (not full1st row), put a marker, it goes in the middle of the back.
3rd row: 20 Sc, İnc, 5 Sc, İnc, 21 Sc = 50 Sc
4th row: 18 Sc, İnc, 11 Sc, İnc, 19 Sc = 52 Sc
5-8 row: 52 Sc (4 rows)
9 row: 12 Sc, Dec, 24 Sc, Dec, 12 Sc = 50 Sc
10 row: 50 Sc
We twist the wire of the legs together, wrap the boom. scotch tape.
11 row: 7 Sc, Dec, 9 Sc, Dec, 10 Sc, Dec, 9 Sc, Dec, 7 Sc = 46 Sc
12 row: 46 Sc
Row 13: 17 Sc, Dec, 8 Sc, Dec, 17 Sc = 44 Sc
Row 14: Dec, 14 Sc, Dec, 8 Sc, Dec, 14 Sc, Dec = 40 Sc
15 row: 40 Sc
16 row: 15 Sc, Dec, 6 Sc, Dec, 15 Sc = 38 Sc
17 row: 8 Sc, Dec, 18 Sc, Dec, 8 Sc = 36 Sc
18 row: (7 Sc, Dec) * 4 = 32 Sc
19-27 row: 32 Sc (9 rows)
28 row: 6 Sc, 2 Dec, 12 Sc, 2 Dec, 6 Sc = 28 Sc
Row 29: 5 Sc, 2 Dec, 10 Sc, 2 Dec, 5 Sc = 24 Sc
30th row: (4 Sc, Dec) * 4 = 20 Sc
31 row: (3 Sc, Dec) * 4 = 16 Sc
33 row: (2 Sc, Dec) * 4 = 12 Sc
34-37 row: 12 Sc (4 rows), fasten the thread and leave it to tighten the navel.
Eyes:
We proceed to the most crucial moment, eye embroidery. Girls, the main thing is not be afraid you will succeed. If anything, you can always dissolve the last tie and put the thread differently, or cut everything off and start over. I am embroidering floss in 3 additions. So, first we embroider the nose, for this the remaining thread we display a row below 21 rows (where we made increases for the cheeks), and focusing on chin we do 5-6 ties, I have 3 Sc between them. We draw the thread into the hole for the neck, we will sew the head with the same thread. Now take the disappearing marker and draw the outline of the upper eyelid. I am always the same
I draw, but the result is always different. We put the first point on a row higher to the left and right of the nose.
Then we go up 5 Sc, with a small slope of 1 Sc. Then straight 4 Sc and down with a slope of one column, and here, at your request, you can bring up to 5 Sc down, I bring the line down 3 Sc.
And we begin to embroider the outline with a seam back with a needle. I embroider where through the column, where through 2, as you like. And since I stuff very tightly, the pliers are very help.
Now we wrap the resulting outline
And with the same thread I immediately embroider the contour of the second eye. I embroider eyebrows, everything is here
individually, and this can be done later. I have the beginning of the eyebrow 3 Sc from the top contour, length 4 Sc and slope 2 Sc.
Now we draw the pupil, in the photo you can clearly see it, it is almost rectangular, slightly wider above and just below.
We embroider the contour of the pupil (all with the same thread), in the way that is more convenient for you will do. In general, I do everything chaotically, where I can shove a needle. Later
I straighten all the strings with a needle, and if necessary I make additional ties.
Now we take the thread of the color you want the princess’s eyes to be.
On the sides of the pupil I make one screed, on the bottom two (I mean the thickness is 1 Sc, bottom 2 Sc). You can walk 2-3 times if necessary. And these ties are the same I wrap it with a thread, like the contour of the eyelet. Do not pull the threads together.
Now I fill the sides from the pupil with a white thread, and on the bottom one screed 1 thick Sc. I wrap the strings, if necessary, I make 1-2 more ties in the same places.
The same thread. I embroider glare on the eyes, look for their correct locations.
We embroider cilia, and if you wish, you can lay with a black thread at the bottom of the eye, or closer to the cilia, but you can leave it that way.
I embroider sponges very simply. You can experiment here too))) Then I
I straighten all the strings with a needle, and then cover with pva glue, diluted with water 1: 1. This fixes and makes the eyes shine.
Ears:
Take the head and draw an outline for the ear with a disappearing marker. I start with the right ear, because here the columns are located in the right direction, and the left ear will already be easier knit, focusing on the left.
We mentally divide the head in half, one part where the hair is, the second, the face itself, up the ear – upper eye contour, 2 columns to the side, 5 Sc down, one Sc to the side.
We collect the chain directly over the head, from top to bottom.
Row 2: Ch, unfold ear and knit 4 Sl-st, 4 Sc, then additional Sc down together with the head, we fix the thread and hide it in the head. We knit the second ear in the same way.
Hair:
We cut the strings of the required length and fasten them like a fringe. Because our girl with embroidered bangs, I begin to fasten, stepping back from the row of the 2 Sc set, and lay the contour.
And since I make two braids, or two tails, I fasten it at the back like this.
Then I fill in the remaining gaps so that there are not too many hairs, this is not always good, I do it through the column.
If you don’t want embroidered bangs, you can style your hair like this.
Or we embroider bangs, focusing on the photo.
In the meantime, we collect the hair in a bun so that it does not interfere when we sew head to body.
Assembly:
First, we make a navel, I bring out the remaining thread on the neck just below the waist in the middle, back down two columns, insert the thread there and bring it out below between the legs, pull it a little, 2-3 ties will be enough. Fasten and hide the thread.
Now, take the 24-27 row, put it on and see where it looks better.
We make holes on the sides with a knitting needle.
We take the hand on which the thread remains, we withdraw it in the place where we have the tip from the wire.
We insert both hands into the body and sew m, not through and through, but picking up only cloth from the body and arms of the inner side, tighten tightly, 3-4 tie, thread fix and hide.
And we sew the head with the remaining thread from the embroidery of the nose.
Slippers:
I knit the sole and the shoe itself in different colors, the shoes are small kind of big, that’s what I intended. It is better to take yarn a little thinner than we knit a doll. If you want a smaller one, write, I’ll try to come up with another option.
So we dial 10 Ch for the sole, knit around the resulting chain starting from 2 hook loops.
1 row: 8 Sc, 3 Sc in one, on the second side of the chain 7 Sc, İnc = 20 Sc
2nd row: İnc, 7 Sc, 3 İnc, 7 Sc, 2 İnc = 26 Sc
3rd row: Sc, İnc, 7 Sc, İnc, 2 Sc, İnc, Sc, İnc, 7 Sc, İnc, 2 Sc, İnc = 32 Sc.
4th row: İnc, 11 Sc, (İnc, Sc) * 2, İnc, 11 Sc, (İnc, Sc) * 2 = 38 Sc
5 row: 38 Sc in the back of the column
We change the thread.
6 row: 38 Sc
7 row: Dec, Sc, Dec, 28 Sc, Dec, Sc, Dec = 34 Sc
8 row: 10 Sc, 14 c1n, do not tie each column, and then all the remaining loops knit together, in one column, 10 Sc, fasten the thread
The shoes are ready, it remains to decorate them.
Pantaloons:
Cast on 55 Sc with white thread, connect and knit in a circle. At the beginning of each row do 1 Ch to climb.
1st row: 55 Sc
2nd row: 55 Sc with elastic (cut off the desired length, trying on the doll, leave
tips so that you can tie knots), laying it and stretching it slightly along
knitting so that the fabric itself is pinched. We tie a knot at the end of the row and
we hide the tips, I knit these tips in the next row, so that
held and the knot had no chance to untie.
Next, we knit c1n, we do at the beginning of each row 2 Ch lifting
3-5 row: 55 c1n
6 row: 12 c1n, Dec, 26 c1n, Dec, 12 c1n = 53 c1n
7 row: 53 c1n
Row 8: Cast on 3 Ch, count out 26 Sc and connect to the opposite side
We knit the first leg in a circle, making 2 Ch lifts at the beginning of each row.
1 row: 30 c1n (adjust the number of loops)
2nd row: 13 c1n, Dec, 13 c1n, Dec = 28 c1n
3rd row: 28 c1n
4th row: 12 s1n, Dec, 12 s1n, Dec = 26 s1n
5 row: knit 26 Sc (regular posts) with elastic
6 row: you can knit any openwork row, I just knitted, 3 Ch, connected through a row and
so until the end of the row, we fix and hide the thread.
We attach the thread to the middle from the Ch chain and knit the second in the same way.
leg
Dress:
Let this description be the basis for your creations. It can be made longer with
one or 5 frills, etc.
We take the thread of the main color, cast on 28 Ch, and starting from 3 loops we knit in columns with
1 crochet in turning rows, making 2 Ch lifts at the beginning of each row.
1 row: 26 c1n
2nd row: 5 c1n, 2 İnc c1n, 12 c1n, 2 İnc c1n, 5 c1n = 30 sec 1n
3rd row: 4 c1n, 8 Ch, skip 6 columns, Sl-st 7 Sc 10 c1n, 8 Ch, 6 columns
skip with 4 knit 4 c1n = 34 c1n
4th row: 3 c1n, Dec, 24 c1n, Dec, 3 c1n = 32 c1n
5-6 row: 32 c1n
7 row: behind the back wall of the loop (1 c1n, İnc) * 16 = 48 c1n
Next, we connect and knit in a circle, also knitting in each row 2 Ch lifts
8 row: (3 c1n, İnc) * 12 = 60 c1n
9 row: 60 c1n
10 row: (5 c1n, İnc) * 10 = 70 c1n
11 row: 70 c1n
If you knit ruffles, then in the indicated rows, knit columns for
the back wall of the loop, if not, and the strapping will only be on the bottom, knit further for both
loop walls.
12 row: We knit for the back wall of the loop 70 c1n
13 row: for both loops 70 c1n
14 row: behind the back wall of the loop 70 c1n
15 row: for both loops 70 c1n, fasten the thread and hide
We knit the left sleeve, for this we turn the knitting back to ourselves and attach
thread in the corner of the armhole
We knit in a circle
1st row: 7 Sc, 9 İnc from c1n, 2 Sc = 27
2-3 row: 27 c1n
4th row: (1 c1n, Dec) * 9 = 18 c1n
5 row: 18 c1n
6 row: 8 c1n, 5 Dec c1n = 13 c1n
7 row: 13 c1n, fasten and cut the thread.
For the right sleeve, attach the thread in the front in the corner of the armhole and knit in the same way as
left sleeve.
Now we take a thread of a contrasting color and attach it by turning the dress with its back, in
the very bottom of the cutout. We will tie the shelves and the neck.
We tie one side of the 14 Sc shelf, 2 Sc in the corner, 20 Sc along the neck, then
knit 7 Ch for the buttonhole (first check if there is enough for you to
climbed, if not, increase the number of Ch) and knit Sc in the same loop. AND
knit 14 Sc on the second side of the shelf, fasten the thread and cut it off.
Girls, you can also skip this, and tie a belt separately, or if
strapping the shelves, make two loops for the buttons.
We collect a chain of 30 Ch, connect from the remaining wall of the 7th row and knit along these
eyelets, 30 Ch, fasten the thread and cut. You can tie on the front
additionally some kind of openwork, or apron.
Now we make a strapping along the hem. At the same time, we keep the dress with the collar to ourselves,
we pick up a thread of a contrasting color to the remaining loop of the 12th row
1st row: Sc
2nd row: 3 Ch, skip one sb, 1 Sc, 3 Ch, skip one column and so on until end of row In the same way we make 3 more frills. You can also knit a collar and make strapping on sleeves. We dress our princess, plait 2 braids, glue the crown.
Be sure to blush, and if you wish, tony we slightly knees, elbows.
