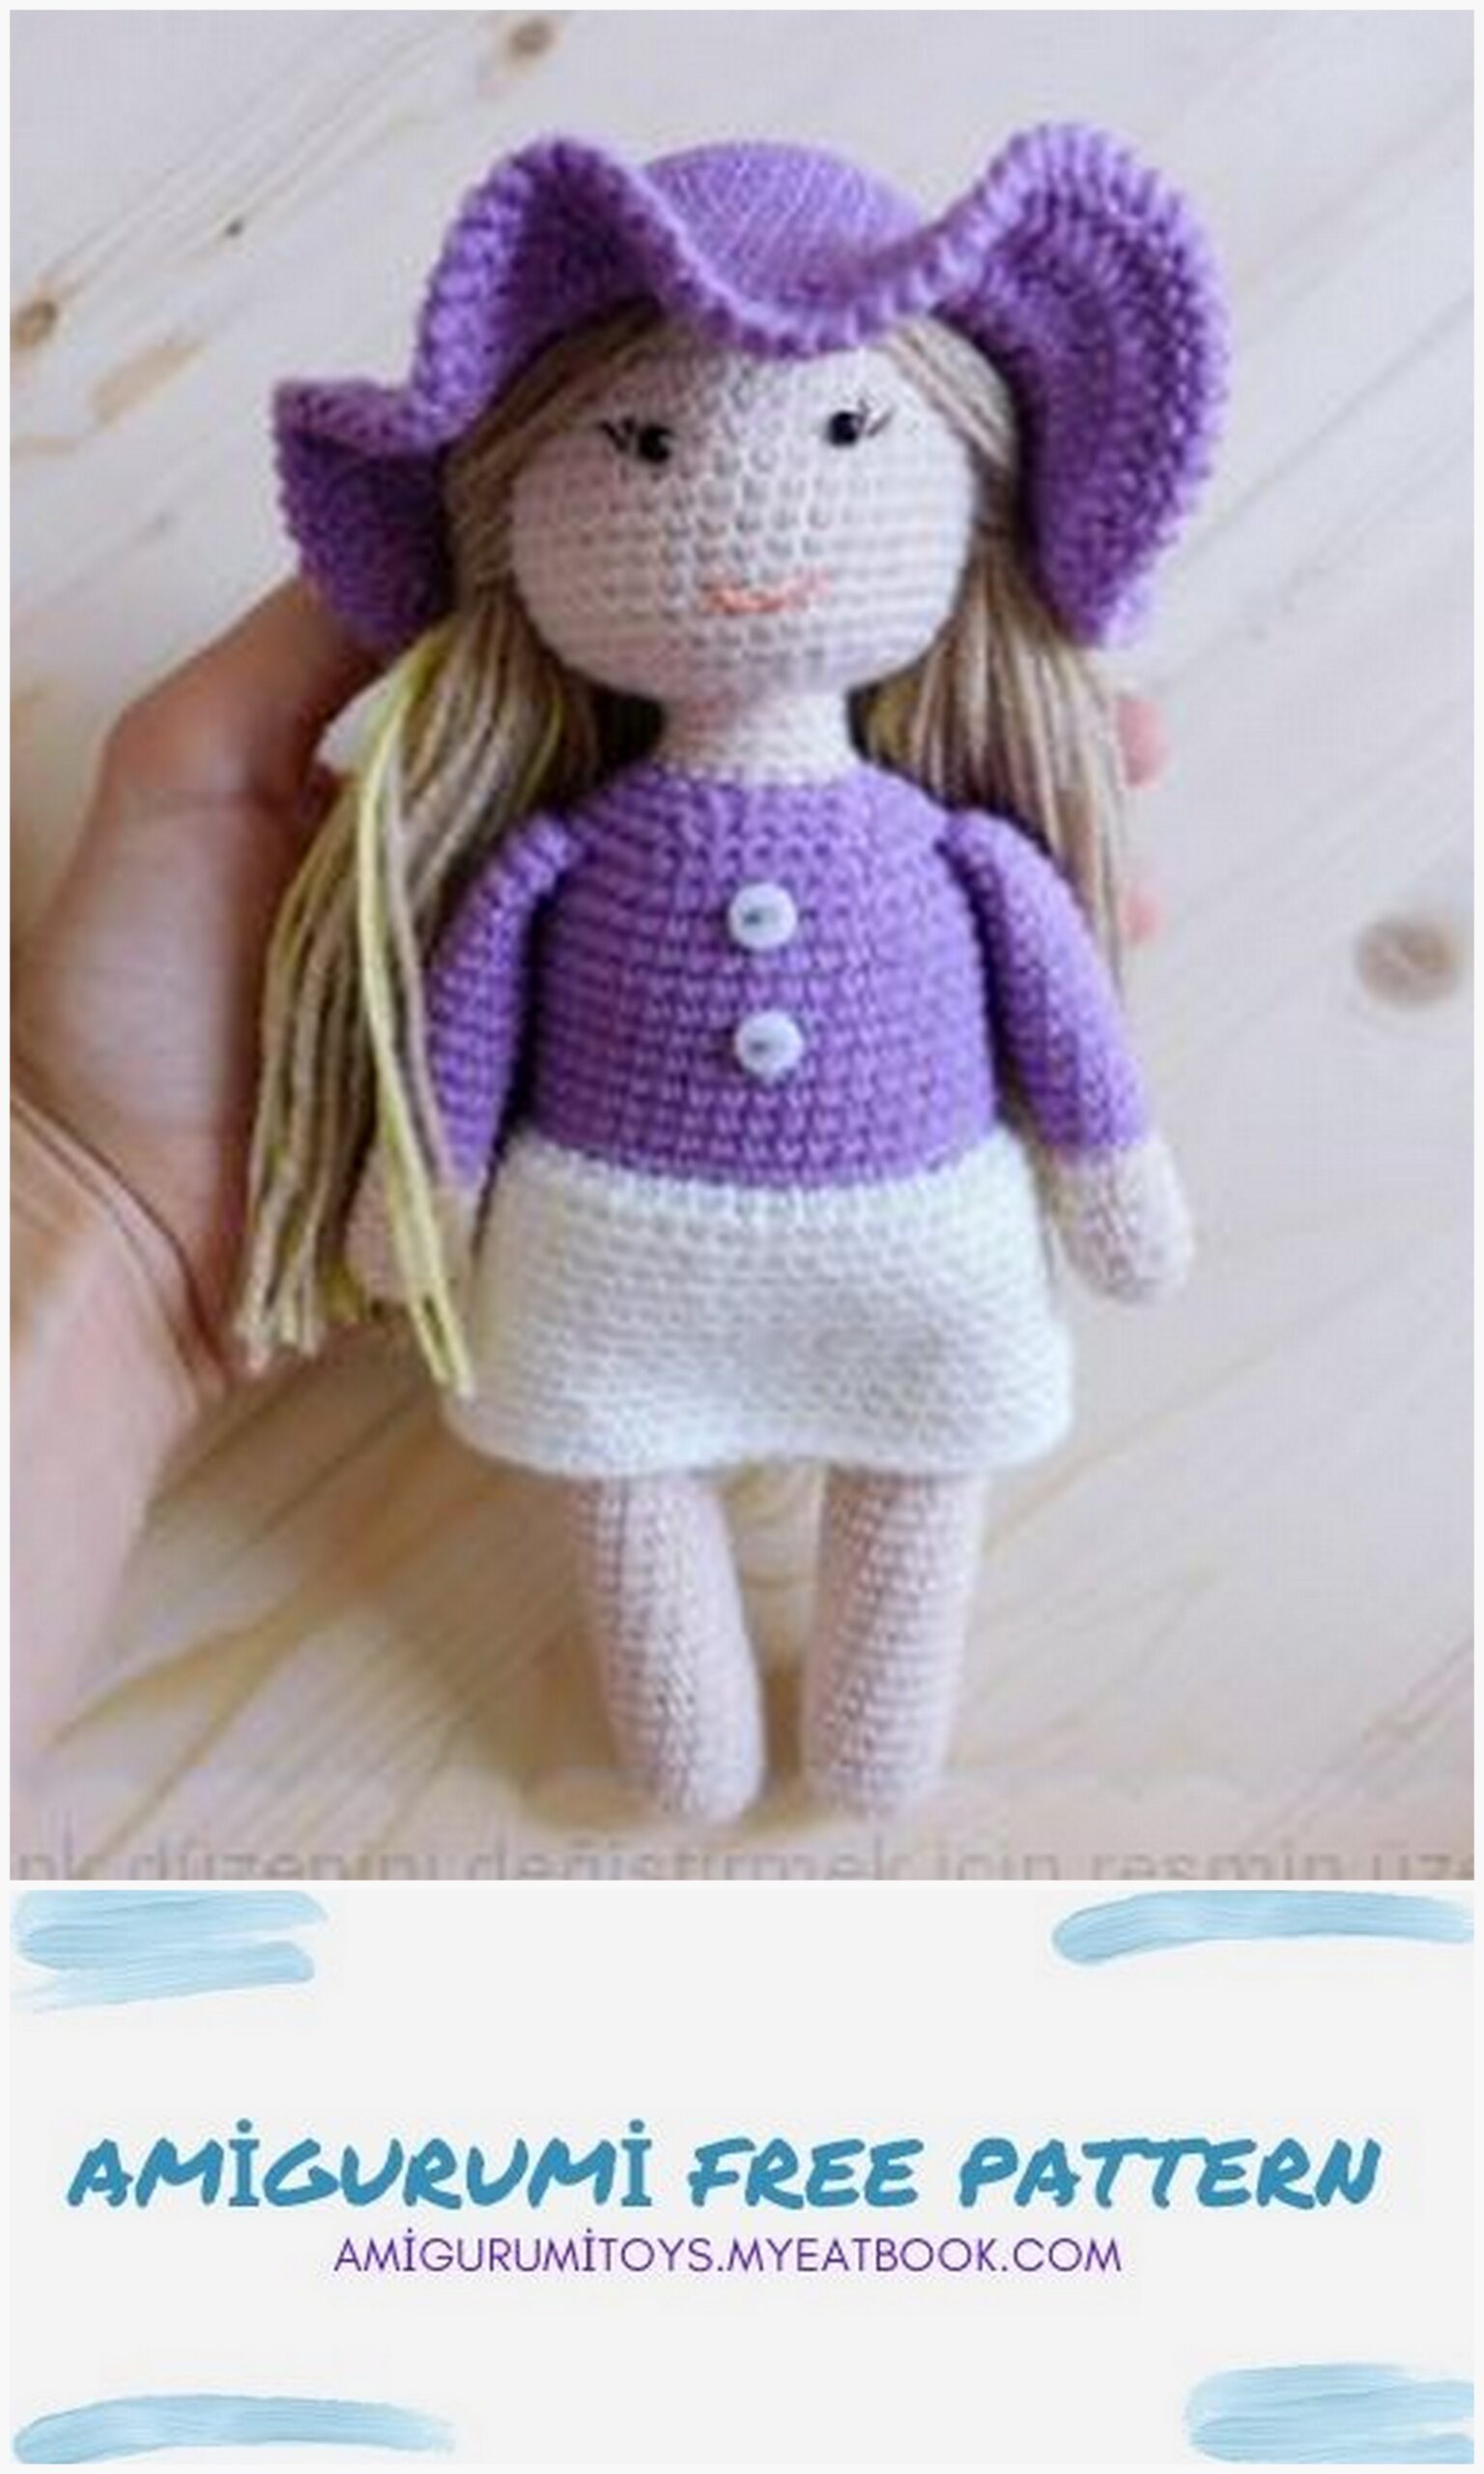
Amigurumi Doll Alice Doll Alice
PLEASANT KNITTING!
Necessary materials:
Filler for toys (synthetic winterizer, synthetic fluff, or holofiber).
Knitting yarn (of any composition, preferably semi-cotton).
Beads for the eyes.
Multicolored small buttons for decorating dolls’ clothes.
Hook number 1.5 – 2.0.
Legend:
SC – single crochet
İNC – increase, two single crochet, knitted in one loop
DEC – Decrease – two single crochets knitted together
DC – column with one crochet
SL-ST – connecting post
CH – air lifting loop
2CH – two air lifting loops
We begin to knit the doll from the left leg.

Left leg.
1.6 SC in a ring
2 p. İNC x 6 times = 12 SC
3 p. (3 SC, İNC) x 3 times = 15 SC
4 – 23 pp. (20 rows) 15 SC
24 p. (4 SC, İNC) x 3 times = 18 SC
25 p. 18 SC. At the end of the row we knit CH, cut the thread and pull it through CH, thereby
we fix it.
Right leg.
1.6 SC in a ring
2 p. İNC x 6 times = 12 SC
3 p. (3 SC, İNC) x 3 times = 15 SC
4 – 23 pp. (20 rows) 15 SC
24 p. (4 SC, İNC) x 3 times = 18 SC
25 p. 18 SC.
Connection of the legs.
26 p. We knit 2 CH from the right leg, insert the hook into the place of knitting of the extreme SC along
left leg of the 25th p. and knit 1 SC, 18 SC along the left leg, 2 SC along the chain from CH, 1 SC in place
tying the extreme SC on the right leg of the 25th row, 18 SC on the right leg, 2 SC on
chain of CH = 42 SC
Please note that the beginning of the row is located at the back of the toy.
27 – 34 pp. (8 rows) 42 SC
Change the base color of the thread to the color of the clothes.
35 rub. 42 SC
36 rub. 42 SC behind the back wall of the hinges of the previous row
37 – 47 pp. (11 rows) 42 SC
48 p. (5 SC, DEC) x 6 times = 36 SC
49 p. (4 SC, DEC) x 6 times = 30 SC
50 p. (3 SC, DEC) x 6 times = 24 SC
51 p. (2 SC, DEC) x 6 times = 18 SC
Next, we knit the neck of the doll. Change the color of the thread to the main (flesh) one.
52 – 55 pp. (4 rows) 18 SC


Head.
We knit in a separate piece, starting from the top of the head.
1.6 SC in a ring
2 p. İNC x 6 times = 12 SC
3 p. (1 SC, İNC) x 6 times = 18 SC
4 p. (2 SC, İNC) x 6 times = 24 SC
5 p. (3 SC, İNC) x 6 times = 30 SC
6 p. (4 SC, İNC) x 6 times = 36 SC
7 p. (5 SC, İNC) x 6 times = 42 SC
8 – 18 pp. (11 rows) 42 SC
19 p. (5 SC, DEC) x 6 times = 36 SC
20 p. (4 SC, DEC) x 6 times = 30 SC
21 p. (3 SC, DEC) x 6 times = 24 SC
22 p. (2 SC, DEC) x 6 times = 18 SC
At the end of the 22nd row we knit SL-ST, CH, cut the thread, pull it through CH, fasten it.
Insert 2-3 sticks into the neck for a stronger fixation of the head. Sew on the head.
Pens.
1r. 6 SC in a ring
2p. 1 SC, İNC x 3 times = 9 SC
3p. 2 SC, İNC x 3 times = 12 SC
4 -9 pp. (6 rows) 12 SC
Change the color of the thread to the color of the clothes.
10 – 22 pp. (13 rows) 12 SC
23 p. Fold the piece in half at the top and knit 5 SC, inserting the hook
simultaneously in two halves.
Leave the long end of the thread for sewing on the part.
Skirt.
We turn the doll over.
We finish each row with SL-ST. Each new row starts with 1 CH.
1 p. 42 SC for the front wall of the 35th row
2 p. (5 SC, İNC) x 7 times = 49 SC
3 – 12 (12 rows) 49 SC
Hat.
1.6 SC in a ring
2 p. İNC x 6 times = 12 SC
3 p. (1 SC, İNC) x 6 times = 18 SC
4 p. (2 SC, İNC) x 6 times = 24 SC
5 p. (SC, İNC) x 12 times = 36 SC
6 p. (5 SC, İNC) x 6 times = 42 SC
7 p. 42 SC for the back wall of the hinges of the previous row
8 – 10 pp. (3 rows) 42 SC
11 p. (13 SC, İNC) x 3 times = 45 SC
12 p. 45 SC
13 p. (14 SC, İNC) x 3 times = 48 SC
14 p. 48 SC
15 p. (15 SC, İNC) x 3 times = 51 SC
16 p. 51 SC. Finish Row with SL-ST. Start next row at 2 CH.
17 p. İNC in each loop, knit with DC (51 İNC) = 102 DC. Finish Row with SL-ST. To begin
next row with 2 CH.
18 p. 102 DC
19 rub. tie the edges of the cap with a “crayfish step” pattern.
Hair.
1 p. We fasten 6 strands in the first row of the head (one strand in each loop).
2 p. We fasten 18 strands in the third row of the head (one strand in each loop).
3 p. We fasten 30 strands in the fifth row of the head (one strand in each loop).
Next, we fasten the strands in the back of the head, one strand through the loop and through a row (4 rows).
We frame the hair on the sides (in each row).
Assembly. Registration.
Sew on the handles between the 47th and 48th rows.
Sew on the eyes between the 10th and 11th rows.
The distance between the beads is 6 loops.
We embroider the mouth in the loops of the 16th and 17th rows (or 6 rows below the level of the eyelet attachment).
We embroider cilia.
We sew buttons on clothes.
Thank you for tying the doll according to my description!