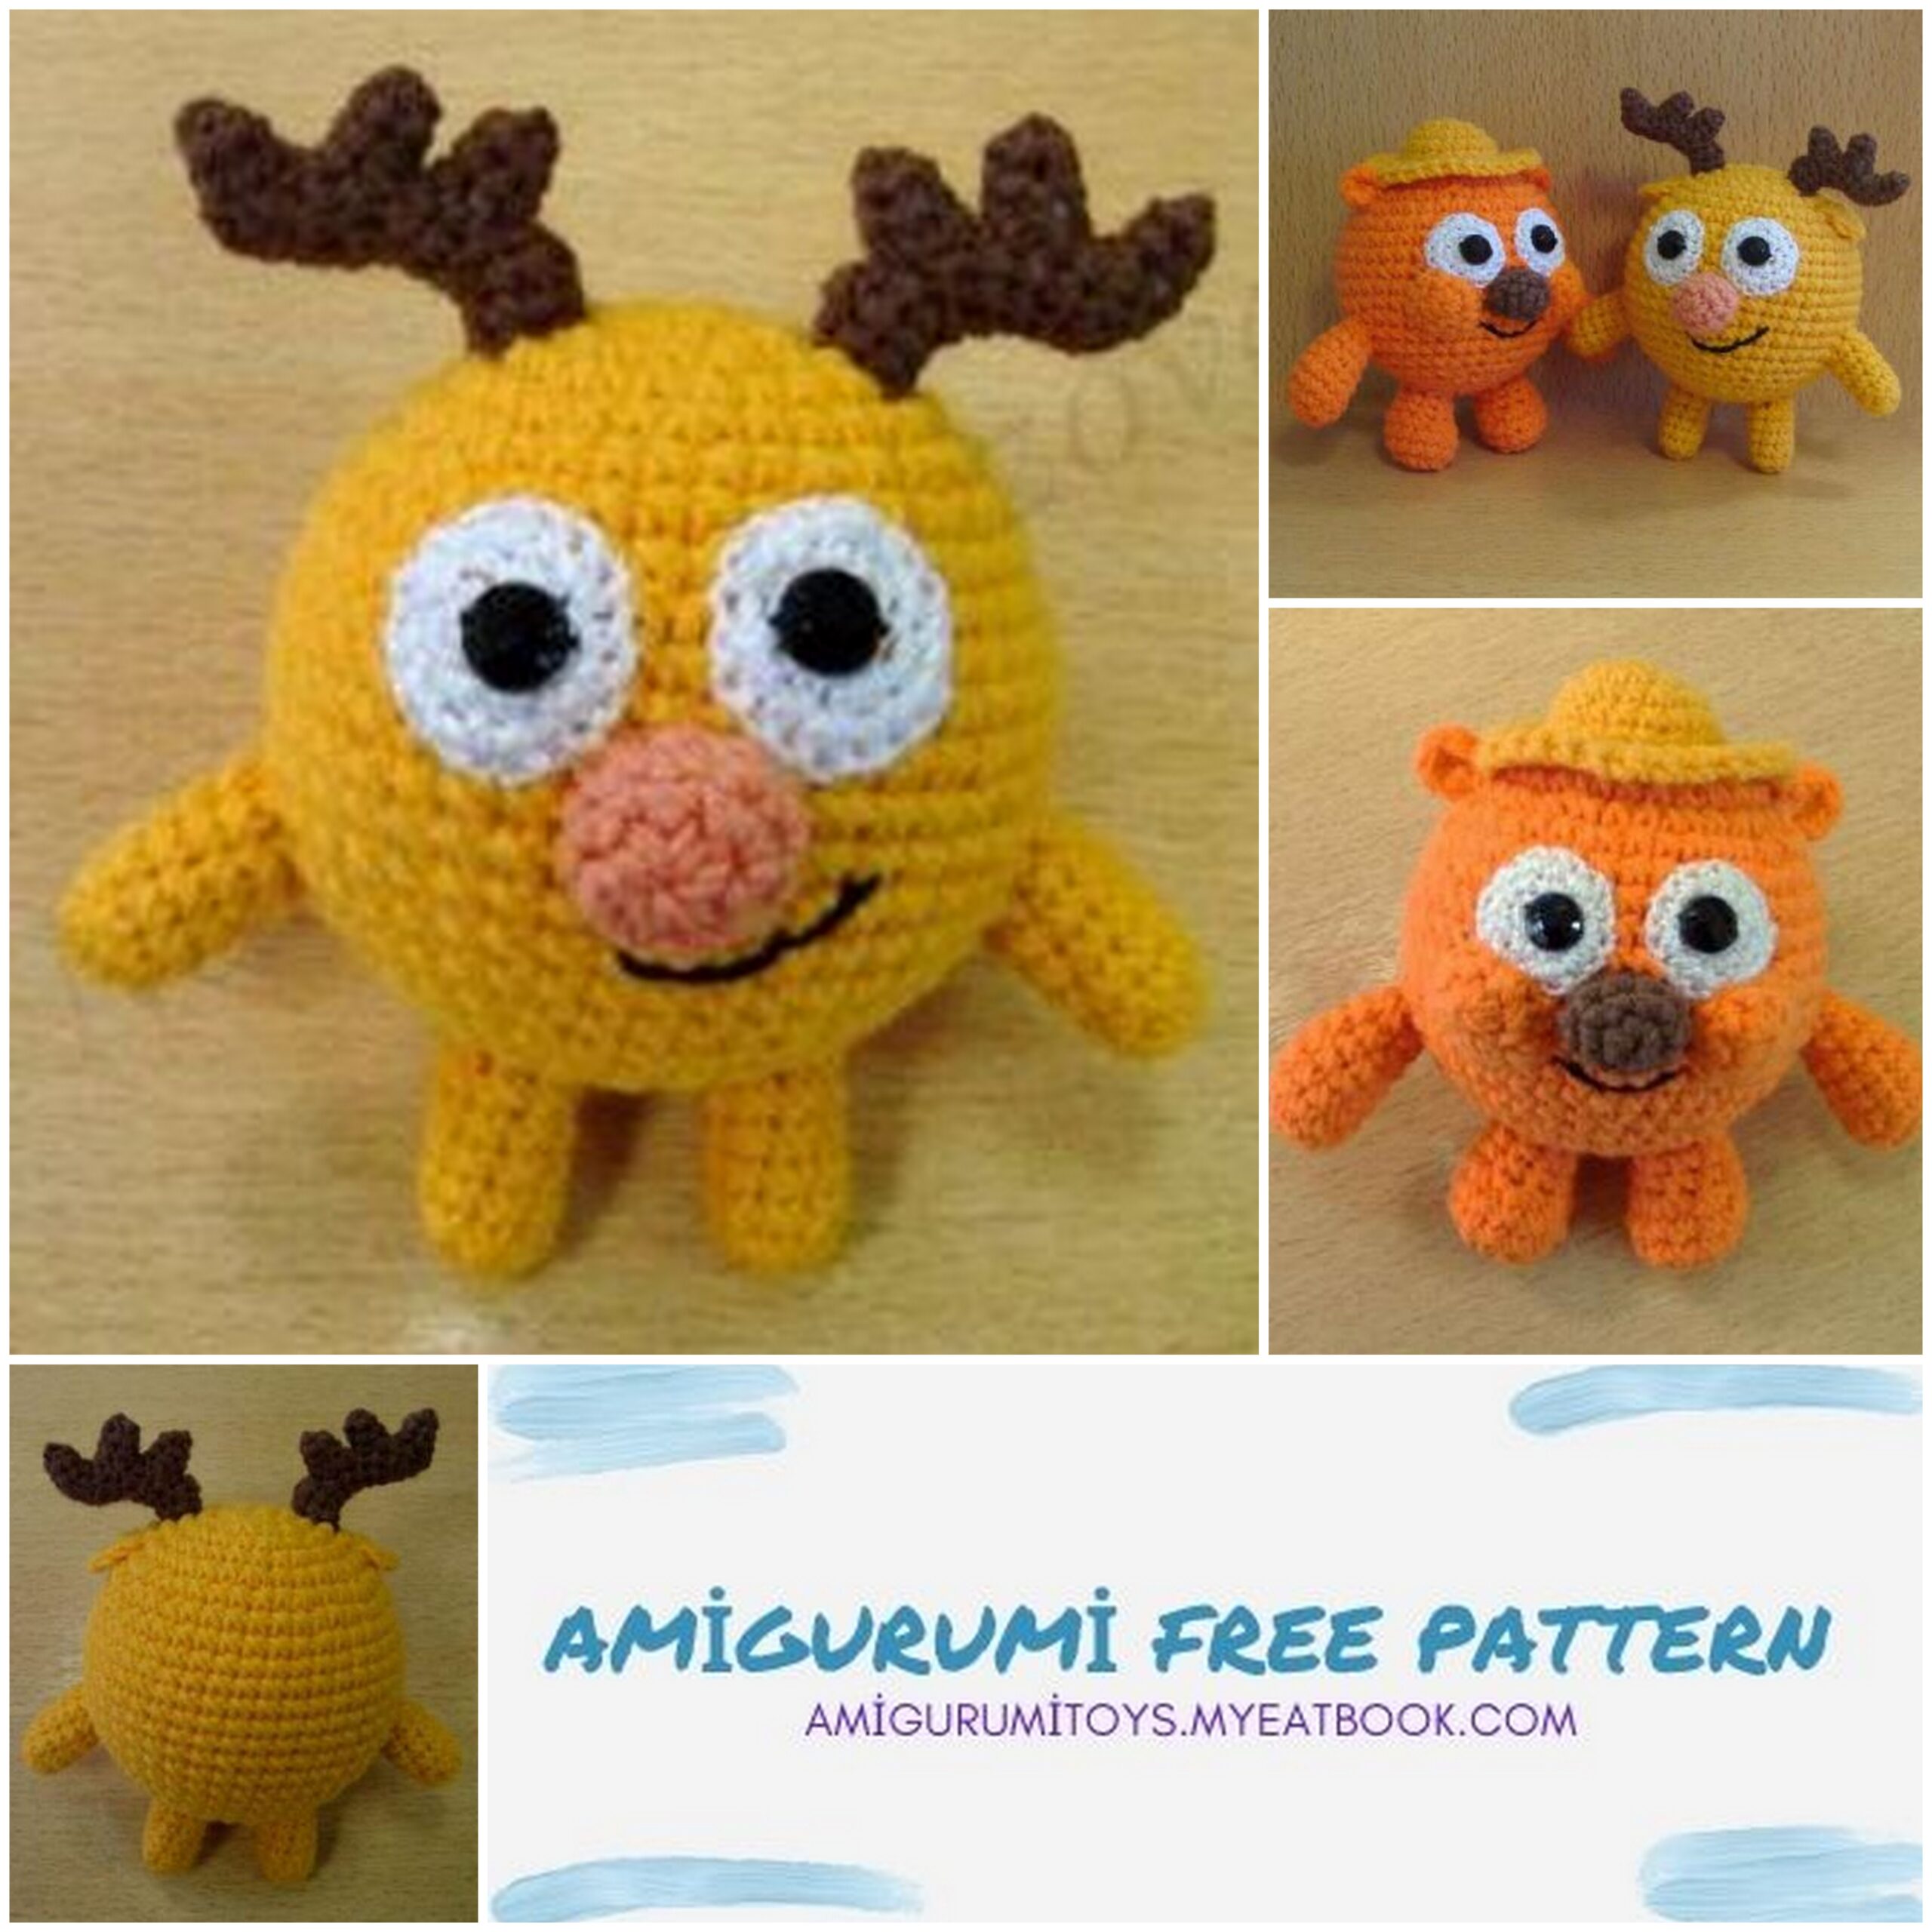
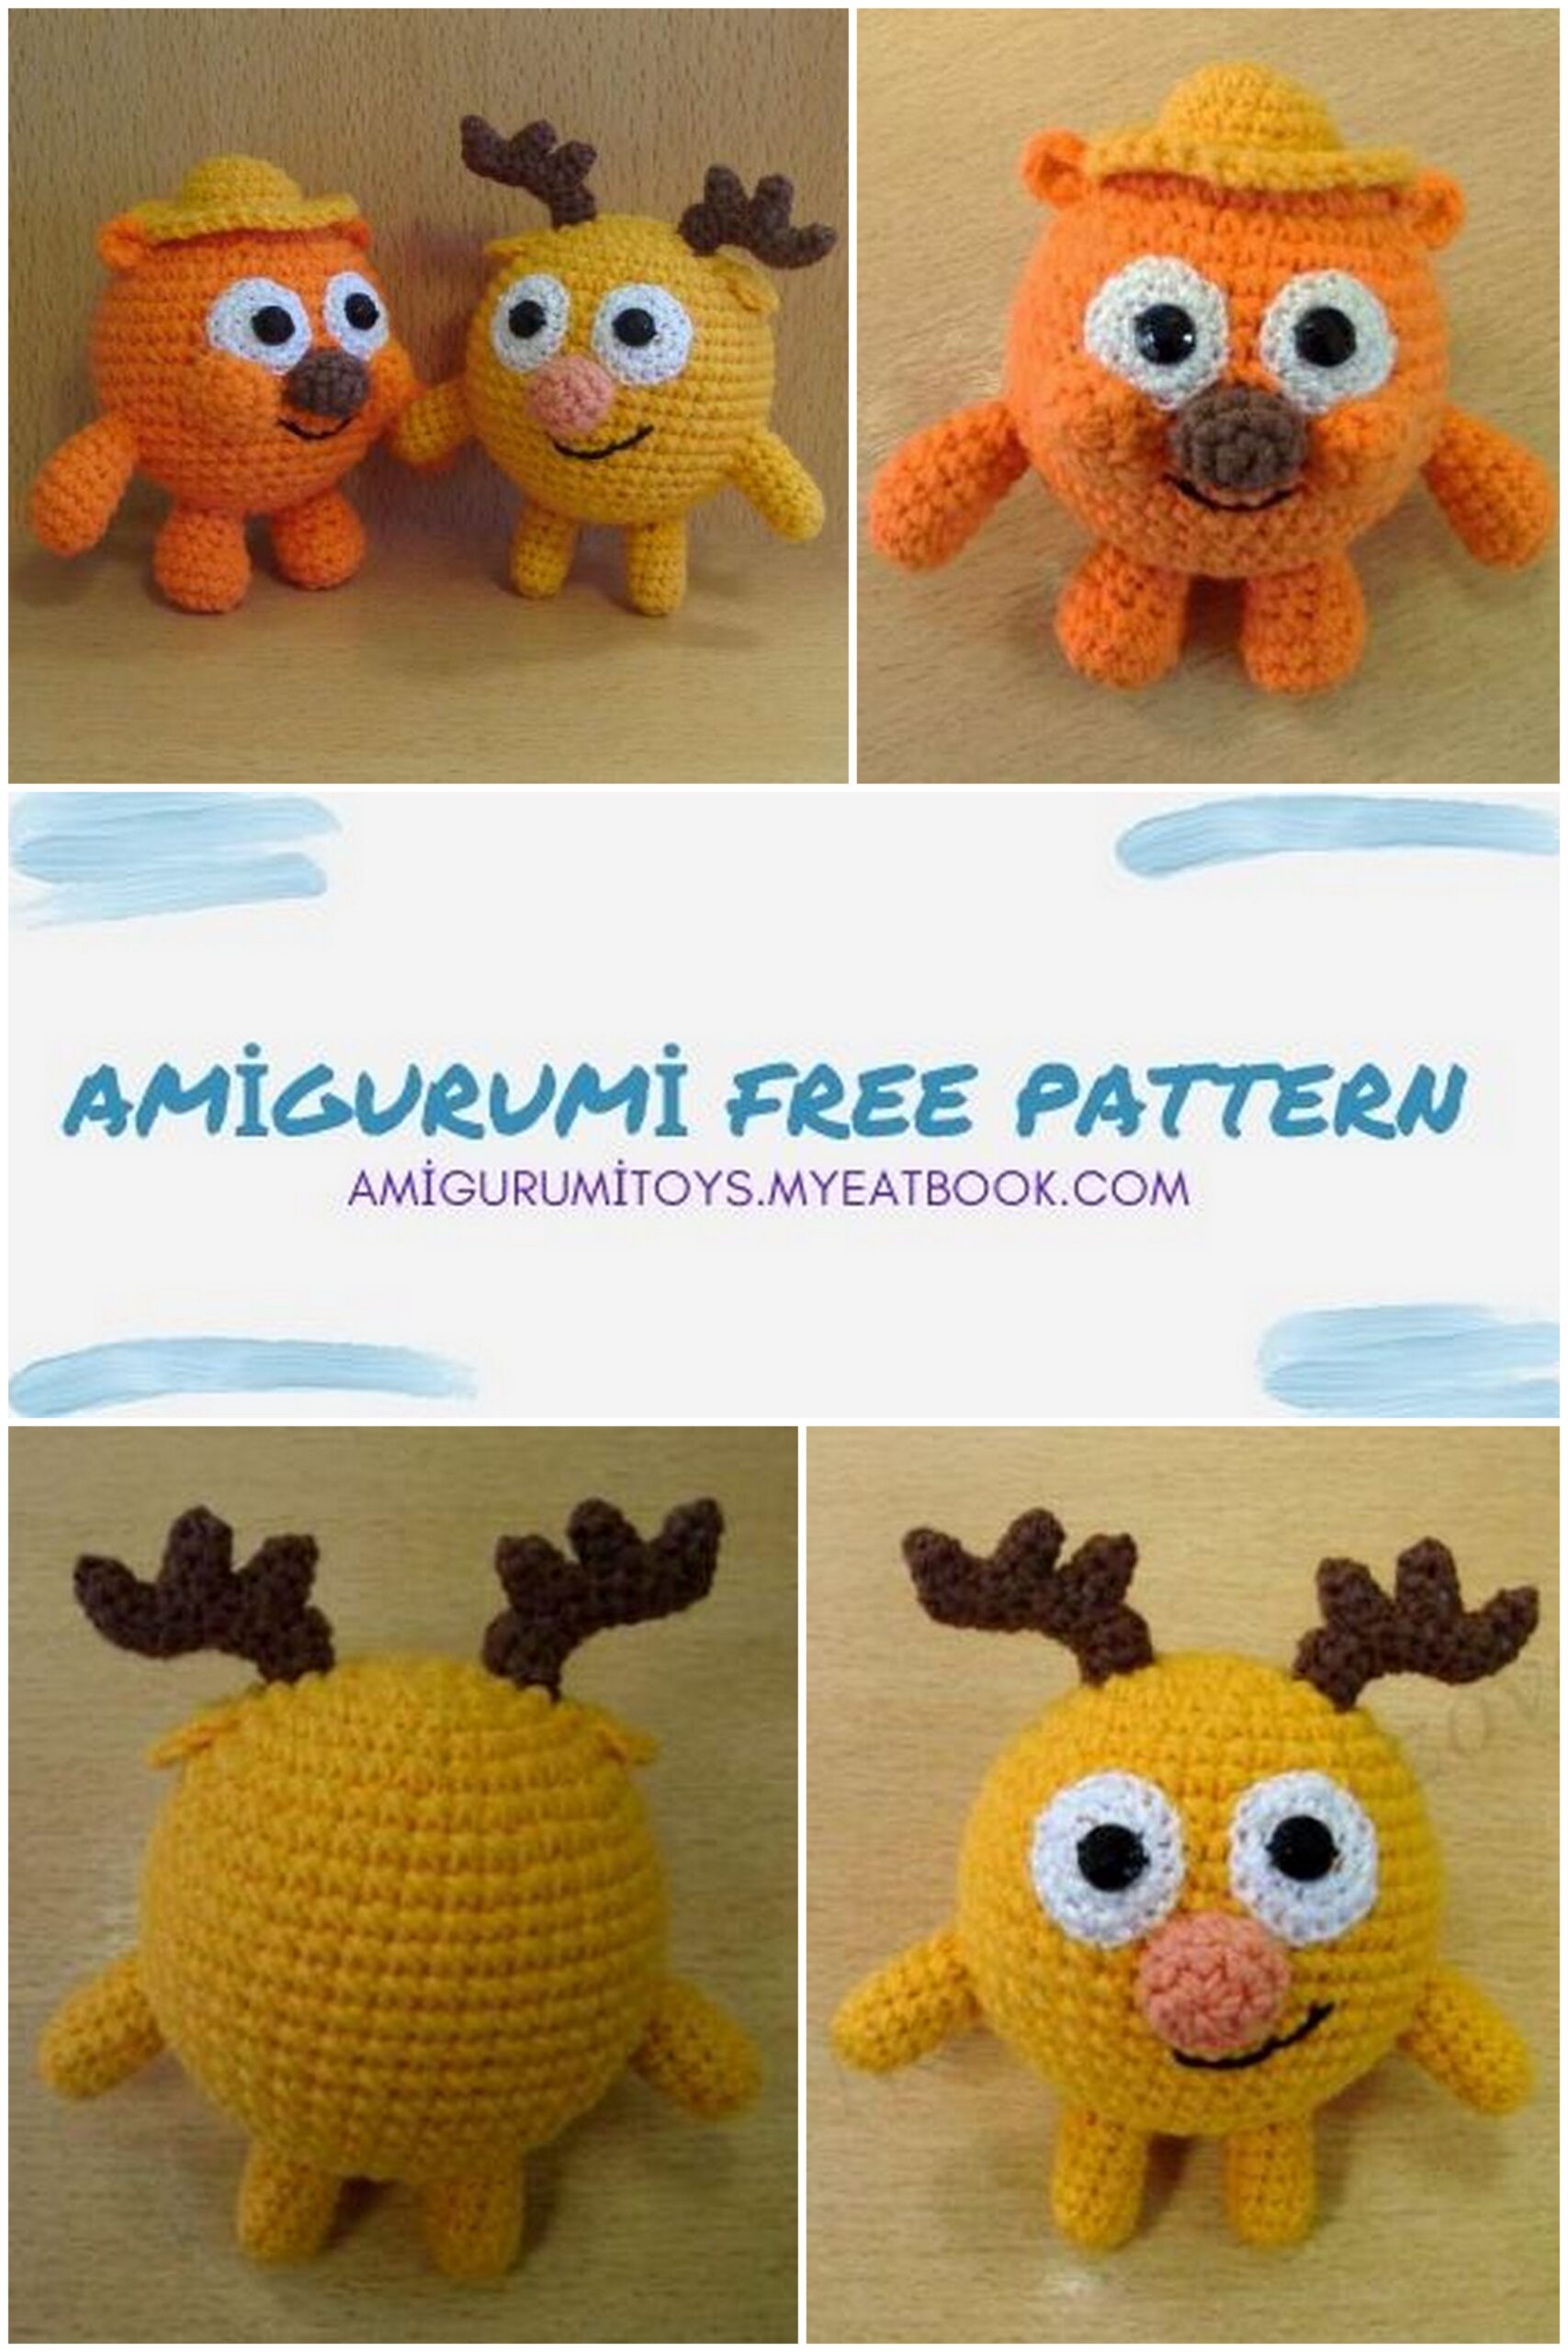
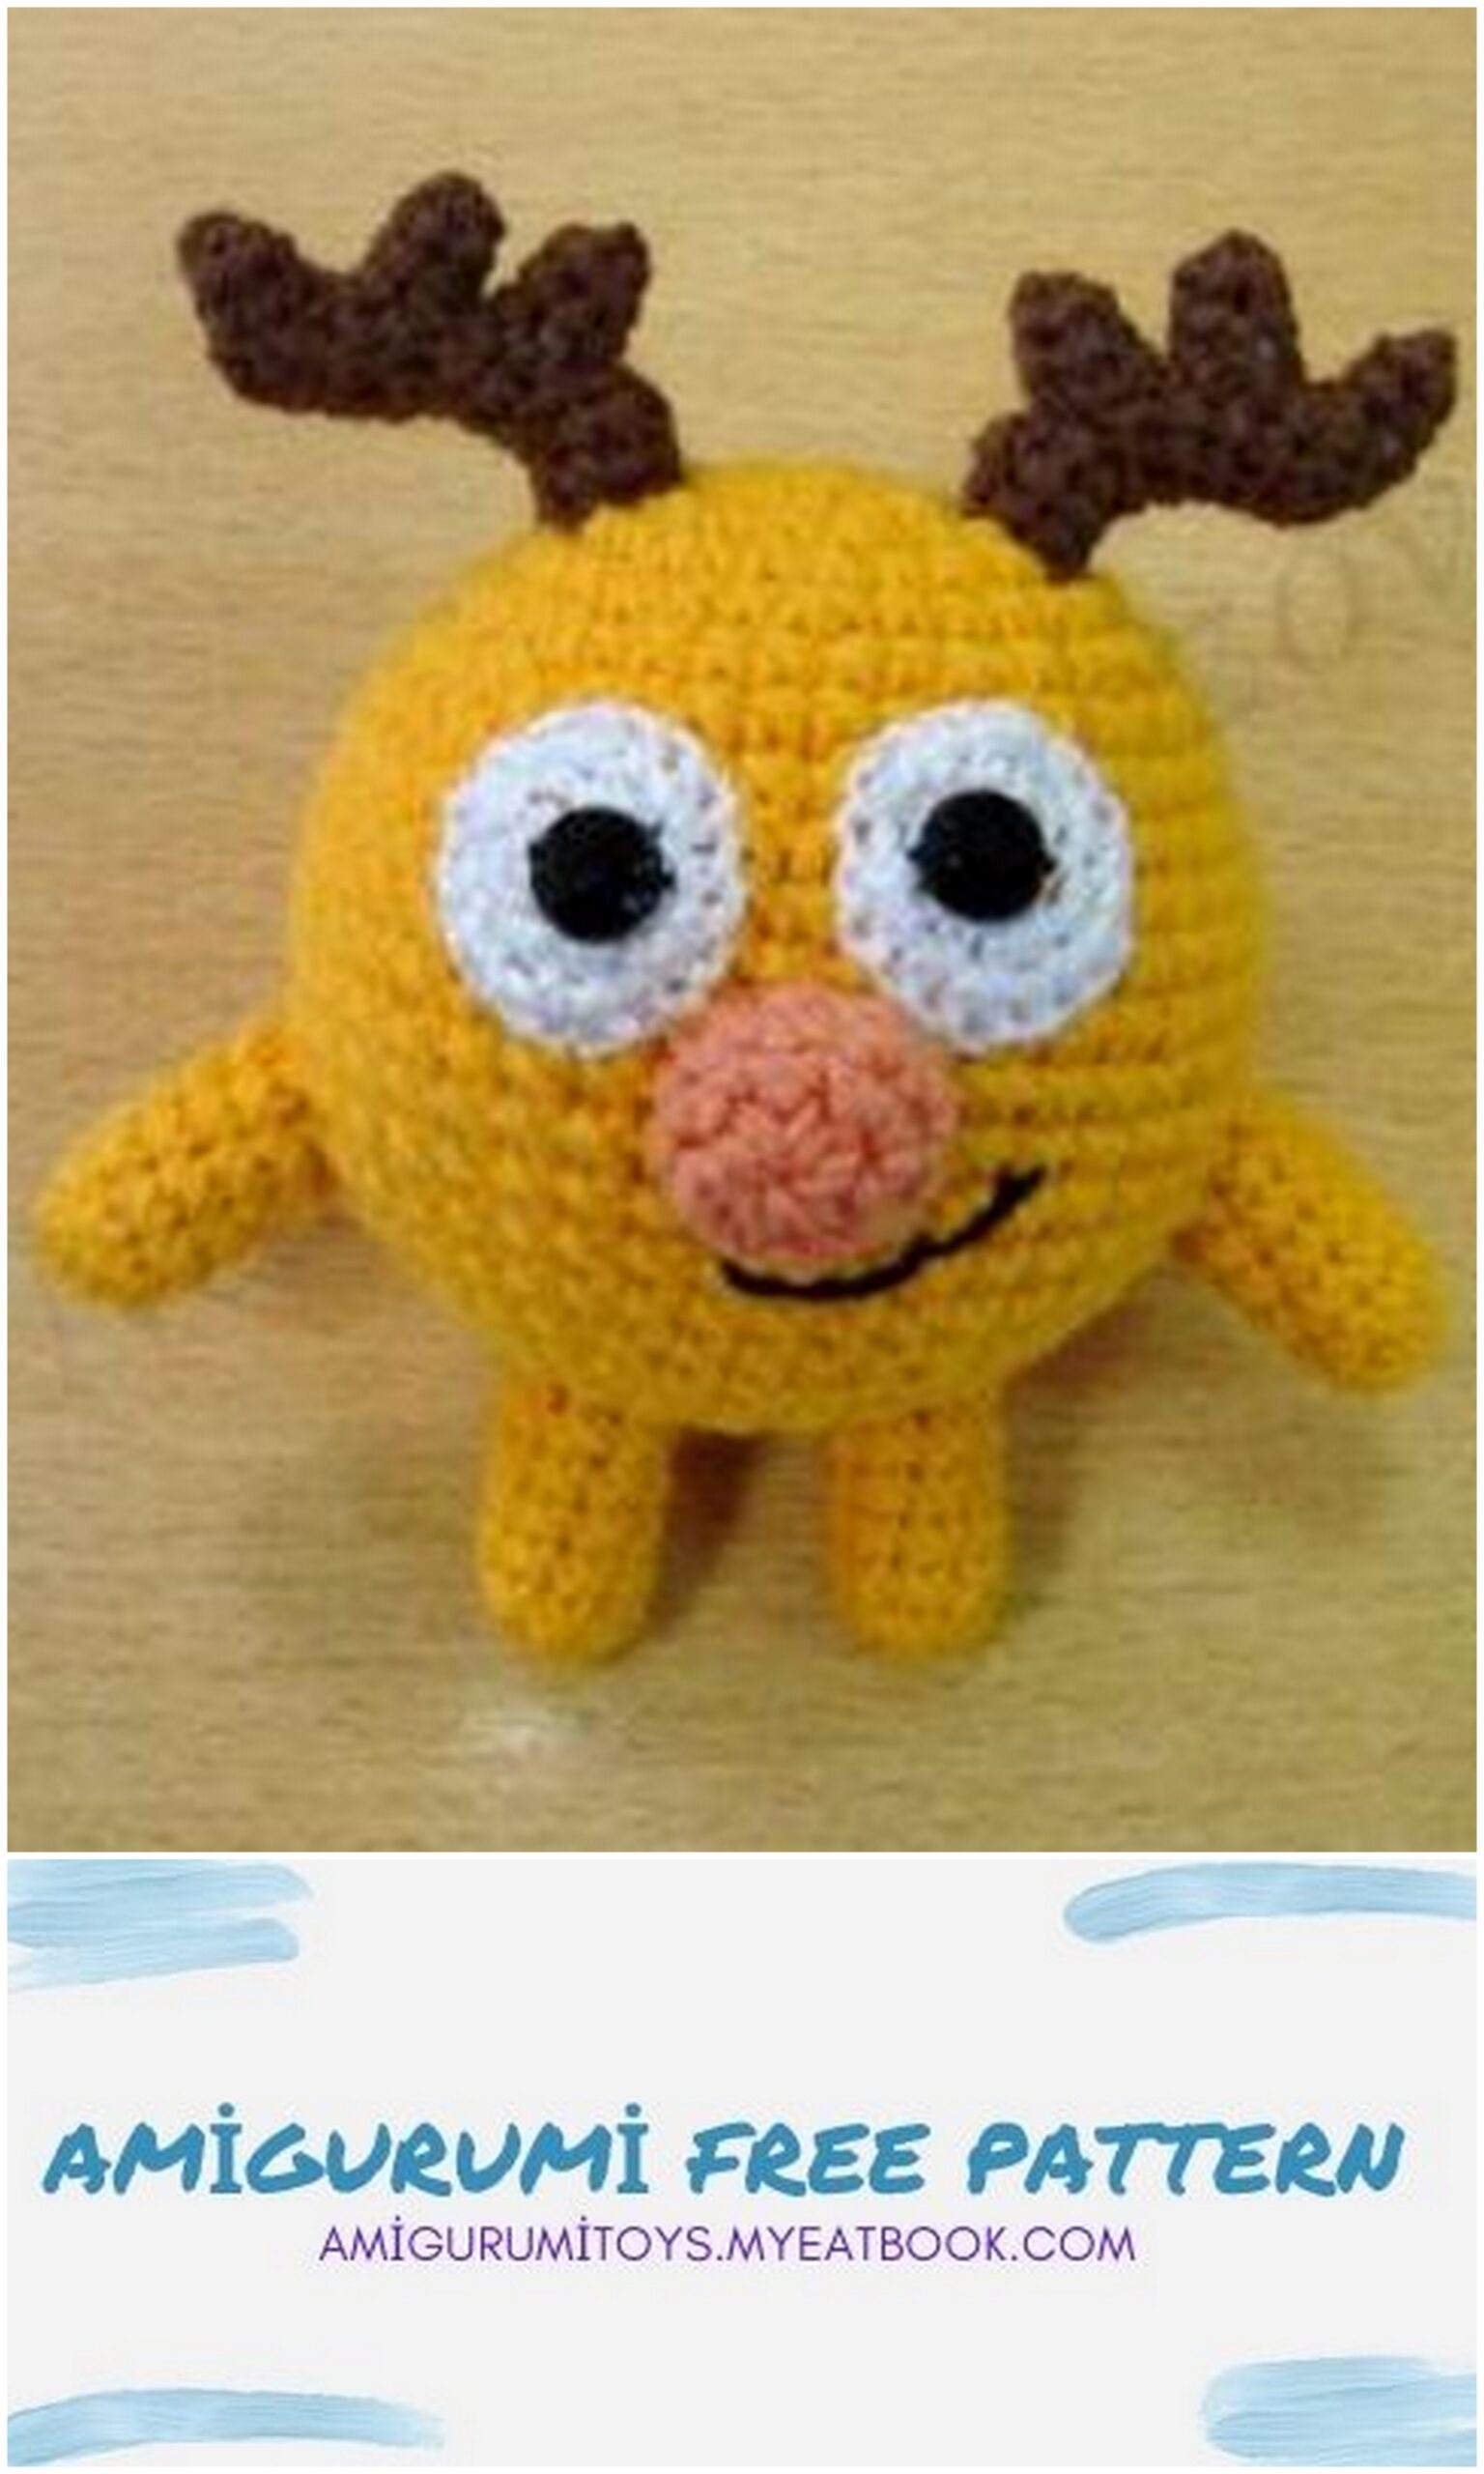
Height 15-20 cm. Amigurumi Kopatych and Losyash Free Pattern
Tools and materials:
Yarn ALIZE Cotton Gold, 55% cotton, 45% acrylic, 330 m / 100 g. YarnArt Jeans is an analogue of the indicated yarn.
Kopatych: orange, yellow, brown;
Losyash: yellow, orange, brown.
Slightly thinner white yarn for the eyes, in this version of VITA cotton Soso, you can use a different one (at least 200 m / 50 g).
Mouline thread is black.
Foam balls d = 6 cm by the number of smeshariki.
Black sewn on rhinestones d = 8 mm for pupils.
Hook – 2 or 2.5 mm; 1.25 – 1.5 mm.
The filler is holofiber.
Legend:
CH () – air loop
SC () – single crochet
SL-ST () – connecting post
İNC () – increase
DEC () – decrease
İNC 3in1 () – 3 single crochet, knitted in the same column of the previous row.All details, unless otherwise indicated, are knitted in a spiral
KOPATYCH
Head – body (orange):
1 p: 6 SC in the amigurumi ring
2 p: 6 İNC = 12 SC
3 p: (İNC, 1 SC) * 6 = 18 SC
4 p: (2 SC, İNC) * 6 = 24 SC
5 p: (İNC, 3 SC) * 6 = 30 SC
6 p: (3 SC, İNC, 1 SC) * 6 = 36 SC
7 p: (İNC, 5 SC) * 6 = 42 SC
8-17 RR: 42 SC
() * 6 – repeat 6 times
We insert the ball. About 1/4 of the ball should remain uncovered and the knitting should wrap around the ball quite tightly. Depending on what happened, you can correct even rows (± 1-2)
18 p: (3 SC, DEC, 2 SC) * 6 = 36 SC
19 p: (DEC, 4 SC) * 6 = 30 SC
20 p: (2 SC, DEC, 1 SC) * 6 = 24 SC
21 p: (DEC, 2 SC) * 6 = 18 SC
22 p: (1 SC, DEC) * 6 = 12 SC
23 p: 6 DEC = 6 SC
Cut the thread, pass the end through all the remaining posts and tighten the hole.

Eyes (white), 2 pcs:
We take thin yarn, hook 1.25-1.5 mm
1 p: 6 SC in the amigurumi ring
2 p: 6 İNC = 12 SC
3 p: (İNC, 1 SC) * 6 = 18 SC
We make SL-ST, cut the thread, leaving the end for sewing, fasten.
Sew on the rhinestones, stepping back 1 row from the edge of the eye to the center. Sew on with a bobbin thread in half, after each stitch, the thread is tightly, but carefully pull it so that the strass fits snugly.
Sew the eyes at a distance of 7 rows from the crown (initial ring), the distance between the eyes is 1 column, the pupils are mowed inward.
Nose (brown):
1 p: 6 SC in the amigurumi ring
2 p: (2 İNC, 1 SC) * 2 = 10 SC
3 p: 9 SC, SL-ST
We cut the thread, leaving the end for sewing, fasten it.
We fill the nose, sew with an oval close to the eyes.
Cheeks (orange), 2 pcs:
1 p: 6 SC in the amigurumi ring
2 p: 3 İNC, 3 SC = 9 SC
3 p: 1 SC, İNC, 2 SC, İNC, SL-ST – incomplete row Cut the thread, leaving the end for sewing, fix.
We sew three columns, which, after the connecting one, are sewn in an even strip, stopping slightly obliquely over the eye. Sew the rest in a circle, slightly stretching.
We do not sew until the end, when a small hole remains, we fill the cheek (not very tightly, to shape it), then we finish sewing.
Black floss in 3 folds with chain stitch embroider a smile with small stitches.
The thread can be attached to one of the corners of the mouth.
Legs (orange), 2 pcs:
1 p: 7 SC in the amigurumi ring
2 p: 7 İNC = 14 SC
3-4 pp: 14 SC
5 p: 3 DEC, 8 SC = 11 SC
6 p: 6 SC, DEC, 3 SC = 10 SC
7 p: 10 SC
We make SL-ST, cut the thread, leaving the end for sewing, fasten.
We stuff the legs, sew at the bottom, around the place where the body is pulled together, the foot “looks” a little clubfoot inside.
Hands (orange), 2 pcs:
1 p: 6 SC in the amigurumi ring
2 p: 6 İNC = 12 SC
3-4 pp: 12 SC
5 p: (DEC, 4 SC) * 2 = 10 SC
6 p: 10 SC
7 p: (2 SC, DEC, 1 SC) * 2 = 8 SC
8 p: (DEC, 2 SC) * 2 = 6 SC
We make SL-ST, cut the thread, leaving the end for sewing, fasten.
We stuff the handles and sew on the sides at the level of the middle of the nose.
Hat (yellow):
1 p: 6 SC in the amigurumi ring
2 p: 6 İNC = 12 SC
3 p: (İNC, 1 SC) * 6 = 18 SC
4-5 pp: 18 SC
6 p: we knit by the front wall (2 SC, İNC) * 6 = 24 SC
7 p: (İNC, 3 SC) * 6 = 30 SC
8 p: (1 SC, CH) * 30
We make SL-ST, cut the thread, leaving the end for sewing, fasten.
The end of the thread on the wrong side is taken to the ring from the remaining back walls of the loops. We will sew the hat to the head precisely for these back walls.
Sew on the top of the head. We do not sew until the end, when a small hole remains, we fill the upper part, then we finish sewing.
Ears (orange), 2 pcs:
1 p: 5 SC in the amigurumi ring, tighten the ring, but do not close it, make CH, unfold the knitting.
2 p: starting from the second loop from the hook (the loop on the hook does not count) knit 5 SL-ST, cut the thread not very short, pull it through the last loop.
We bring the end of the thread forward.
We draw the initial end on the other side.
We fasten the ends of the threads to the body on the sides,
≈ 2 rows from the place where the hat is sewn on.
The front can be made on either side of the ear, but on both ears the same way.
We tighten, tie the ends of the threads with a knot at the back of the ear and put it inward. We also knit and
attach the second ear.
THE DIGGER IS READY!
LOSYASH
Head – body (yellow):
1 p: 6 SC in the amigurumi ring
2 p: 6 İNC = 12 SC
3 p: (İNC, 1 SC) * 6 = 18 SC
4 p: (2 SC, İNC) * 6 = 24 SC
5 p: (İNC, 3 SC) * 6 = 30 SC
6 p: (3 SC, İNC, 1 SC) * 6 = 36 SC
7 p: (İNC, 5 SC) * 6 = 42 SC
8-17 RR: 42 SC
We insert the ball. About 1/4 of the ball should remain uncovered, knit e should wrap around the ball quite tightly.
18 p: (3 SC, DEC, 2 SC) * 6 = 36 SC
19 p: (DEC, 4 SC) * 6 = 30 SC
20 p: (2 SC, DEC, 1 SC) * 6 = 24 SC
21 p: (DEC, 2 SC) * 6 = 18 SC
22 p: (1 SC, DEC) * 6 = 12 SC
23 p: 6 DEC = 6 SC
Cut the thread, pass the end through all the remaining posts and tighten the hole.
Eyes (white), 2 pcs:
We take thin yarn, hook 1.25-1.5 mm
1 p: 6 SC in the amigurumi ring
2 p: 6 İNC = 12 SC
3 p: (İNC, 3 SC) * 3 = 15 SC
We make SL-ST, cut the thread, leaving the end for sewing, fasten.
Sew on the rhinestones, stepping back 1 row from the edge of the eye to the center.
Sew the eyes at a distance of 7 rows from the crown (initial ring). Distance between eyes ≈ 1 column, pupils slant inward.
Nose (orange):
1 p: 6 SC in the amigurumi ring
2 p: (İNC 3in1, 2 SC) * 2 = 10 SC
3 p: (1 SC, İNC, 3 SC) * 2 = 12 SC
2 p: 2 SC, 3 DEC, 2 SC, DEC = 8 SC
We cut the thread, leaving the end for sewing, fasten it. We stuff the nose not very tightly, just to keep its shape. Sew on the nose just under the eyes. The place of the last decrease is the upper part of the nose between the eyes, respectively, 3 DECs will be at the bottom.
We embroider a smile with a black floss in 3 folds with a chain stitch. Since the nose of the elk hangs, it is better to make a smile a little to one side.
Legs, arms (yellow), 4 pcs:
1 p: 8 SC in the amigurumi ring
2-6 pp: 8 SC
We make SL-ST, cut the thread, leaving the end for
sewing, fix. We stuff the handle legs.
Sew the legs at the bottom, around the tightening point torso.
Sew the handles on the sides at the level of the lower edge of the nose (not the hanging tip, but where sewn).
Horns (brown), 2 pcs:
Divide the main thread (it is twisted from 4 threads) in half lengthwise, take a thin hook.
1 p: 8 SC in the amigurumi ring We knit 1 more SC, closing the ring, the beginning of the row at
we will be in this place.
2 p: we collect 3 CH, skip 3 columns, starting from the 4th we knit 5 SC = 8
3 r: 8 SC knit air loops in this row behind the back wall.
4 p: 1 SC, we collect 3 CH, skip 3 columns, starting from the 4th we knit 4 SC = 8
5 p: 8 SC (CH for the back wall)
6 p: 2 SC, we collect 3 CH, skip 3 columns, starting from the 4th we knit 3 SC = 8
7 p: 8 SC (CH for the back wall)
8 p: SL-ST, 2 SC, 2 HDC, 2 SC, SL-ST = 8
9 p: 8 SC We make SL-ST, cut the thread, leaving the end for sewing, fasten.
Now we knit the branches of the horn.
3 holes – 3 processes, all knit the same.
1 p: We collect 6 SC along the hole
2-3 pp: 6 SC
We fill, make SL-ST, cut the thread, tighten the hole.
Sew on horns ≈ 3 rows from the crown, slightly in front.
Ears (yellow), 2 pcs:
1 p: 6 SC in the amigurumi ring
2 p: İNC, 1 SC, [1 SC, SL-ST] in one loop –
incomplete row
We cut the thread, leaving the end for sewing, fasten it. We will sew on the ears on the side where the end of the thread is.
6 SC
6 SC
6 SC
Sew on Sew on the ears on the sides one row below the horns.
We fasten the initial end of the thread to the body, pulling the ear to the head, and remove it inward.
LOSYASH IS READY!