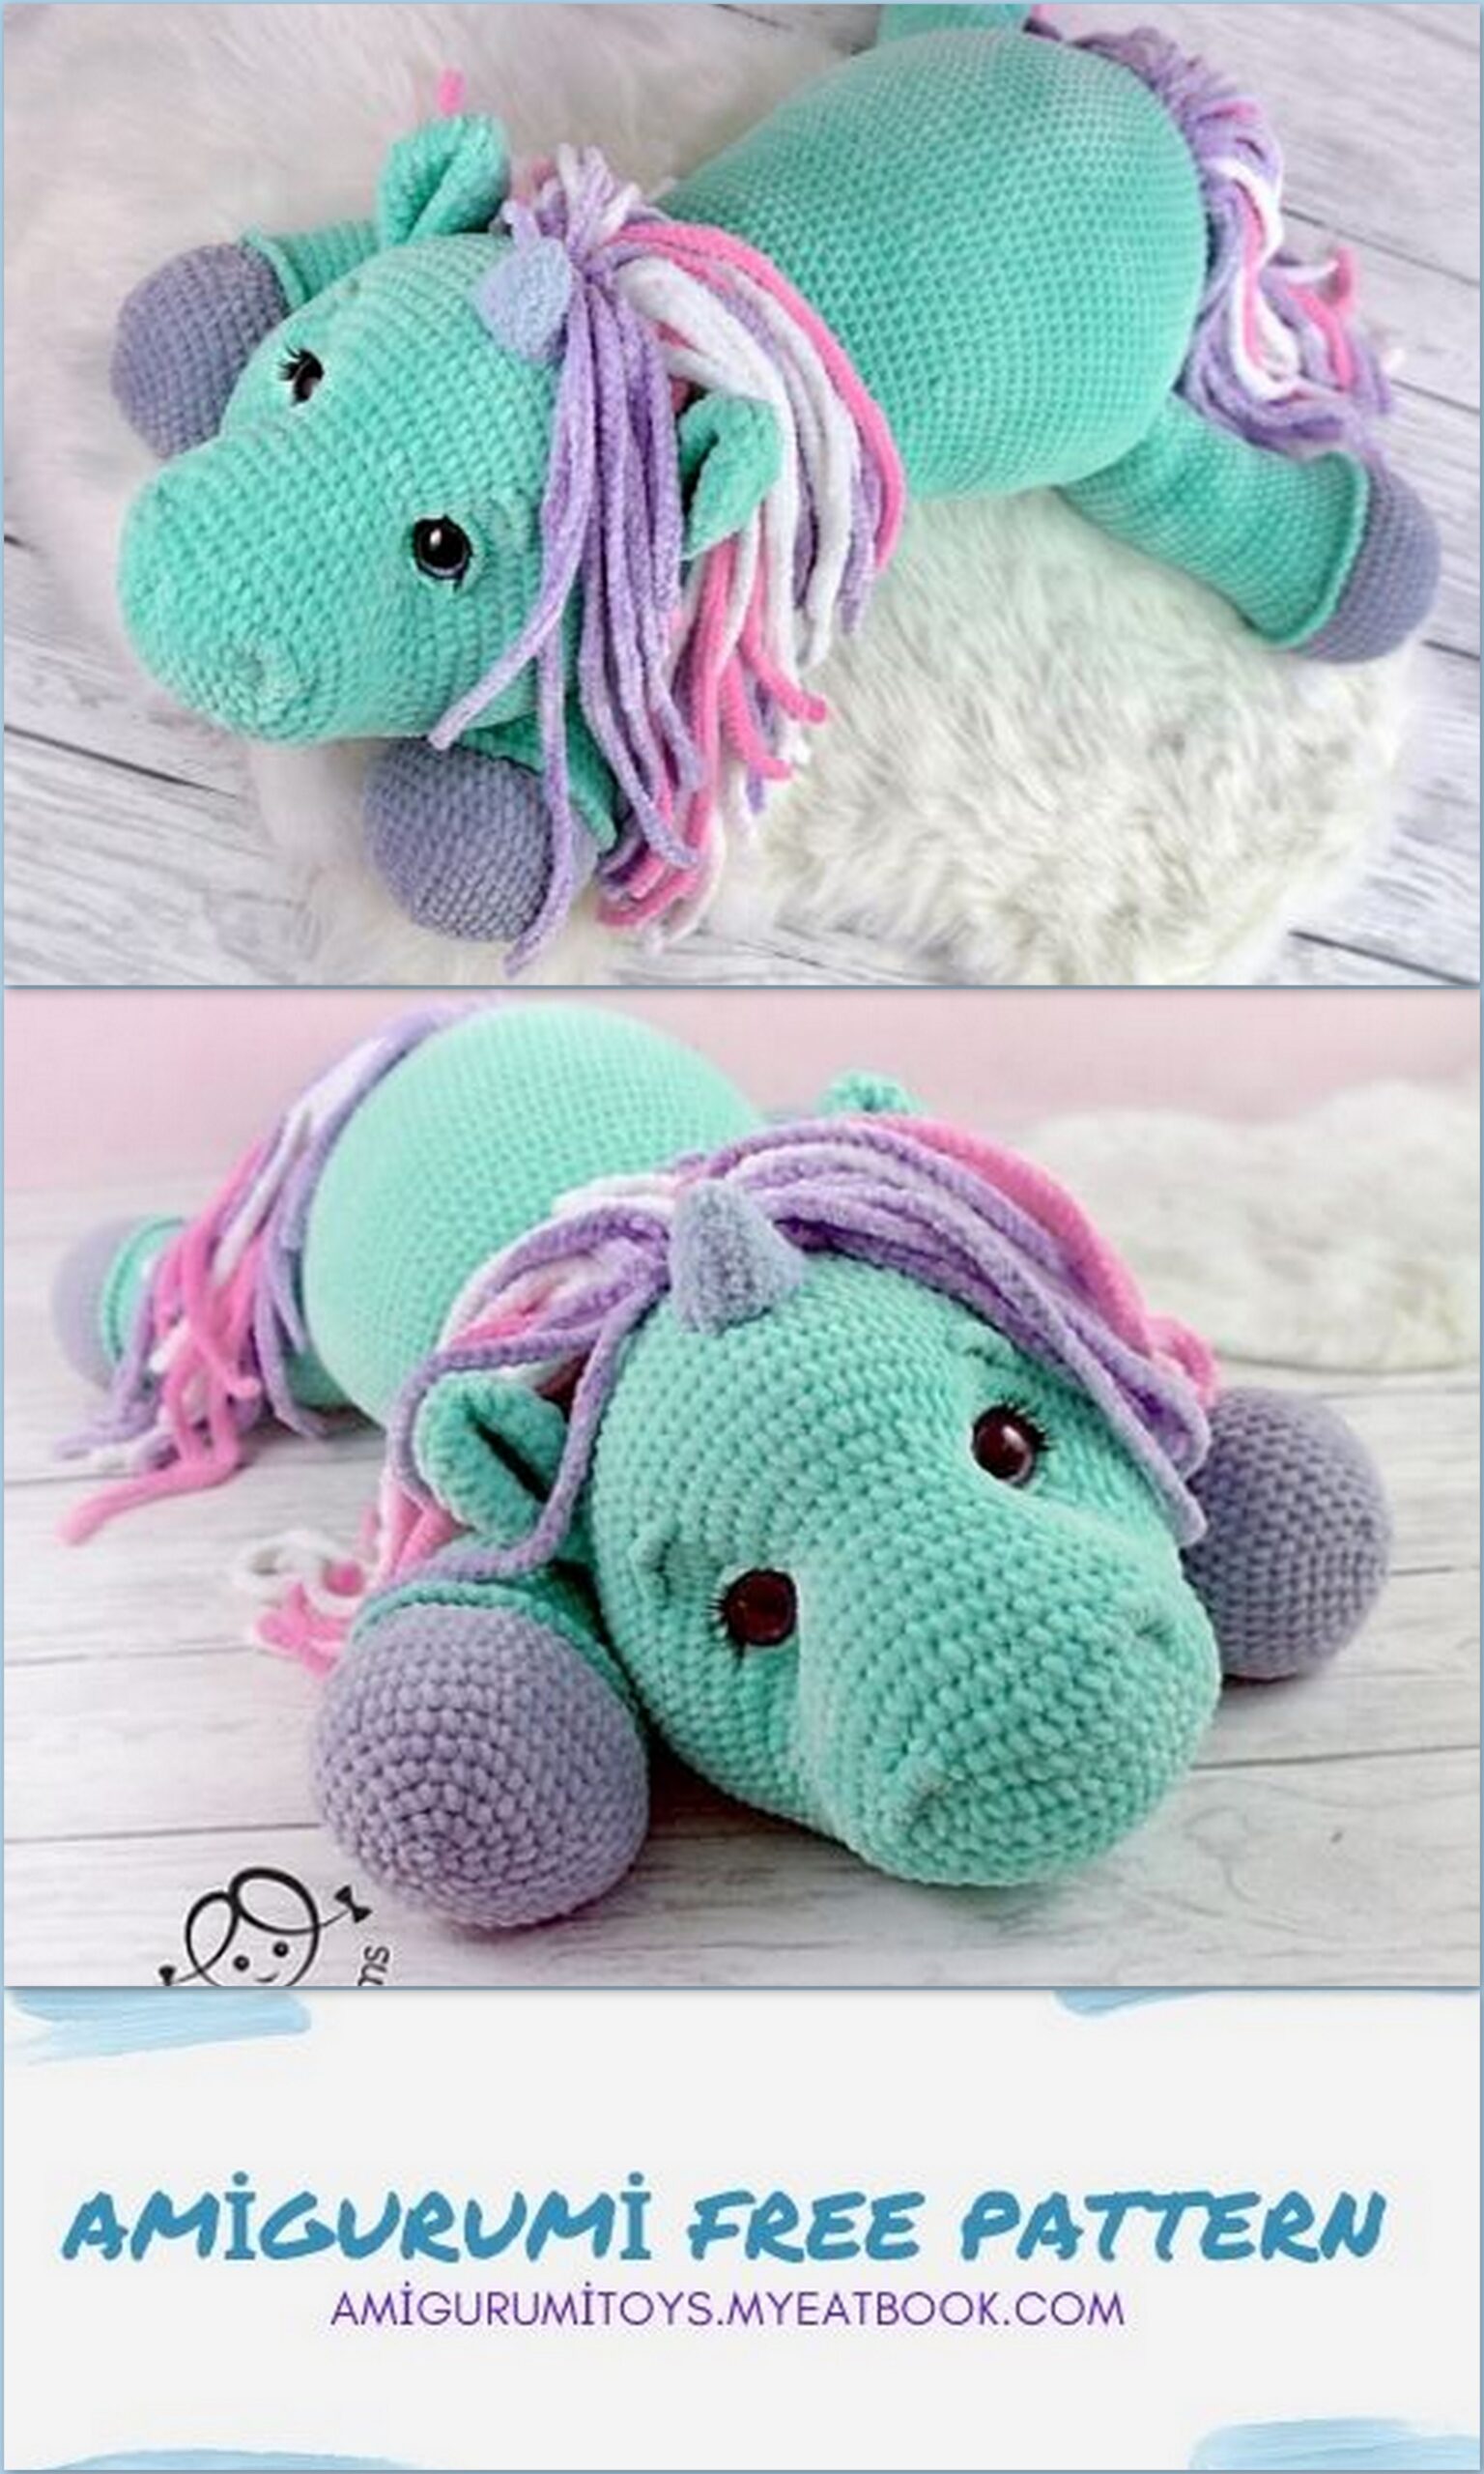
Amigurumi Plush Unicorn Free Pattern
This plush unicorn is crocheted of Himalaya Dolphin baby yarn. When using the specified yarn, its dimensions are 85cm. If you wish, you can make a unicorn
and smaller, in the form of a small toy. To do this, use a finer yarn and a suitable crochet hook.
The toy is spirally tied, so no connecting loops at the end of the row are used.
Abbreviations:
Sc – single crochet
Ch – air loop
İnc. – increase, knit in one loop 2 times
Dec. – decrease, knit two loops together
(—) x – repeat what is in parentheses X times
You will need:
✓ Hook 4 mm
✓500 gr of yarn of the main color 100g / 120m 100 g – per hoof, 250 g – mane and tail (Himalaya Dolphin Baby or Yarn Art Dolce)
✓ Thread for sewing, safety eyes – 30 mm, filler.
Plush unicorn
Hind legs (2 parts)
We start knitting with a hoof
6 Sc in the amigurumi ring,
1.6 İnc. (12)
2. (1 Sc, 1 İnc) x6 (18)
3. (2 Sc, 1 İnc) x6 (24)
4. (3 Sc, 1 İnc) x6 (30)
5. (4 Sc, 1 İnc) x6 (36)
6. (5 Sc, 1 İnc) x6 (42)
7. (6 Sc, 1 İnc) x6 (48)
8. (7 Sc, 1 İnc) x6 (54)
9- 10.54 Sc
11. (7 Sc, 1 Dec) x6 (48)
12. (6 Sc, 1 Dec) x6 (42)
Change the thread color to the main one.
We knit row 13 for the back half-loops
12 rows.
13.15 Sc, 6 Dec, 15 Sc (36)
14-33. 36 Sc
We stuff the legs.
Fasten the thread, leave for sewing.
Front legs (2 parts)
We start knitting with a hoof
6 Sc in the amigurumi ring,
1.6 İnc. (12)
2. (1 Sc, 1 İnc) x6 (18)
3. (2 Sc, 1 İnc) x6 (24)
4. (3 Sc, 1 İnc) x6 (30)
5. (4 Sc, 1 İnc) x6 (36)
6. (5 Sc, 1 İnc) x6 (42)
7. (6 Sc, 1 İnc) x6 (48)
8. (7 Sc, 1 İnc) x6 (54)
9- 10.54 Sc
11. (7 Sc, 1 Dec) x6 (48)
12. (6 Sc, 1 Dec) x6 (42)
Change the thread color to the main one.
We knit row 13 for the back half-loops
12 rows.
13.15 Sc, 6 Dec, 15 Sc (36)
14-30. 36 Sc
31.1 Dec, 14 Sc,
2 Dec, 14 Sc, 1 Dec
(32) Fasten thread, leave for sewing.
Body
6 Sc in the amigurumi ring.
We take into account the offset loops, the marker runs in the middle of the tummy.
1.6 İnc. (12)
2. (1 Sc, 1 İnc) x6 (18)
3. (2 Sc, 1 İnc) x6 (24)
4. (3 Sc, 1 İnc) x6 (30)
5. (4 Sc, 1 İnc) x6 (36)
6. (5 Sc, 1 İnc) x6 (42)
7. (6 Sc, 1 İnc) x6 (48)
8. (7 Sc, 1 İnc) x6 (54)
9. (8 Sc, 1 İnc) x6 (60)
10. (9 Sc, 1 İnc) x6 (66)
11. (10 Sc, 1 İnc) x6 (72)
12. (11 Sc, 1 İnc) x6 (78)
13. (12 Sc, 1 İnc) x6 (84)
14. (13 Sc, 1 İnc) x6 (90)
15. (14 Sc, 1 İnc) x6 (96)
16. (15 Sc, 1 İnc) x6 (102)
17.8 Sc, cast on 18 Ch, skip 18 sts previous row, 50 Sc, dial 18 Ch, and skip
18 sts of previous row, 8Sc (102)
In the resulting holes we will insert the legs and sew them to the body.
18.102 Sc
19- 35.102 Sc Insert the legs into the holes for
legs in the body in the 17th row, we sew.
Body
36.21 Sc, (2 Sc, 1 Dec) х15, 21 Sc (87)
37.87 Sc
38.42 Sc, 1 Dec, 43 Sc (86)
39.30 Sc, 1 Dec, 22 Sc, 1 Dec, 30 Sc (84)
40.20 Sc, 1 Dec, 40 Sc, 1 Dec, 20 Sc (82)
41.30 Sc, 1 Dec, 18 Sc, 1 Dec, 30 Sc (80)
42.30 Sc, 1 Dec, 16 Sc, 1 Dec, 30 Sc (78)
43. (11 Sc, Dec) x6 (72)
44-47. 72 Sc
48. (10 Sc, Dec) x6 (66)
49-51. 66 Sc
52.6 Sc, cast on 16 Ch, and skip 16 loops previous row, 22 Sc, cast on 16 Ch, and skip 16 sts of previous row, 6 Sc
53.66 Sc
54. (9 Sc, Dec) x6 (60)
55.60 Sc
56. (8 Sc, Dec) x6 (54)
57.54 Sc
58. (7 Sc, Dec) x6 (48)
We take the front legs, insert them into the resulting holes in the 52nd row of the body, sew them.
59.48 Sc
We stuff the body and legs.
Fasten the thread, leave for sewing on the head.
Head
Dial 12 Ch,
1.with 2 Ch from the hook, knit 10 Sc, 3 Sc in 1, then knit along the other side of the chain
10 Sc, 3 Sc in 1 (26)
2.10 Sc, 3 İnc, 10 Sc, 3 İnc (32)
3.10 Sc, (1 İnc, 1 Sc) x3, 10 Sc, (1 İnc, 1 Sc) x3 (38)
4.10 Sc, (1 İnc, 2 Sc) x3, 10 Sc, (1 İnc, 2 Sc) x3 (44)
5.10 Sc, (1 İnc, 3 Sc) x3, 10 Sc, (1 İnc, 3 Sc) x3 (50)
6.10 Sc, (1 İnc, 4 Sc) x3, 10 Sc, (1 İnc, 4 Sc) x3 (56)
7- 11.56 Sc
Knit 7 Sc, move the marker to the middle and mark the new beginning of the row.
Behind the marker we follow independently, we take into account the displacement loops. The marker runs down the middle of the head, from below.
12.10 Sc, 1 İnc, 10 Sc, 1 İnc, 12 Sc, 1 İnc, 10 Sc, 1 İnc, 10 Sc (60)
13.12 Sc, (1 Sc, 1 İnc) x 4, put marker 1, (1 Sc, 1 İnc) x 1, put marker 2 (1 Sc, 1 İnc) x 8,
put marker 3, (1 Sc, 1 İnc) x1, put marker 4, (1 Sc, 1 İnc) x 4, 12 Sc (78)
In row 13, we marked the eye-tightening markers.
14.18 Sc, (2 Sc, 1 İnc) x 14, 18 Sc (92)
15- 25.92 Sc
26. (44 Sc, 1 Dec) x 2 (90)
27. (13 Sc, 1 Dec) x6 (84)
28.84 Sc
29. (12 Sc, 1 Dec) x6 (78)
30. (11 Sc, 1 Dec) x6 (72)
31. (10 Sc, 1 Dec) x6 (66)
32. (9 Sc, 1 Dec) x6 (60)
33. (8 Sc, 1 Dec) x6 (54)
34. (7 Sc, 1 Dec) x6 (48)
35. (6 Sc, 1 Dec) x6 (42)
36. (5 Sc, 1 Dec) x6 (36)
37. (4 Sc, 1 Dec) x6 (30)
38. (3 Sc, 1 Dec) x6 (24)
We stuff the head, leave a hole for securing the safety peephole.
Let’s move on to tightening.

Head
EYE STRETCH
In the 13th row we find the markers for the eyes.
We introduce the needle from 2 markers and bring it to 3 mark, retreat 3 loops to the left, insert the needle at 4 marker and output back to marker h1. We tighten the threads well, fix and hide.
For the unicorn, I used safety eyes. For this, I left my head untied to end. Insert eyes in places of ties and fasten from the inside. After the eyes are fixed, we close the head.
39.12 Dec
40. 6 Dec Pull, fasten, trim and hide.
Registration
My horse was tied for a girl over 3 years old, so I glued on the eyelashes. If a your toy is designed for a small child, do not forget about safety. In this case, it is better to embroider the cilia and fasten the threads well. At your discretion, the eyelashes can be not to do. We glue the cilia. After the glue has dried, we embroider the eyelids around the eyes.
To do this, take a needle with a thread in two additions. We introduce the needle from under the bottom of the head and withdraw from one side of the eye, insert the needle from the other side of the eye and bring it down. Divide by thread into upper and lower eyelids. Gently pull the strings from behind, fasten, cut and hide. You can add a drop of glue to prevent the strings from sliding over your eyes.
For the eyebrows, we make a couple of stitches, then we sew them.
We embroider nostrils between 3 and 5 near heads double thread, capturing 2 rows at once.
We make a couple of stitches, then we sew them.
Registration We find row 13 on the legs, tie them with columns without crochet for the front half-loops in the main color.
We lay our head between the front legs, sew to body.
EARS
6 Sc in the amigurumi ring,
1.6 Sc
2. 6 İnc. (12)
3. (1 Sc, 1 İnc) x 6 (18)
4. (2 Sc, 1 İnc) x 6 (24)
5. (3 Sc, 1 İnc) x 6 (30)
6- 8.30 Sc
Pull and sew on the ears without stuffing,
we retreat from the eyes 9 rows up.
HORN
6Sc in amigurumi ring
1.6 Sc
2.6 İnc (12)
3.12 Sc
4. (1 Sc, İnc) x6 (18)
5- 6. 18 Sc
Fasten the thread, leave for sewing. Sew the horn between 19 and 23 near the head.
TAIL AND MANE Fasten the thread to the body where there will be a tail, dial 41 Ch, from 2 loops from the hook to knit 40 connecting posts without crochet back. Knit 1 Sc across body, cast on 41 Ch more, from 2 sts from hook
knit 40 connecting posts without crochet back.
Thus, we collect the required number of loops.
(from 40 to 60 Ch) and knit the amount you need rows and stripes. The mane is knitted in the same way.
Mane width I have 8 strips. Tail width 7.