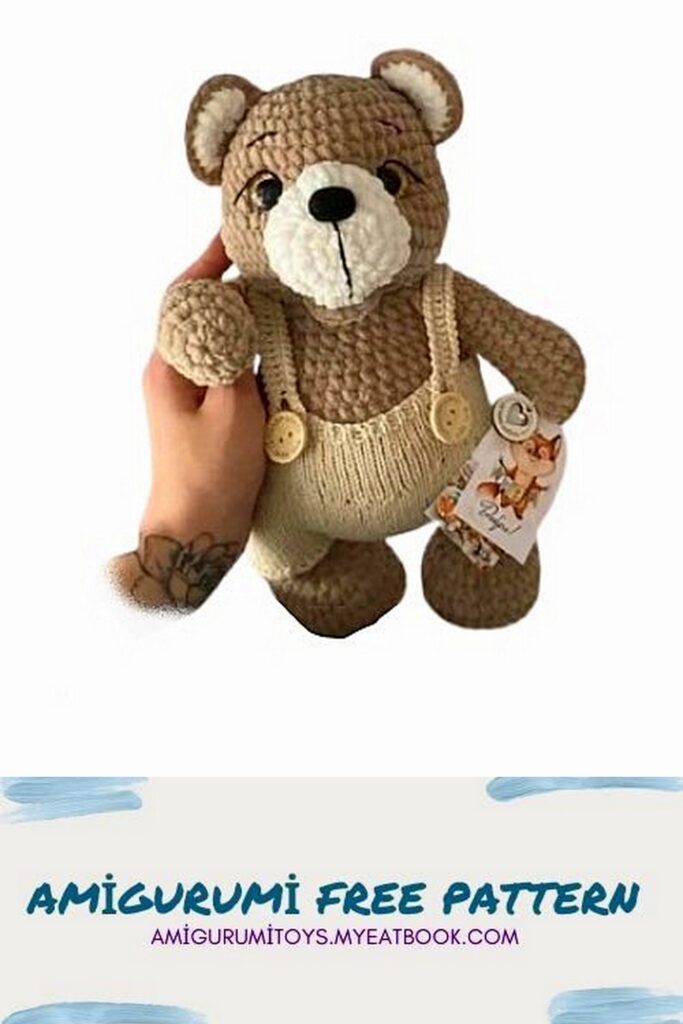
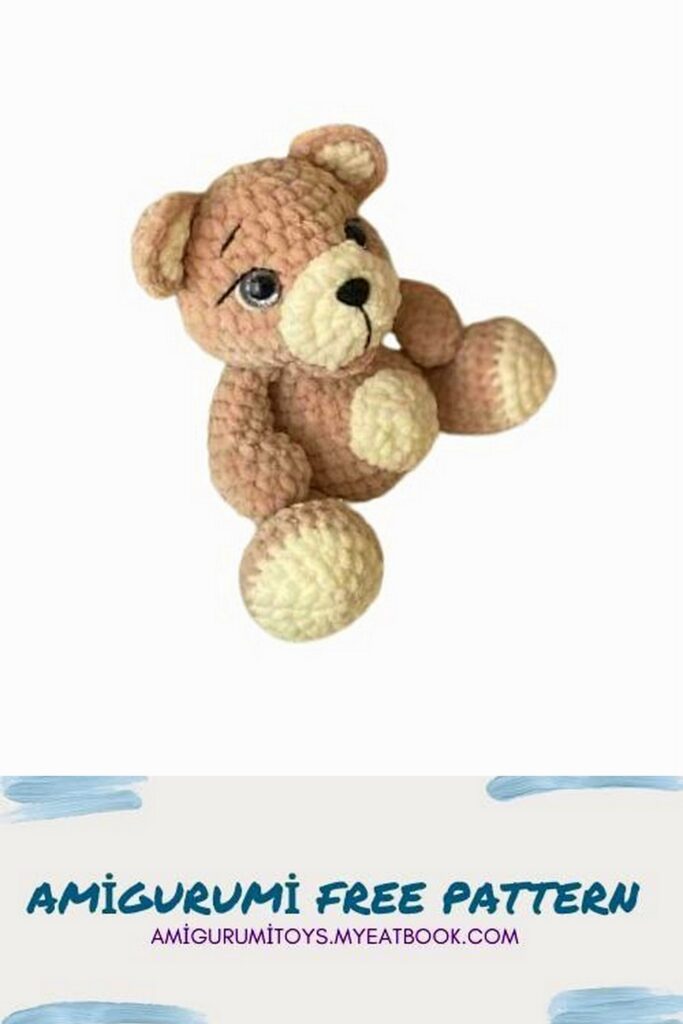
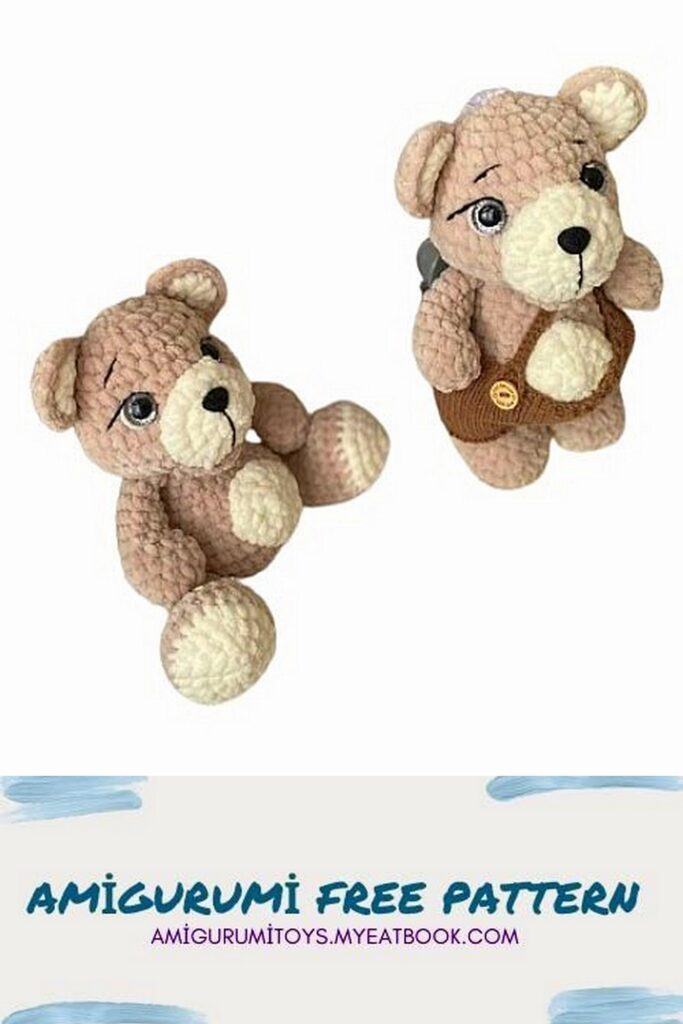
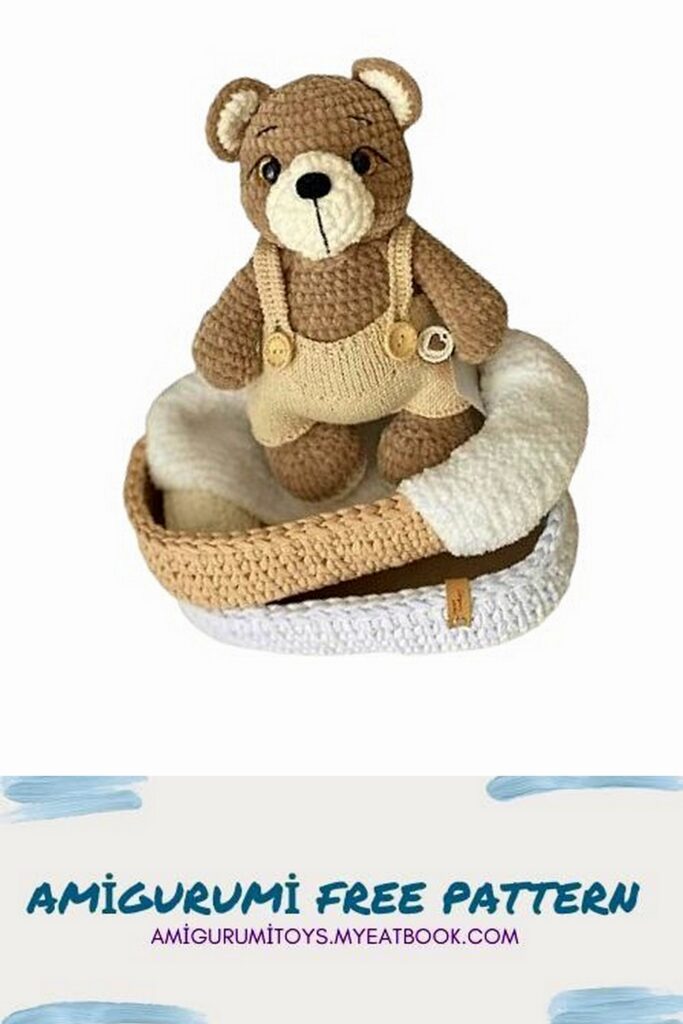
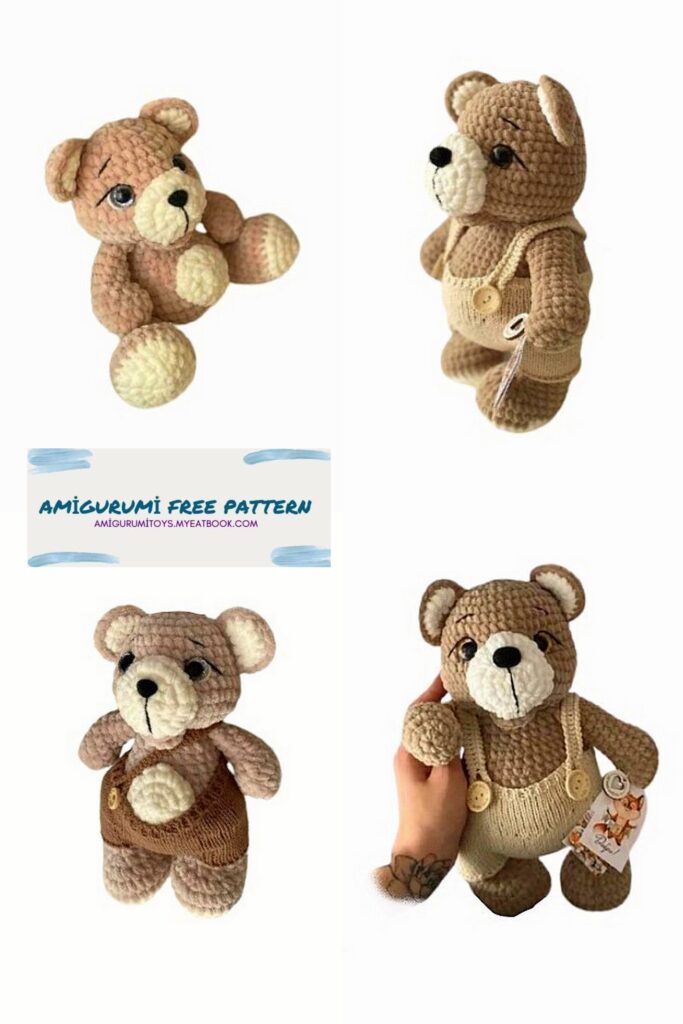
Adorable Bear Amigurumi Free Pattern: Bring Cuteness to LifeAre you a fan of crocheting adorable creatures? Look no further! We have an enchanting free pattern just for you – the Amigurumi Adorable Bear. This delightful project promises hours of joy as you craft your very own cuddly companion.
Amigurumi, a Japanese art form of crocheting or knitting small stuffed creatures, has gained immense popularity worldwide for its charm and versatility. Our free pattern offers step-by-step instructions, making it perfect for both beginners and seasoned crafters alike.
The Amigurumi Adorable Bear is not just a toy; it’s a friend waiting to be brought to life by your creative hands. Whether you’re making it for yourself or as a heartfelt gift for a loved one, this charming bear is sure to bring smiles and warmth to anyone’s heart.
Necessary materials
• Himalaya dolphin baby plush yarn I have 2 skeins of the main color, 1/2 of the additional color and ~40cm of pink thread for the tongue
• Yarn consumption depends on knitting density and hook number
• Hook 4.5
• Spout on a safe mount -21x16mm
• Eyelets on a safe mount – 18mm
• Filling – holofiber
• Needle with a large eye for stitching
• Scissors
• Yarn yarnart jeans black for the design of the muzzle

Amigurumi Abbreviations
MR- amigurumi ring
Ch- air loop
Sc-single crochet
İnc – increase
Dec – decrease
SL-ST- lifting loop
We knit in a spiral
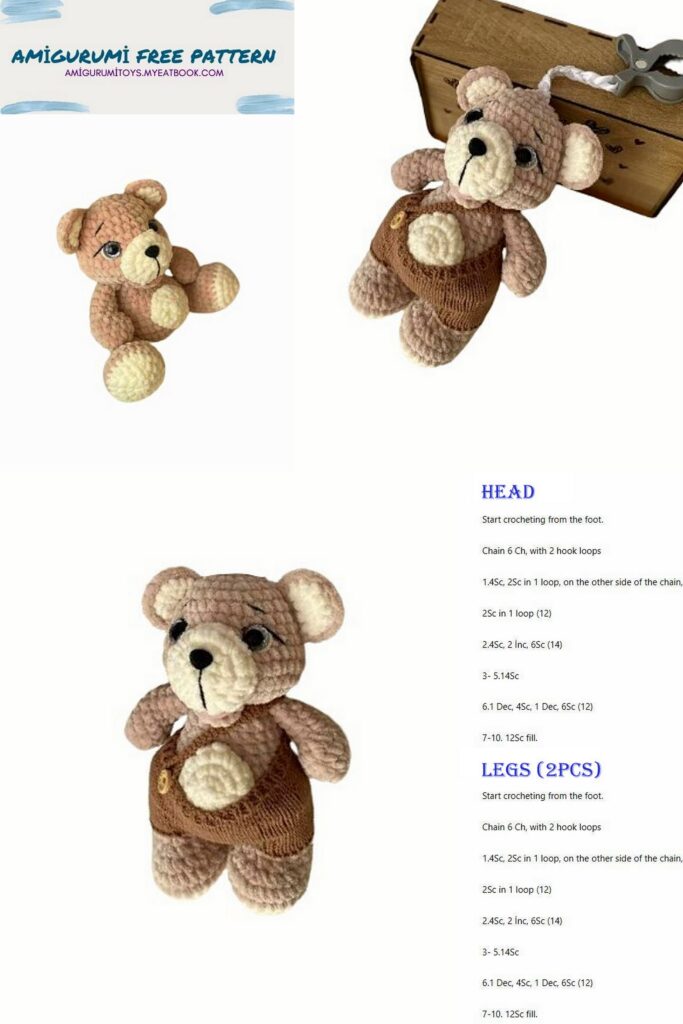
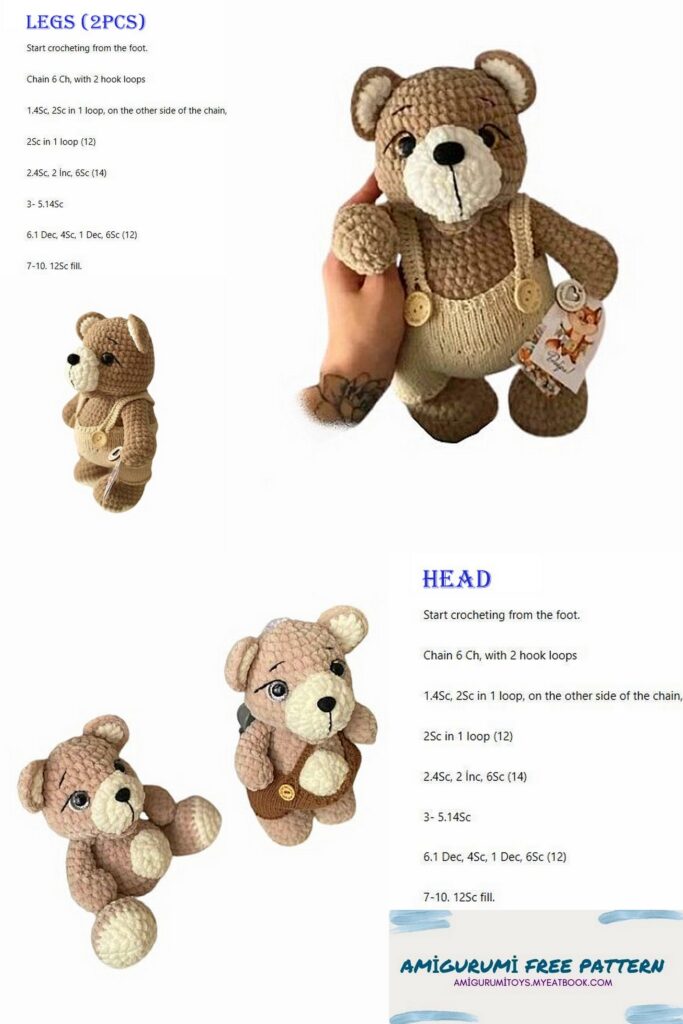
Lower legs
(the beginning of the row goes from the side of the leg)
Knitting in white
1-6Sc (6)
2-6İnc (12)
3-(1Sc, İnc)x6 (18)
4-(2Sc, İnc)x6 (24)
5-(İnc, 3Sc)x6 (30)
Changing the color
6-8-no change 3 rows (30)
9-8Dec, 14Sc(22)
10-4Dec, 14Sc(18)
11-1Sc, Dec from 3Sc, 14Sc (16)
12-17-no change (16)
Let’s stuff it. Fold in half and knit behind both walls, cut and hide the thread
Muzzle
Knitting in white
1-6Sc (6)
2-6İnc (12)
3-12İnc (24)
4-(1Sc, İnc)x12 (36)
5-(1Sc, İnc)x8, do not finish the row, finish knitting and leave a thread to sew
When sewing on the muzzle, we do NOT stuff it
Upper legs
1-8Sc (8) 2-8İnc (16)
3-3Sc, 4İnc, 9Sc (20)
4-12Sc, 4Dec (16)
5-12Sc, 2Dec (14)
6-no change (14)
7-1Sc, Dec, 4Sc, Dec, 5Sc (12)
8-14-no change (12)
We stuff the foot, fold it in half and knit it behind both walls.
Ears (two parts in primary color and two in white)
1-6Sc, Sl-st, do not join the circle, unfold the knitting (6)
2-(1Sc, İnc)х6 (18) 3-(2Sc, İnc)х6 (24)
At this point we finish the details of the additional color and cut the thread. We combine the details of the main color with white ones. Apply to each other and knit around the entire perimeter – 23Sc, İnc, turn and 7Sc
Head
1-7Sc in MR (7)
2-7İnc (14)
3-(1Sc, İnc)x7 (21)
4-(İnc, 2Sc)x7 (28)
5-(3Sc, İnc)x7 (35)
6-(İnc, 4Sc)x7 (42)
7-11-no changes 5 rows (42)
12-(4Sc, İnc)х8, 2Sc (50)
13-(İnc, 5Sc)х8, 2Sc (59)
14-16 – unchanged 3 rows (59)
Insert eyes between rows 11 and 12, between eyes 9Sc
17-(3Sc, Dec)х11, 2Sc (46)
18-(2Sc, Dec)х11, 2Sc (35)
19-(1Sc,Dec)x11, 1Sc (23)
20-(1Sc,Dec)x7, 1Sc (15)
21-(1Sc,Dec)x5 (10)
22-Dec until end
Mouth
1-6Sc (6)
2-(1Sc, İnc)х6 (18) 3-(2Sc, İnc)х6 (24)
Torso
(the beginning of the row goes exactly to the side of the toy – the left side relative to the toy)
1-7Sc in MR (7)
2-7İnc (14)
3-(1Sc, İnc)x7 (21)
4-(İnc, 2Sc)x7 (28)
5-(3Sc, İnc)x7 (35)
6-(İnc, 4Sc)x7 (42)
7-(5Sc, İnc)x7 (49)
8-(İnc, 6Sc)х7(56)
9-no changes(56)
10-knit the lower legs, 7Sc on the foot, 20Sc, 7Sc on the foot, 22Sc (56)
11-(3Sc, Dec)х11, 2Sc (46)
12-14 – no changes 3 rows (46)
15-5Sc, 1Dec, 4Sc, 1Dec, 4Sc, 1Dec, 27Sc (43)
16-17 – no changes 2 rows (43)
18-(2Sc, Dec)x10, 2Sc (32)
19-20-no changes (32)
21-knit the top ones, 6Sc on the foot, 7Sc, 6Sc on the foot, 13Sc on the tongue
We embroider with thread when decorating the face, Lastly
Tail
1-6Sc (6)
2-6İnc (12)
3-5Sc, İnc, 5Sc, İnc (14)
4-no change (14)
5-(2Sc, Dec)х4, 2Sc (11)
Decoration of the muzzle
We tighten the eyes, decorate the eyelashes with black thread and embroider the eyebrows.
We install the spout on a safe fastening to the white part – the muzzle. Sew on the muzzle, no need to stuff. We embroider the muzzle from the nose to the mouth with black thread, embroider the tongue and sew on the detail – the mouth.
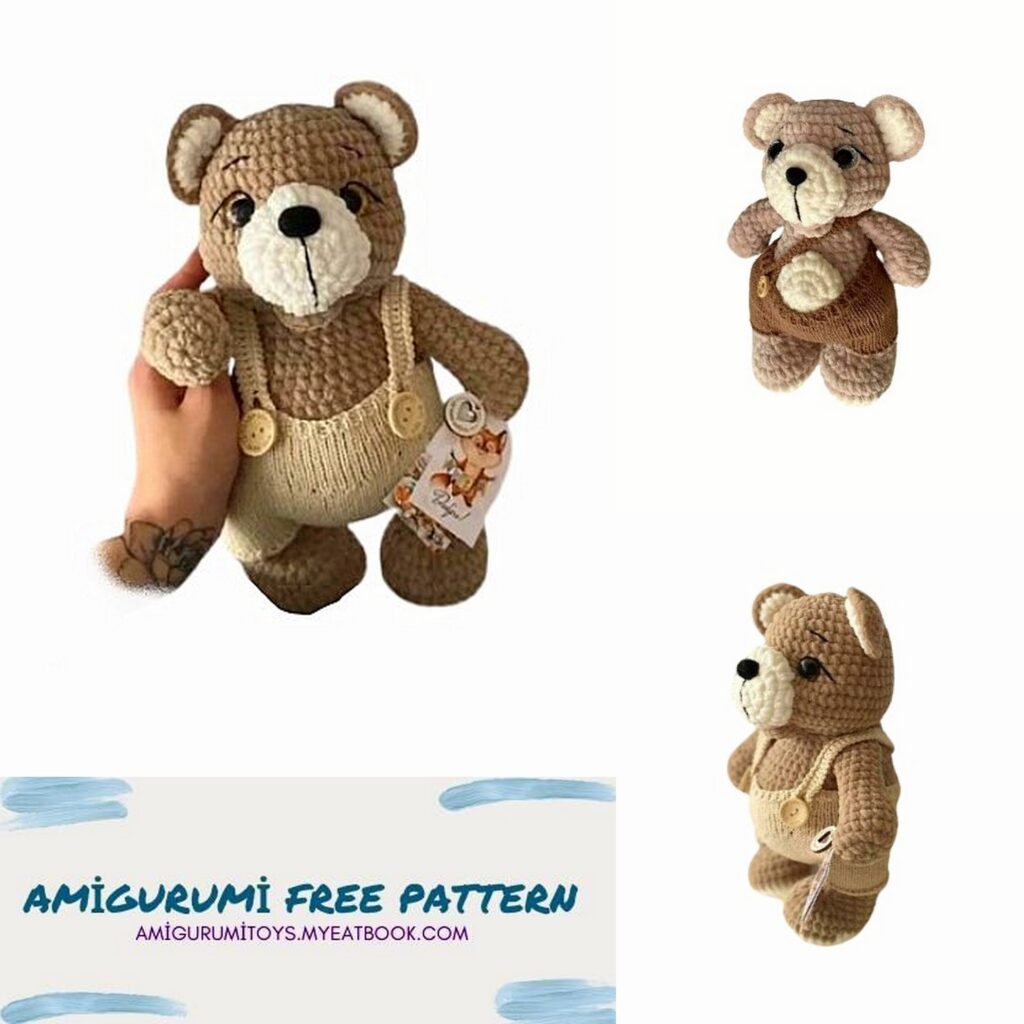
Your amigurumi bear is ready..