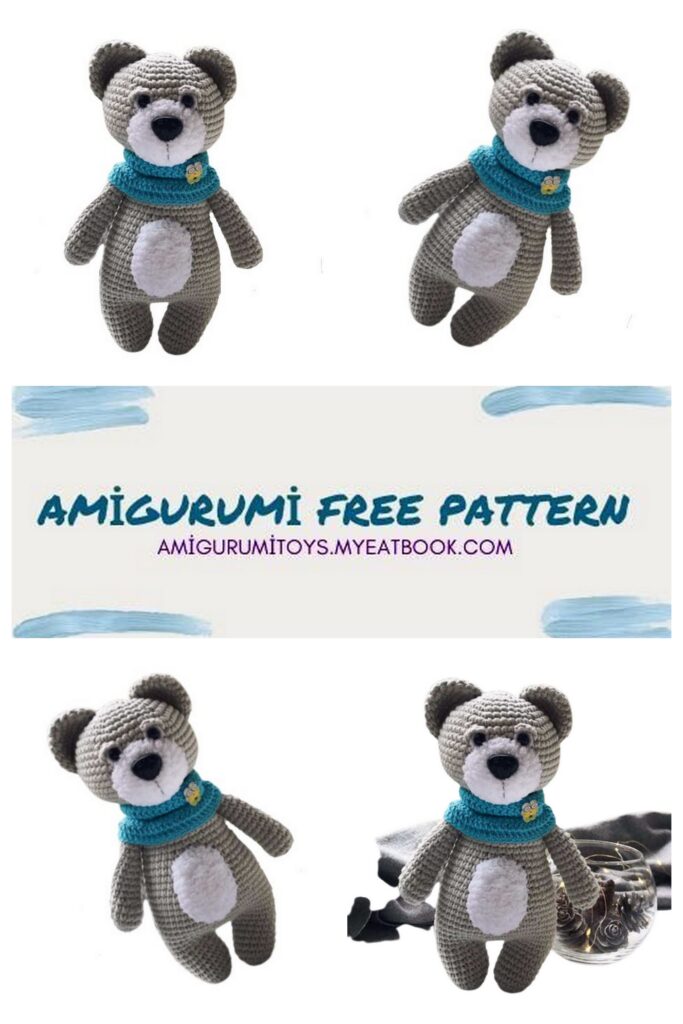
Materials
1. Yarn:
– for a teddy bear – Alize Lanagold Classic (100 g / 240 m, my color is No: 56). You can use any other yarn of approximately the same thickness. YarnArt eap, I think, is also suitable, but, perhaps, the bear will turn out to be smaller. My finished bear turned out to be 25 cm high.
– for the face and a speck on the belly – Alize Softy (50 g / 115 m, color No: 55) or any other light yarn, approximately equal in thickness to the main one.
– for snood – Semenovskaya yarn Sgappu zos (100 g / 250 m, color t. natural (574). You can take any to your taste.
2. Hook:
– No:2.5 (for base yarn and for Alize Softy) – No: 3.5 (for snood)
3. Eyes 8 mm (I have a secure mount)
4. Spout 1.5-2 cm (on a secure mount)
5. A small piece of white felt to decorate the eyes
6. Wide eye needle, large needle
7. Filler holofiber or synthetic fluff
8. Pins
9. Scissors
10. Marker for marking the end of the row
Abbreviations
MR: Amigurumi Magic ring
sc : Single Crochet
inc : Increase
dec : Decrease
trc : Triple Crochet/ Treble Crochet
st: Stitch
dc : Double Crochet
hdc: Half Double Crochet
slst : Slip Stitch
ch : Chain
..in : make increase into same stitch as many as the number which is given in front of “inc” abbreviation (exp; 3inc, 4inc..).
FLO : Crochet into front loops only
BLO : Crochet into back loops only
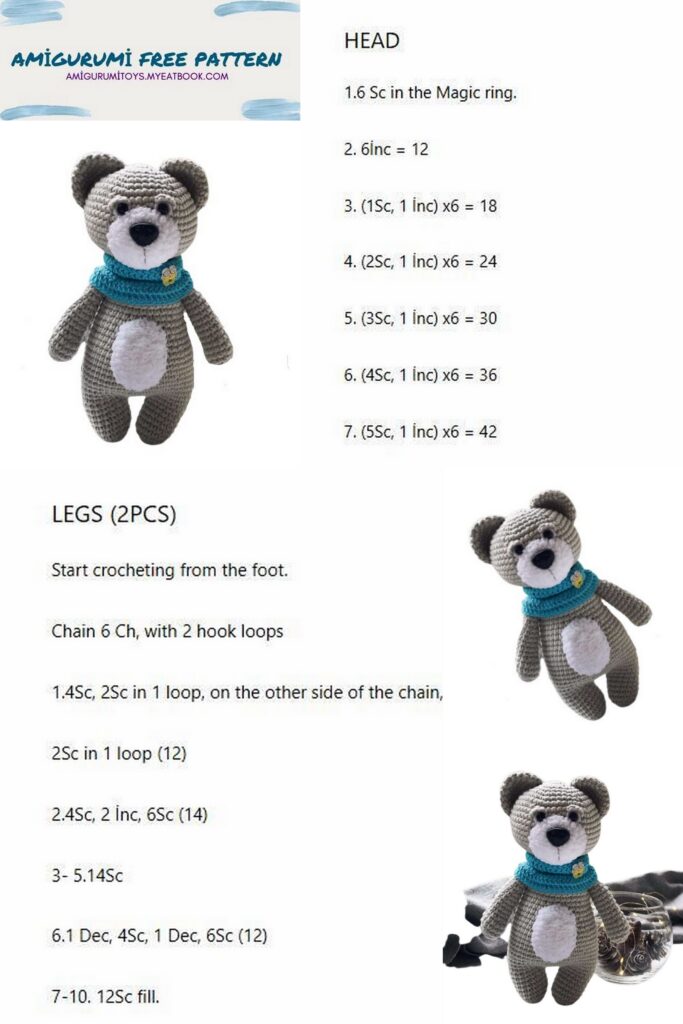
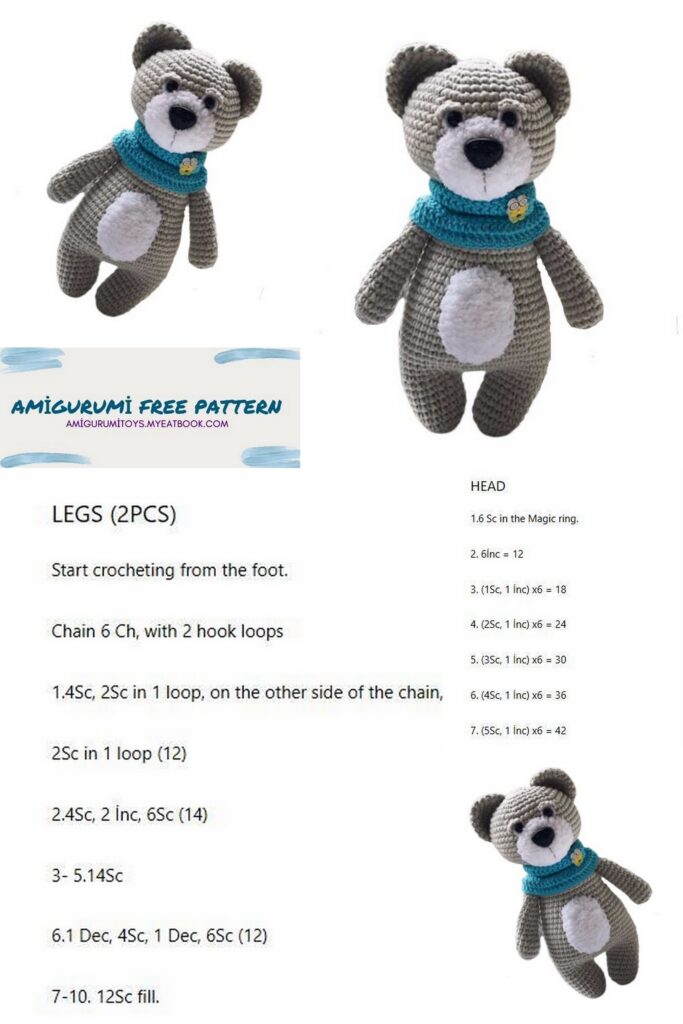
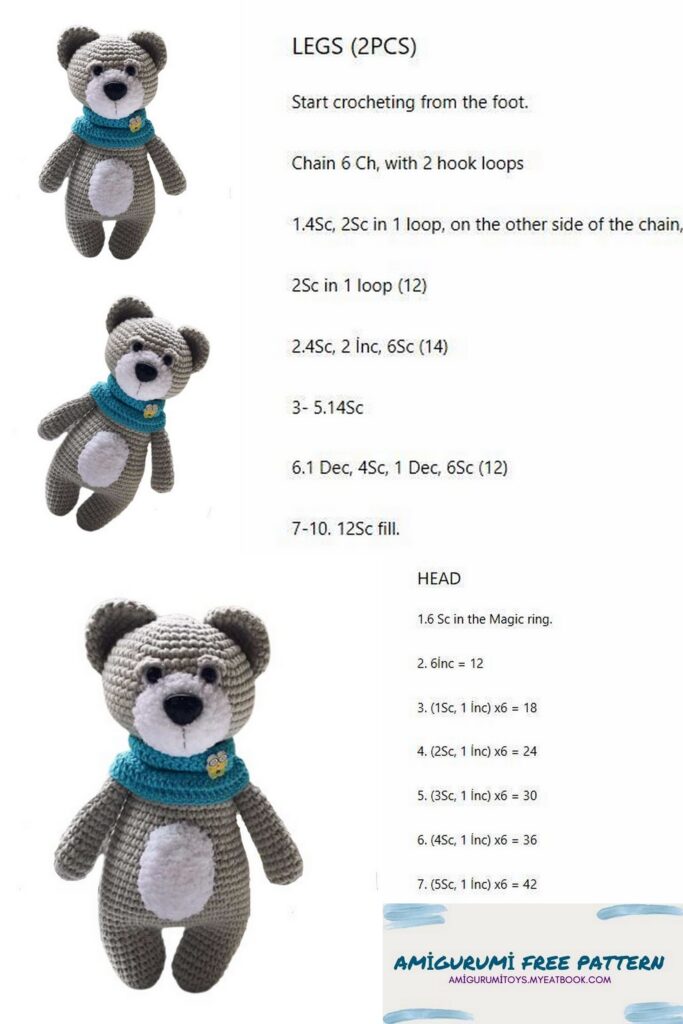
Head:
1. 6 sc in MR (6)
2. Increase in each column (12)
3. (1 sc+inc) * 6 (18)
4. (2 sc+inc) * 6 (24)
5. (3 sc+inc) * 6 (30)
6. (4 sc+inc) * 6 (36)
7. (5 sc+inc) * 6 (42)
8. (6 sc+inc) * 6 (48)
9. (7 sc+inc) * 6 (54)
10. (8 sc+inc) * 6 (60)
11-21. 60 sc in each row
22. (8 sc+dec) * 6 (54)
23. (7 sc+dec) * 6 (48)
24. (6 sc+dec) * 6 (42)
25. (5 sc+dec) * 6 (36)
26. (4 sc+dec) * 6 (30)
27. (3 sc+dec) * 6 (24)
Muzzle:
1. 6 sc in MR (6)
2. Increase in each column (12)
3. (1 sc+inc) * 6 (18)
4. (2 sc+inc) * 6 (24)
5. (3 sc+inc) * 6 (30)
6. (4 sc+inc) * 6 (36)
7. 36 sc

Ears (2 parts):
1. 6 sc in MR (6)
2. Increase in each column (12)
3. (1 sc+inc) * 6 (18)
4. (2 sc+inc) * 6 (24)
5. (10 sc+dec) * 2 (22)
Fold the ears in half and sew the edge, leave the end of the yarn for sewing on the ear.
Legs + body:
We start by crocheting the first leg:
1. 6 sc in MR (6)
2. Increase in each column (12)
3. (1 sc+inc) * 6 (18)
4. (5 sc+inc) * 3 (21)
5-9. 21 sc
We fasten and cut the yarn. We crochet exactly the same second leg, but we do not cut the yarn, but we connect it to the first leg after 2 ch.
10. We tie both legs and a chain of 2 ch in a circle, make 2 increments at the points of attachment of the chain to the legs (48)
11. We make 6 increments in the area of the chain from ch 3 in front and three in the back (54)
12-30. 54 sc. After about the 20th row, you can start stuffing the legs and body.
31. (7 sc+dec) * 6 (48)
32. 48 sc
33. (14 sc+dec) * 3 (45)
34. 45 sc
35. (13 sc+dec) * 3 (42)
36, 37. 42 sc
38. (5 sc+dec) * 6 (36)
39. 36 sc
40. (4 sc+dec) * 6 (30)
41. (3 sc+dec) * 6 (24)
42, 43, 44. 24 sc. We fasten and cut off the yarn, fill the top.

Arms (2 pcs):
1. 6 sc in MR (6)
2. Increase in each column (12)
3. (3 sc+inc) * 3 (15)
4 and 5. 15 sc
6. (3 sc+dec) * 3 (12)
7-12. 12 sc. We do not stuff the handle very tightly.
13. (4 sc+dec) * 2 (10)
14 and 15. 10 sc. We stuff a little more. After the 15th row, we do not add any more filler.
16. 1 decrease (9)
17. 9 sc. Close the arms.
Tail:
1. 6 sc in MR (6)
2. Increase in each column (12)
3. 12 sc
4. (2 sc + dec) * 3 (9)
Sew on the tail in the back in the middle, departing from the legs up 6-7 rows.
Speck on the Belly
White Alize Softy yarn and No: 2.5 crochet hook.
We crochet an oval consisting of huts ch, tied with two rows of columns with one crochet (dc). The oval scheme looks like this:
1. We collect a chain of 6 ch and 3 ch lifting.
2. In the 4th loop from the hook we crochet 1 dc. In the next 4 loops we crochet 1 dc each. In the last loop of the chain we crochet b dc.
We turned to the other side of the chain, and in the next 4 loops we crochet at 1 dc. In the last loop of the chain we crochet 4 dc (20). We connect crocheting using a connecting post with a chain of 3 ch lifts. which we crocheted at the beginning of the row. Place a marker here just in case.
3. 3 ch lifts and into the same loop 1 dc.
In the next 4 columns we crochet 1 dc each.
In the next 6 columns (at the turn) we crochet 2 dc in each column.
In the next 4 columns we crochet 1 dc each.
We have 5 stitches left to the end of the row (up to our marker), crochet 2 dc in each stitch (32)
we fix the yarn, leave the long end for sewing: Sew on a spot in the middle of the abdomen, stepping back from the legs 6-7 rows.Semenovskaya yarn Sgappu sock and hook No: 3.5
We collect – a chain from vp with a length of about 60 cm.To try on the length, we close the chain in a ring with a connecting post and try to put this ring on the bear’s head in three turns. Should be worn loosely. When you have made sure that the desired length of the chain has been reached, you need to connect the chain into a ring with a connecting column, carefully checking that the chain is not twisted anywhere. It is important!
We make 3 ch lifts and crochet in a circle a row with double crochets to the junction. We close the row in a ring using a connecting post with a chain of 3 ch, which we crocheted at the beginning of the row.
We make 3 ch lifts, TURN, and crochet a row. in the opposite direction with double crochets behind the back wall of the loop. After crocheting each row, it is better to try on the snood on the bear to make sure that it fits easily.
If desired, you can crochet another row or two of the dc, just as each time at the beginning of the row doing 3 ch lifts and turning around.
We fasten and cut off the end of the yarn, hide the ends between the columns of the snood with a needle. We put the snood on the bear, you can decorate it with a beautiful button.
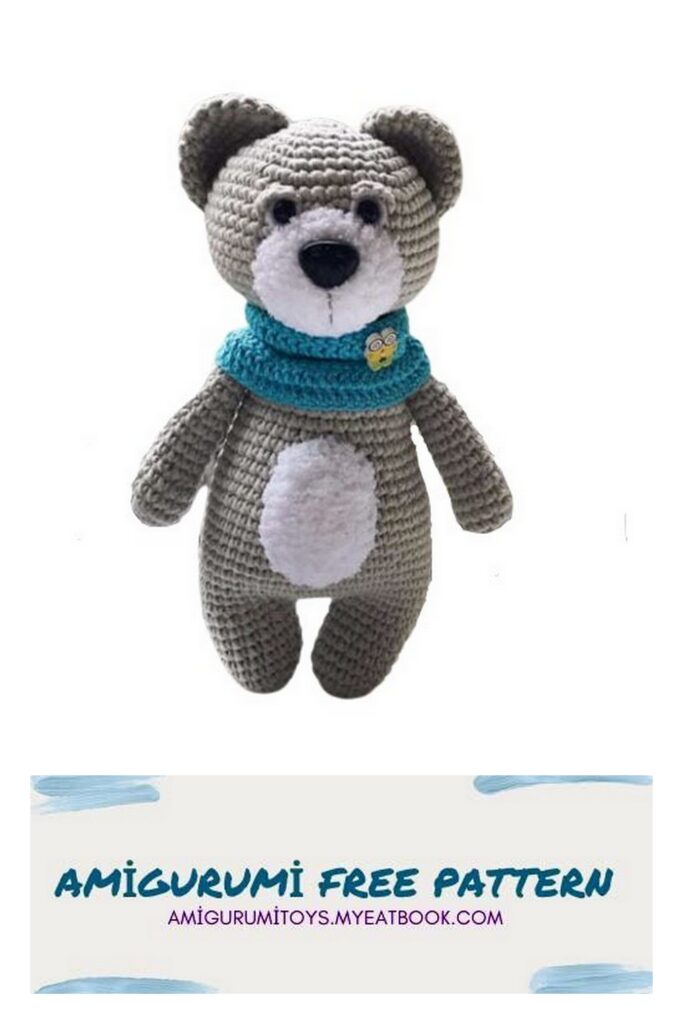
Your bear is ready!