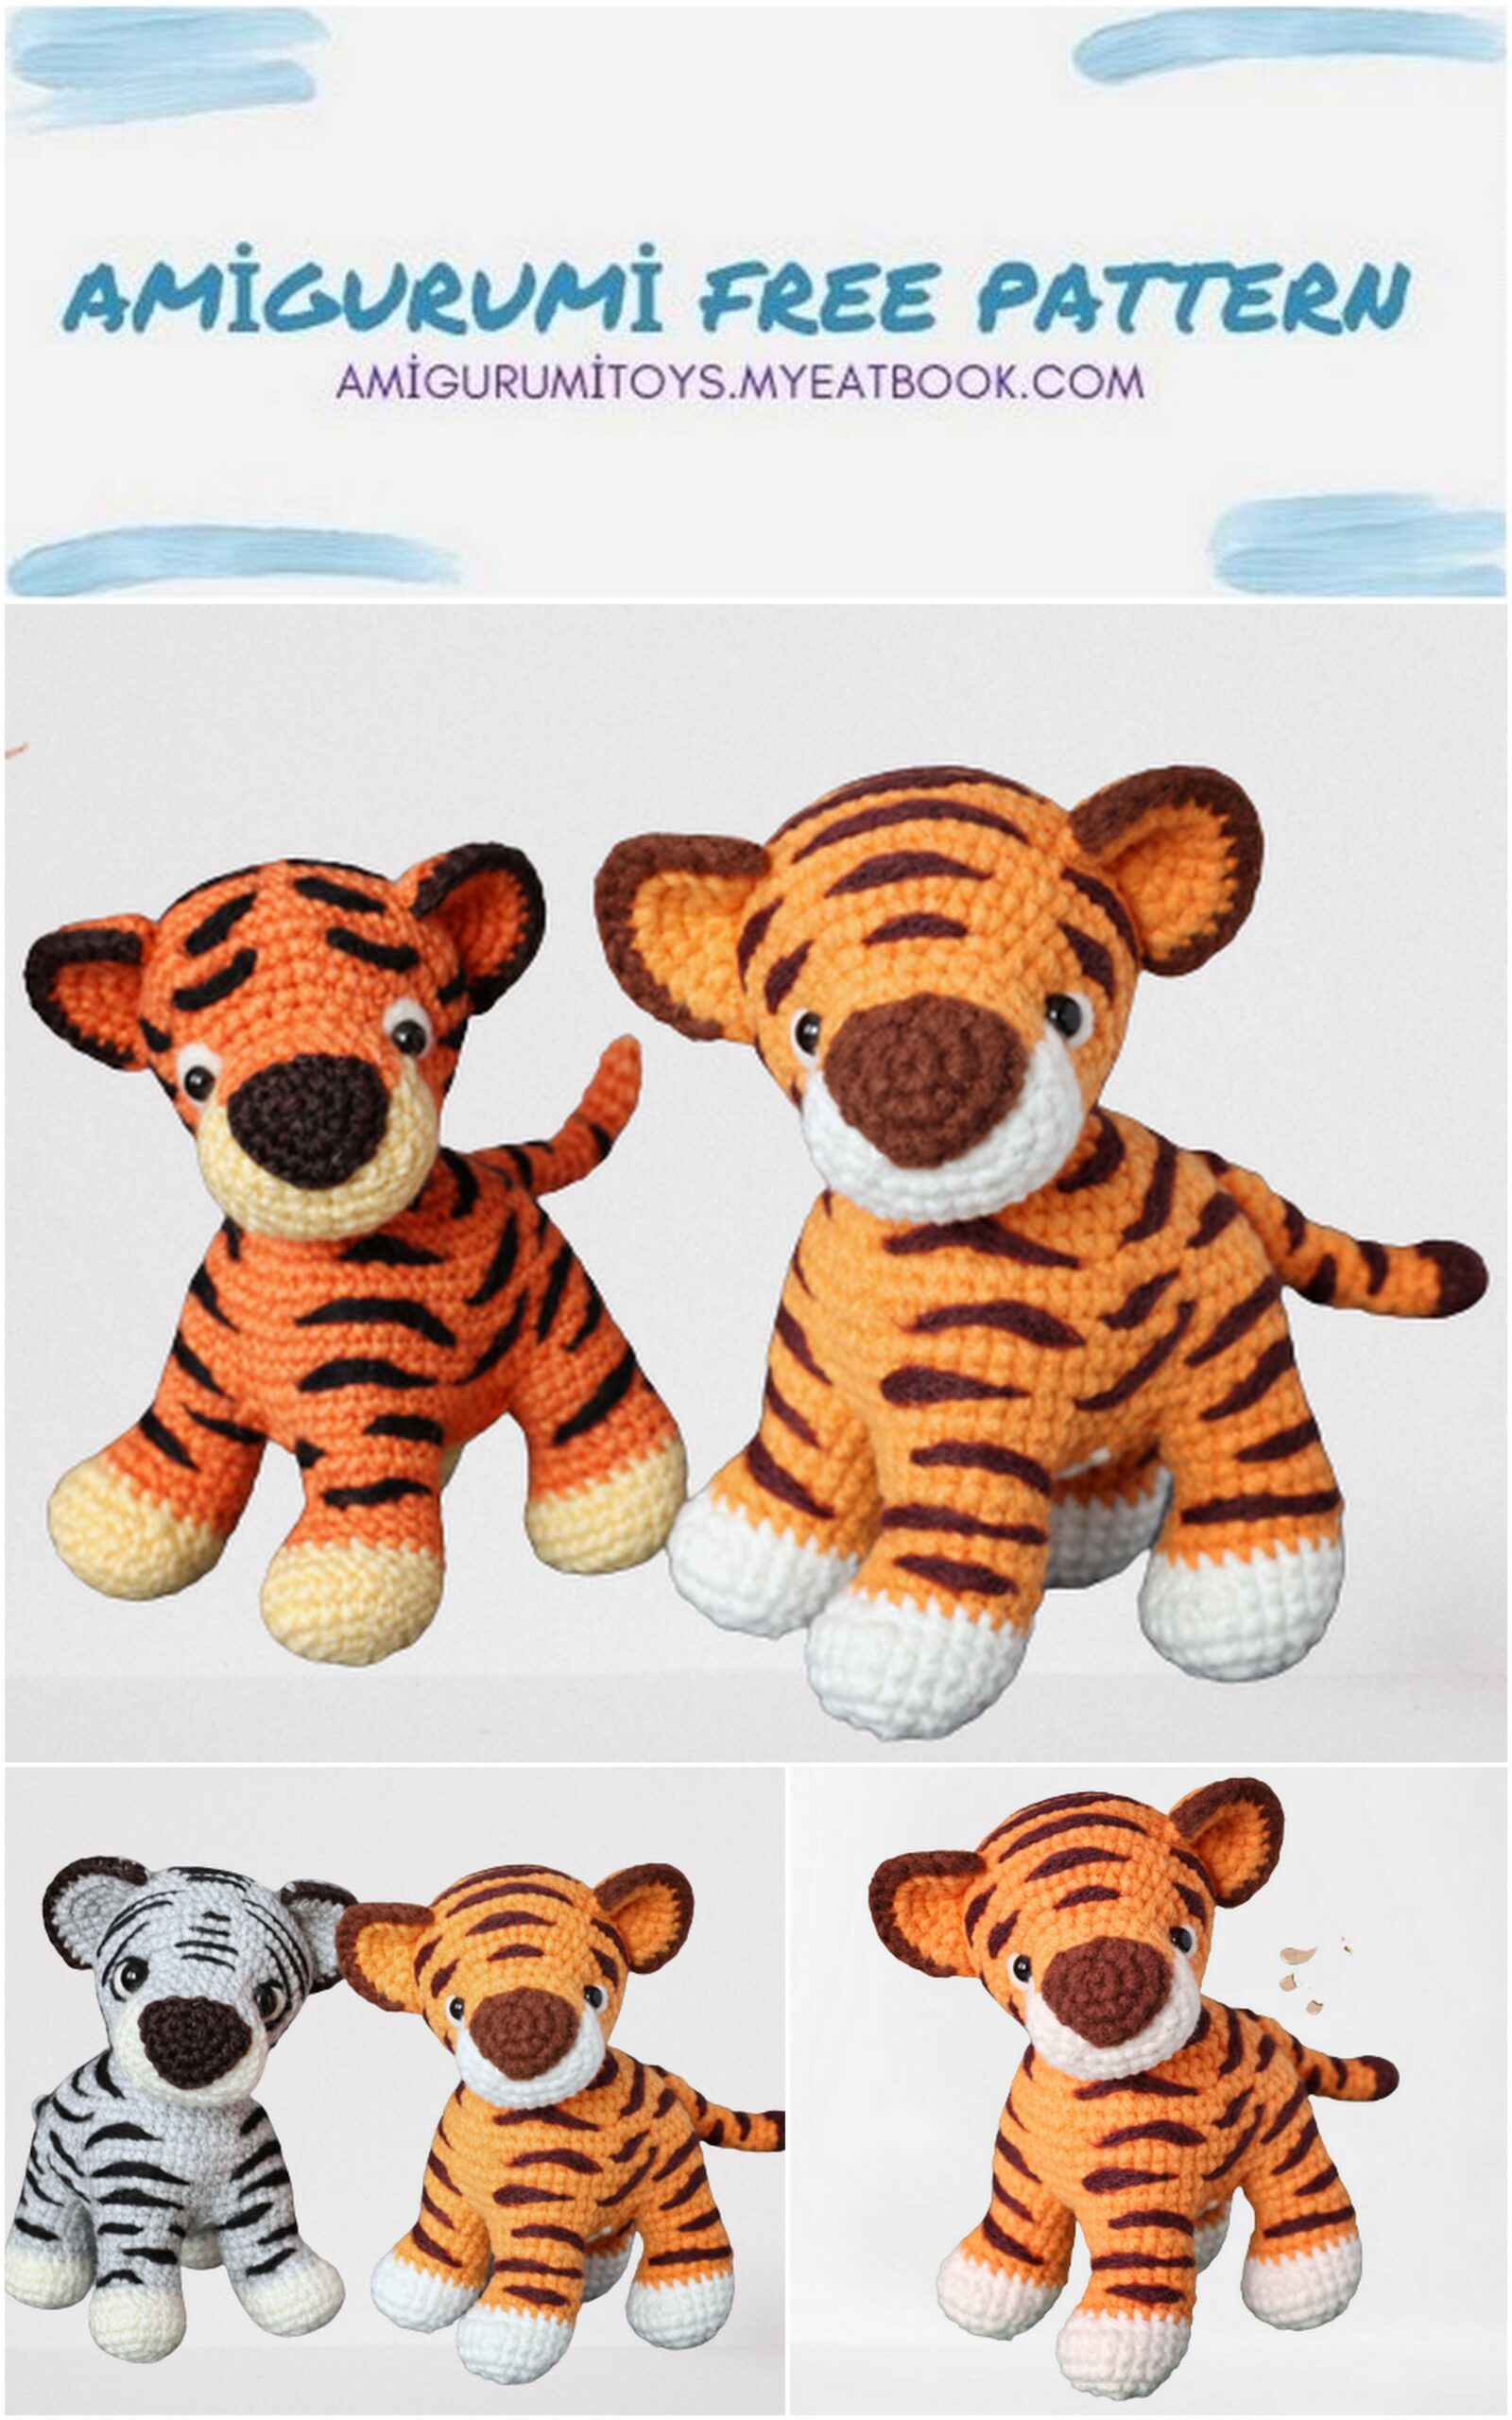
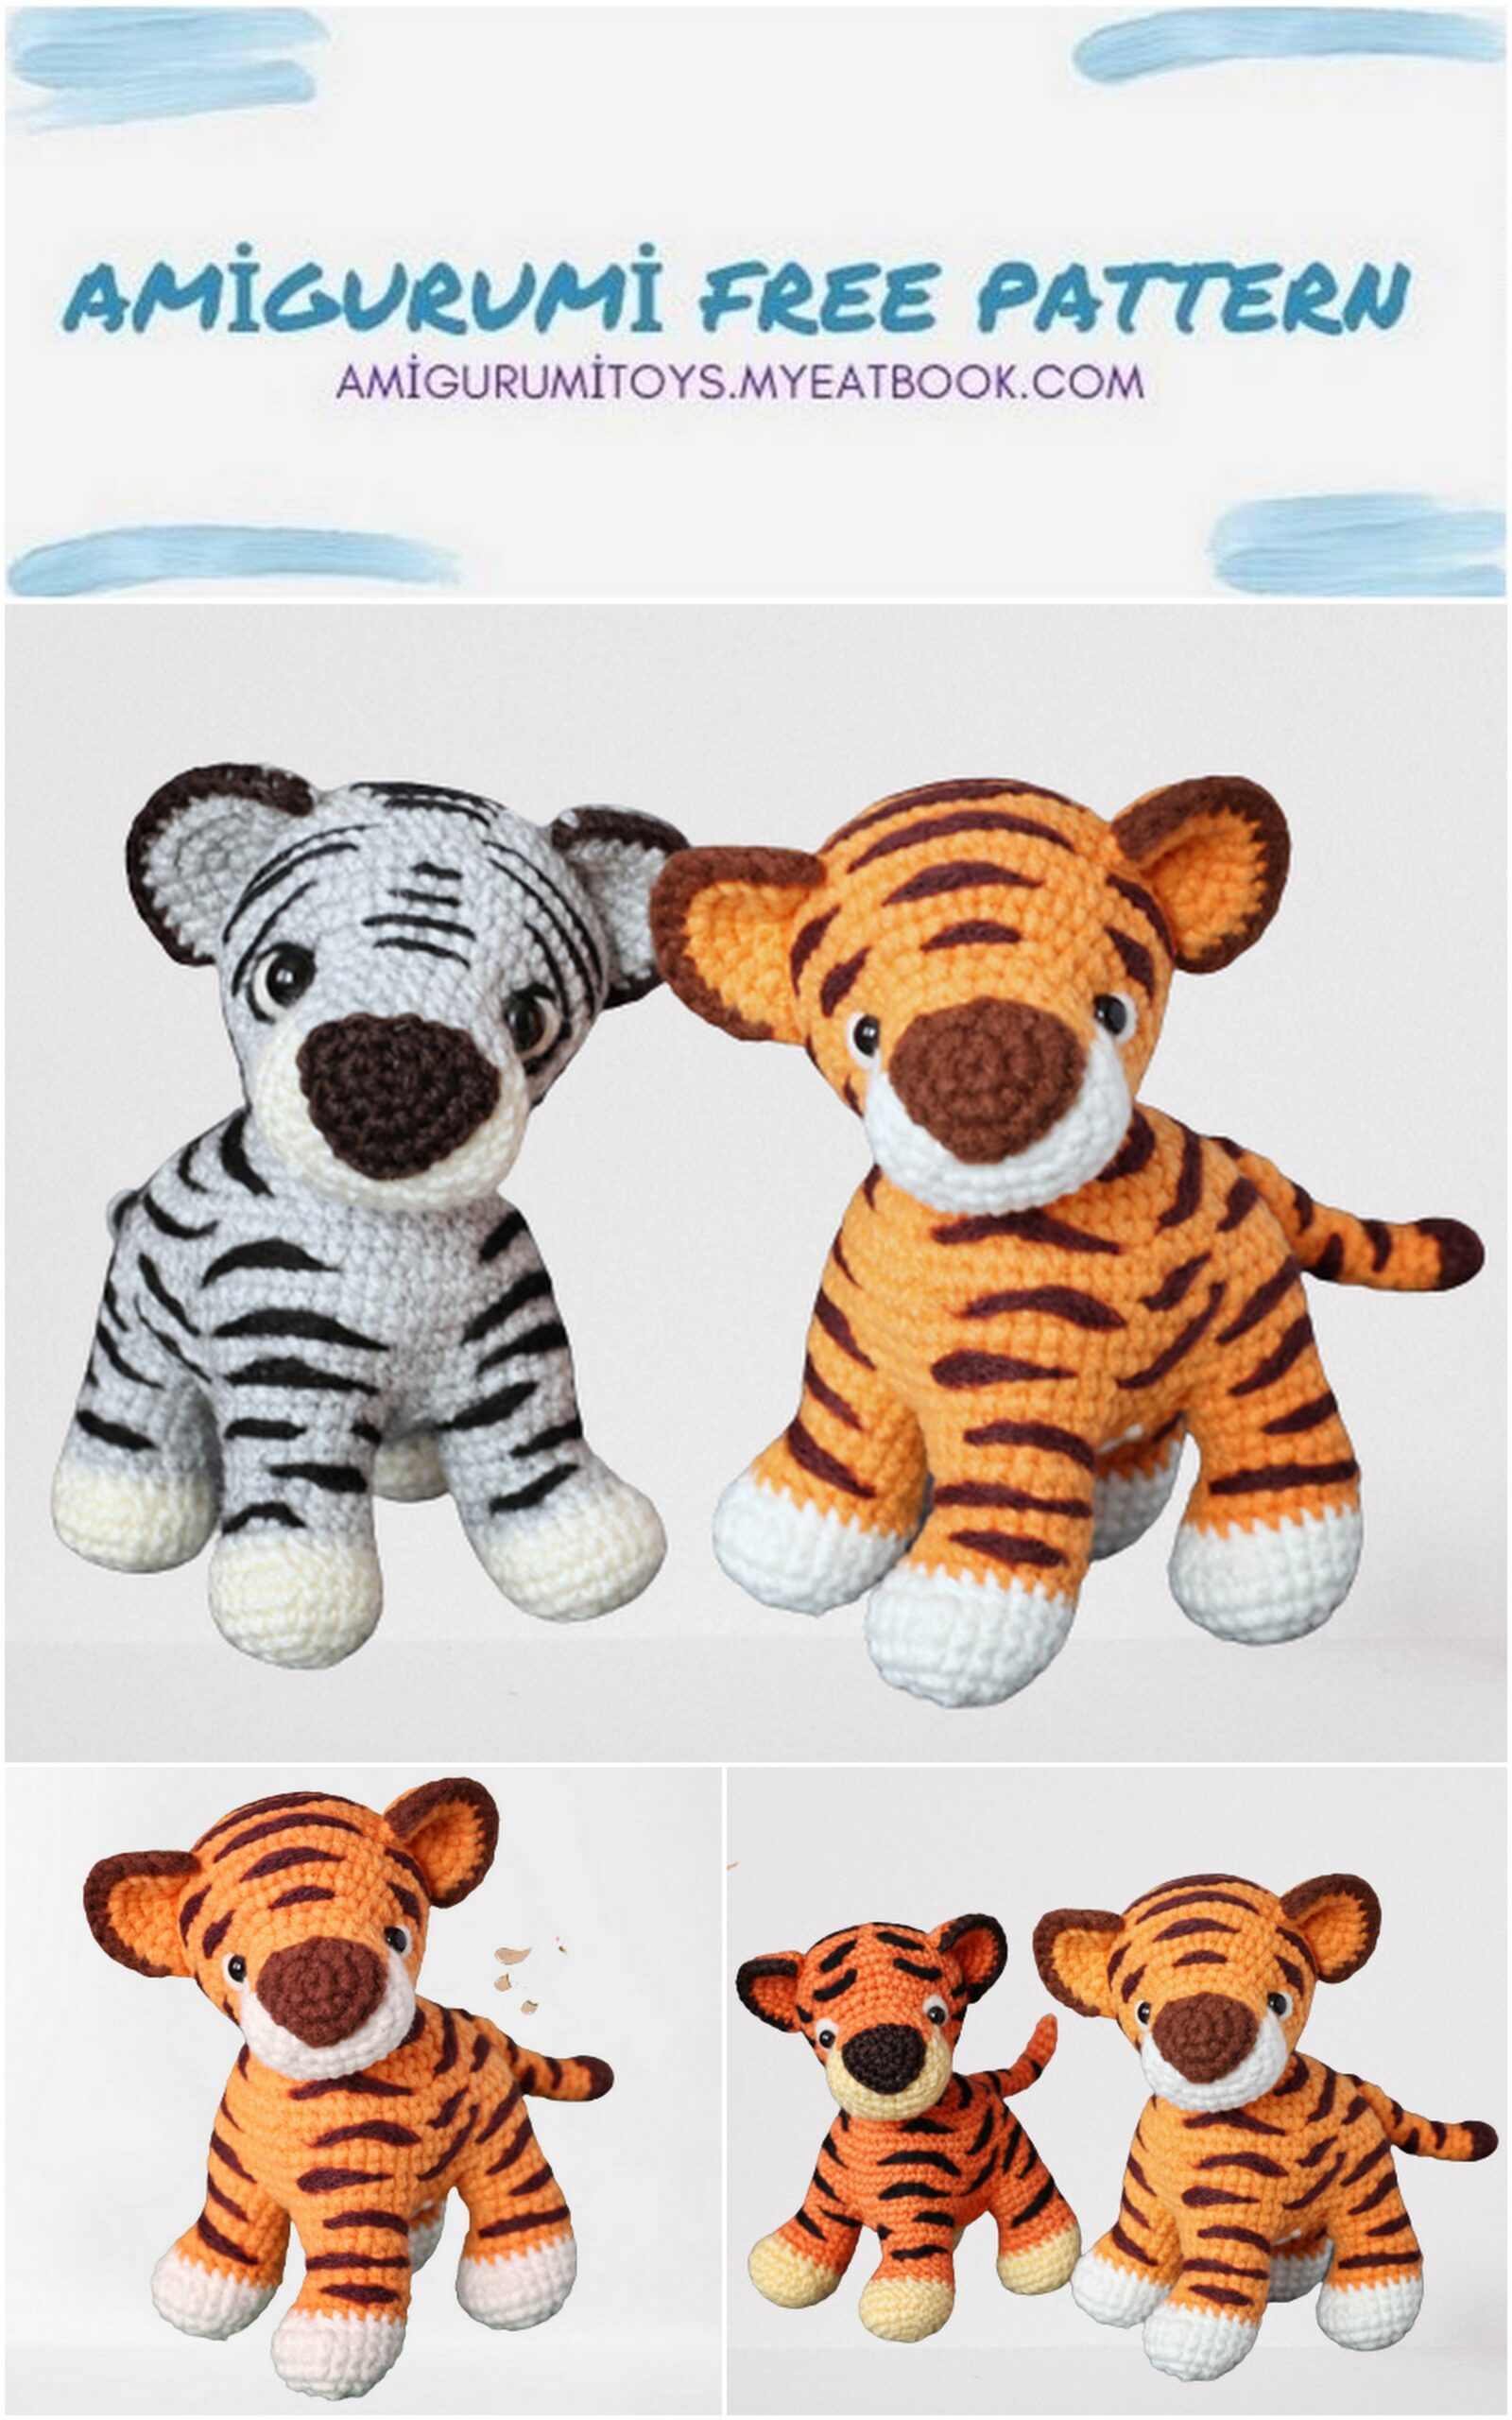
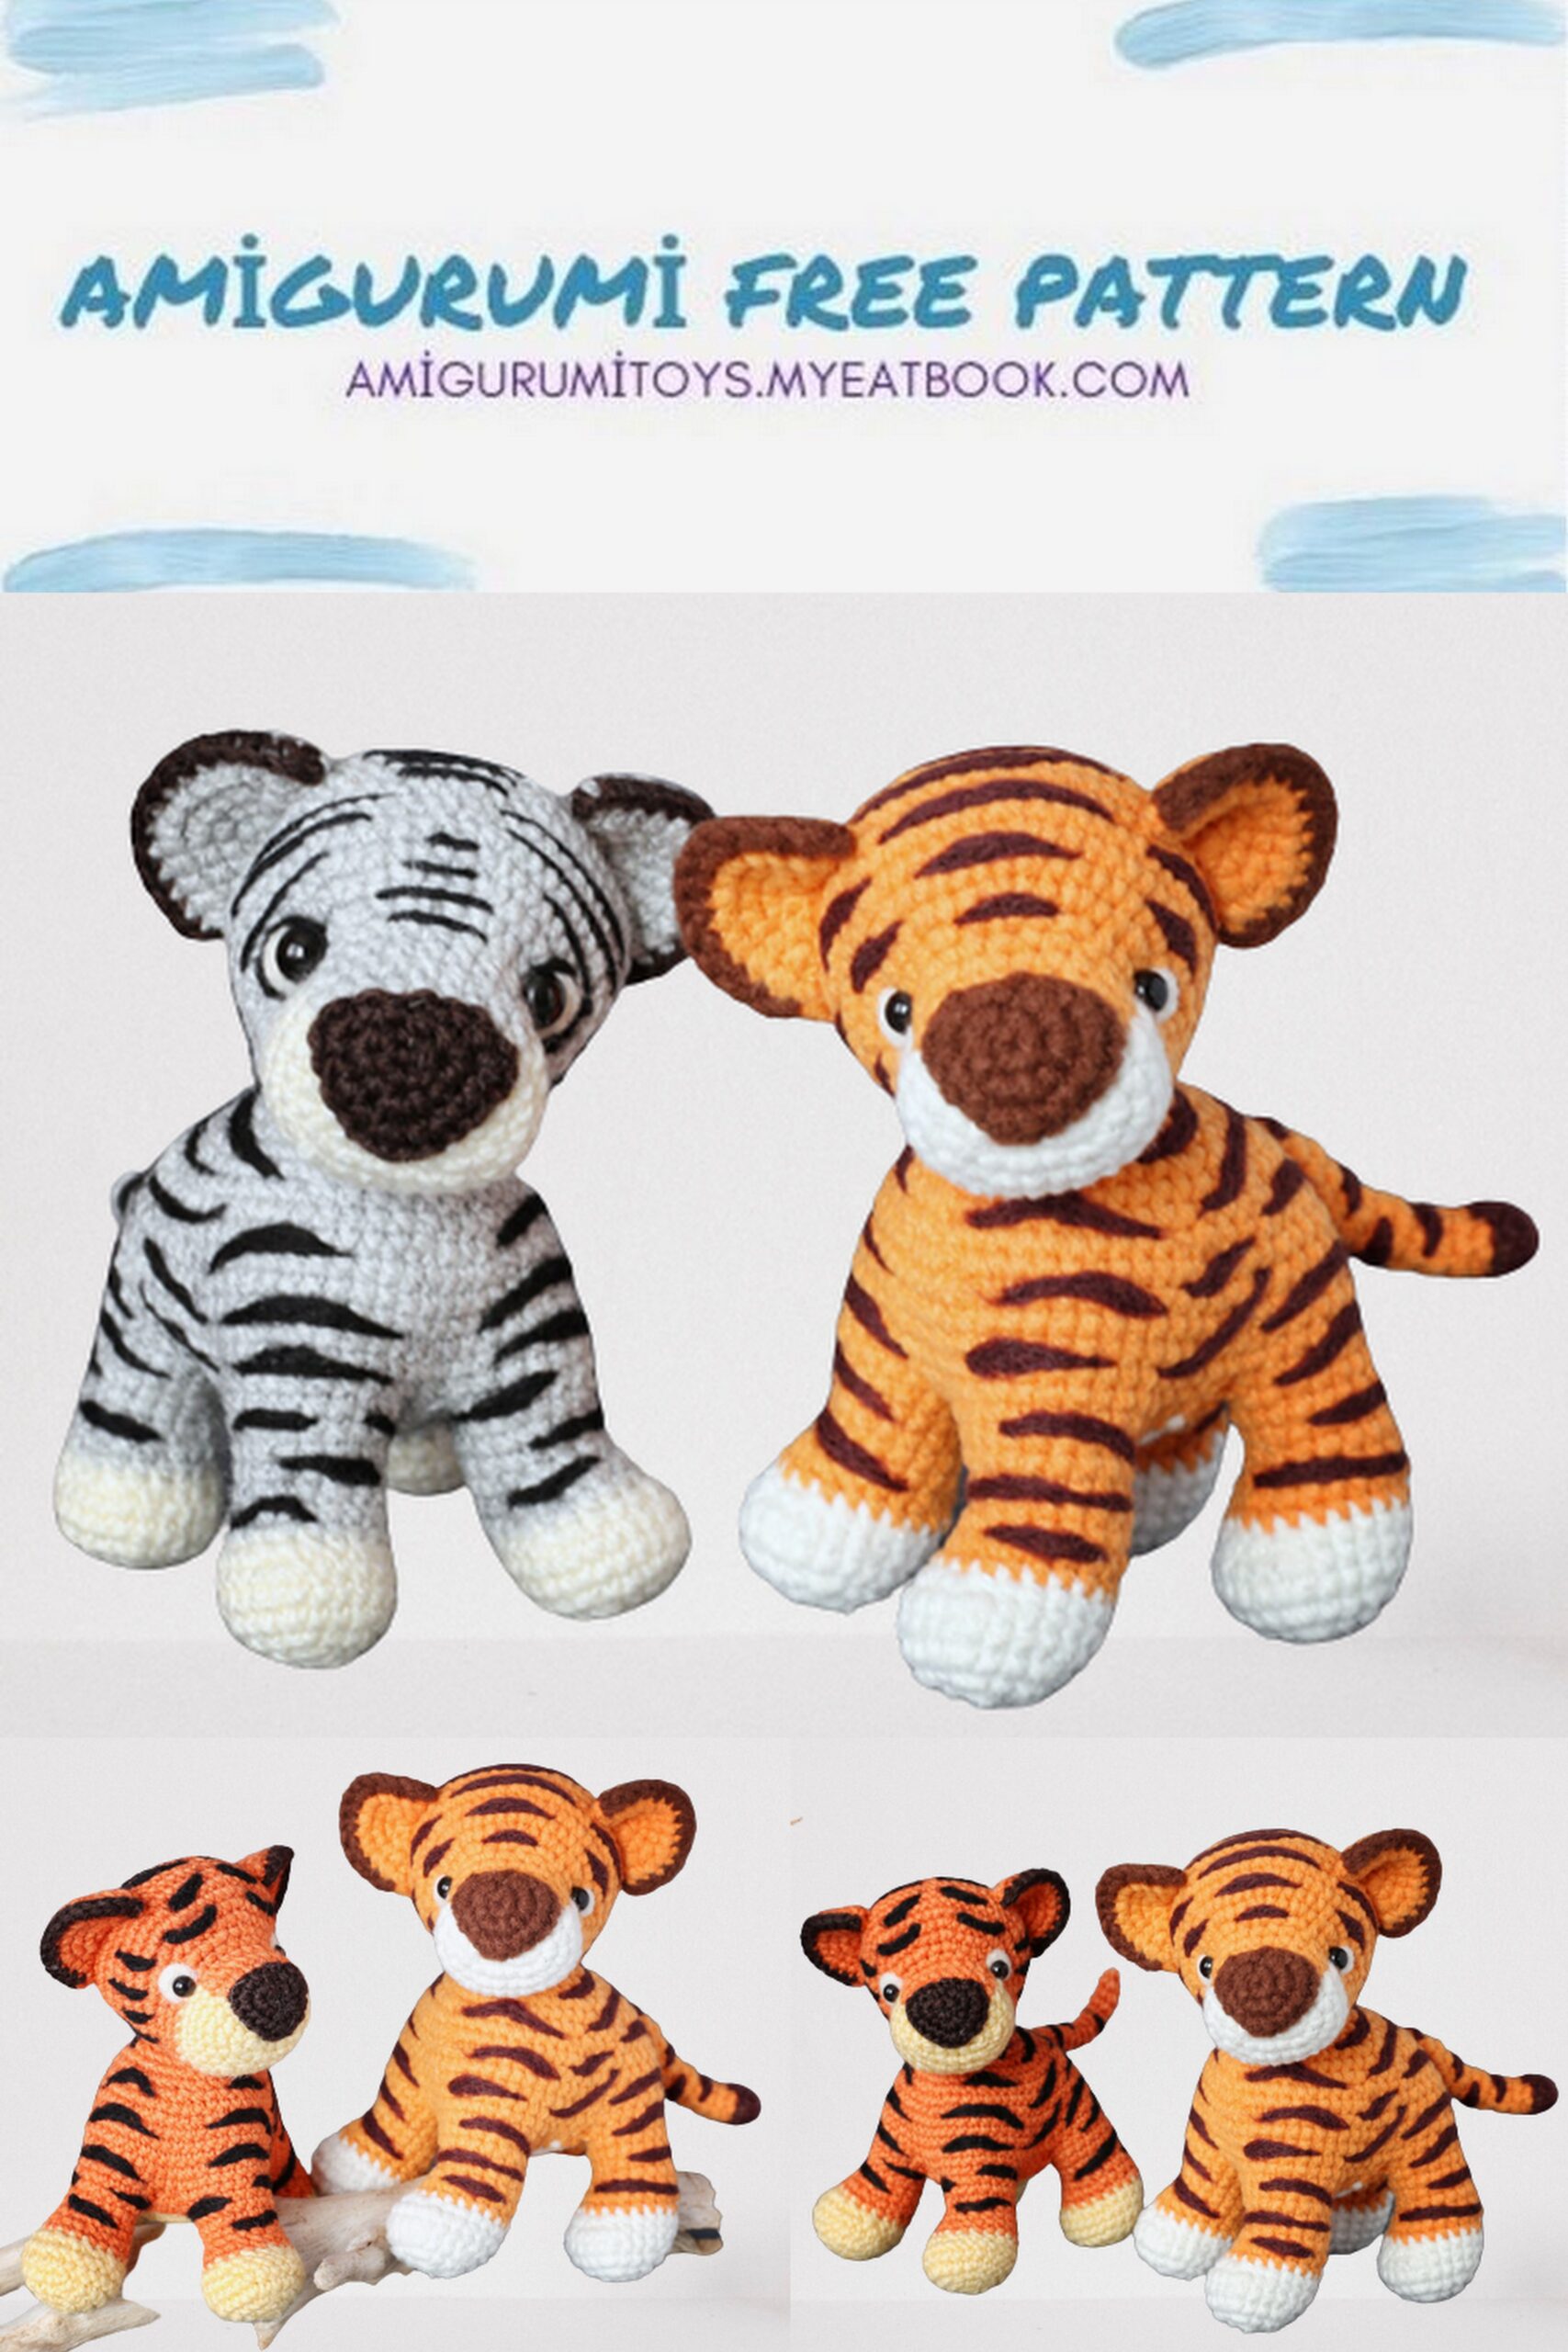
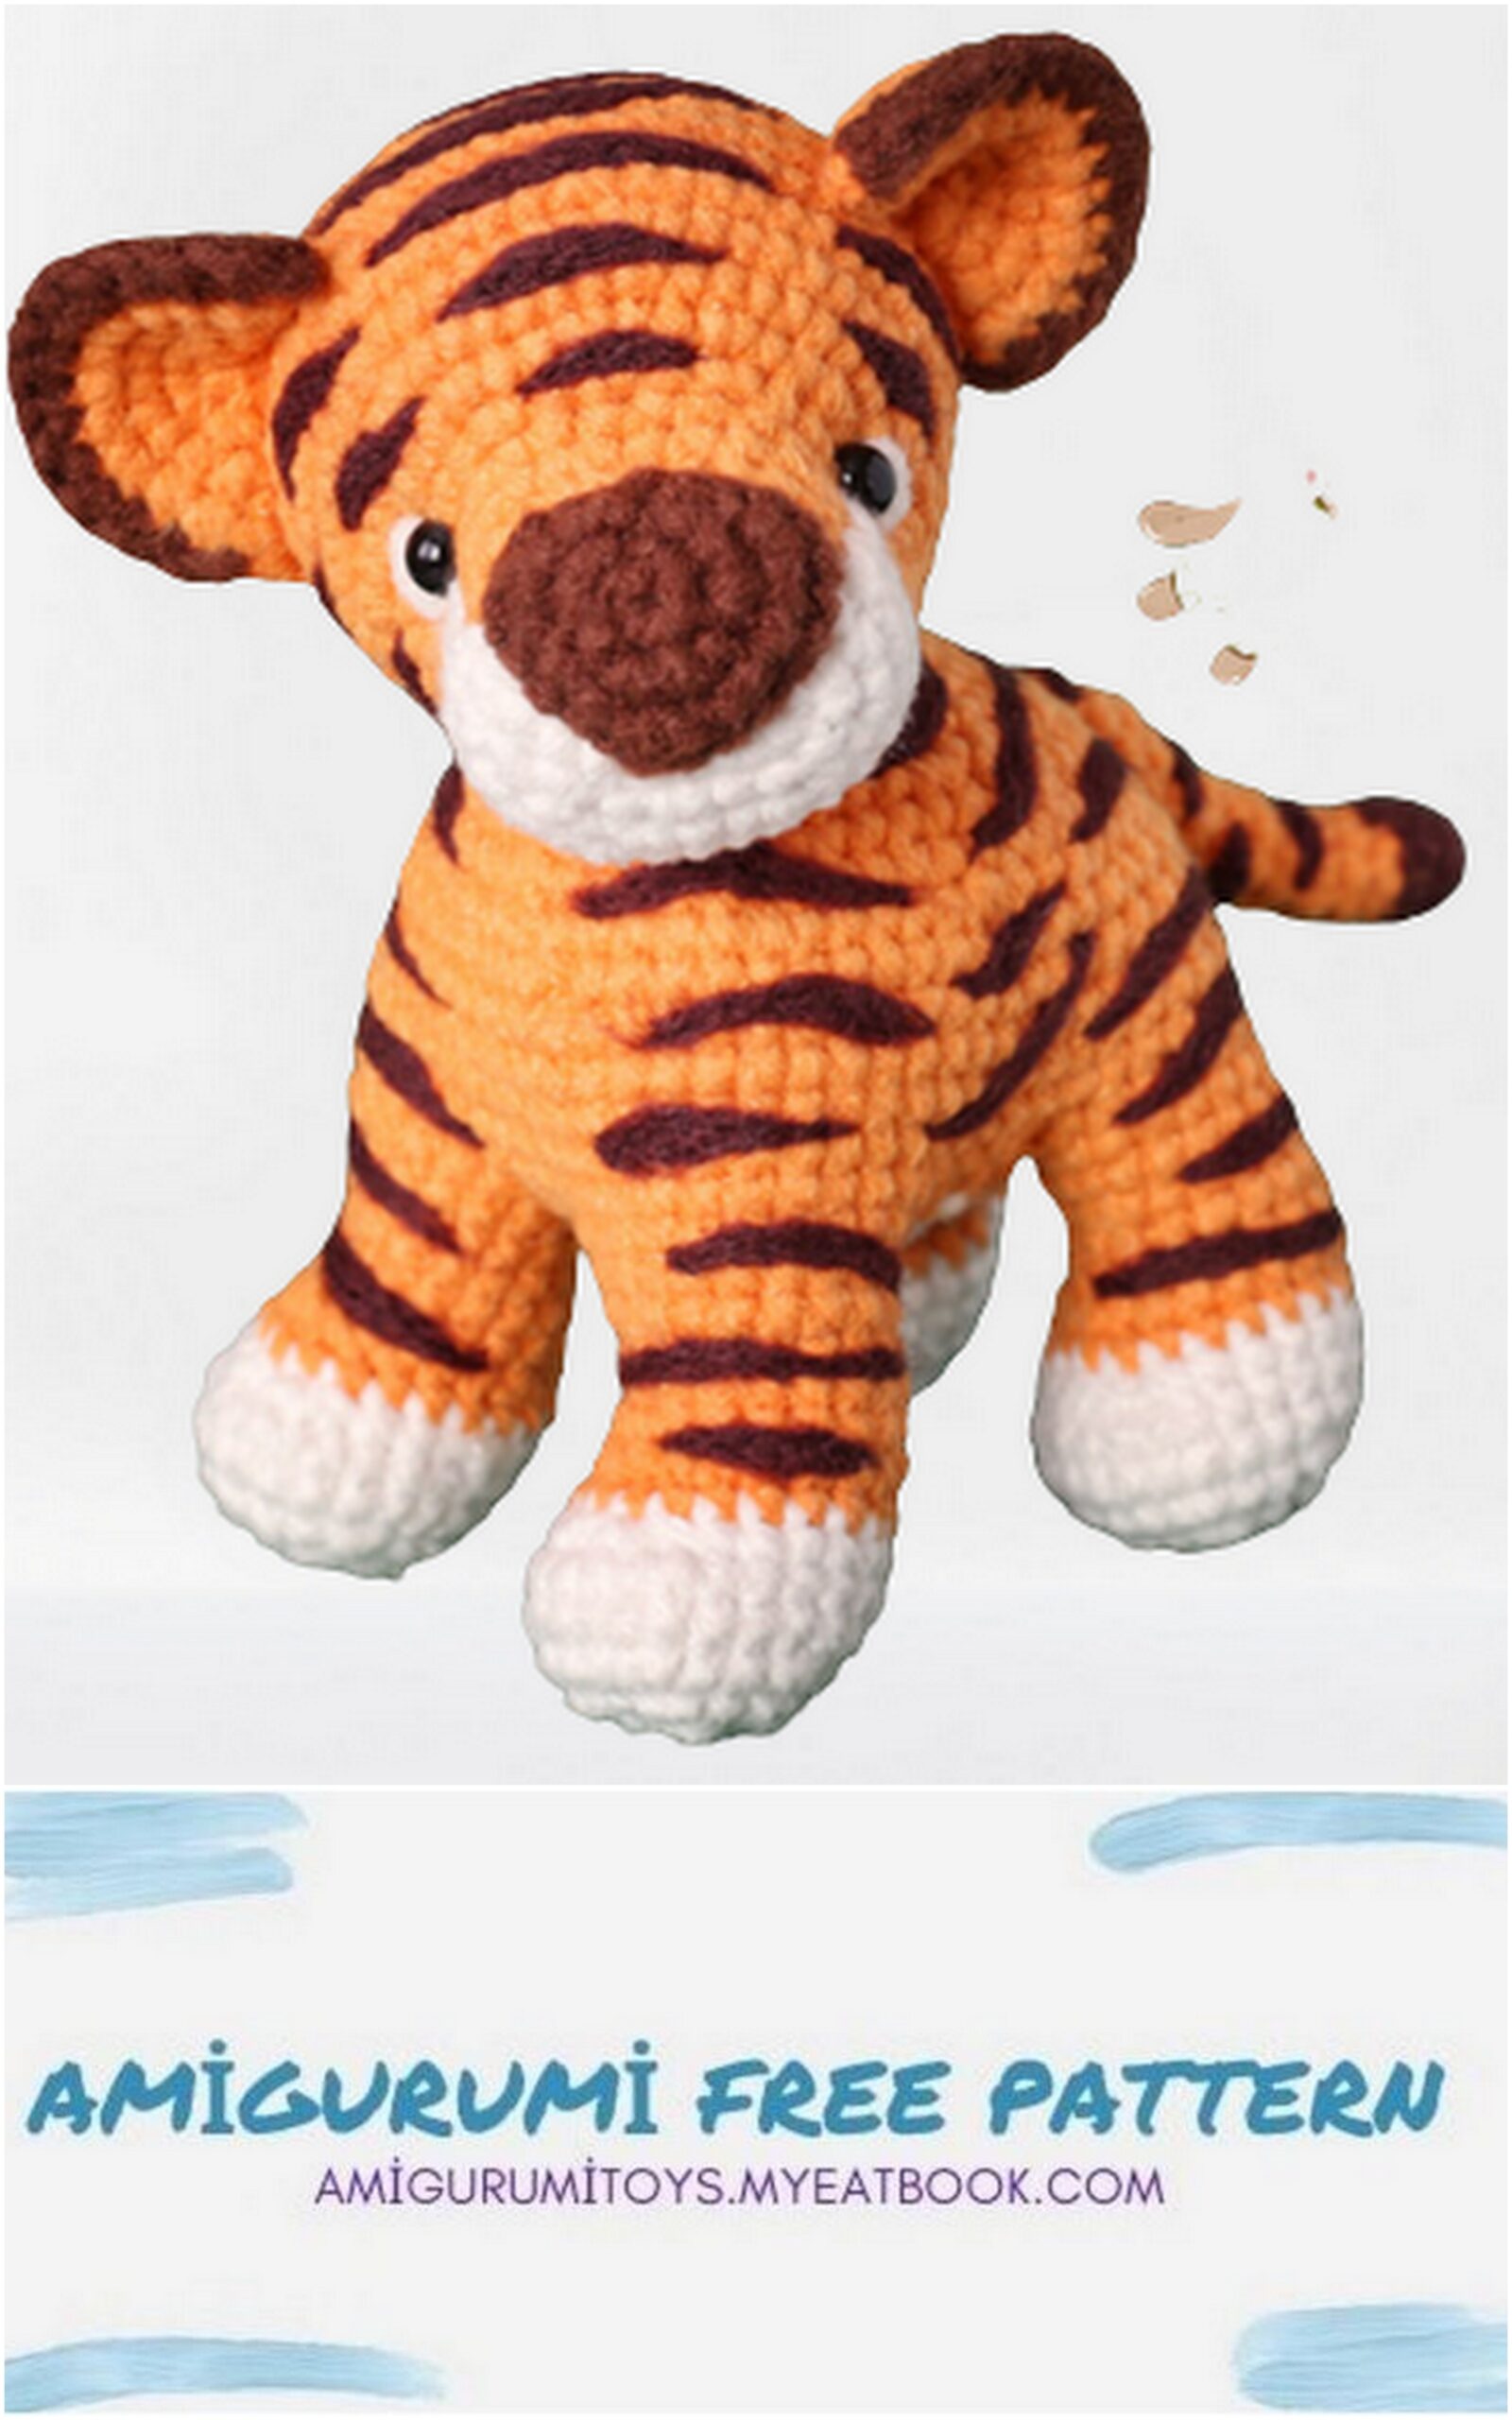
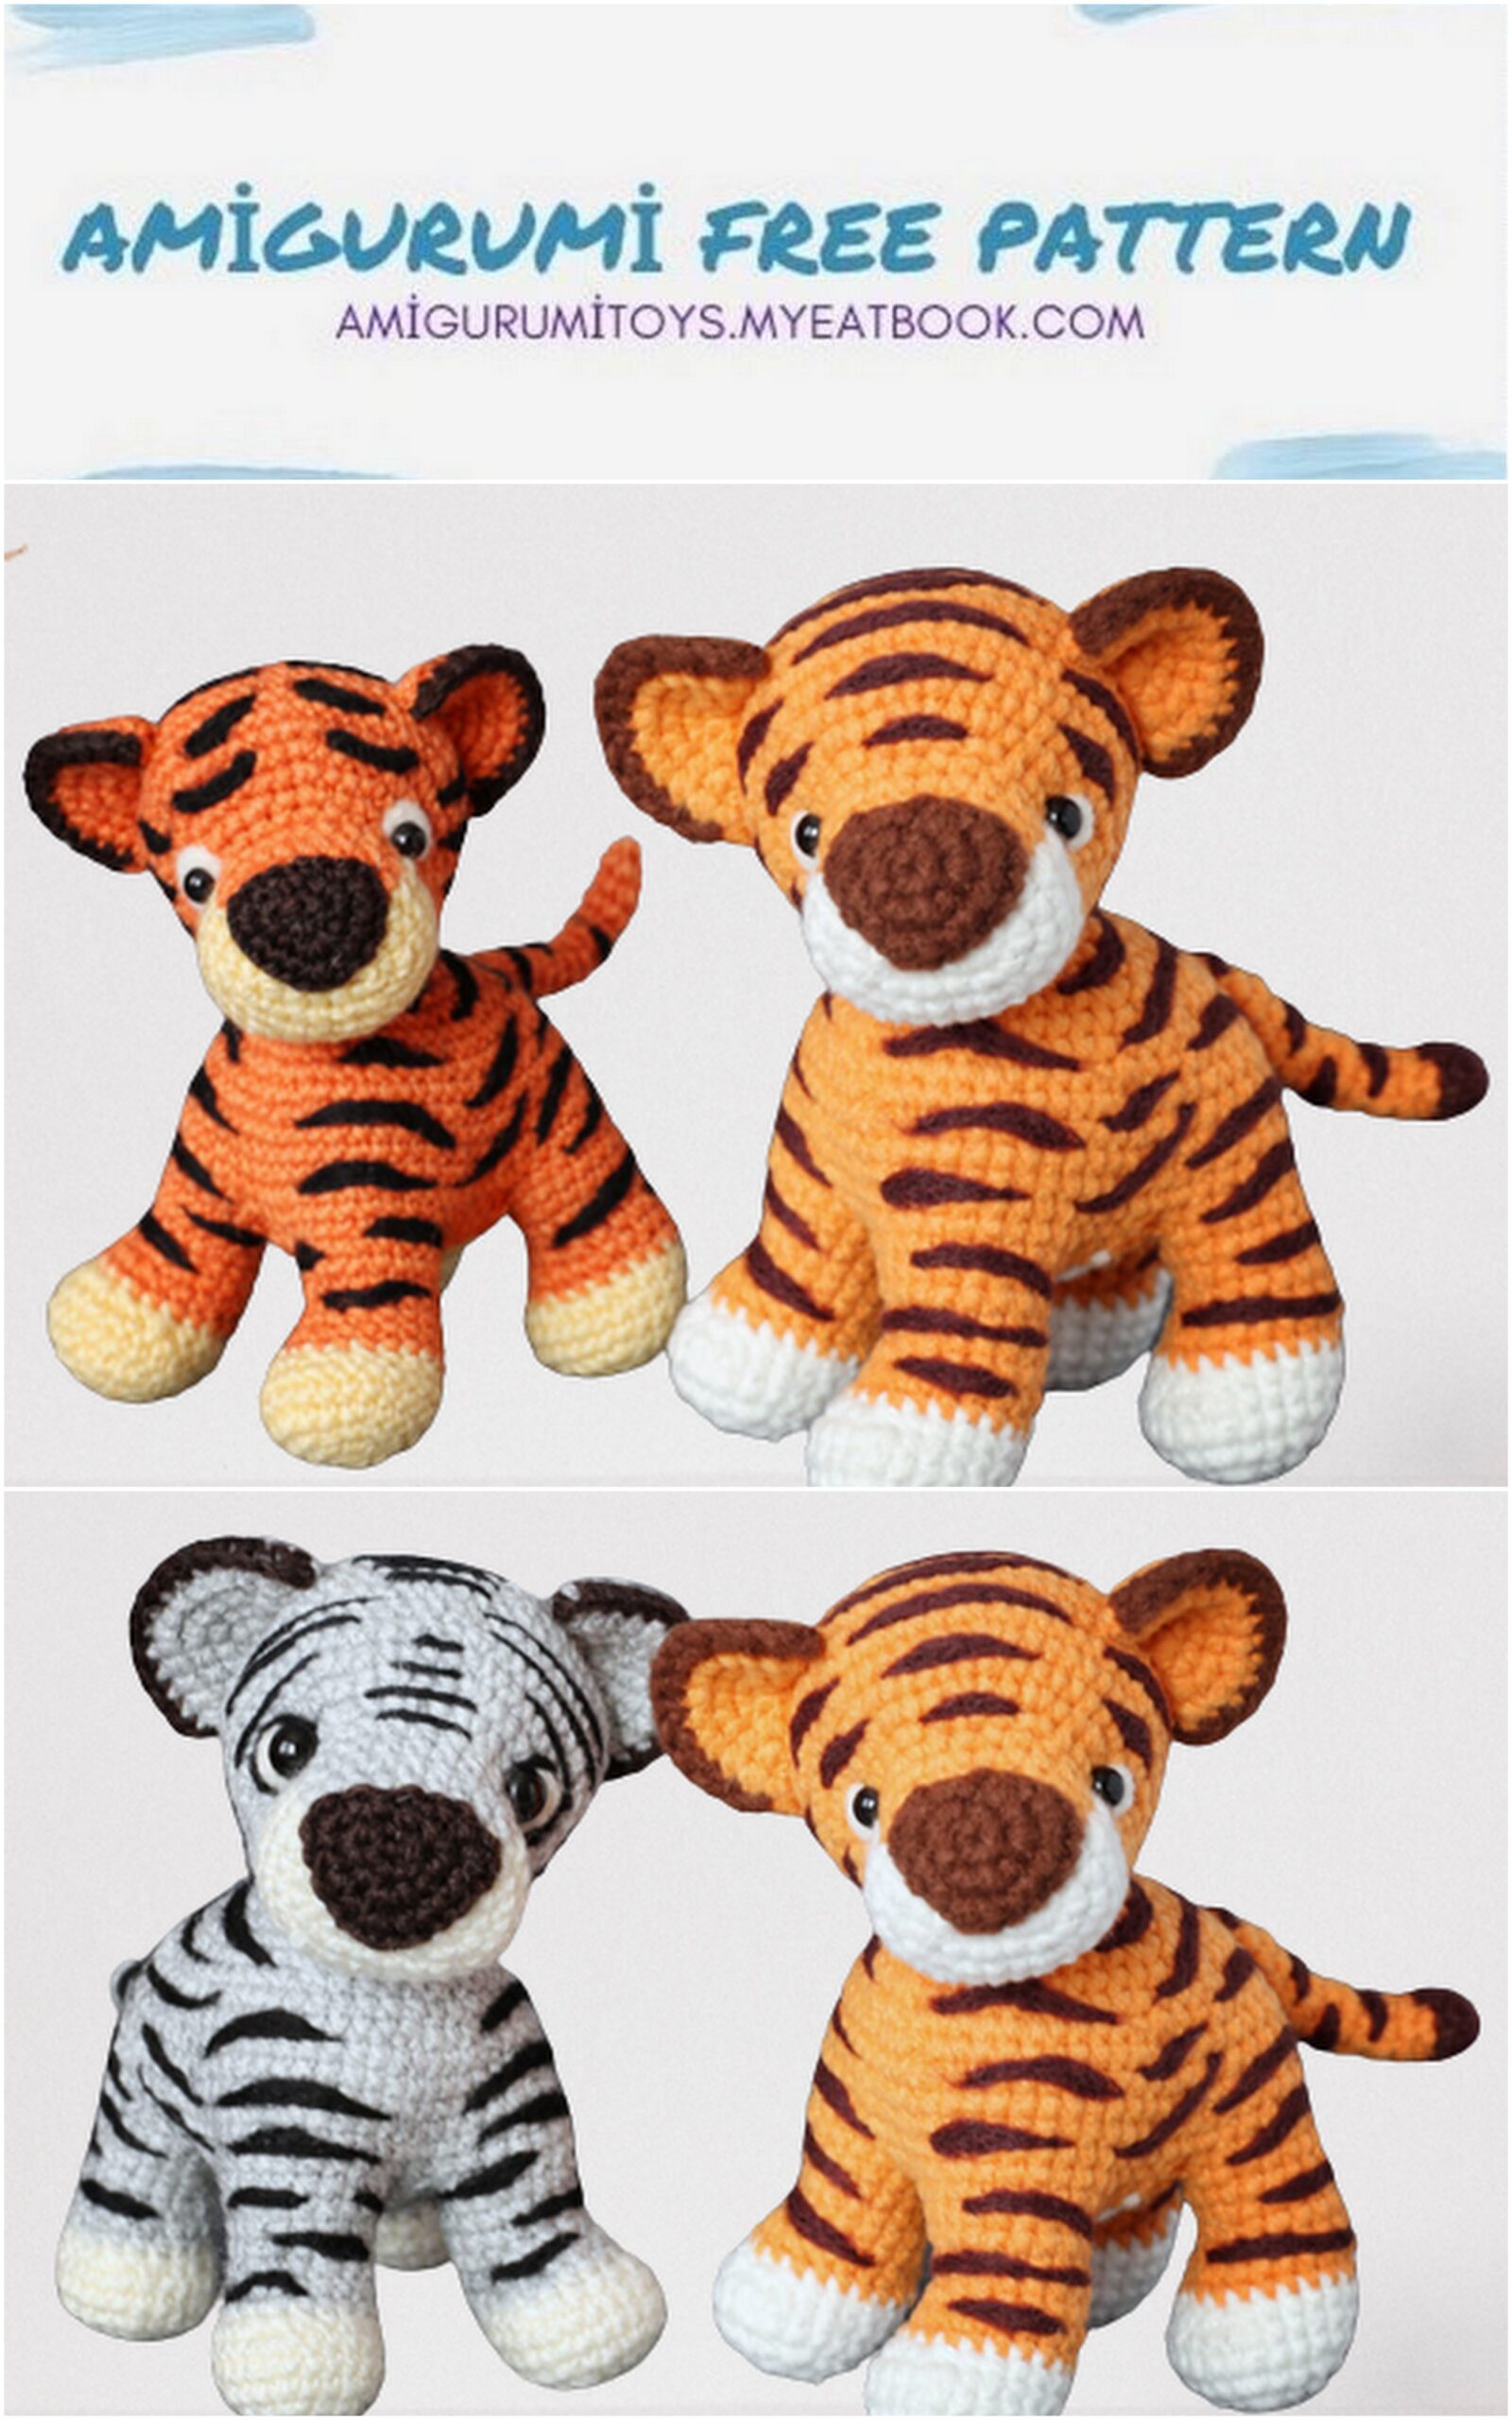
Knitted Tiger Cub Cupid.
Materials and tools for knitting a tiger cub.
Yarn in three colors: orange, black and white. I knitted my tiger cubs from different yarns: from semi-wool “Semenovskaya” OLGA, from Alize Superlana Klasik and Adelia Kiss yarn.
Hook of the right size. For knitting a tiger cub from all the listed types of yarn, I used hook No. 1.5.
Two black beads for tiger cub eyes or special eyes for soft toys.
Black wool for felting (if we use the dry felting technique when making tiger stripes).
Needle for felting (I have a thin twisted No. 40).
Sponge or brush for felting.
Filler for soft toys.
Threads and a needle for sewing on the details of our knitted tiger.

Knitting paws of a tiger cub (4 details).
We start knitting with white yarn.
1st row: cast on 2 ch. and knit 6 single crochets in the second loop from the hook (6). An alternative way is to tie 6 sc into an amigurumi ring (KA).
2 row: (1 inc) – repeat 6 times (12).
3 row: (1 inc, 1 sc) – repeat 6 times (18).
4 row: (1 inc, 2 sc) – repeat 6 times (24).
Rows 5-6: Work 1 sc in each st of previous row (24).
7 row: 6 sc, (1 dec, 1 sc) – repeat 4 times, 6 sc (20).
Starting from the next row, we will knit a tiger cub’s foot with yarn of the main (orange or gray) color.
8 row: knit 1 sc in each loop of the previous row (20).
9 row: 7 sc, (1 dec, 1 sc) – repeat 2 times, 7 sc (18).
10 row: 6 sc, 1 dec, 2 sc, 1 dec, 6 sc (16).
11 row: knit 1 sc in each loop of the previous row (16).
12th row: 6 sc, 1 inc, 2 sc, 1 inc, 6 sc (18).
Rows 13-14: Work 1 sc in each st of previous row (18).
Knitting the body of a tiger.
We start knitting with yarn of light (white or light yellow) color. We start knitting the details from the abdomen.
1st row: cast on 2 ch. and knit 6 single crochets in the second loop from the hook (6). An alternative way is to tie 6 sc into an amigurumi ring (KA).
2 row: (1 inc) – repeat 6 times (12).
3rd row: 3 inc, 3 sc, 3 inc, 3 sc (18).
4 row: (1 sc, 1 inc) – repeat 3 times, 3 sc, (1 sc, 1 inc) – repeat 3 times, 3 sc (24).
5 row: (2 sc, 1 inc) – repeat 3 times, 3 sc, (2 sc, 1 inc) – repeat 3 times, 3 sc (30).
Next, we knit with yarn of the main (orange or gray) color.
6 row: (3 sc, 1 inc) – repeat 3 times, 3 sc, (3 sc, 1 inc) – repeat 3 times, 3 sc (36).
7 row: we begin to knit the paws of the tiger cub in the body, forming one piece. Note! First we fix the two front legs. This must be taken into account in order to correctly orient the paws. They must “look” ahead. It is possible that you will have to dissolve the knitting in this place and knit the foot again. I did this several times before the foot fell into place. We knit: 2 sc, then with 6 single crochets we attach the foot to the tummy (we knit 6 loops of the foot and 6 loops of the abdomen together), 2 sc (they are located above the increase in the previous row), 6 sc (knitting together the loops of the foot and tummy, i.e. we attach the second paw of the knitted tiger), 4 sc along the long side of the oval, then we attach the third paw, knitting together with single crochets 6 loops of the paw and tummy (the third and fourth paws of the tiger cub should be directed in the same direction as the two front legs), 2 sc, attach the fourth leg, knitting together with single crochets 6 loops of the foot and tummy, 2 sc.
See how the paws of the tiger cub are oriented relative to the beginning of the row:
8 row: knit in a circle 60 sc: 2 sc on the tummy, then we tie the foot – 12 sc, 2 sc on the tummy, again we tie the tiger cub’s foot – 12 sc, 4 sc along the long side of the oval (along the tummy), along the foot 12 sc, 2 sc on the tummy, 12 sc on the paw and 2 sc on the tummy.
Rows 9-13: Work 1 sc in each st of previous row (60).
14th row: 12 sc, 1 dec, 2 sc, 1 dec, 24 sc, 1 dec, 2 sc, 1 dec, 12 sc (56).
In the photo, the arrows show the location of the reductions above the front paws of the tiger cub. They are also symmetrically located above the hind legs.
15 row: in this row we will have to make a blank for the future tail of the tiger cub. But first we need to get to the right place. To do this, we knit: 1 dec, 25 sc, 1 dec, 12 sc. We should be on the back of the body of the toy almost in the center. In the photo below, three single crochets are highlighted, which we will use when knitting a ponytail. The tail of the tiger will be located above them.
We knit 3 ch, skip 3 loops of the previous row, and, starting from the fourth, we continue to knit single crochets in a circle. We knit 12 sc. We will get a row with a hole for the tail (54).
16 row: 6 sc, 1 dec, 4 sc, 1 dec (between the front paws of a knitted tiger cub), 4 sc, 1 dec, 8 sc, (2 sc, 1 dec) – repeat 6 times, 2 sc (45).
17 row: 21 sc, (2 sc, 1 dec) – repeat 6 times (39).
We fill the paws of a tiger cub with a filler for soft toys.
18 row: 21 sc, (3 sc, 1 dec) – repeat 3 times, 3 sc (36).
19 row: (4 sc, 1 dec) – repeat 6 times (30).
20 row: (3 sc, 1 dec) – repeat 6 times (24).
We stuff the connected part of the toy.
21 row: (2 sc, 1 dec) – repeat 6 times (18).
22 row: (1 sc, 1 dec) – repeat 6 times (12).
23 row: we knit decreases until the hole is completely closed.
Knitting a ponytail for a tiger cub.
We fix the working thread in one of the 6 loops that form a hole for the tiger’s tail. We knit the tail in a circle clockwise (so that there are facial loops on top). There are 6 loops in one row of the tail. We knit to the desired length of the tail. I knitted 12 rows. Then we knit the decreases until the hole is completely closed, cut off the working thread. The tail does not need to be stuffed.
If you knit from stiff non-plastic yarn, then such a problem may arise: the tail of the tiger cub will be pulled up. When I knitted a gray tiger cub from Alize Superlana yarn, this happened. The fix is simple: with ordinary sewing threads, matched to the tone of the main yarn, make a few stitches under the tail and pull it to the body.
Knitting the head of a tiger cub.
We begin to knit the head of a tiger cub from the muzzle. For knitting, we use light yarn (white or light yellow).
1 row: we collect a chain of 5 ch. Next, we begin to tie the chain, starting with the second loop from the hook. 1 inc, 2 sc, 2 inc in one loop at the end of the chain. Then we knit on the other side of the chain: 2 sc, 1 inc (12).
2 row: (1 inc, 1 sc) – repeat 6 times (18).
3 row: (1 inc, 2 sc) – repeat 6 times (24).
4 row: (1 inc, 3 sc) – repeat 6 times (30).
Before moving on to knitting the 5th row, you may need to knit a few stitches to even out the knitting. In the fifth row, we will use yarn in two colors: light and basic. To the place where the yarn is changed (this is the beginning of the 5th row), we need to knit 4 sc. A red (or gray) area is located in the middle of the upper part of the muzzle (this is the long side of the oval). It takes 10 loops. This is a very important point, since it determines where the tiger cub’s nose will be located, whether it will be even. When knitting the first red tiger cub (from Semyonov yarn) and gray, I had to knit 2 sc for alignment. But knitting a tiger from the MK video did not require loops for alignment. The beginning of the row is shown in the photo:
From the 5th to the 8th rows inclusive, we will knit 1 sc in each loop of the previous row, but in the 5th, 6th and 7th rows we will alternate yarn of two colors – main and light.
5 row: light yarn: 4 sc;
main yarn (red or gray): 10 sc;
light yarn: 16 sc (30).
6 row: light yarn: 4 sc;
main yarn (red or gray): 10 sc;
light yarn: 16 sc (30).
7 row: light yarn: 4 sc;
main yarn (red or gray): 10 sc;
light yarn: 9 sc.
We change the color of the yarn to the main one and then we knit the part of the toy only with the yarn of the main color.
main yarn: 7 sc (30).
8 row: knit 1 sc in each loop of the previous row (30).
9 row: 4 sc, (1 sc, 1 inc) – repeat 6 times, 14 sc (36).
The area where we alternate 1 sc and 1 increase is highlighted in the photo:
10 row: 4 sc, (2 sc, 1 inc) – repeat 6 times, 14 sc (42).
11 row: (6 sc, 1 inc) – repeat 6 times (48).
12 row: (7 sc, 1 inc) – repeat 3 times, 24 sc (51).
Rows 13-16: Work 1 sc in each st of previous row (51).
17 row: (7 sc, 1 dec) – repeat 3 times, 24 sc (48).
18 row: (6 sc, 1 dec) – repeat 6 times (42).
19 row: (5 sc, 1 dec) – repeat 6 times (36).
20 row: (4 sc, 1 dec) – repeat 6 times (30).
21 row: (3 sc, 1 dec) – repeat 6 times (24).
22 row: (2 sc, 1 dec) – repeat 6 times (18).
23 row: (1 sc, 1 dec) – repeat 6 times (12).
24 row: we knit decreases until the hole is completely closed.

Knitting the nose of a tiger cub.
The basis of the spout is crocheting a triangle. We will knit the triangle with single crochets from the center.
We knit the nose with black or dark brown yarn.
1st row: cast on 2 ch. and knit 6 sc in the second loop from the hook.
2 row: (1 sc, 2 inc in one loop) – repeat to the end of the row, i.e. 3 times (15).
Increases are located at the vertices of the triangle.
3 row: 3 sc, 3 sc in one loop, 3 sc, 3 sc in one loop, 4 sc, 3 sc in one loop. We knitted 13 loops of the previous row. We have them in a row, as you remember, 15. So, we knit 2 more sc. We finish knitting a row with a connecting column. (21).
Knitting ears for a tiger cub (2 parts).
We start knitting the eyelet with yarn of the main color.
Row 1: Cast on 2 ch., 6 sc in 2nd st from hook.
2 row: 1 inc in each loop of the previous row (12).
3 row: (1 sc, 1 inc) – repeat 6 times (18).
4 row: (2 sc, 1 inc) – repeat 6 times (24).
5 row: (3 sc, 1 inc) – repeat 6 times (30)
We fold the part in half, tie the outer edge of the ear with single crochets with black or dark brown yarn.
We make stripes on the body of a tiger cub using the technique of dry felting.