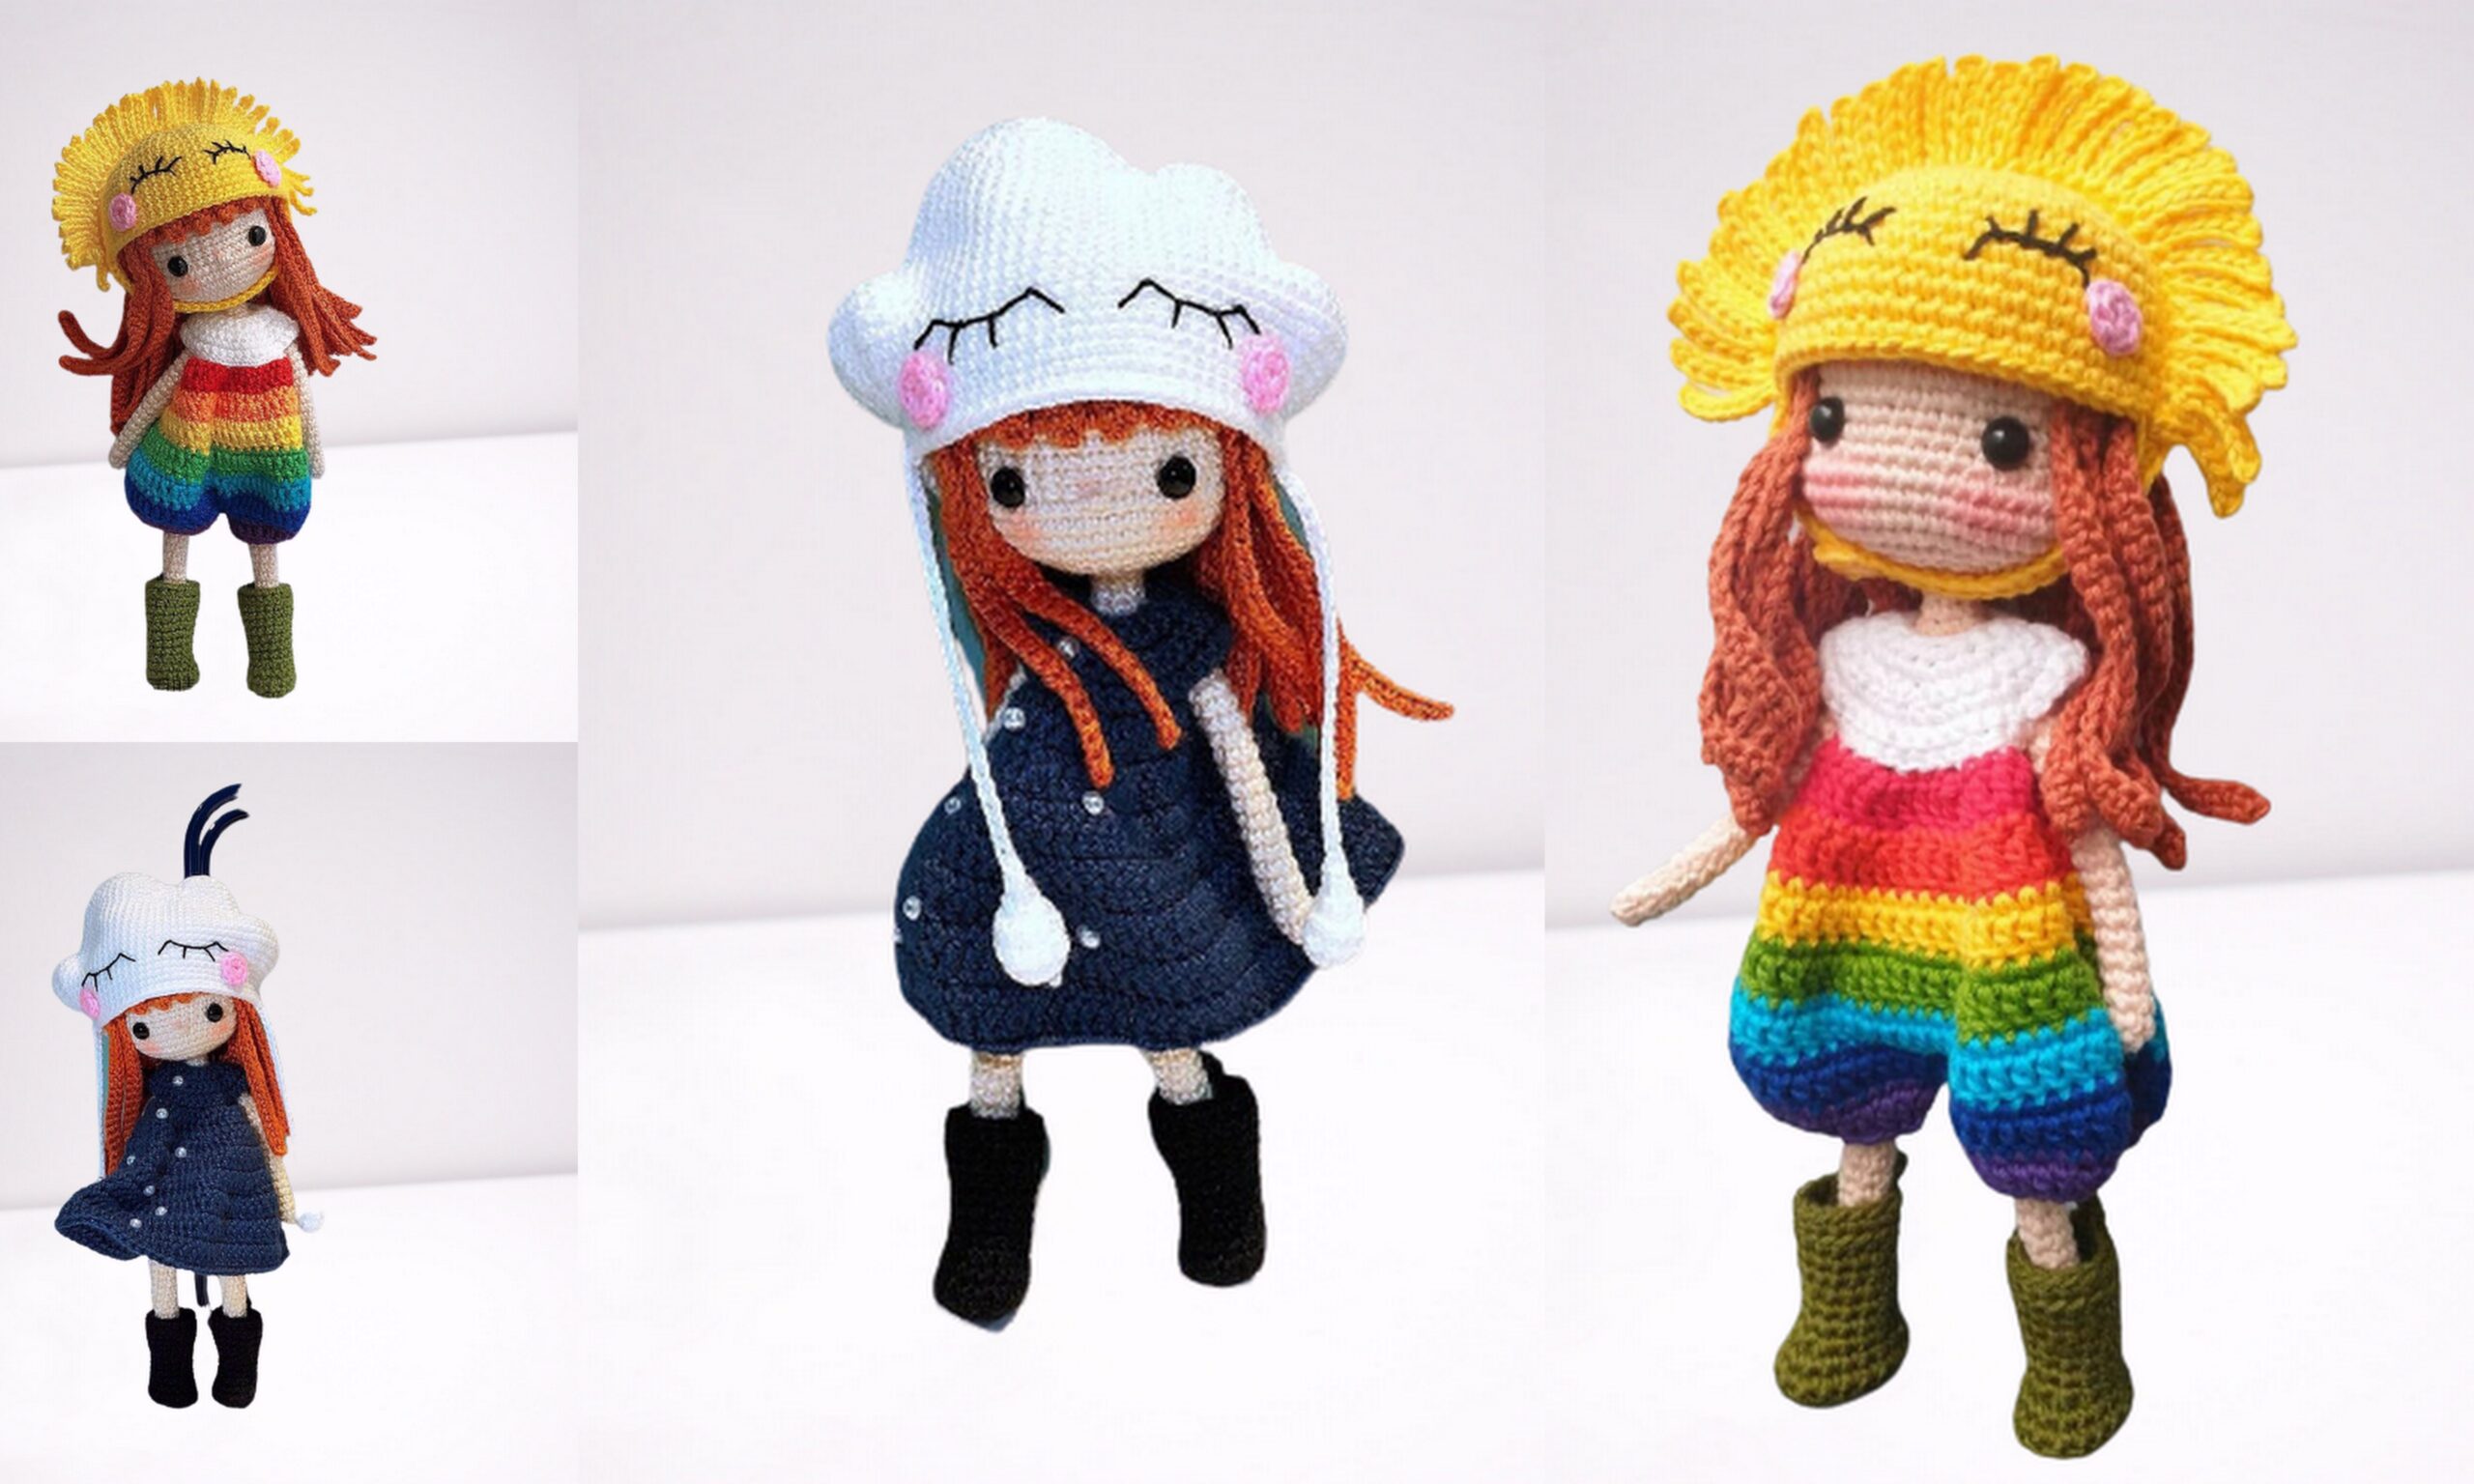
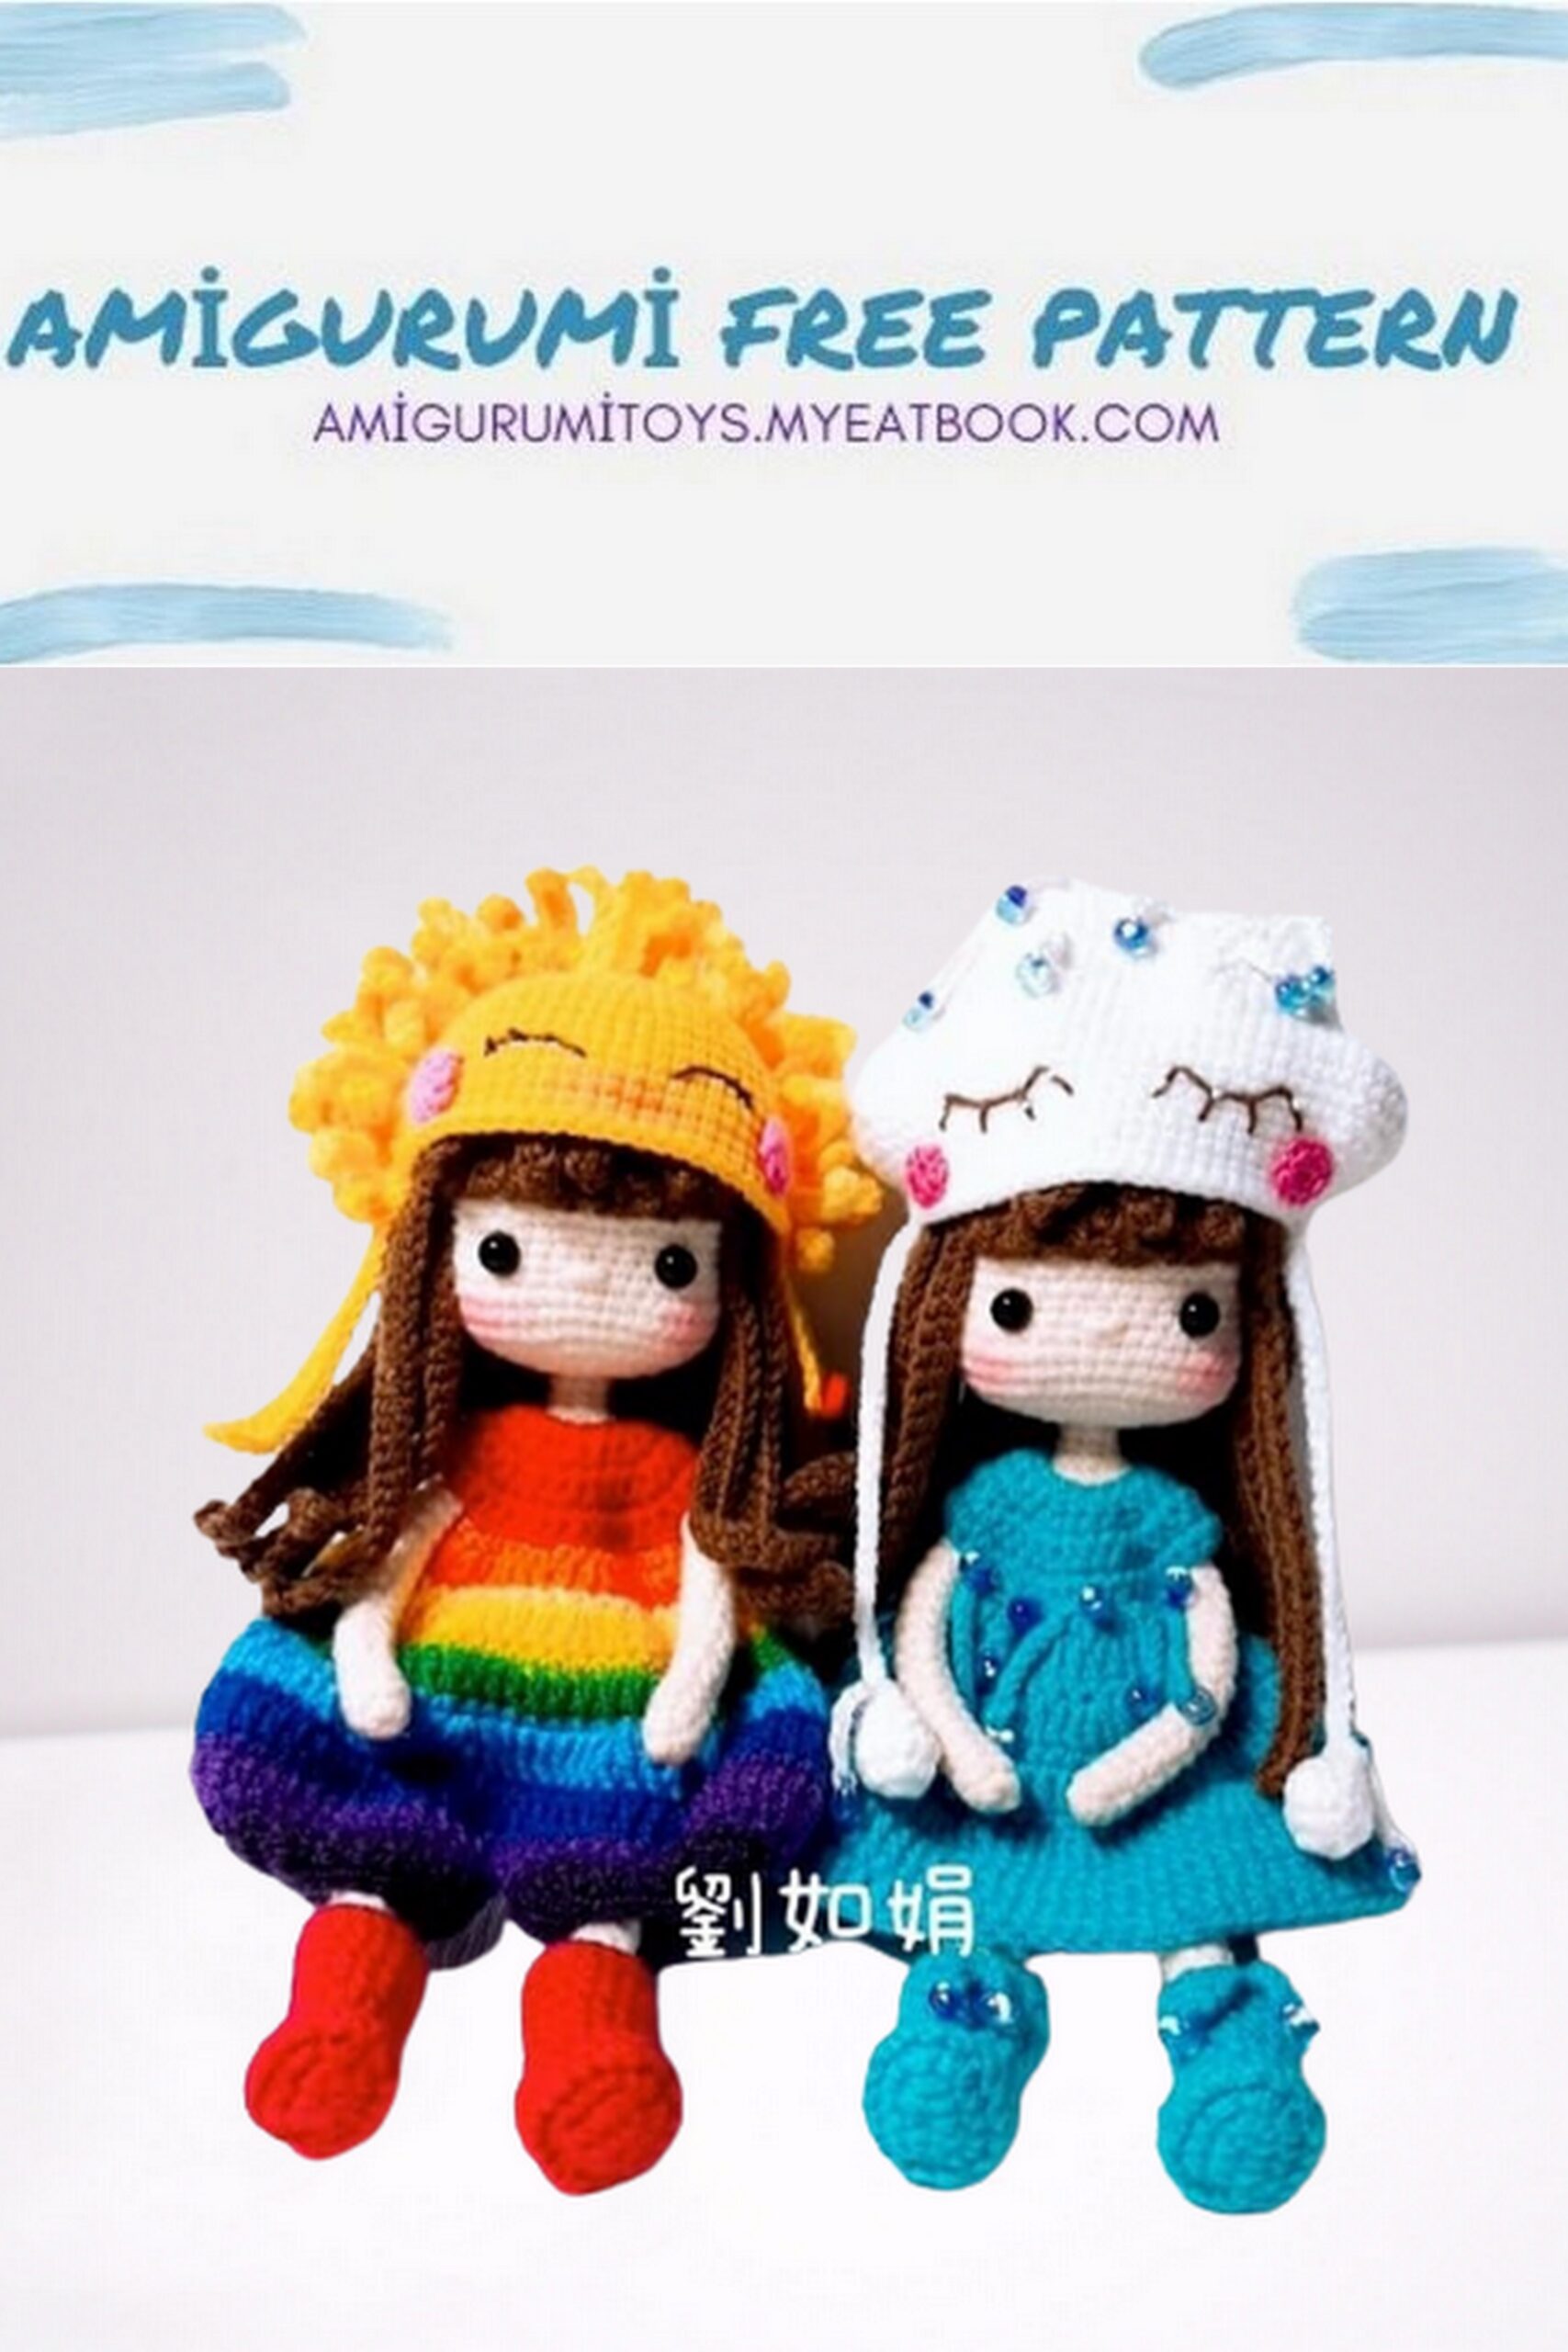
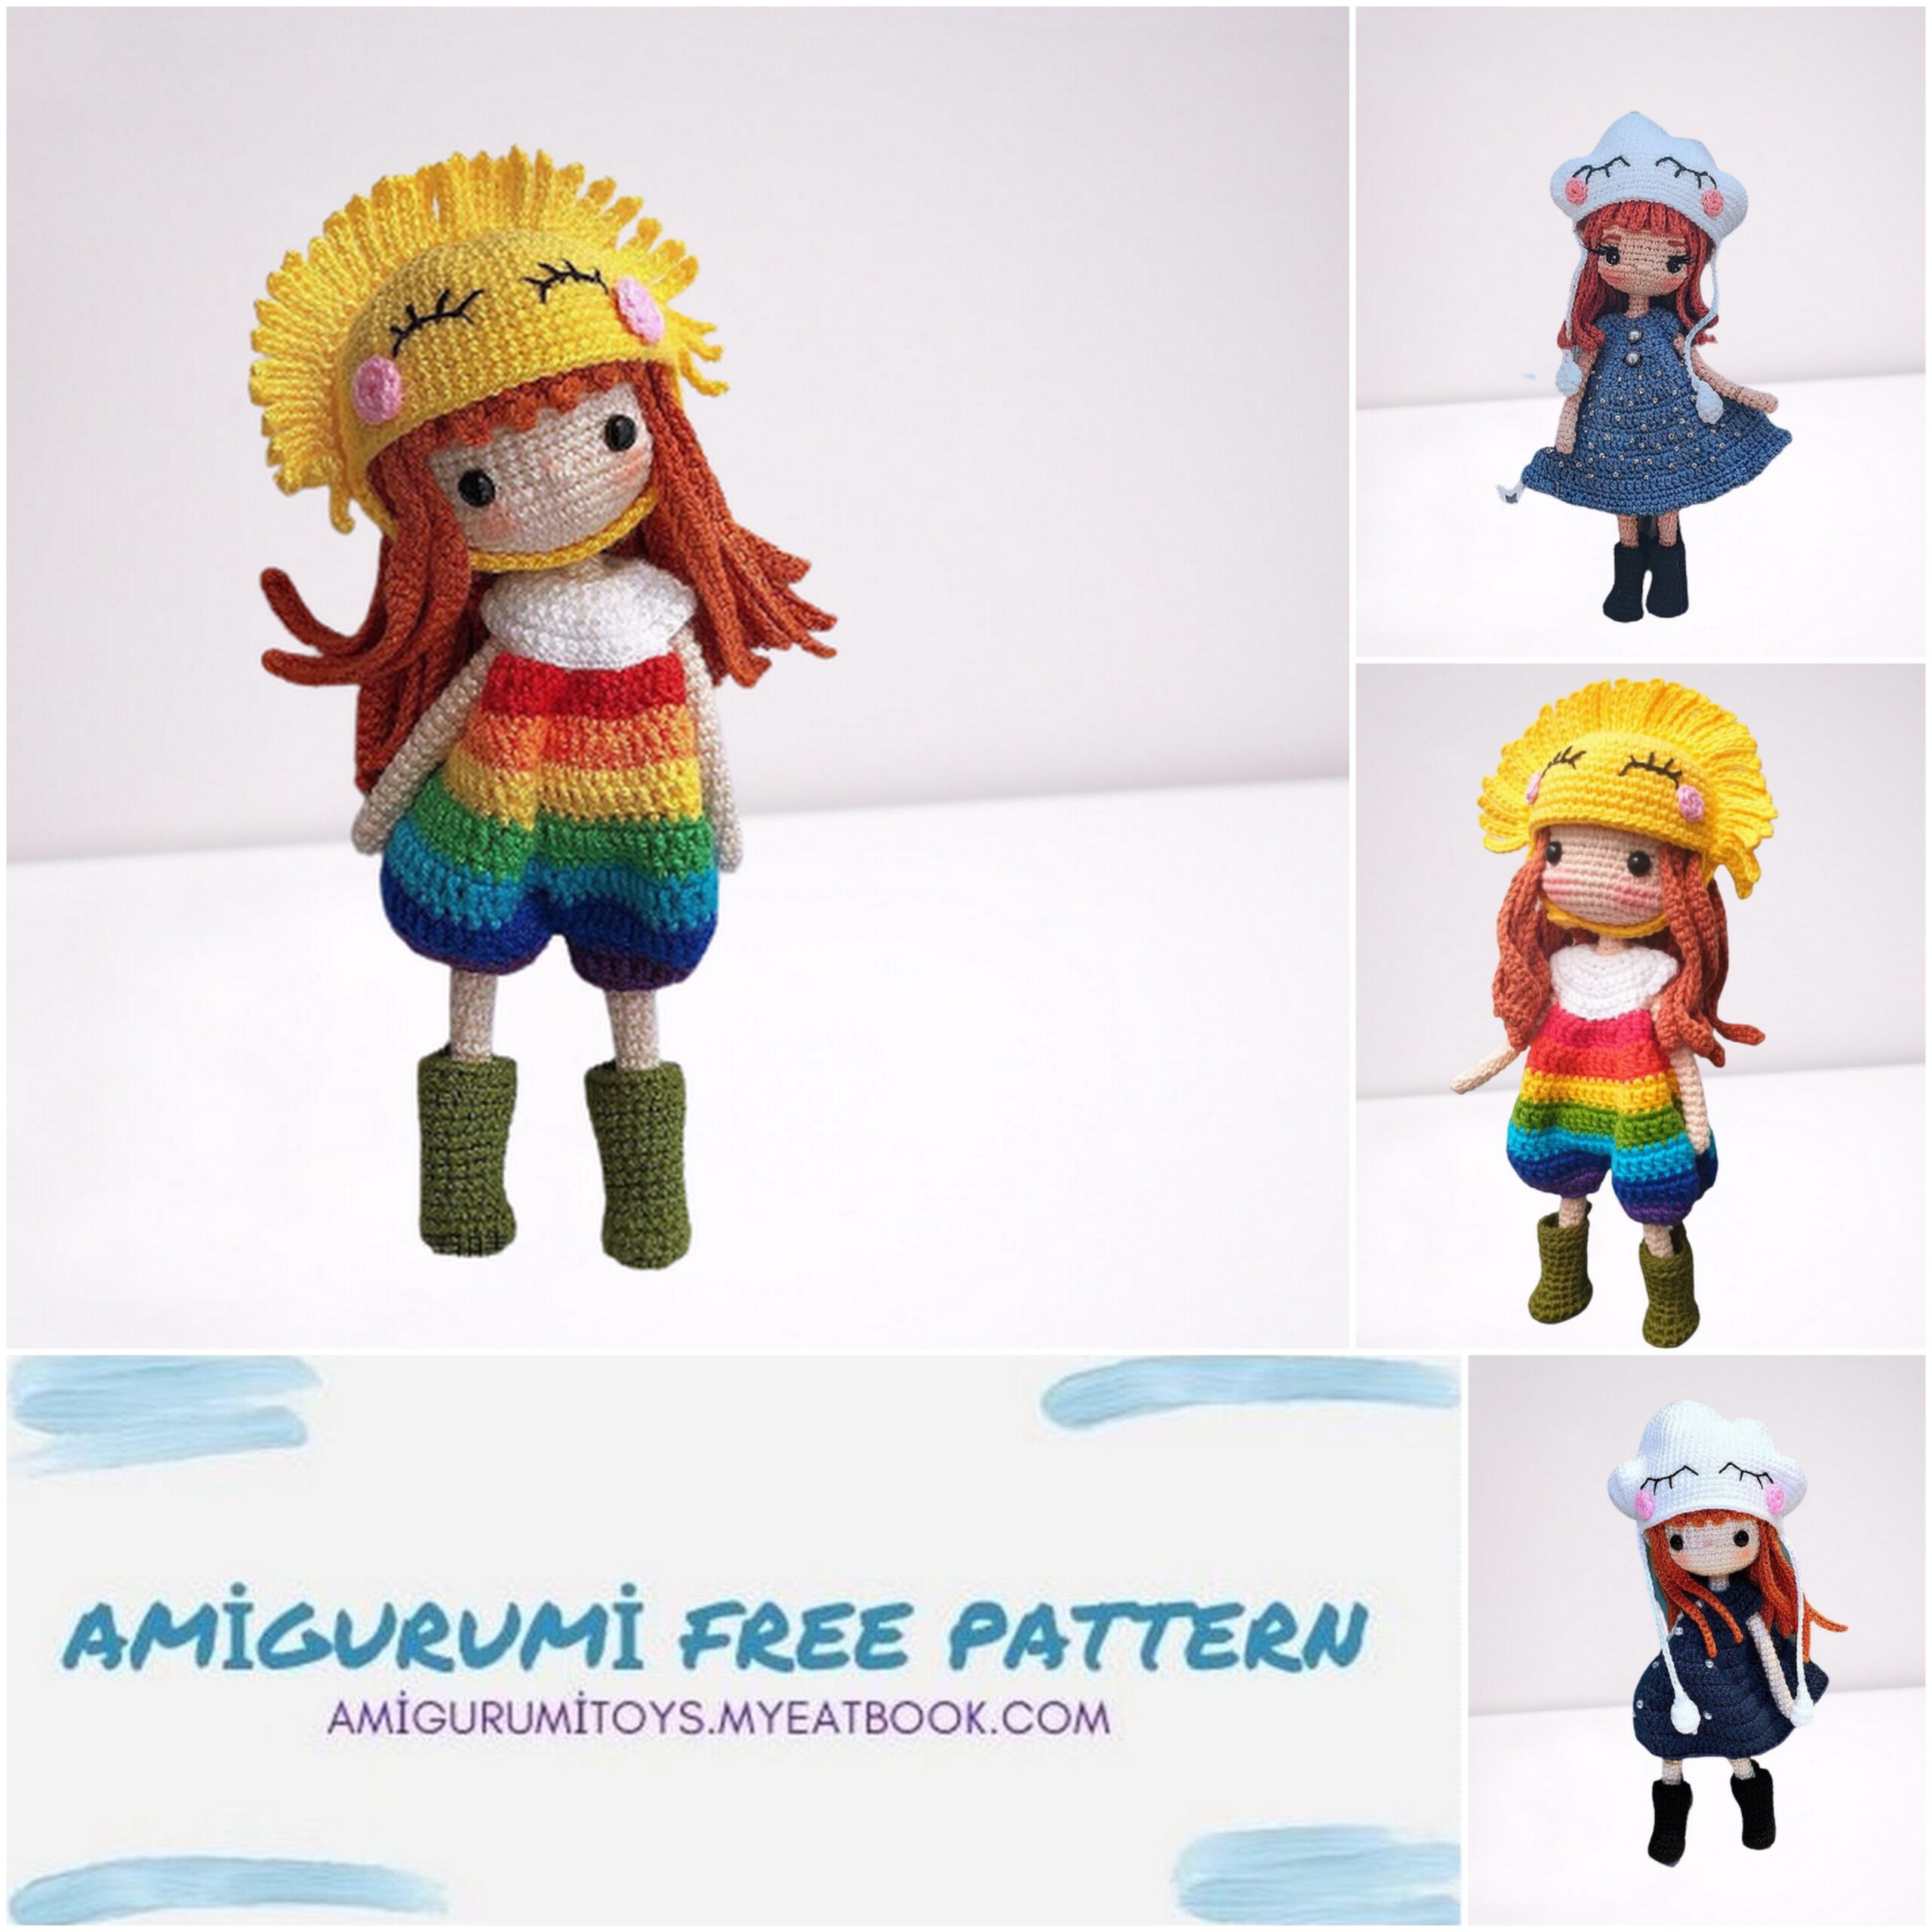
We continue to share the most beautiful free amigurumi patterns. You can find the free pattern of Amigurumi Weathergirl on our website.
Stitch symbol:
SC: single crochet
İNC: increase (make 2 sts in one st)
DEC: decrease (make 1 st from two st)
W: 3 single crochet in one st
HDC: half double crochet
DC: double crochet
DC-DEC: decrease double crochet (make 1st from two sts)
FW: 3 single double crochet in one st
BLO: back loop only
FLO: front loop only
CH: chain
SL-ST: slip stitch
Tools, materials and colors:
1.75mm hook
4 ply acrylic yarn or 3# lace yarn
Note: you may change color and yarn
4mm/5mm black eye (insert type)
Fiberfill, 1.5mm/2mm aluminium wire, button (2pcs)
* Height of finished doll about 19cm (with hat)
Arm*2
Skin Color
1: Work in Spiral: Magic Ring 1CH, 6SC
2-20: 6SC (Fasten off and leave a LONG tail for sewing armpit hole)
Note: Only put wire in arms – no stuffing

Leg*2
Skin Color
1: Work in Spiral: Magic ring 5SC
2: 4SC, İNC
3: 4SC, 2İNC
4: 4SC, 2DEC
5-11: 6SC
12: 5SC, İNC
13-19: 7SC
20: 3SC, İNC, 3SC
21-22: 8SC
23: 7SC, İNC
24: 4SC, İNC, 4SC
25: 10SC (Fasten off)
Body
White Color
26: From now make a SL-ST and 1CH at the end of each row.
Find the middle point on the inside of the legs and make White 3CH to join the right leg to left leg at the back 10SC, 3SC, 10SC, 3SC, SL-ST
27: 1CH, 26SC, SL-ST
28: 1CH, 24SC, DEC, SL-ST
29: 1CH, 4SC, DEC, 12SC, DEC, 5SC, SL-ST
Skin Color
30: BLO 1CH, 23SC, SL-ST
31: 1CH, 21SC, DEC, SL-ST
32: 1CH, 4SC, DEC, 10SC, DEC, 4SC, SL-ST
33: 1CH, 3SC, DEC, 10SC, DEC, 3SC, SL-ST
34: 1CH, (SC, DEC)*6, SL-ST
35-42: 1CH, 12SC, SL-ST
43: 1CH, 3SC, (add arm 6SC), 6SC, (add arm 6SC), 3SC, SL-ST
44: 1CH, 24SC, SL-ST
45: 1CH, (2SC, DEC, 2SC)*4, SL-ST (Put in wire and stuff)
46: 1CH, (SC, DEC)*6, DEC, SL-ST
47: 1CH, SC, 6DEC, SL-ST
48-49: 1CH, 7SC, SL-ST
50: 1CH, 6SC, İNC, SL-ST

Head
51: 1CH, FLO 8İNC, SL-ST
52: 1CH, (SC, İNC)*8, SL-ST
53: 1CH, (SC, İNC, SC)*8, SL-ST
54: 1CH, (3SC, İNC)*8, SL-ST
55: 1CH, 13SC, 4İNC, 6SC, 4İNC, 13SC, SL-ST
56-58: 1CH, 48SC, SL-ST
59: 1CH, 13SC, 4DEC, 6SC, 4DEC, 13SC, SL-ST
60-61: 1CH, 40SC, SL-ST
62: 1CH, 11SC, (SC, İNC, SC)*6, 11SC, SL-ST
63-64: 1CH, 46SC, SL-ST
65: 1CH, 12SC, DEC, 2SC, DEC, 10SC, DEC, 2SC, DEC, 12SC, SL-ST
66: 1CH, 42SC, SL-ST
67: 1CH, (5SC, DEC)*6, SL-ST
68: 1CH, 36SC, SL-ST
69: 1CH, (2SC, DEC, 2SC)*6, SL-ST (Stuff)
70: 1CH, (3SC, DEC)*6, SL-ST
71: 1CH, (SC, DEC, SC)*6, SL-ST
72: 1CH, (SC, DEC)*6, SL-ST
73: 1CH, 6DEC, SL-ST (Stuff , fasten off and leave a LONG tail for sewing hole)
Nose –
Please see pic
Hair Cap A (bottom)
Hair color
A- Magic Ring 3CH, 11DC, SL-ST (3CH=1DC)
Hair (total 24 strands)
1: 31CH, turn to 2nd st, 30SC, SL-ST into same st
2: 1CH, turn and work in row (see pic), 10SC, 21CH, turn to 2nd st, 30SC, SL-ST into next st
3: 1CH, turn and work in row (see pic), 10SC, 21CH, turn to 2nd st,30SC, SL-ST into same st
4: 1CH, turn and work in row (see pic), 10SC, 21CH, turn to 2nd st,30SC, SL-ST into next st
5-18: REPREAT ROW 3 & 4 30
19-24: 1CH, turn to 2nd st, 5SC, 2HDC, 1CH, turn to 2nd st, 2HDC, 5SC, SL-ST into next st (Fasten off and leave a LONG tail for sewing)
Hair Cap B (top)
Hair color
B-Magic Ring 8SC, SL-ST
Hair (total 16 strands)
1: 35CH, turn to 2nd st, 34SC, SL-ST into same st
2: 35CH, turn to 2nd st, 34SC, SL-ST into next st
3-10: REPEAT ROW 1 & 2
11: 11CH, turn to 2nd st, 10SC, SL-ST into same st
12: 11CH, turn to 2nd st, 10SC, SL-ST into next st
13-16: REPEAT ROW 11 & 12 (Fasten off)
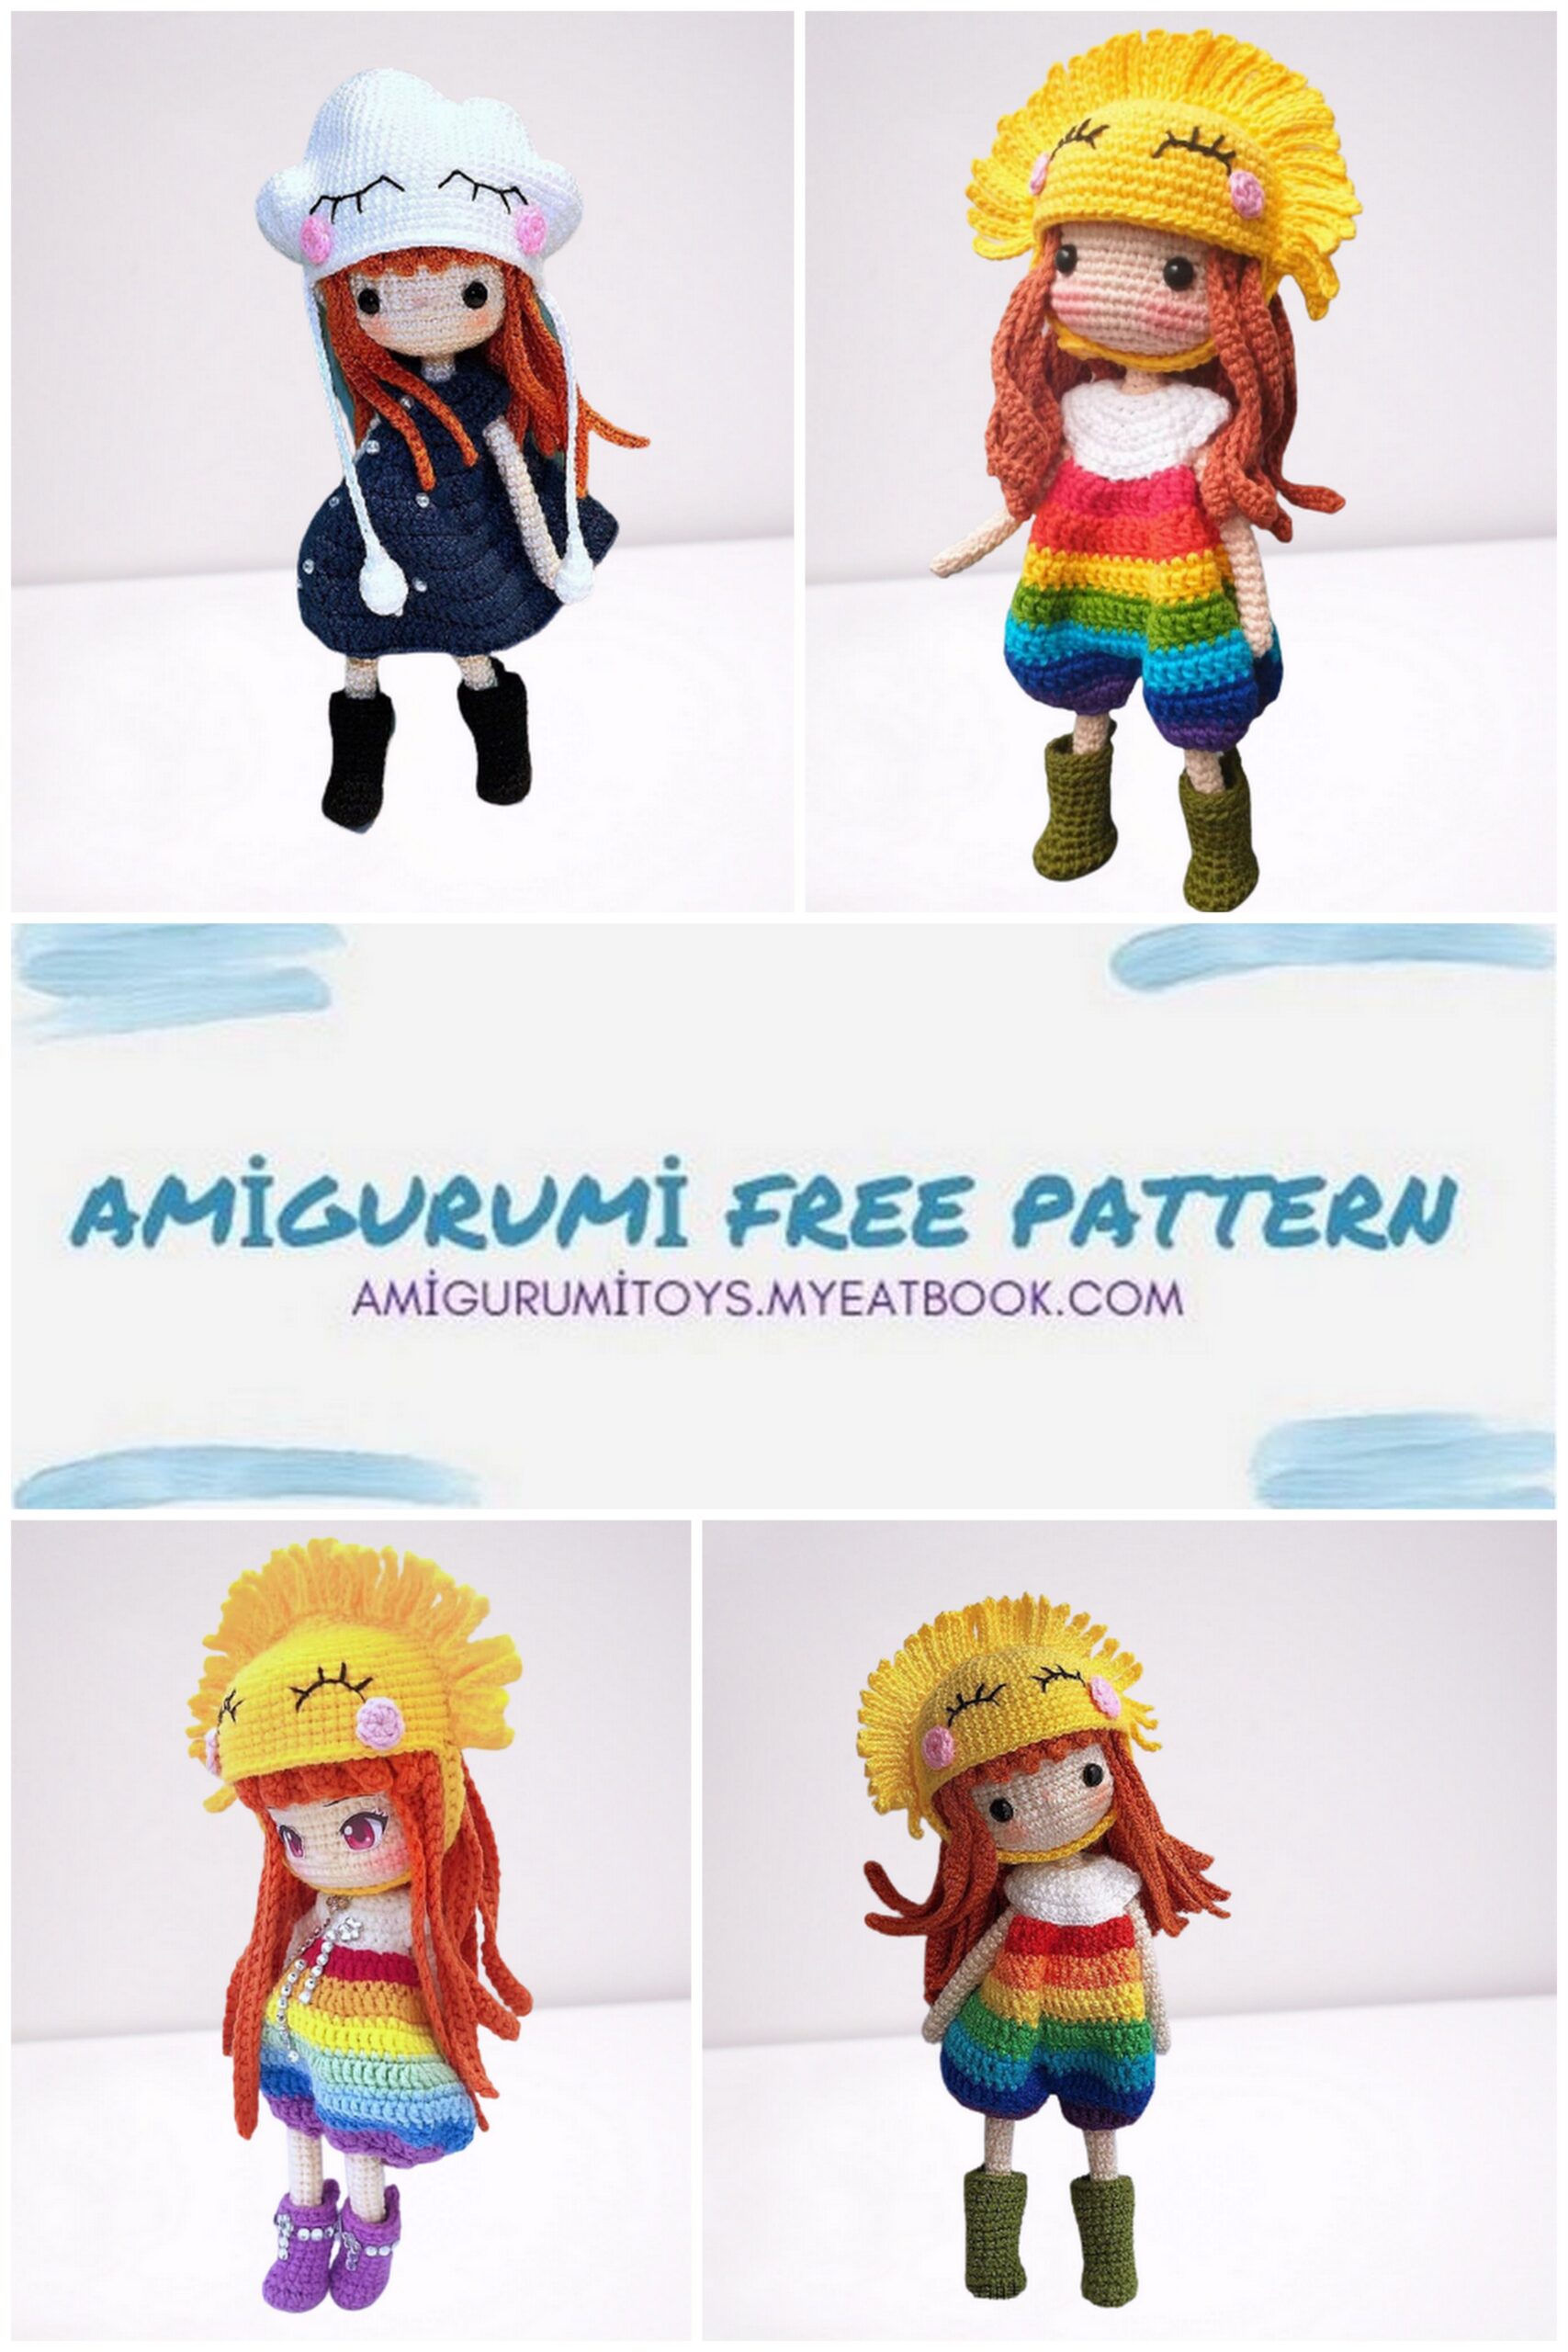
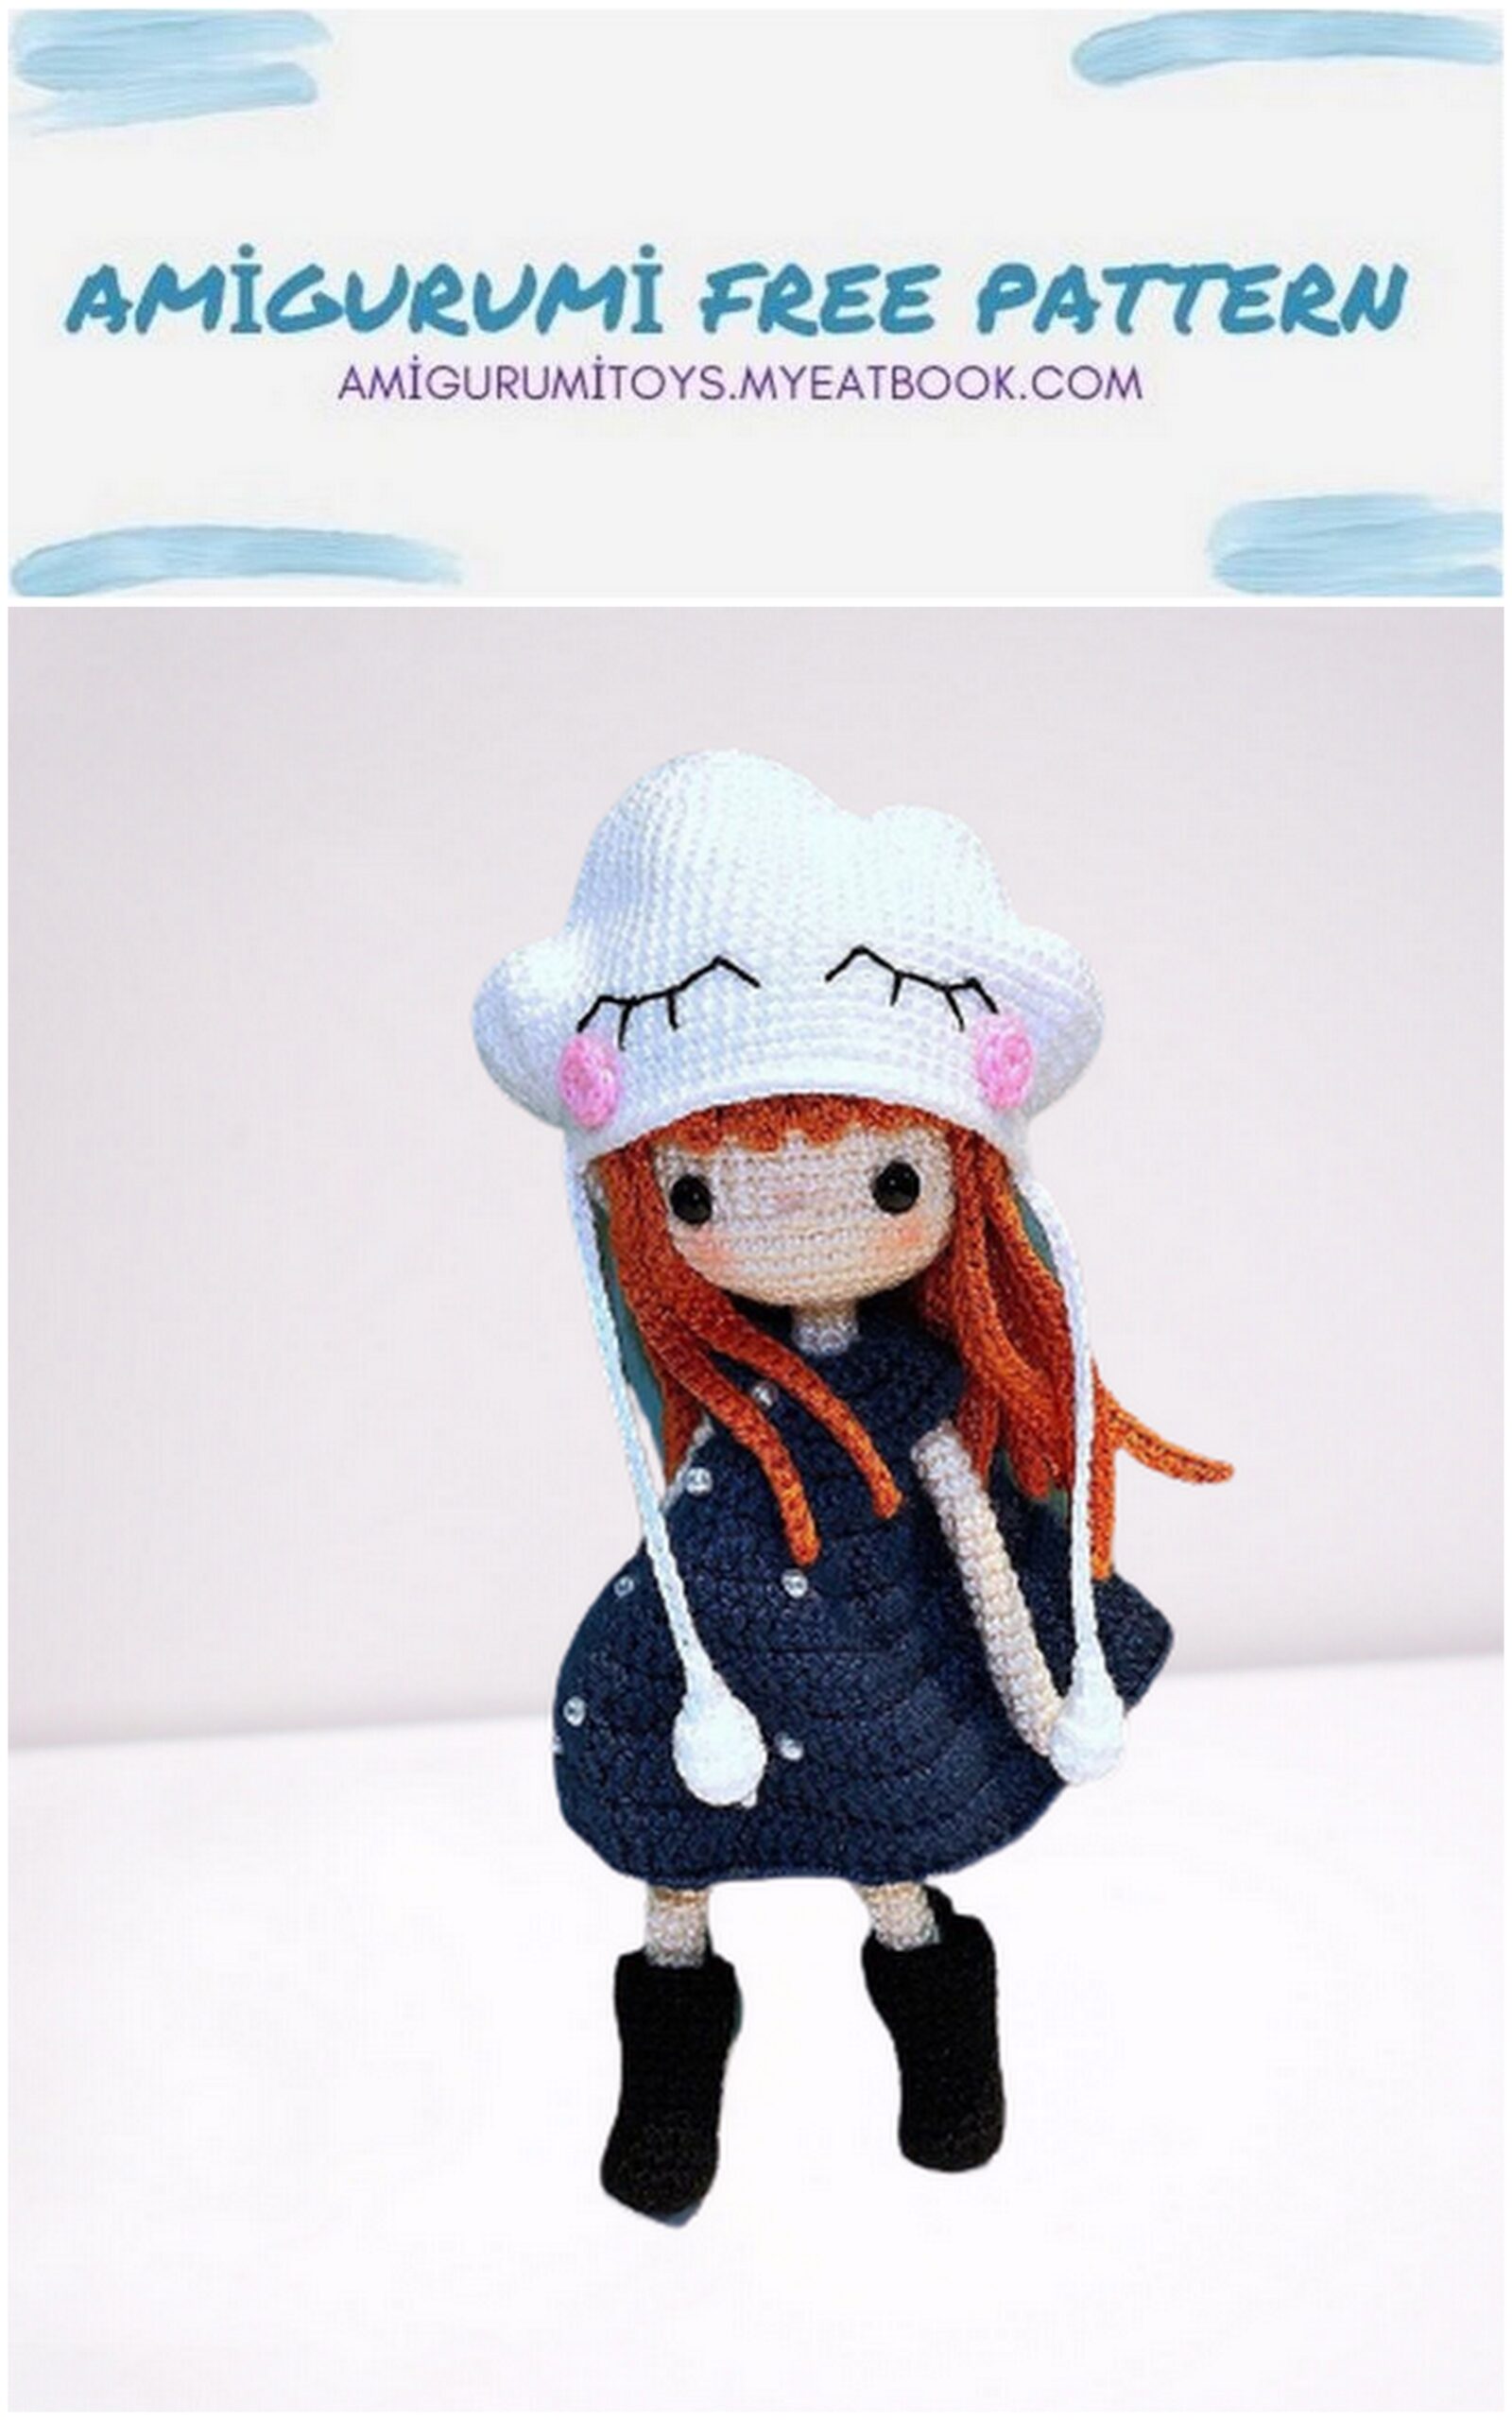
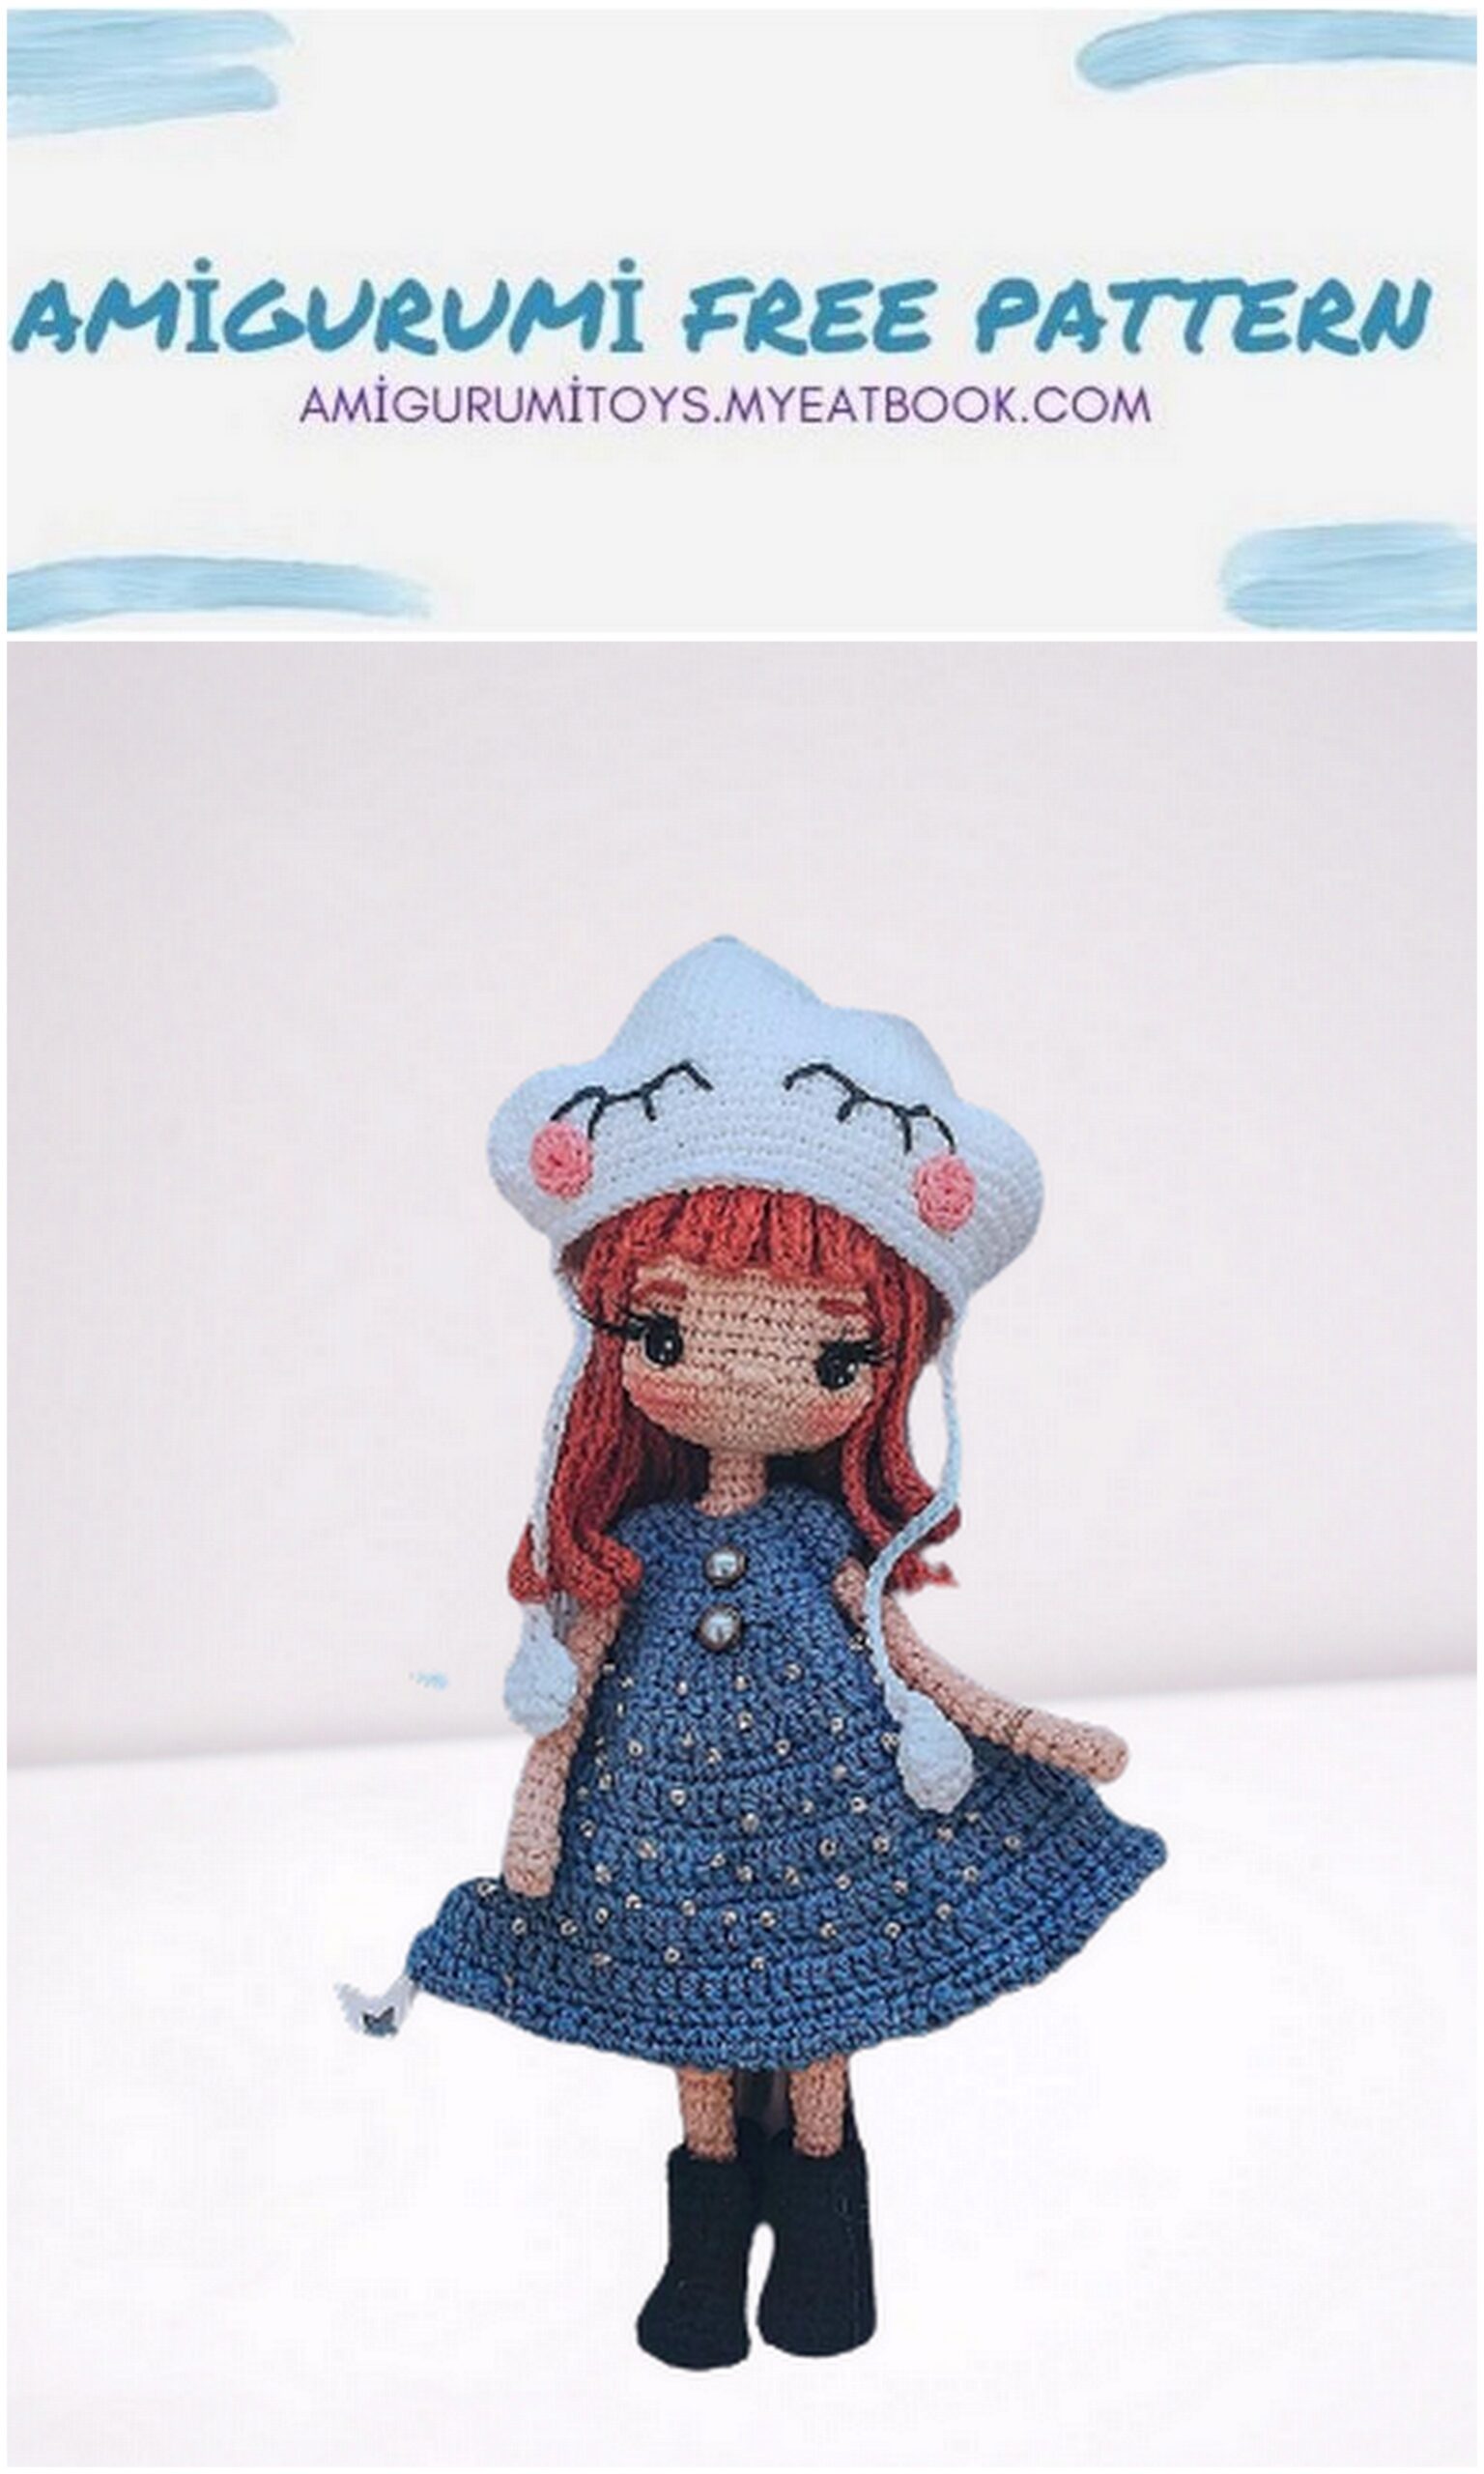
Rainy Mood
Clothes
1: Work in Rows: 13CH, turn to 2nd st, (SC, İNC)*6, 1CH+Turn
2: (2SC, İNC)*6, 1CH+Turn
3: (3SC, İNC)*6, 1CH+Turn
4: (4SC, İNC)*6, 1CH+Turn
5: 36SC, 1CH+Turn
6: 4SC, 5CH skip 8 sts, 12SC, 5CH skip 8 sts, 4SC, 1CH+Turn
7: FLO 2SC, W, 6SC, (SC, W, SC)*4, 6SC, W, 2SC, Turn
8: 3CH, 41F, 1CH+Turn
9: 42SC, Turn
10: 3CH, (2DC, FW, 2DC)*8, DC, make SL-ST to join the first st
11: Start Work in Round: 1CH, 58SC, SL-ST
12: 3CH, 57DC, SL-ST
13: 1CH, 58SC, SL-ST
14: 3CH, (3DC, FW, 3DC)*8, DC, SL-ST
15: 1CH, 74SC, SL-ST
16: 3CH, 73DC, SL-ST
17: 1CH, 74SC, SL-ST
18: 3CH, 73DC, SL-ST
19: 1CH, 74SC, SL-ST
20: 3CH, 73DC, SL-ST (Fasten off)
Note: If the dress is too long, you can skip last 2 rows or make your own adjustment.
Clothes (back)
1 (see pic) 1CH, (in same st, SC, 7CH, SL-ST), downward 9SC, the other side 10SC, SL-ST (Fasten off)
Details
Put on buttons and add some beads
Shoe*2
1: Work in Rounds : 5CH, turn to 2nd, 3SC, W, 2SC, İNC, SL-ST
2: 1CH, İNC, 2SC, 3İNC, 2SC, 2İNC, SL-ST
3: 1CH FLO: 16SC, SL-ST
4: 1CH, Join together the BLO of previous row (see pic), 16SC, SL-ST
5: 1CH, 16SC, SL-ST (put in shoe support)
6: 1CH, 5SC, 3DEC, 5SC, SL-ST
7-8: 1CH, 13SC, SL-ST
9: 1CH, 6SC, İNC, 6SC, SL-ST
10: 1CH, 14SC, SL-ST
11: 1CH, 3SC, İNC, 6SC, İNC, 3SC, SL-ST
12: 1CH, 16SC, SL-ST
13: 1CH, 15SC, İNC, SL-ST
14: 1CH, BLO 17SC, SL-ST, (5CH, SL-ST) (Fasten off)
Cloud Cap
Work in Spiral:
(B)
White
1: Magic Ring 6SC
2: 6İNC
3: (SC, İNC)*6 (Fasten off and leave a LONG tail for sewing the hole)
(A)
1: Magic Ring 6SC
2: 6İNC
3: (SC, İNC)*6
4: (SC, İNC, SC)*6
5: (3SC, İNC)*6
6: (2SC, İNC, 2SC)*6
7: 36SC
8: (see pic) Join the A+B: 16SC, (add B, 15SC, skip 3 sts), join again the DEC, 17SC
9: (7SC, İNC)*6
10: 15SC, İNC, 2DEC, İNC, 11SC, İNC, 2DEC, İNC, 16SC,
11: (4SC, İNC, 4SC)*6
12: 17SC, İNC, 2DEC, İNC, 13SC, İNC, 2DEC, İNC, 18SC
13: 19SC, DEC, 8SC, İNC, 8SC, DEC, 17SC, 3İNC
14: 2İNC, 26SC, 4İNC, 26SC, (SC, İNC)*2
15: (SC, İNC)*2, 26SC, (SC, İNC)*4, 26SC, (SC, İNC, SC)*2
16: (SC, İNC, SC)*2, 26SC, (SC, İNC, SC)*4, 34SC
17-20: 84SC
21: 76SC, (SC, DEC, SC)*2
22: (SC, DEC, SC)*2, 26SC, (SC, DEC, SC)*4, 32SC
23: 70SC, (SC, DEC)*2
24: (SC, DEC)*2, 26SC, (SC, DEC)*4, 30SC
25: 64SC, 2DEC
26: 2DEC, 62SC
27: 64SC (Fasten off)
Raindrop*2
White
1: Magic Ring 6SC
2: 6İNC
3: 12SC
4: (SC, DEC)*4
5: 4DEC
6: 2DEC
7: 25CH (Fasten off and leave a LONG tail for sewing)
Blush*2
Pink
1: Magic Ring 8SC (Fasten off)
* Stick with glue the blushes to cheek of cloud cap
Details * Embroider eye
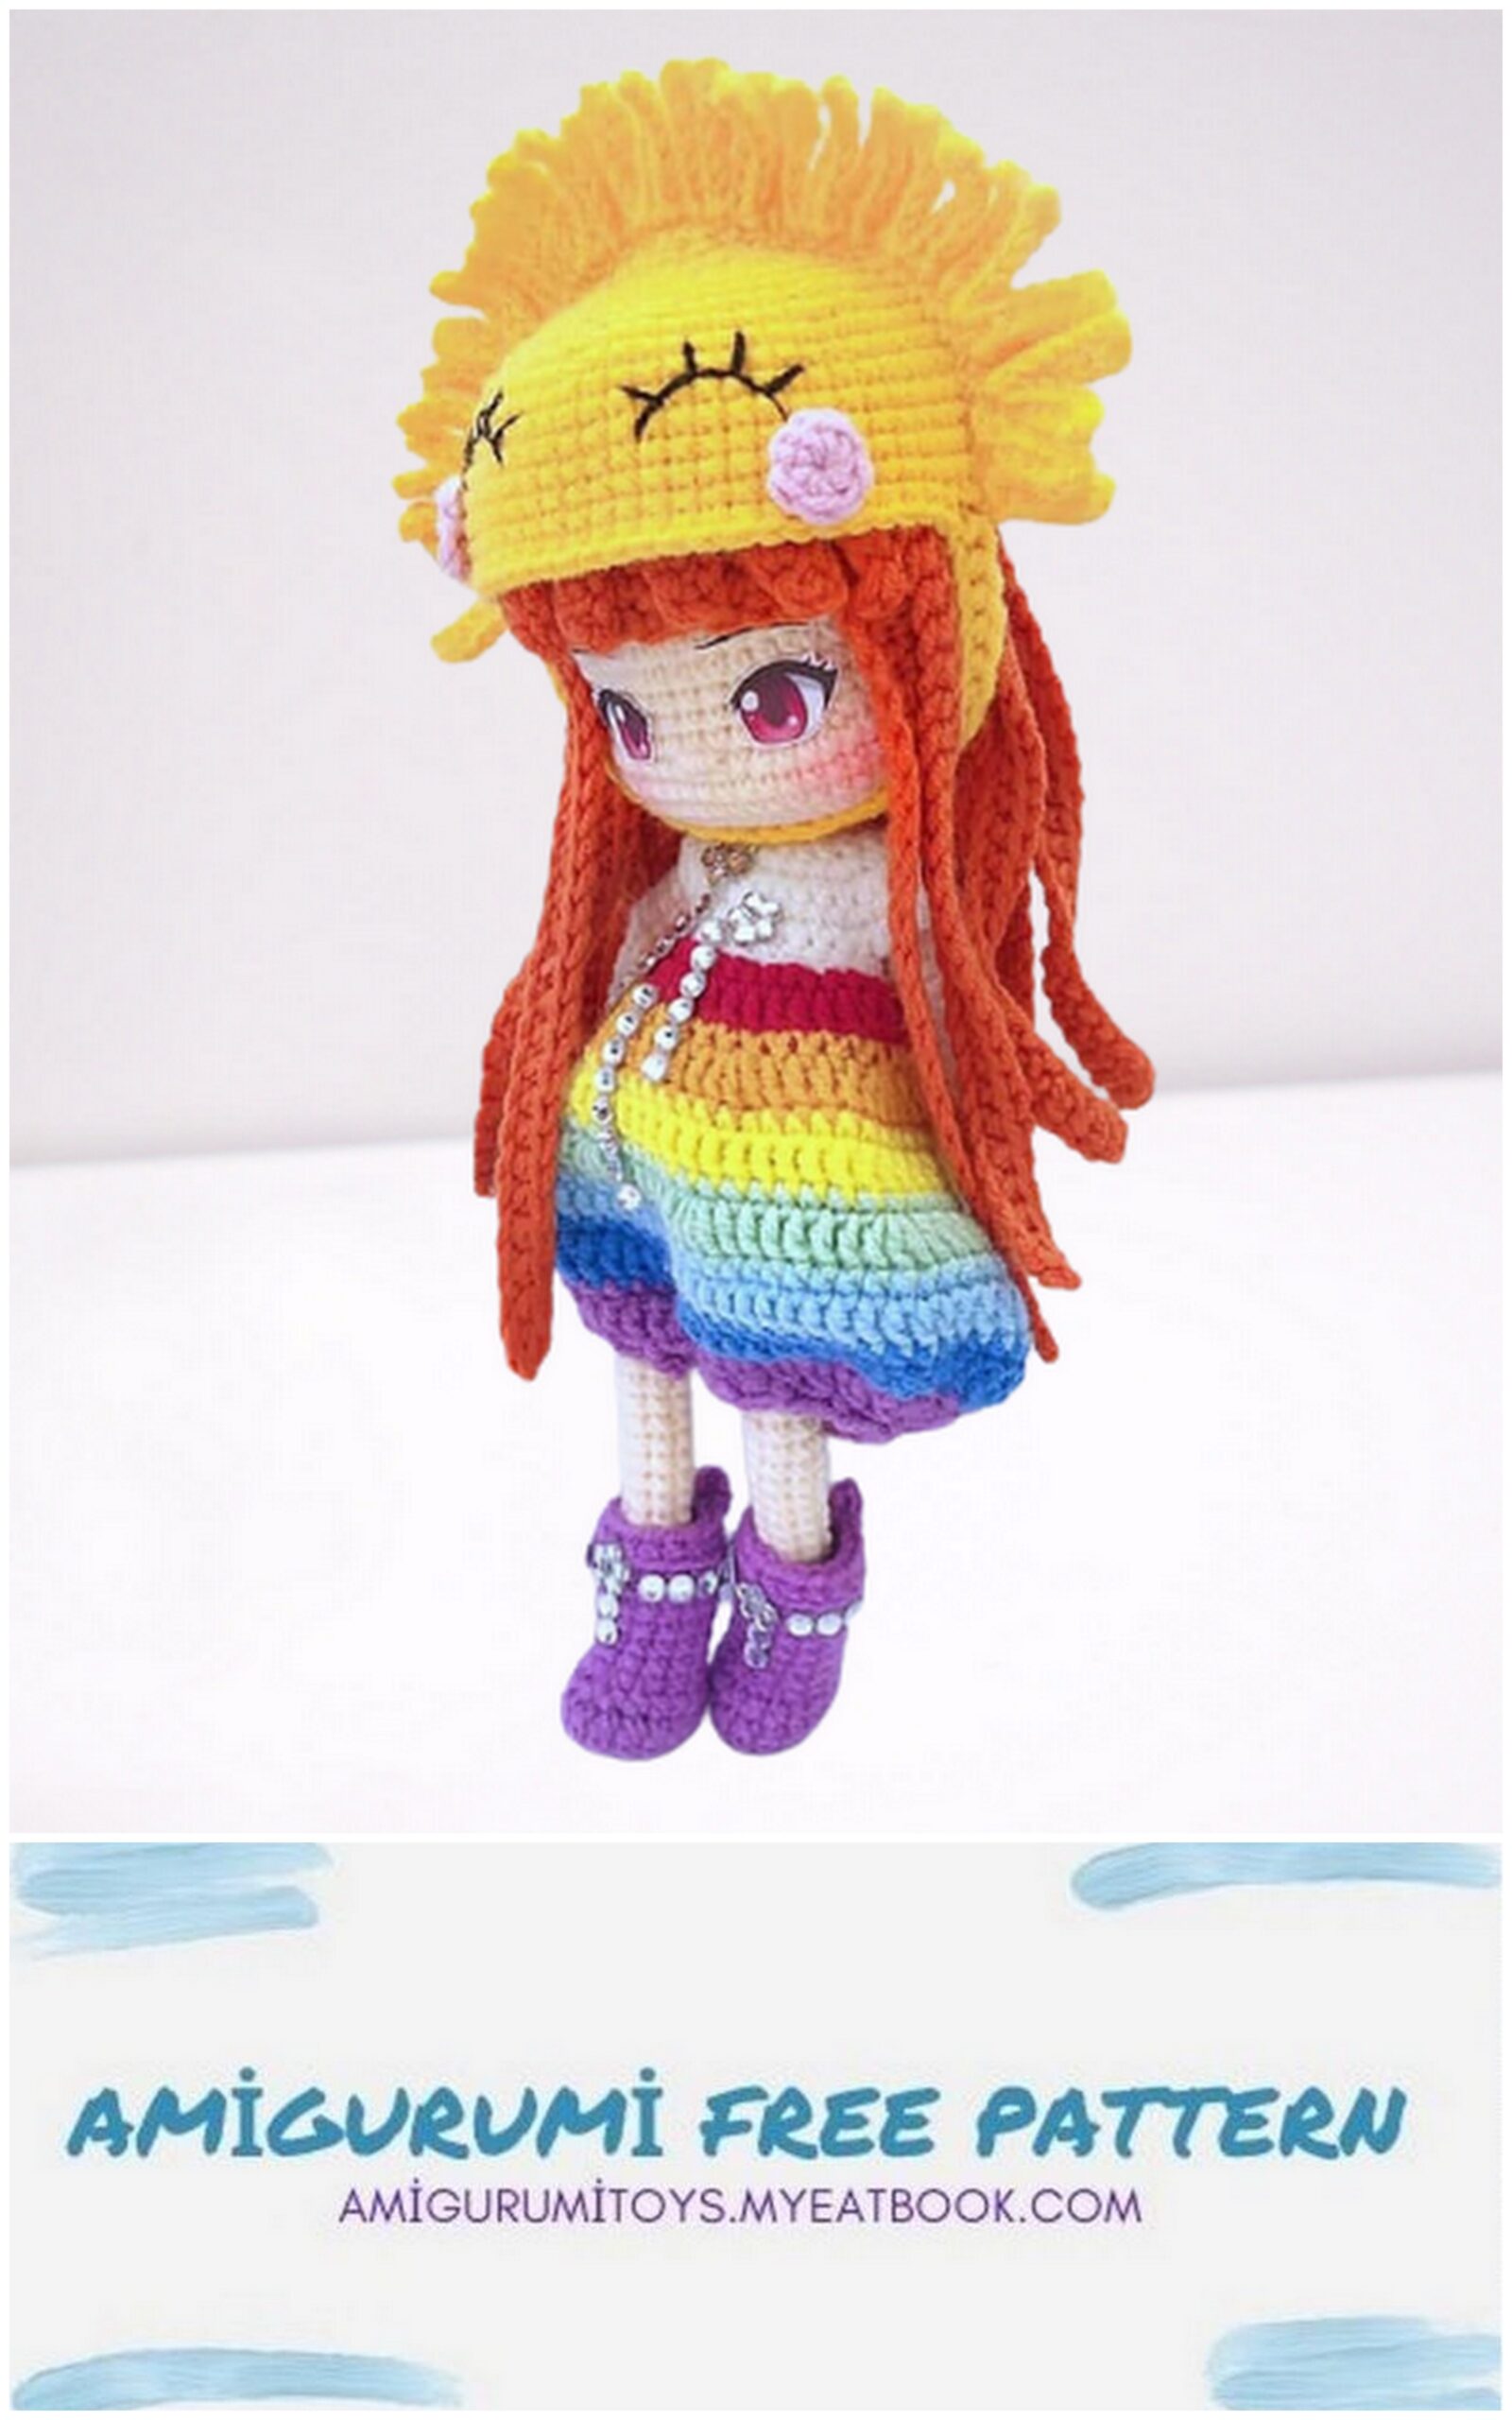
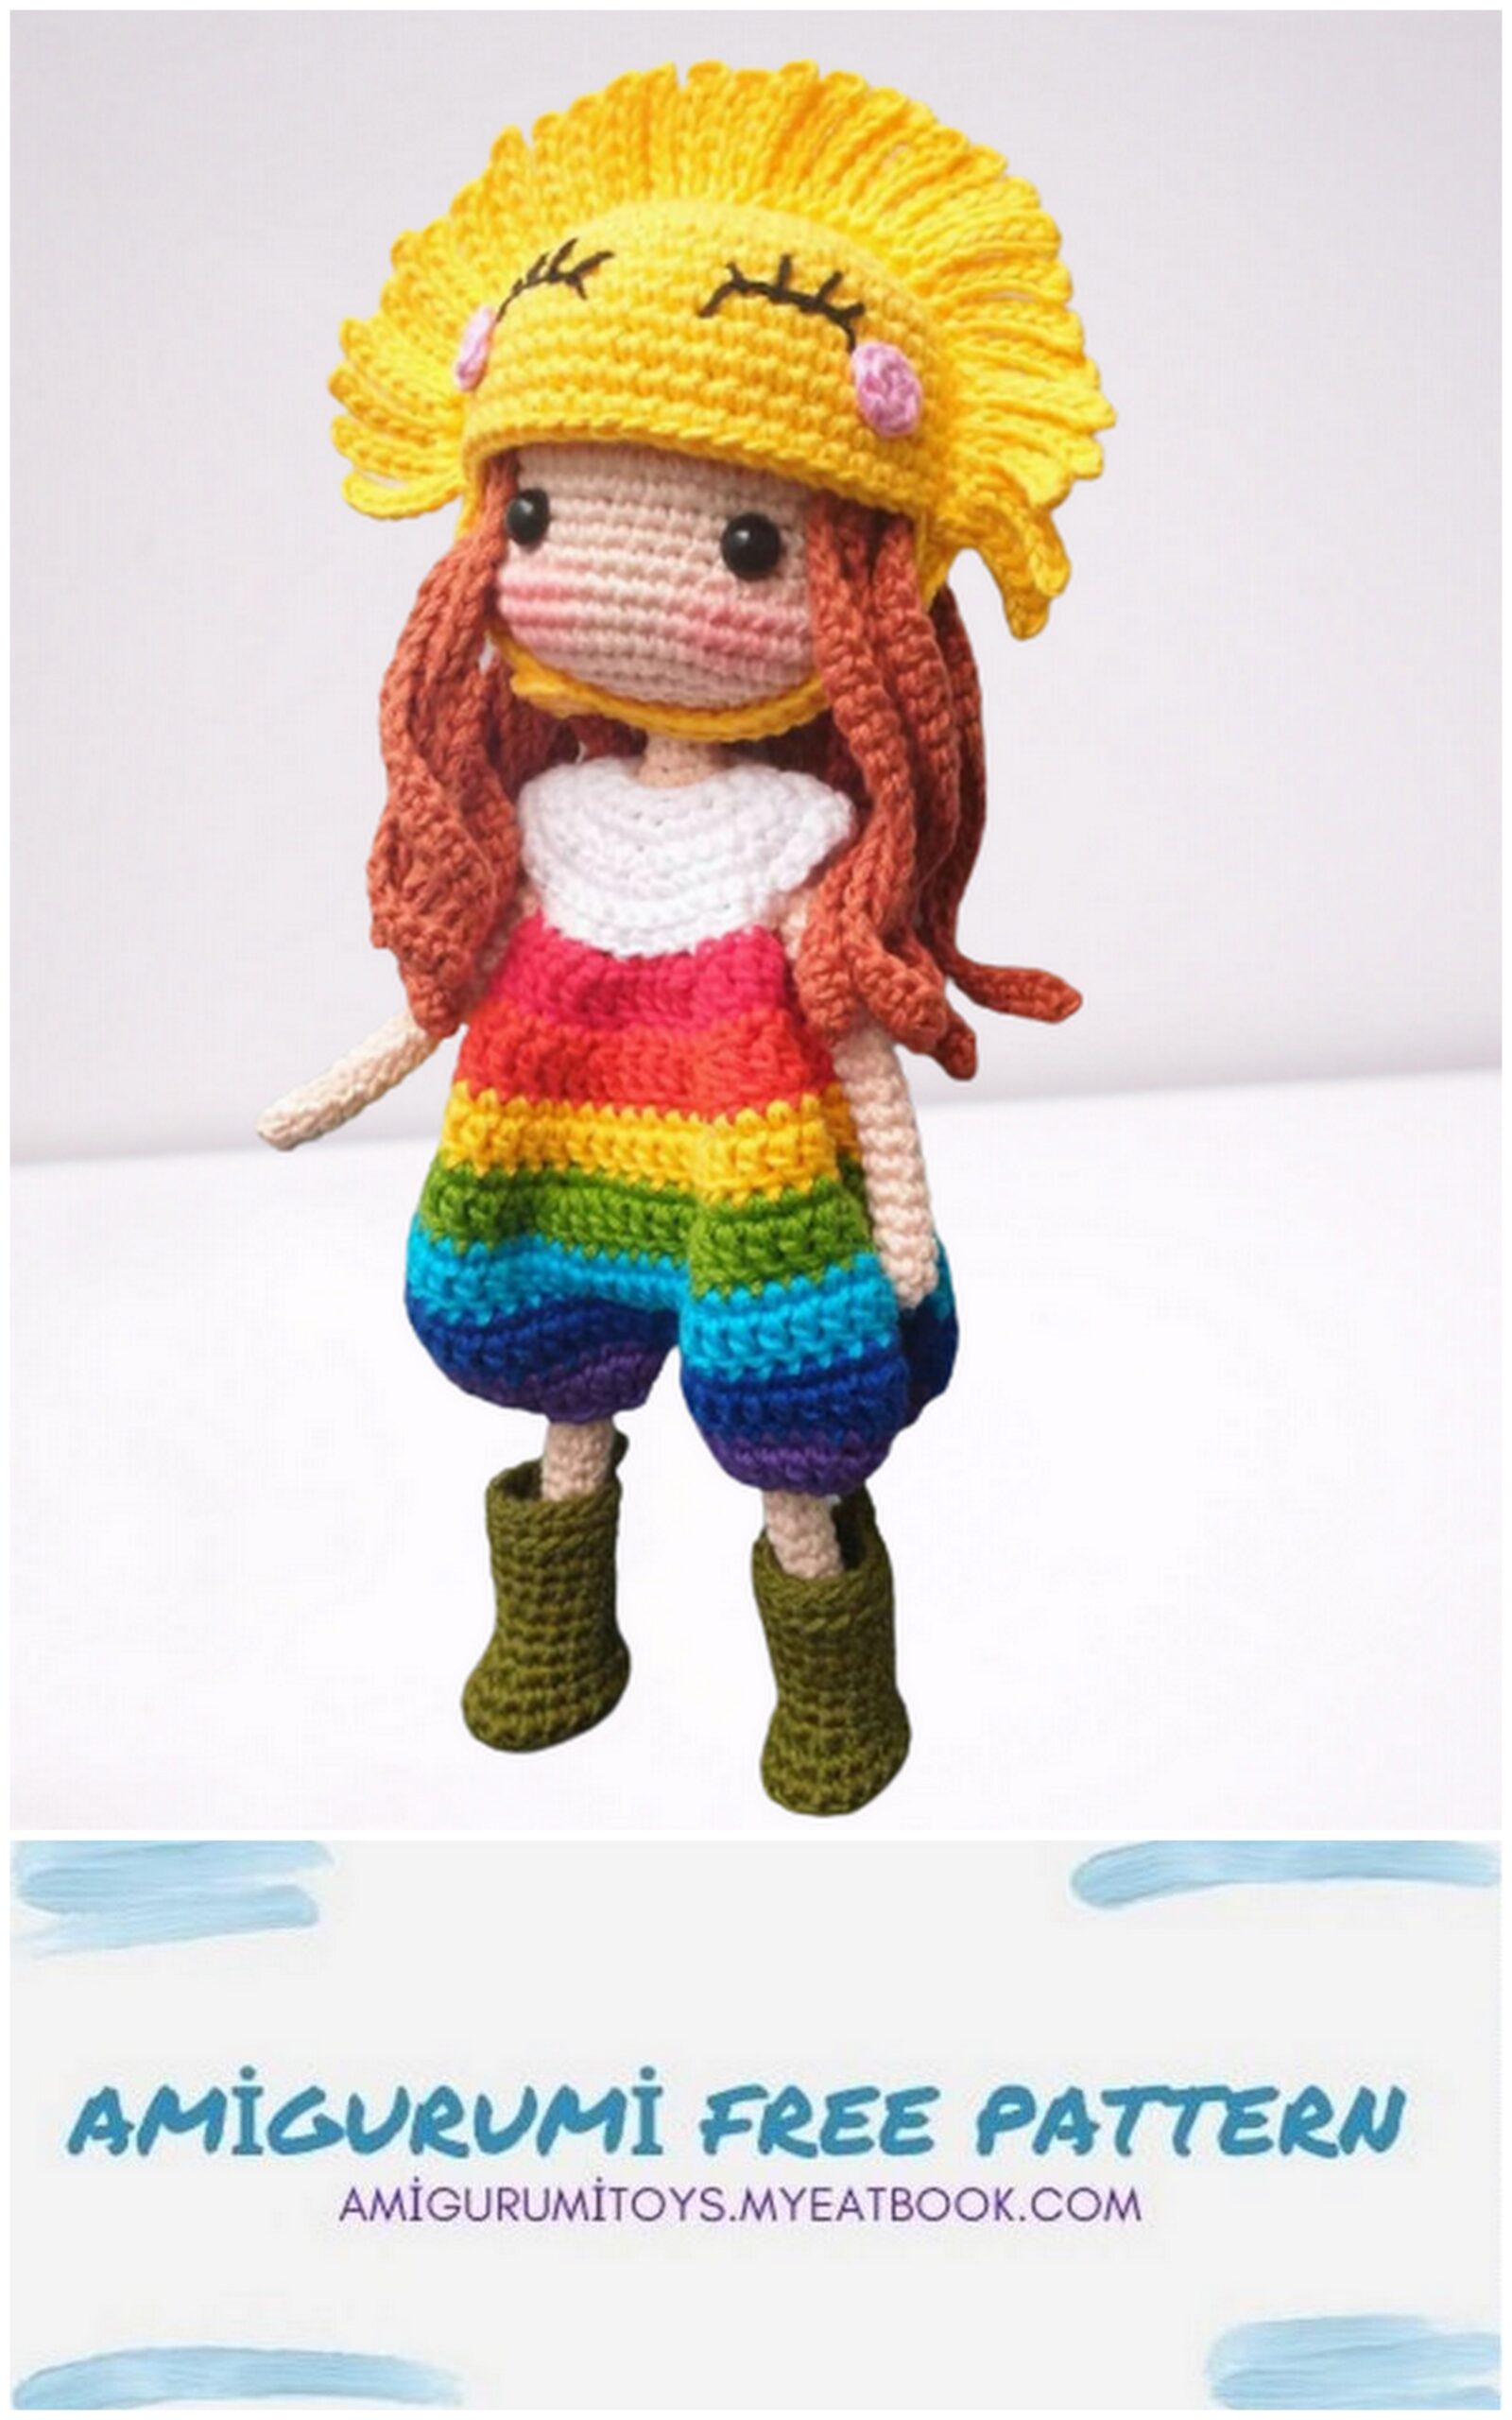
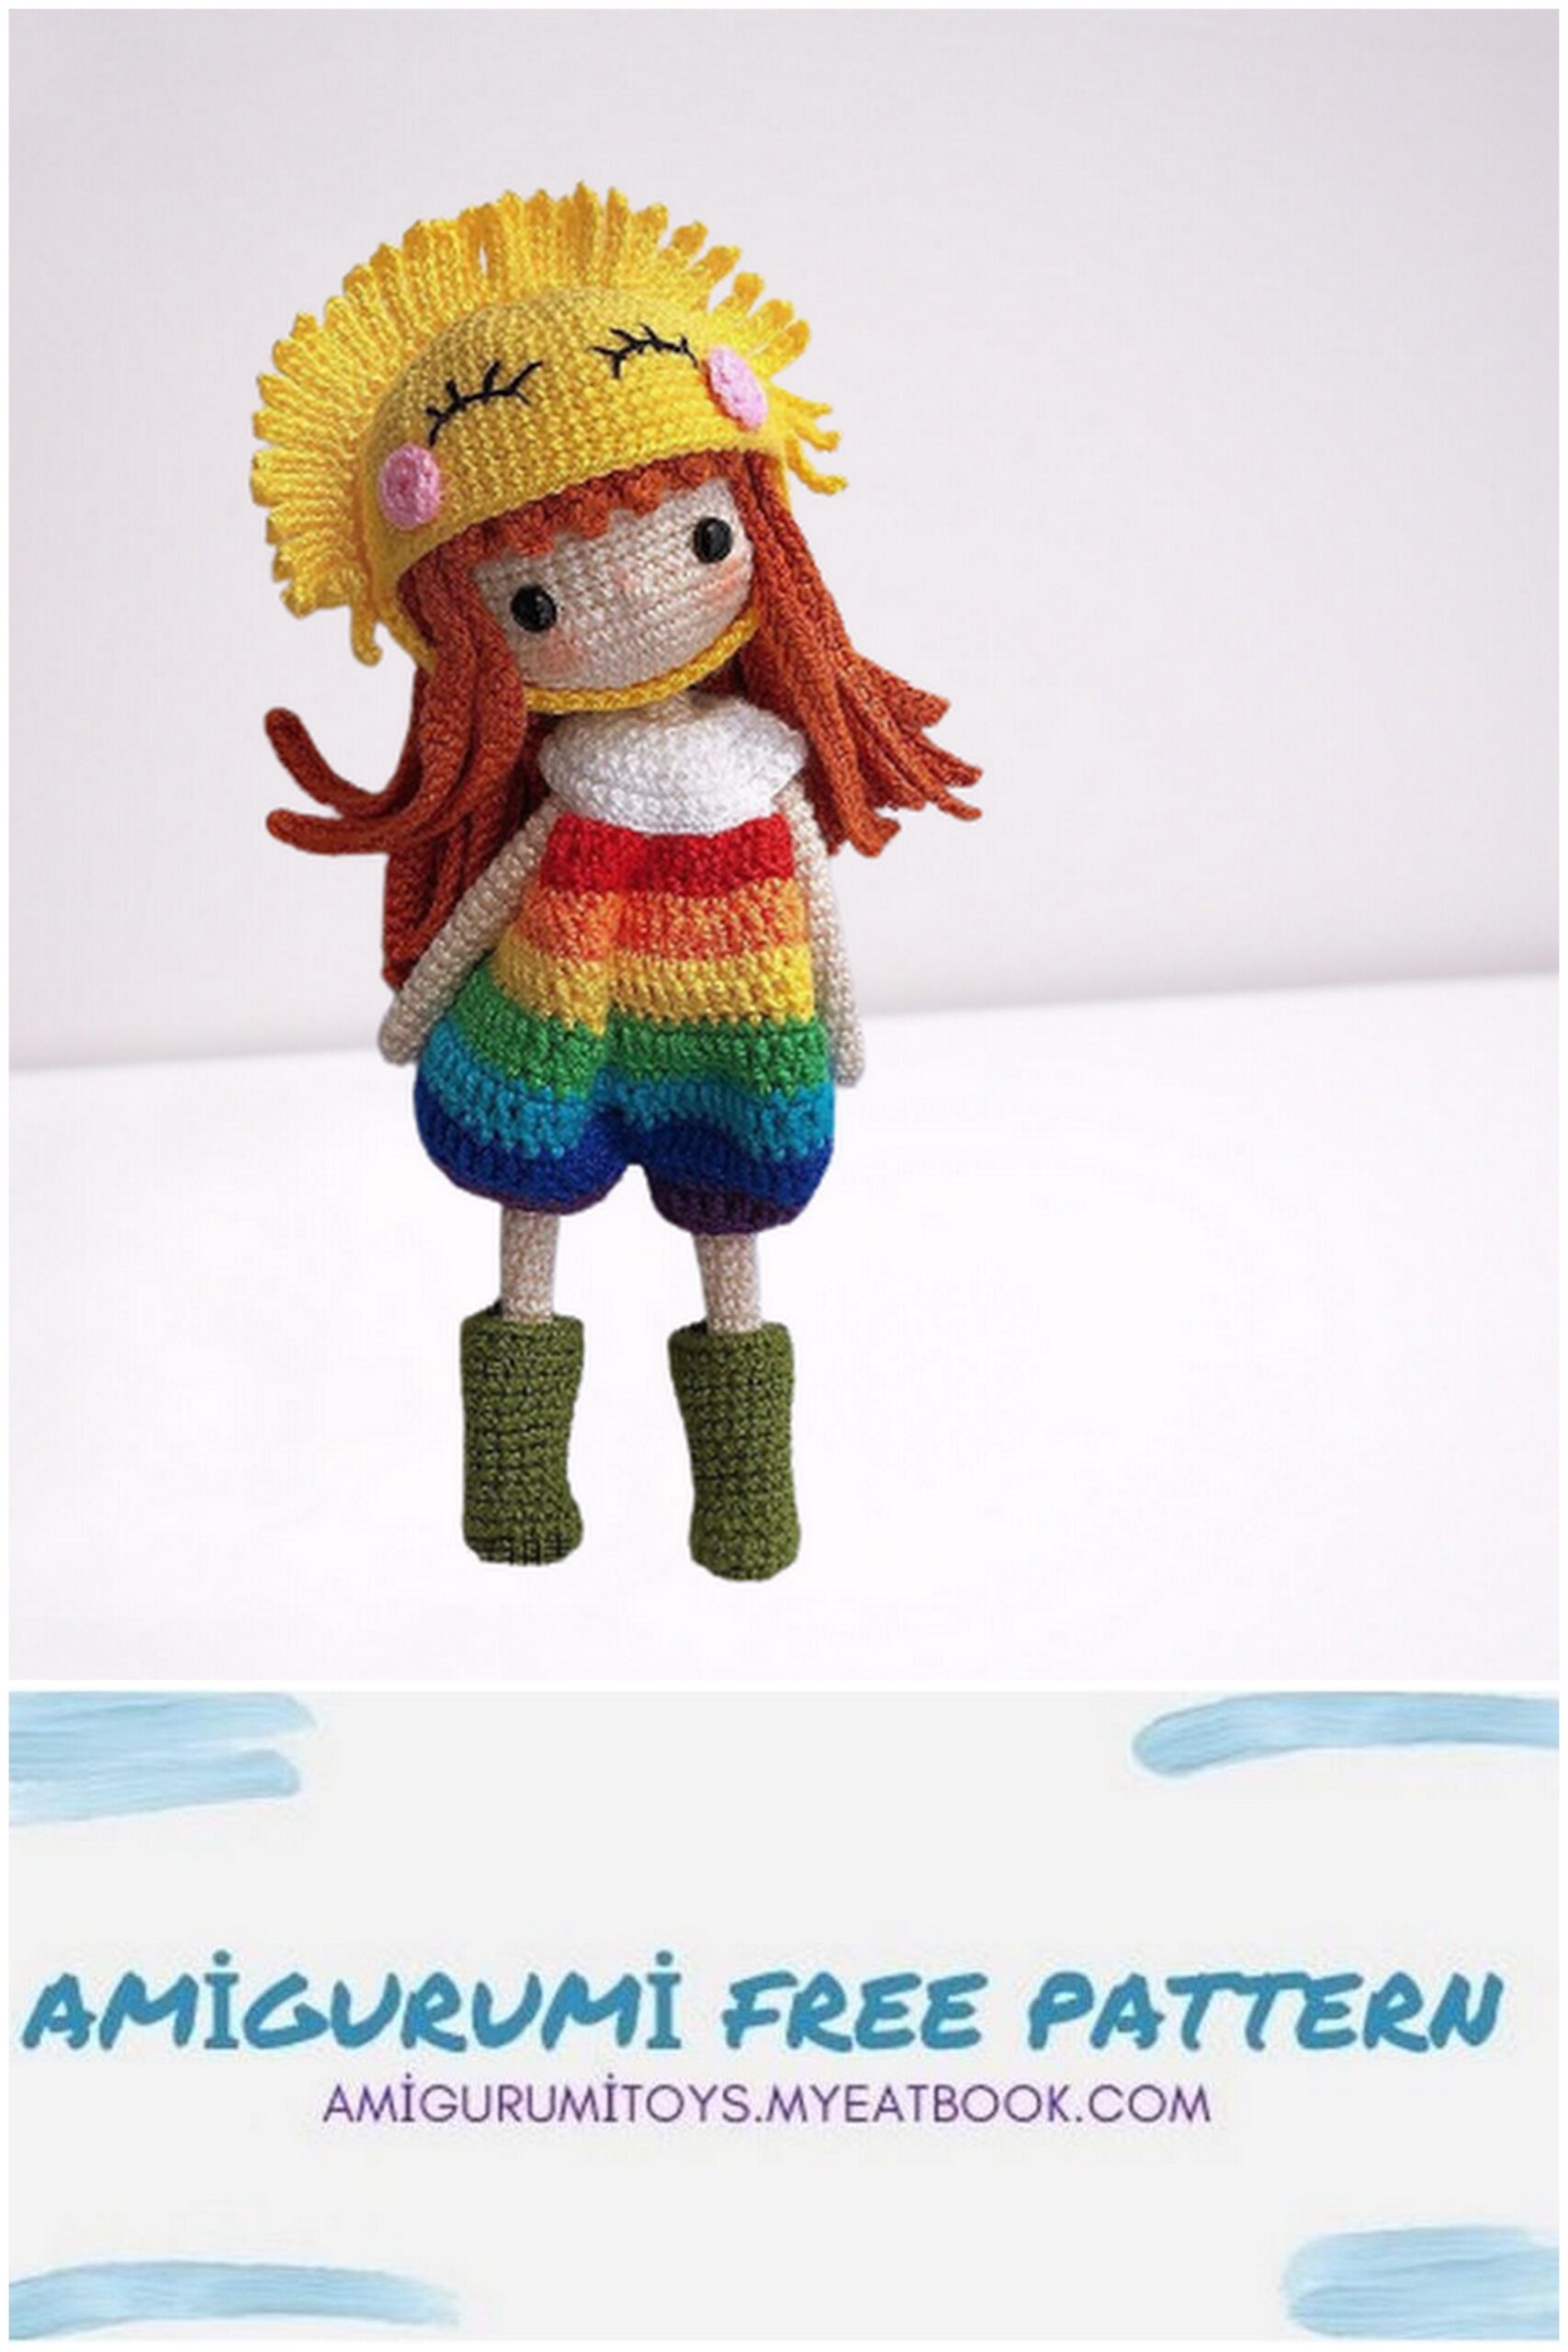
Sunny Mood
Rainbow Clothes
Work in Row: (3CH=1F)
White
1: 13CH turn to 2nd st, (SC, İNC)*6, 1CH+Turn
2: (2SC, İNC)*6, 1CH+Turn
3: (3SC, İNC)*6, 1CH+Turn
4: (4SC, İNC)*6, 1CH+Turn
5: 36SC, 1CH+Turn
6: 4SC, 5CH skip 8 sts, 12SC, 5CH skip 8 sts, 4SC, 1CH+Turn
7: Change color FLO 2SC, W, 6SC, (SC, W, SC)*4, 6SC, W, 2SC, Turn Red
8: 3CH, 41DC, 1CH+Turn
9: Change color 42SC, Turn Orange
10: 3CH, (2DC, FW, 2DC)*8, DC, Join the first st with SL-ST (see pic)
11: Start Work in Rounds: Change color 1CH, 58SC, SL-ST Yellow
12: 3CH, 57DC, SL-ST
13: Change color 1CH, 58SC, SL-ST Green
14: 3CH, (3DC, FW, 3DC)*8, DC, SL-ST
15: Change color 1CH, 74SC, SL-ST Blue
16: 3CH, 73DC, SL-ST
17: Change color 1CH, 74SC, SL-ST Dark Blue
18A:Seperate for the trousers of the pants (A and B, see pic) and
Work In Rounds:
3CH, 34DC, DC-DEC, SL-ST+Join the first st
19A: Change color 1CH, 10SC, 8DEC, 10SC, SL-ST Purple
20A: 3CH, 4DC, 9DC-DEC, 5DC, SL-ST
21A: 1CH, 19SL-ST (Fasten off)
18B: Start from the middle at the inside of the pants (see pic) and Dark Blue
Work in Rounds:
Leave long yarn (for sewing hole) 3CH, 34DC, DC-DEC, Join the first st with SL-ST
19B: Change color 1CH, 10SC, 8DEC, 10SC, SL-ST Purple
20B: 3CH, 4DC, 9DC-DEC, 5DC, SL-ST
21B: 1CH, 19SL-ST (Fasten off)
Clothes (back)
White
1: (see pic) 1CH, (in same st, SC, 7CH, SL-ST), downward 9SC, the other side 10SC, SL-ST (Fasten off)
Details – * Put on buttons
Shoe*2 – Same pattern as shoes of Rainny Mood Green
Sun Cap
Work in Spiral: Yellow
1: Magic Ring 6SC
2: 6İNC
3: (SC, İNC)*6
4: (SC, İNC, SC)*6
5: (3SC, İNC)*6
6: (2SC, İNC, 2SC)*6
7: (5SC, İNC)*6
8: (3SC, İNC, 3SC)*6
9: (7SC, İNC)*6
10: (4SC, İNC, 4SC)*6
11-17: 60SC
18: (21CH turn to 2nd st, SC, 3CH skip 3 sts, 13SC, 3HDC), DEC, 28SC, (10CH turn to 3rd st, 8HDC), DEC, 28SC, SL-ST
Sunshine
1: 36CH turn to 2nd st, SL-ST, (7CH turn to 2nd st, 6SC, SL-ST into next st)*35 (Leave a LONG LONG tail for sewing)
* Across the middle point of the cap, pin the “sunshine” into place and sew it (see picture).
Blush*2
1: Magic Ring 8SC (Fasten off) * Stick with glue the blushes to cheek of sun cap
Details * Embroider eye and put on buttons