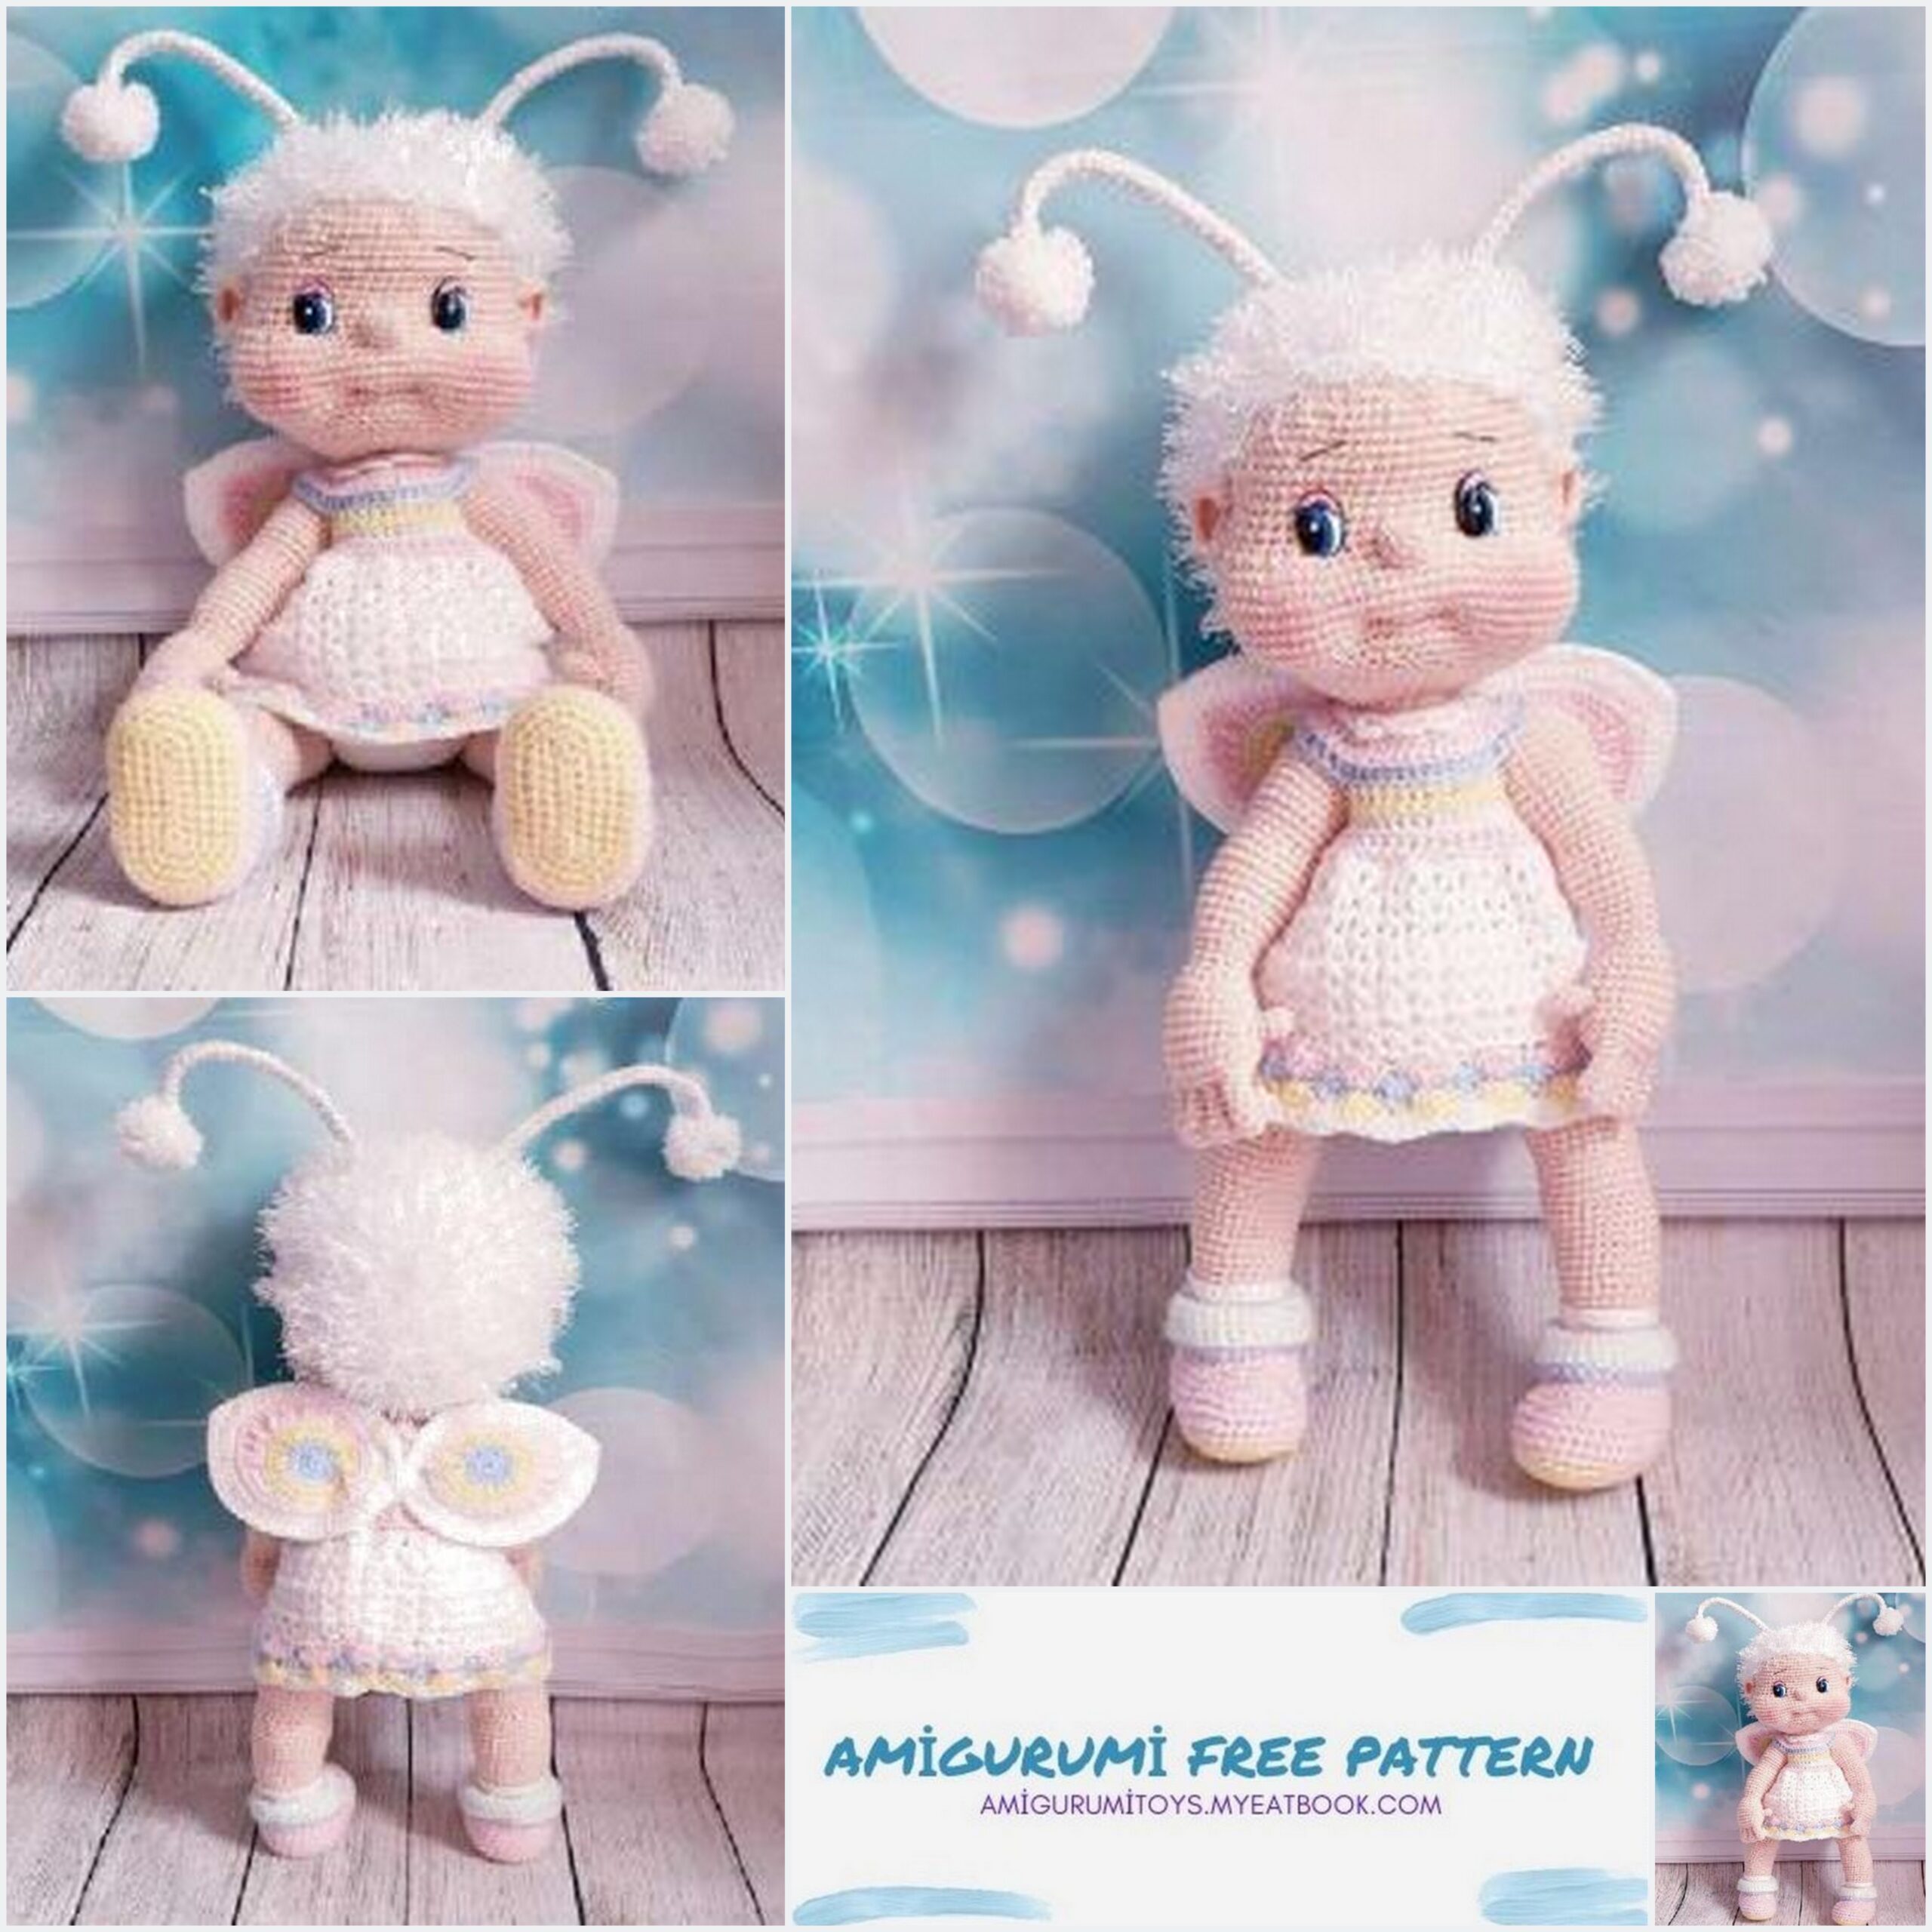
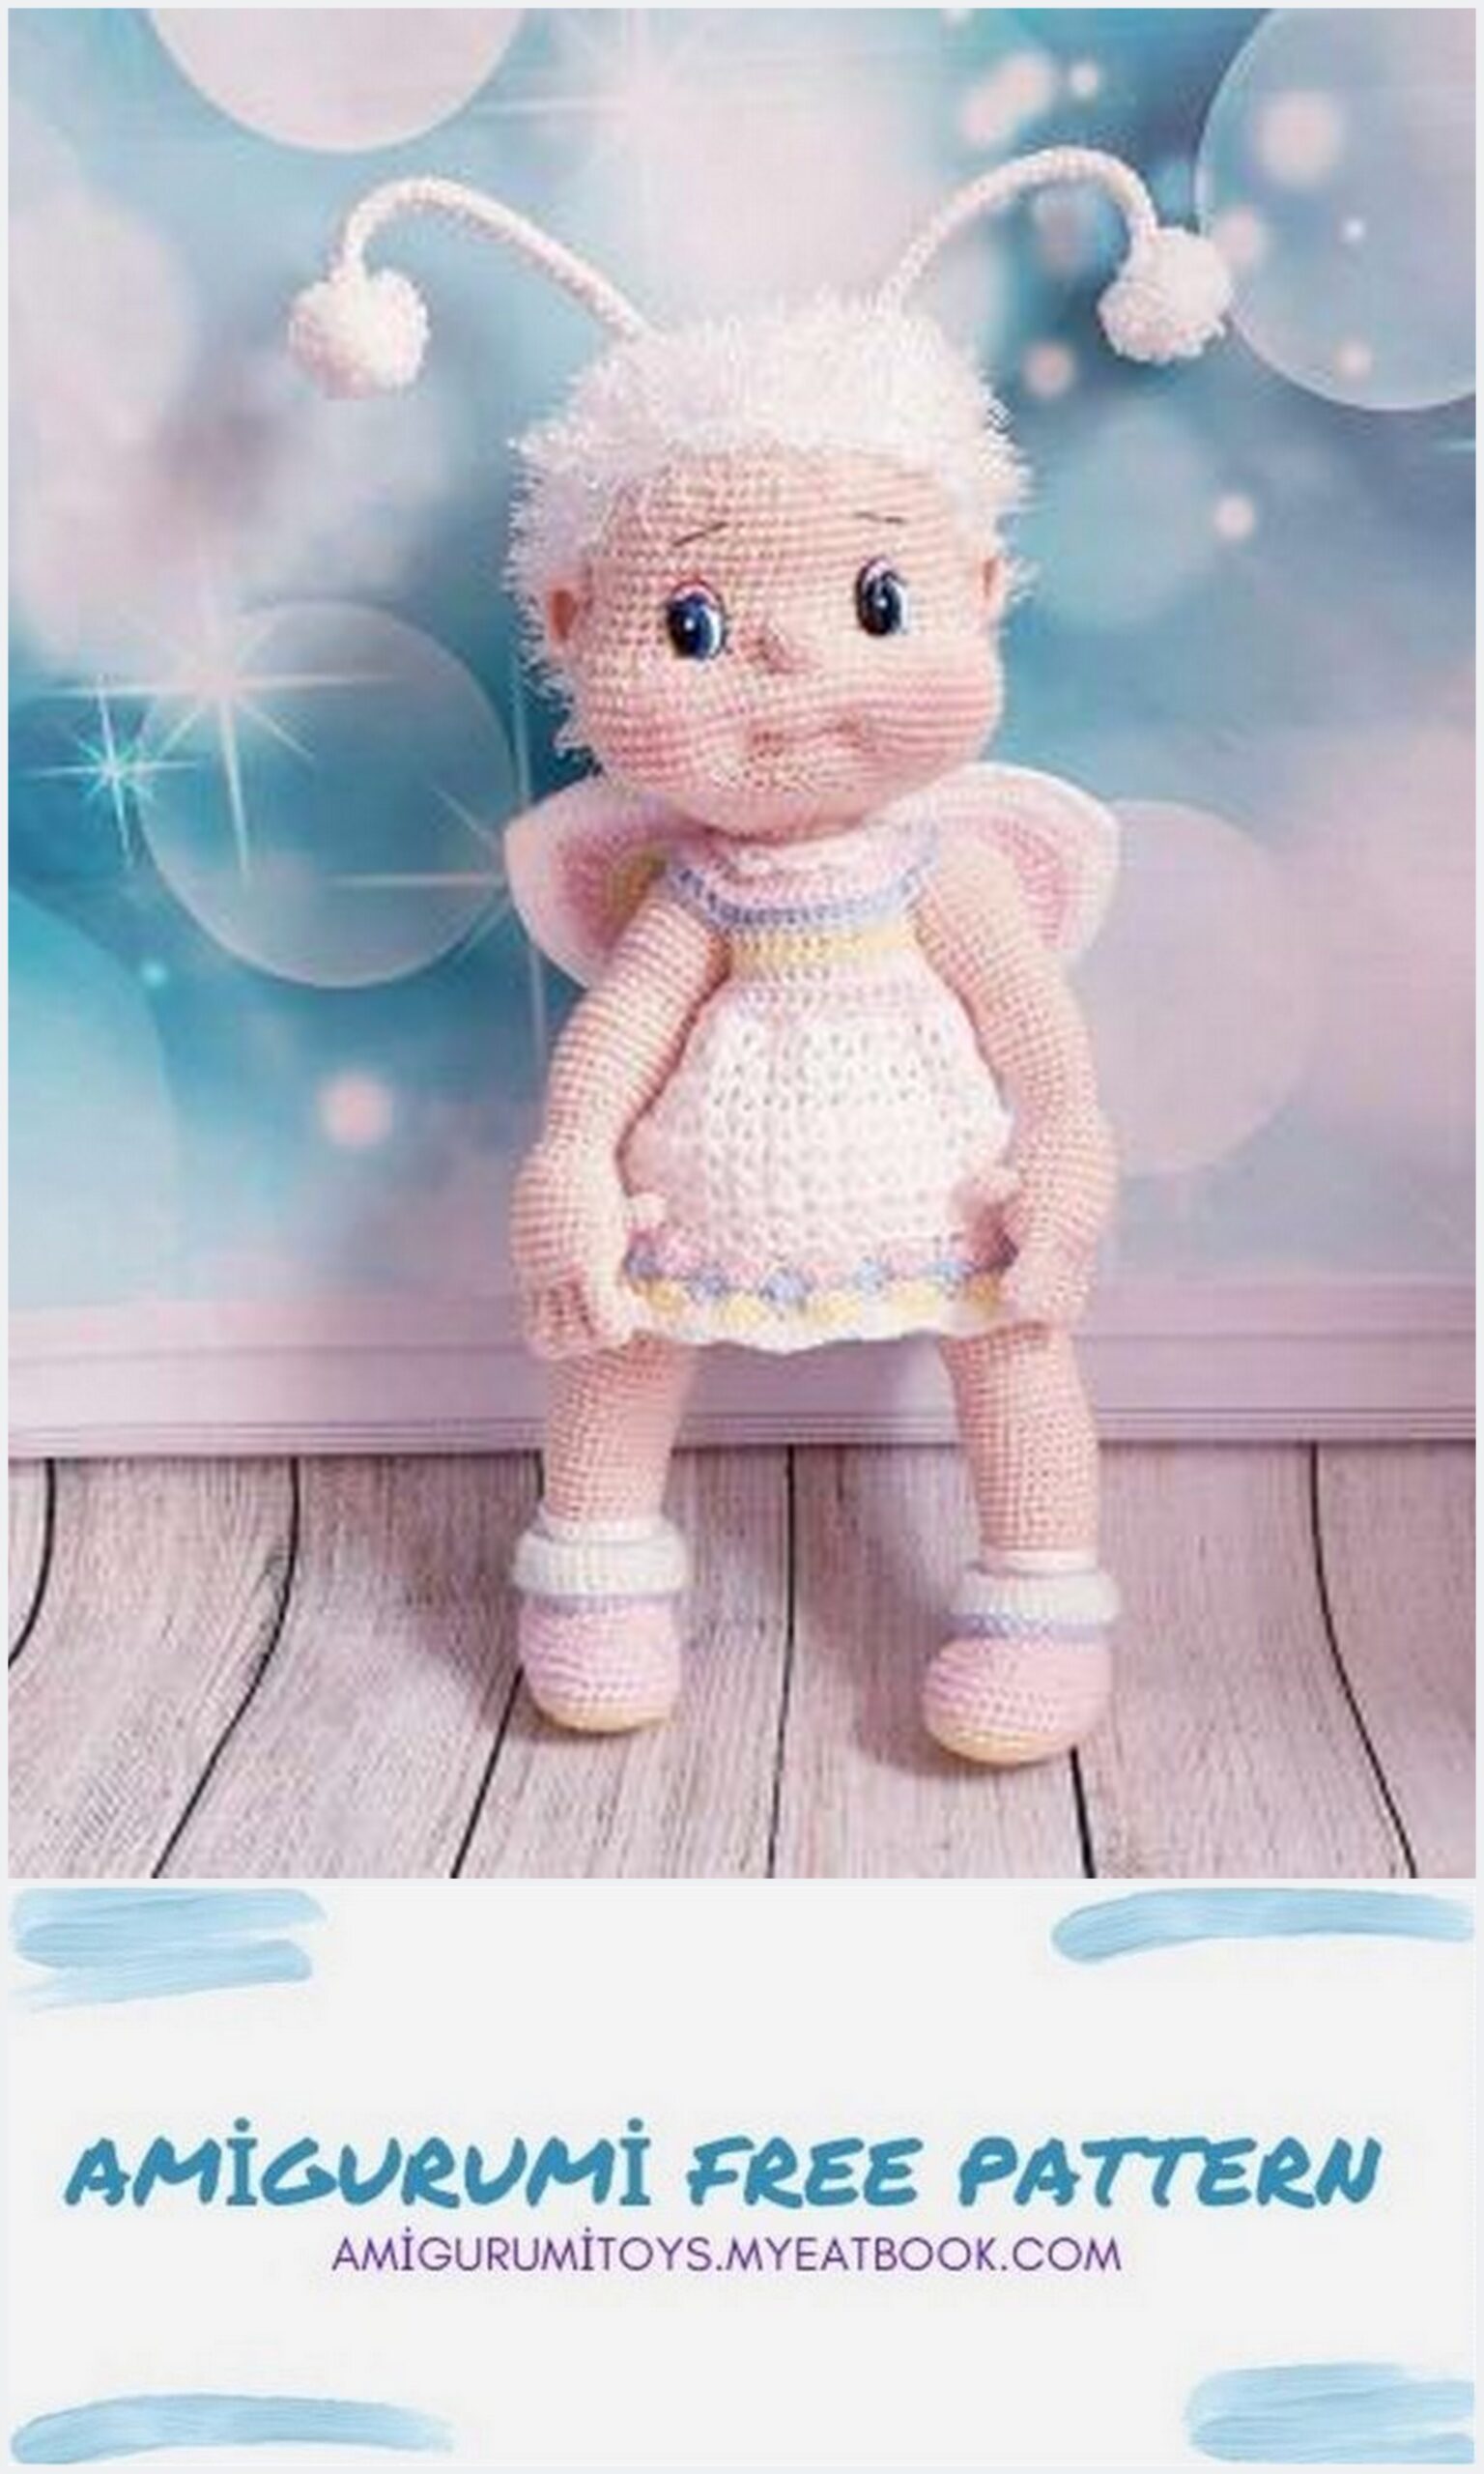
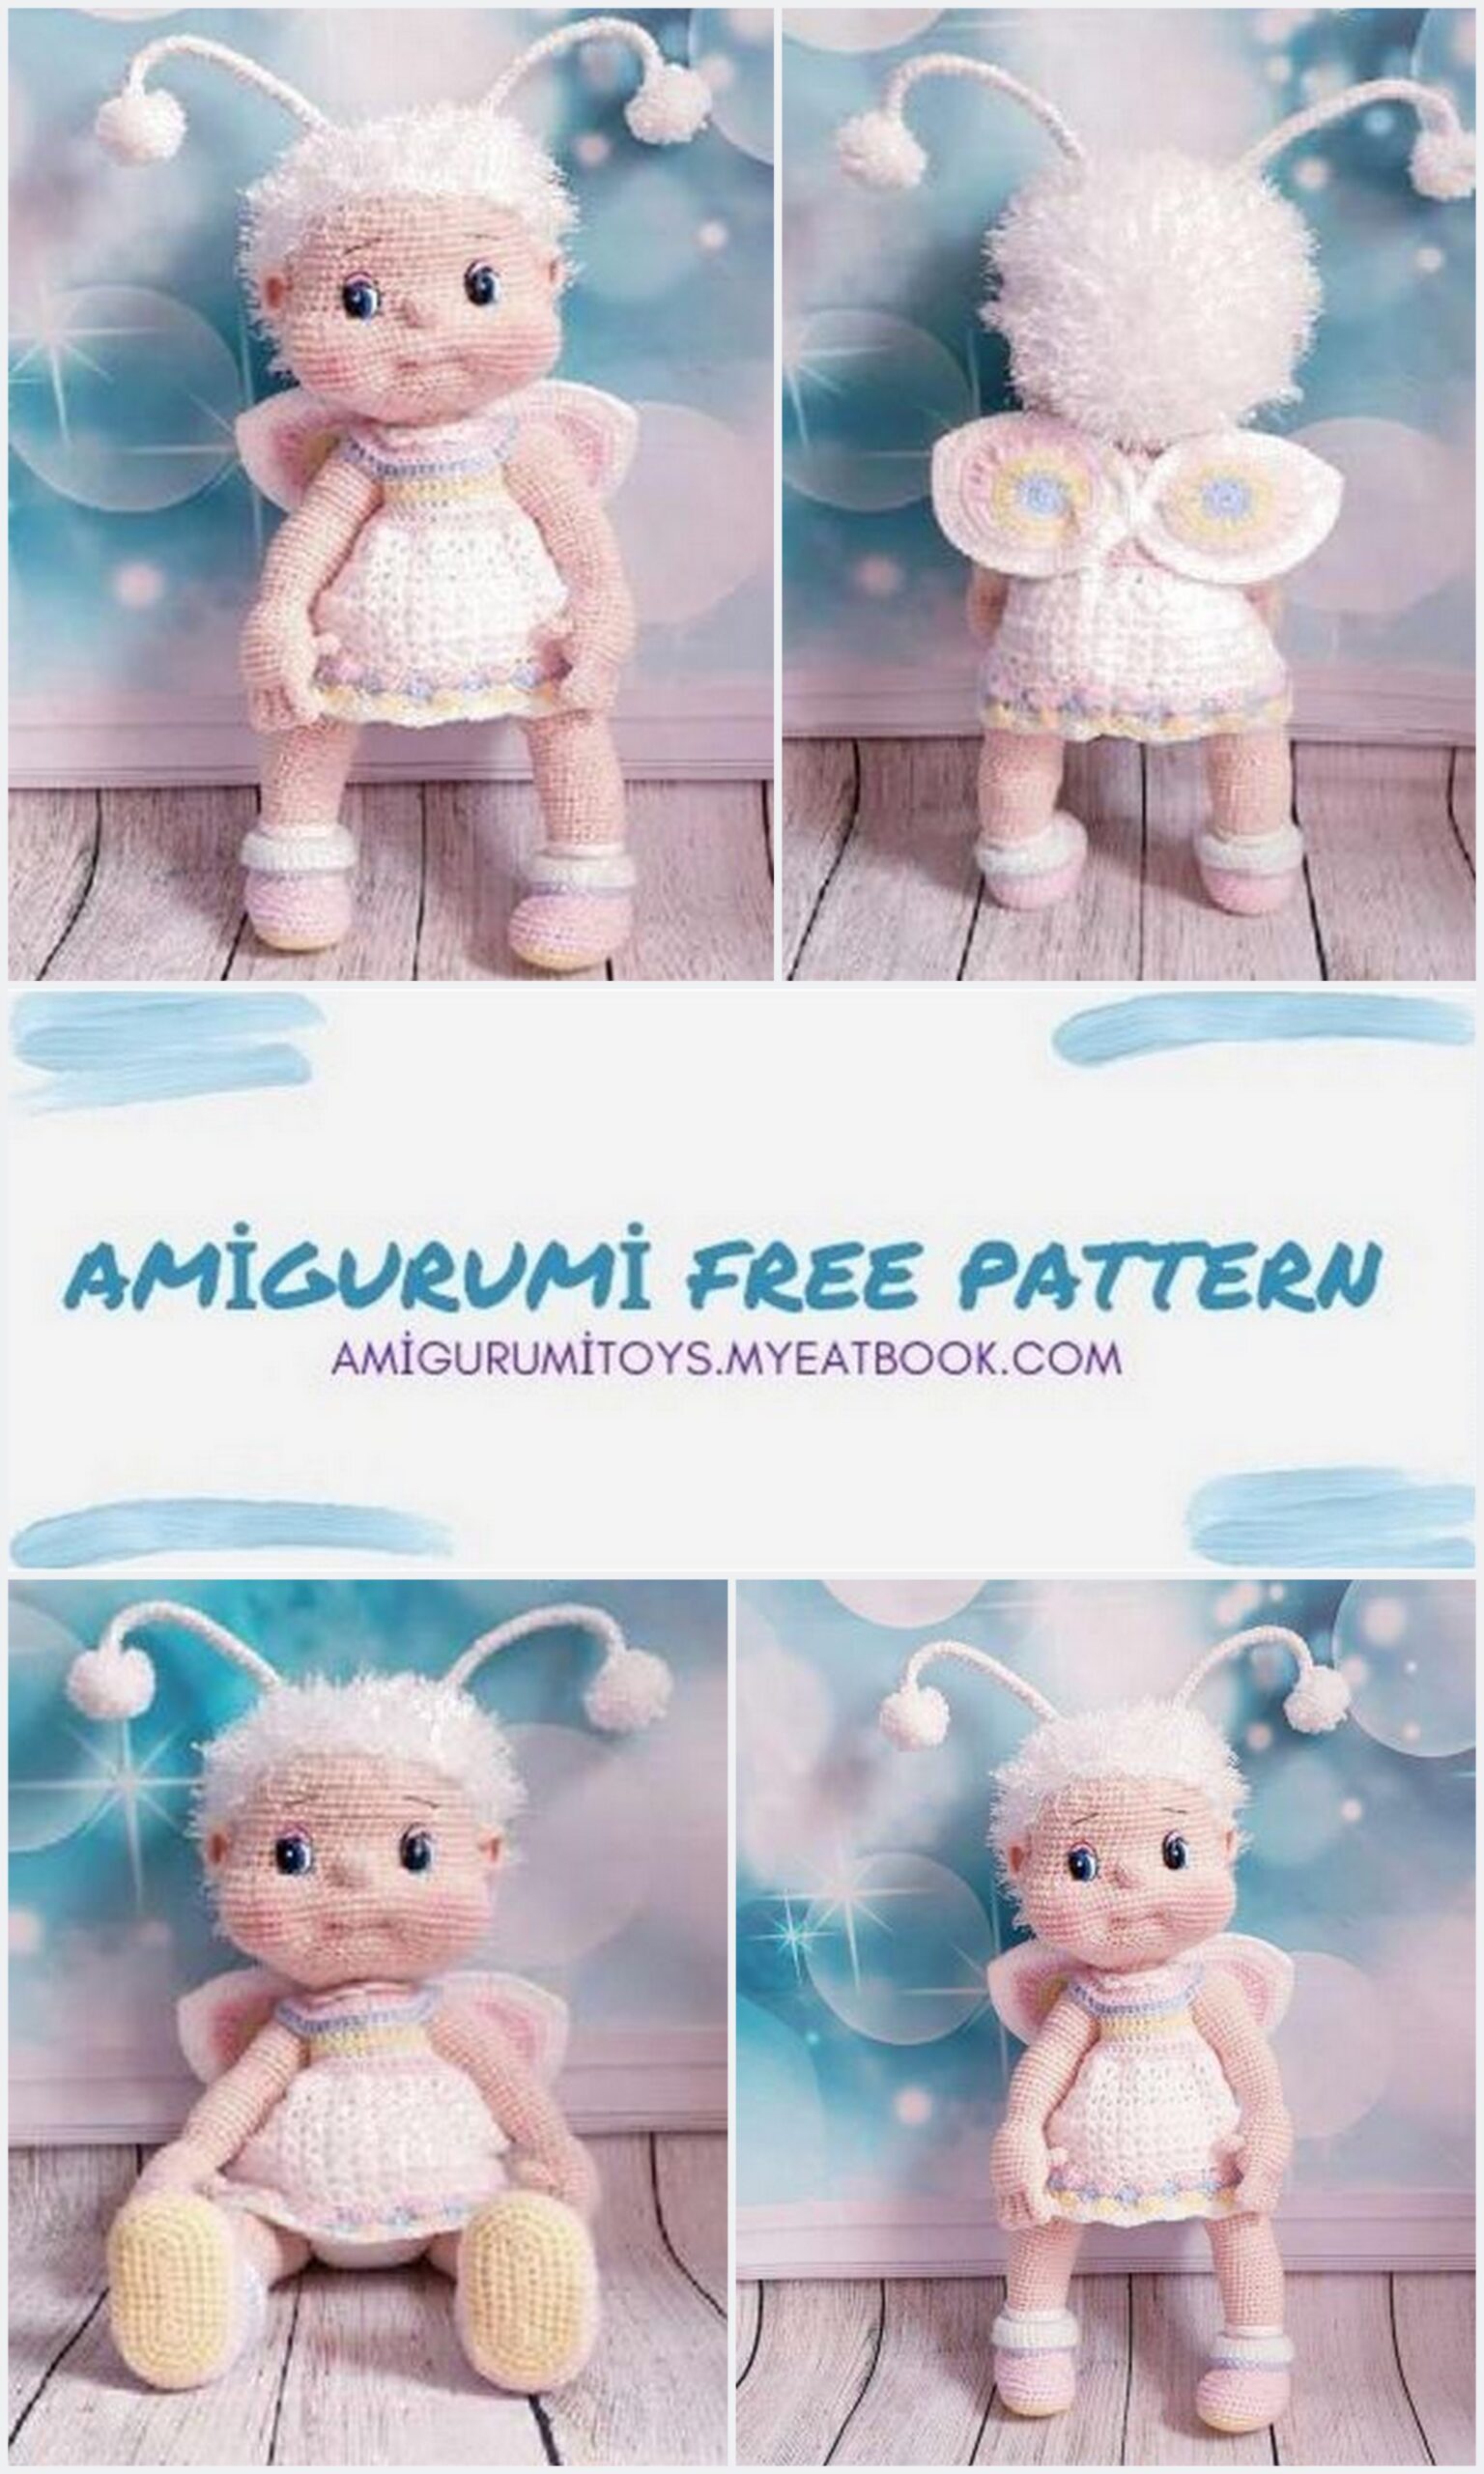
Hello everyone. We would like to present to you “Molly Butterfly, Baby”, she is made in basic posts and rows, she is about 40 cm tall and a little cute, we hope you enjoy making her as much as we enjoyed designing her. Good luck and happy knitting!
Abbreviations
CH – air loop
MR – amigurumi magic ring
SC – single crochet
DC – double crochet
HDC – half double crochet
C2H – a column with two crochets
С3Н – a column with three crochets
İNC – increase
DEC – decrease
SL-ST – connecting post
FLO – Front Column Loops
BLO – back stitches
3SC in 1 – decrease 3SC in one column
V st – (DC, CH, DC) * in one column
Materials (edit)
Yarn – body colors, white, pink, lemon, mint, silver or white
shiny
Hook
2.00mm
2.50mm
3.50mm
Filler
Needle
2 x 15mm Safety Eyes
Blush (For Cheeks)
Wire 2 mm thick x 36 cm long
wire cutters
roulette
insulating tape
2 White little pom-poms
Black thread for embroidery
Scissors
Marker
Now that we have listed all the materials, we will now move on to creating Molly, firstly, we will be doing the head and facial features, so continue: –
Head
Body color yarn and hook 2.00mm
1) 6SC to MR (6)
2) 6İNC (12)
3) (SC, İNC) x 6 (18)
4) SC, İNC (2SC, İNC) x 5, SC (24)
5) (3SC, İNC) x 6 (30)
6) 2SC, İNC (4SC, İNC) x 5, 2SC (36)
7) (5SC, İNC) x 6 (42)
8) 3SC, İNC (6SC, İNC) x 5, 3SC (48)
9) (7SC, İNC) x 6 (54)
10) 4SC, İNC (8SC, İNC) x 5, 4SC (60)
11) (9SC, İNC) x 6 (66)
12) 5SC, İNC (10SC, İNC) x 5, 5SC (72)
13-18) 72SC (72)
19) 5SC, DEC (10SC, DEC) x 5, 5SC (66)
20-21) 66SC (66)
22) 27SC, 2CH, 2nd skip, 8SC, 2CH, 2nd skip, 27SC (62)
23) 27SC, 2SC at 2CH, 8SC, 2SC at 2CH, 27SC (66)
24) 21SC, 6İNC, 12SC, 6İNC, 21SC (78)
25) 21SC, (3SC, İNC) x 3, 12SC, (İNC, 3SC) x 3, 21SC (84)
26) 21SC, (4SC, İNC) x 3, 12SC, (İNC, 34bn) x 3, 21SC (90)
27-30) 90SC (90)
31) 21SC, (4SC, DEC) x 3, 12SC, (DEC, 34bn) x 3, 21SC (84)
32) 21SC, (3SC, DEC) x 3, 12SC, (DEC, 3SC) x 3, 21SC (78)
33) 21SC, 6DEC, 12SC, 6DEC, 21SC (66)
34) (9SC, DEC) x 6 (60)
35) S60SC (60)
36) 4SC, DEC (8SC, DEC) x 5, 4SC (54)
37) (7SC, DEC) x 6 (48)
38) 3SC, DEC (6SC, DEC) x 5, 3SC (42)
39) (5SC, DEC) x 6 (36)
40) 2SC, DEC (4SC, DEC) x 5, 2SC (30)
41) (3SC, DEC) x 6 (24)
42) 24SC, SL-ST, Leave a long thread for sewing! (24)
You will now need to use 2 x 15mm cartoon safety eyes.
Slide each eye into the eye slits and snap the backs into place to lock in place, then stuff your head, making sure you pay close attention to stuffing those cheeks, but don’t overdo it. We knit further:

Nose
Body color yarn and hook 2.00mm
1) 6SC to MR (6)
2) 6İNC (12)
3) 12SC, SL-ST, Leave a long thread for sewing! (12)
Fill in the nose lightly, then pin and sew so that the nose sits between each eye, we will now move on to creating the ears, so continue:
Ears x 2
Body color yarn and hook 2.00mm
Left ear
1) 6SC to MR, 1CH, turn (6)
2) 6İNC, 1CH, turn (12)
3) 11SC, 4SC in one st, 1CH, turn (15)
4) 15SC, 1CH, turn (15)
5) 15SC, SL-ST, Leave a long thread for sewing! (15)
Right ear
1) 6SC to MR, 1CH, turn (6)
2) 6İNC, 1CH, turn (12)
3) 4SC in one st, 11SC, 1CH, turn (15)
4) 15SC, 1CH, turn (15)
5) 15SC, SL-ST, Leave a long thread for sewing! (15)
Set the ears aside for now as we will be attaching them later in the template.
Mouth
Now you will need to take a large needle and a long body colored thread, draw the needle down through the top of the head, now bring the needle 6 rows down from the bottom of the nose and 3 rows down from the right side of the nose.
Now count 9 steps to the left and insert the needle. (See Pictures).
Now lift the needle up and out of the top of your head, pull it tight, tie a knot to secure and weave at the end. Now with a needle and black embroidery thread, embroider the small eyebrows, then use a little pink blush to color the cheeks and put the head to the side, we will now knit the body, so continue:
Body
Body color yarn and hook 2.00mm
1) 6SC to MR (6)
2) 6İNC (12)
3) (SC, İNC) x 6 (18)
4) SC, İNC (2SC, İNC) x 5, SC (24)
5) (3SC, İNC) x 6 (30)
6) 2SC, İNC (4SC, İNC) x 5, 2SC (36)
7) (5SC, İNC) x 6 (42)
8) 3SC, İNC (6SC, İNC) x 5, 3SC (48)
9) (7SC, İNC) x 6 (54)
10) 4SC, İNC (8SC, İNC) x 5, 4SC (60)
11) (9SC, İNC) x 6 (66)
12) 5SC, İNC (10SC, İNC) x 5, 5SC (72)
13-16) 72SC (72)
17) 5SC, DEC (10SC, DEC) x 5, 5SC (66)
18-20) 66SC (66)
21) (9SC, DEC) x 6 (60)
22-23) 60SC (60)
24) 4SC, DEC (8SC, DEC) x 5, 4SC (54)
25-26) 54SC (54)
27) (7SC, DEC) x 6 (48)
28-29) 48SC (48)
30) 3SC, DEC (6SC, DEC) x 5, 3SC (42)
31-32) 42SC (42)
33) (5SC, DEC) x 6 (36)
34-35) 36SC (36)
36) 2SC, DEC (4SC, DEC) x 5, 2SC (30)
37-38) 30SC (30)
39) (3SC, DEC) x 6 (24)
40-41) 24SC (24)
42) 24SC, SL-ST, Leave a long thread for sewing! (24)
Now we are going to stuff the body, but make sure you don’t overdo it, once you do, we’ll move on to working with the legs and feet, so continue:
Legs x 2
From white crochet yarn 2.00 mm
10CH starting from the second hook loops
1) 3SC in one st, 7sc, 3SC in one st, 7SC (20)
2) 3İNC, 7SC, 3İNC, 7SC (26)
3) (SC, İNC) x 3, 7SC, (SC, İNC) x 3, 7SC (32)
4) (2SC, İNC) x 3, 7SC, (2SC, İNC) x 3, 7SC (38)
5) (3SC, İNC) x 3, 7SC, (3SC, İNC) x 3, 7SC (44)
6) for BLO: 44SC (44)
7-9) 44SC (44)
10) 22SC, 6DEC, 10SC (38)
11) 22SC, 6DEC, 4SC (32)
Now you need to draw the bottom of the foot on a piece of cardboard, cut it out and place it inside the foot. (See photo
12) 22SC, 4DEC, 2SC (28)
Now stuff your leg and keep stuffing on and on
13) (4SC, DEC) x 4, 4SC (24)
14-15) 24SC (24)
16) (11SC, İNC) x 2 (26)
17-18) 26SC (26)
19) For FLO: 26SC (26)
20) 26SC (26)
21) 26SC, SL-ST, fasten and cut the thread. (26)
Attach a body colored thread to the back sts of the foot of row 19 – SL-ST and CH,: –
To access these hinges fold like this
22) 26SC (26)
23-25) 26SC (26)
26) (12SC, İNC) x 2 (28)
27-29) 28SC (28)
30) (13SC, İNC) x 2 (30)
31-34) 30SC (30)
Now we are going to work with the kneecap so do the following: –
35) 2DEC, 9SC, 4İNC, 9SC, 2DEC (30)
36-38) 30SC (30)
39) 2İNC, 9SC, 4DEC, 9SC, 2İNC (30)
40) 30SC (30)
41) (14SC, İNC) x 2 (32)
42-43) 32SC (32)
44) (15SC, İNC) x 2 (34)
45-46) 34SC (34)
47) (16SC, İNC) x 2 (36)
48-49) 36SC (36)
50) (17SC, İNC) x 2 (38)
51) 38SC (38)
52) (18SC, İNC) x 2 (40)
53) 40SC (40)
54) (19SC, İNC) x 2 (42)
55) 42SC (42)
56) (5SC, DEC) x 6 (36)
57) (4SC, DEC) x 6 (30)
58) (3SC, DEC) x 6 (24)
59) (2SC, DEC) x 6 (18)
60) (SC, DEC) x 6 (12)
61) 6DEC (6)
62) 3DEC, SL-ST, Leave a long thread for sewing!
Repeat this for the 2nd leg, then do this: –
Take one of the legs and use a large needle to pass the needle through the lower body, then take it back, do this a couple more times to secure, do this for the other leg too. (See Photos.)
Now we are going to work with the arms, firstly, we will make the left arm, so continue: –
Left Arm and Forearm
Using body color yarn and a 2.00mm crochet hook: –
First we will make the fingers and thumb: –
Thumb
1) 6SC to MR (6)
2-3) 6SC (6)
4) 6SC, SL-ST (6)
Set aside for now, as we’ll connect the thumb later.
continued: – fingers 4 pieces
1) 6SC to MR (6)
2-5) Sc around (6)
6) 6SC, SL-ST (6) (Only the first 3 fingers!)
We knit the last finger and do not cut the thread, we will now connect the fingers, connect the fingers as follows:
1) (1 finger = 3SC, 2 finger = 3SC, 3 finger = 3SC, 4 finger = 6SC, 3 finger = 3SC, 2 finger = 3SC, 1 finger = 3SC) (24) (Put a marker.)
2-5) 24SC (24)
In the next row we will connect the thumb, so do the following:
6) SC, 3SC (through the art of the hand and the art of the finger together), 20SC (24)
7) SC, 3SC on the finger, 20SC (24)
8) 24SC (24)
9) (2SC, DEC) x 6 (18)
Fill in your thumb, fingers and hand, continue to fill further: –
10) 18SC (18)
11) (SC, DEC) x 6 (12)
12) 12SC (12)
13) (3SC, İNC) x 3 (15)
14) 15SC (15)
15) (4SC, İNC) x 3 (18)
16) 18SC (18)
17) (5SC, İNC) x 3 (21)
18) 21SC (21)
19) (6SC, İNC) x 3 (24)
20-21) 24SC (24)
22) (6SC, DEC) x 3 (21)
23) (5SC, DEC) x 3 (18)
24) 18SC (18)
25) (2SC, İNC) x 6 (24)
26) 24SC (24)
27) (11SC, İNC) x 2 (26)
28) 26SC (26)
29) (12SC, İNC) x 2 (28)
30) 28SC (28)
31) (13SC, İNC) x 2 (30)
32-34) 30SC (30)
35) (3SC, DEC) x 6 (24)
36) (2bn, DEC) x 6 (18)
37) (SC, DEC) x 6 (12)
38) 6DEC (6)
39) 3DEC, SL-ST, Leave a long thread for sewing! (3)
We will now work with the right hand, so continue: –
Using body color yarn and a 2.00mm crochet hook: –
First we will make the fingers and thumb: –
Thumb
1) 6SC to MR (6)
2-3) 6SC (6)
4) 6SC, SL-ST (6)
Set aside for now, as we’ll connect the thumb later.
continued: – fingers 4 pieces
1) 6SC to MR (6)
2-5) Sc around (6)
6) 6SC, SL-ST (6) (Only the first 3 fingers!)
We knit the last finger and do not cut the thread, we will now connect fingers, connect your fingers as follows:
1) (1 finger = 3SC, 2 fingers = 3SC, 3 fingers = 3SC, 4 fingers = 6SC, 3 fingers = 3SC, 2 fingers = 3SC, 1 finger = 3SC) (24) (Put a marker.)
2-5) 24SC (24)
5) 21SC (21)
6) 3SC (simultaneously through the hand and through the finger together), 21SC (24)
7) 3SC (on the finger), 21SC (24)
8) 24SC (24)
9) (2sc, dec) x 6 (18)
10) 18SC (18)
Fill in your thumb, fingers and hand, continue to fill further: –
11) (SC, DEC) x 6 (12)
12) 12SC (12)
13) (3SC, İNC) x 3 (15)
14) 15SC (15)
15) (4SC, İNC) x 3 (18)
16) 18SC (18)
17) (5SC, İNC) x 3 (21)
18) 21SC (21)
19) (6SC, İNC) x 3 (24)
20-21) 24SC (24)
22) (6SC, DEC) x 3 (21)
23) (5SC, DEC) x 3 (18)
24) 18SC (18)
25) (2SC, İNC) x 6 (24)
26) 24SC (24)
27) (11SC, İNC) x 2 (26)
28) 26SC (26)
29) (12SC, İNC) x 2 (28)
30) 28SC (28)
31) (13SC, İNC) x 2 (30)
32-34) 30SC (30)
35) (3SC, DEC) x 6 (24)
36) (2bn, DEC) x 6 (18)
37) (SC, DEC) x 6 (12)
38) 6DEC (6)
39) 3DEC, SL-ST, Leave a long thread for sewing! (3)
Now we sew our hands to the body, take one of the hands and a large needle and do the following: – Take the needle, thread it to the other side, and then take it back, do this a couple more times to secure, repeat this for the other hand. (See Photo )
Now you will need to sew head to body, when sewing head to body make sure you pad your neck as you sew around for extra stability. (See Photos)
Tepe pw, when we have finished the head, body and facial features, we will now move on to working with the clothes, firstly, we will make her underwear, so continue: –
Underwear Using White Yarn And 2.50mm Crochet Hook
37CH, from the second loop from the hook: –
1) 36 HDC, 1CH turn (36)
2) 36HDC, 1CH turn (36)
3) DEC, 32HDC, DEC, 1CH turn (34)
4) 2DEC, 26HDC, 2DEC, 1CH turn (30)
5) 2DEC, 22HDC, 2DEC, 1CH turn (26)
6) 26 HDC, 1CH turn (26)
7) 2DEC, 18HDC, 2DEC, 1CH turn (22)
8) 2DEC, 14HDC, 2DEC, 1CH turn (18)
9) 2DEC, 10HDC, 2DEC, 1CH turn (14)
10) 14 HDC, 1CH turn (14)
11) DEC, 10HDC, DEC, 1CH turn (12)
12) DEC, 8HDC, DEC, 1CH turn (10)
13) DEC, 6HDC, DEC, 1CH turn (8)
14-18) 8 HDC, 1CH turn (8)
19) İNC, 6HDC, İNC, 1CH turn (10)
20) İNC, 8HDC, İNC, 1CH turn (12)
21) İNC, 10HDC, İNC, 1CH turn (14)
22) 14 HDC, 1CH turn (14)
23) 2İNC, 10HDC, 2İNC, 1CH turn (18)
24) 2İNC, 14HDC, 2İNC, 1CH turn (22)
25) 2İNC, 18HDC, 2İNC, 1CH turn (26)
26) 26 HDC, 1CH turn (26)
27) 2İNC, 22HDC, 2İNC, 1CH turn (30)
28) 2İNC, 26HDC, 2İNC, 1CH turn (34)
29) İNC, 32HDC, İNC, 1CH turn (36)
30) 36HDC, 1CH turn (36)
31) 36HDC, 1CH turn (36)
32) 36SC, SL-ST – Leave a long thread for sewing!
Now you will put on Molly’s underwear and sew up the sides with the threads you have left. (See photo.)
Now that we have finished the underwear, we will now focus on working with the dress, so continue: –
The dress
Starting at pink and 2.50mm crochet: –
41CH, From the second loop from the hook: –
1) 40SC, 2CH turn (40)
2) DC, İNCDC (2DC, İNCDC) x 12, DC, SL-ST (52)
Changeover to blue yarn SL-ST and 2CH: –
3) for BLO: -52DC, SL-ST (52)
Changeover to lemon yarn SL-ST and 2CH: –
4) for FLO: -7DC, İNCDC, 8CH, 10st İNC, İNCDC, 12DC, İNCDC, 8CH, 10st skip, İNCDC, 9DC, SL-ST (36)
Change mint yarn SL-ST and 2CH: –
5) for BLO: -11DC, 8 DC at 8CH, 16DC, 8DC at 8CH, 9DC (52)
Changes pink yarn SL-ST and 2CH: –
6) for FLO: -52DC, SL-ST (52)
Change to white yarn SL-ST and 2CH: –
7) for BLO: – 52İNCDC, 3CH and turn (104)
8) * Vst, 2st skip * to the end of the row
9) Vst in each CH Vst of the previous row, 3CH and turn
10-17) repeat row 9.
Join with pink yarn SL-ST and CH: –
18) art in CH, * skip 2st, 5DC in CH, skip 2st, SC in CH * – repeat to the end of the row.
Changeover to 3CH blue yarn: –
19) 2 DC in the last column of the previous row, * SC in the 3rd (middle)
shell loop of previous row, 5 DC in SC (between shells)
previous row * – repeat to the end of the row. Finish work with 3 DC at the edge of the piece (instead of 5 DC).
Changeover to lemon yarn SL-ST: –
20) 1 CH lift, SC in the last loop + on the previous row, * 5 DC in SC (between the shells) of the previous row, SC in the 3rd (middle) loop of the shell of the previous row * – repeat to the end of the row.
Change mint yarn SL-ST
21) 3CH repeat 19 row, SL-ST
Now that we have finished the dress, we will now focus on working with the collar, so continue: –
Collar
Looking at the front of the dress, crochet the white yarn at the top right corner with a 2.50mm crochet, SL-ST and CH
1) 40SC, 5CH and turn and turn (40) (Now we will make the lace effect): –
2) for BLO: – skip 2nd, SC * 5CH, skip 2nd, SC * repeat until the end of the SL-ST row.
If you find that the collar is not straight, take a thread and a needle and sew a few stitches.
Now you will need to put the dress on Molly by sewing the hole in the back.
(See photo.)
Once you have done that, we will move on to working with booties, so continue: –
Booties x 2
We start with lemon yarn and a 2.5 mm crochet hook: –
10CH, from the second loop from the hook
1) 3SC one loop, 7SC, 3SC one loop, 7SC (20)
2) 3İNC, 7SC, 3İNC, 7SC (26)
3) (SC, İNC) x 3, 7SC, (SC, İNC) x 3, 7SC (32)
4) (2SC, İNC) x 3, 7SC, (2SC, İNC) x 3, 7SC (38)
5) (3SC, İNC) x 3, 7SC, (3SC, İNC) x 3, 7SC, SL-ST (44)
Changeover to pink yarn SL-ST and 1CH: –
6) for BLO: -44SC (44)
7-9) 44SC (44)
10) 22SC, 6DEC, 10SC (38)
11) 22SC, 6DEC, 4SC (32)
12) 23SC, DEC triple (3SC in one), 6SC (30)
13-15) 30SC (30)
16) 30SC, SL-ST (30)
Change to mint yarn SL-ST and 1CH: – 17) In BLO: -Sc around (30)
18) for FLO- (4SC, İNC) x 6, SL-ST t CH (36)
19-20) 36SC, SL-ST (36)
Changeover to blue yarn SL-ST and 1CH: –
21) for FLO: -36SC, SL-ST (36)
Fasten and cut the thread, repeat this for the 2nd boot, then put on Molly’s feet, once you do that we will move on to the work of the wings, so continue: –
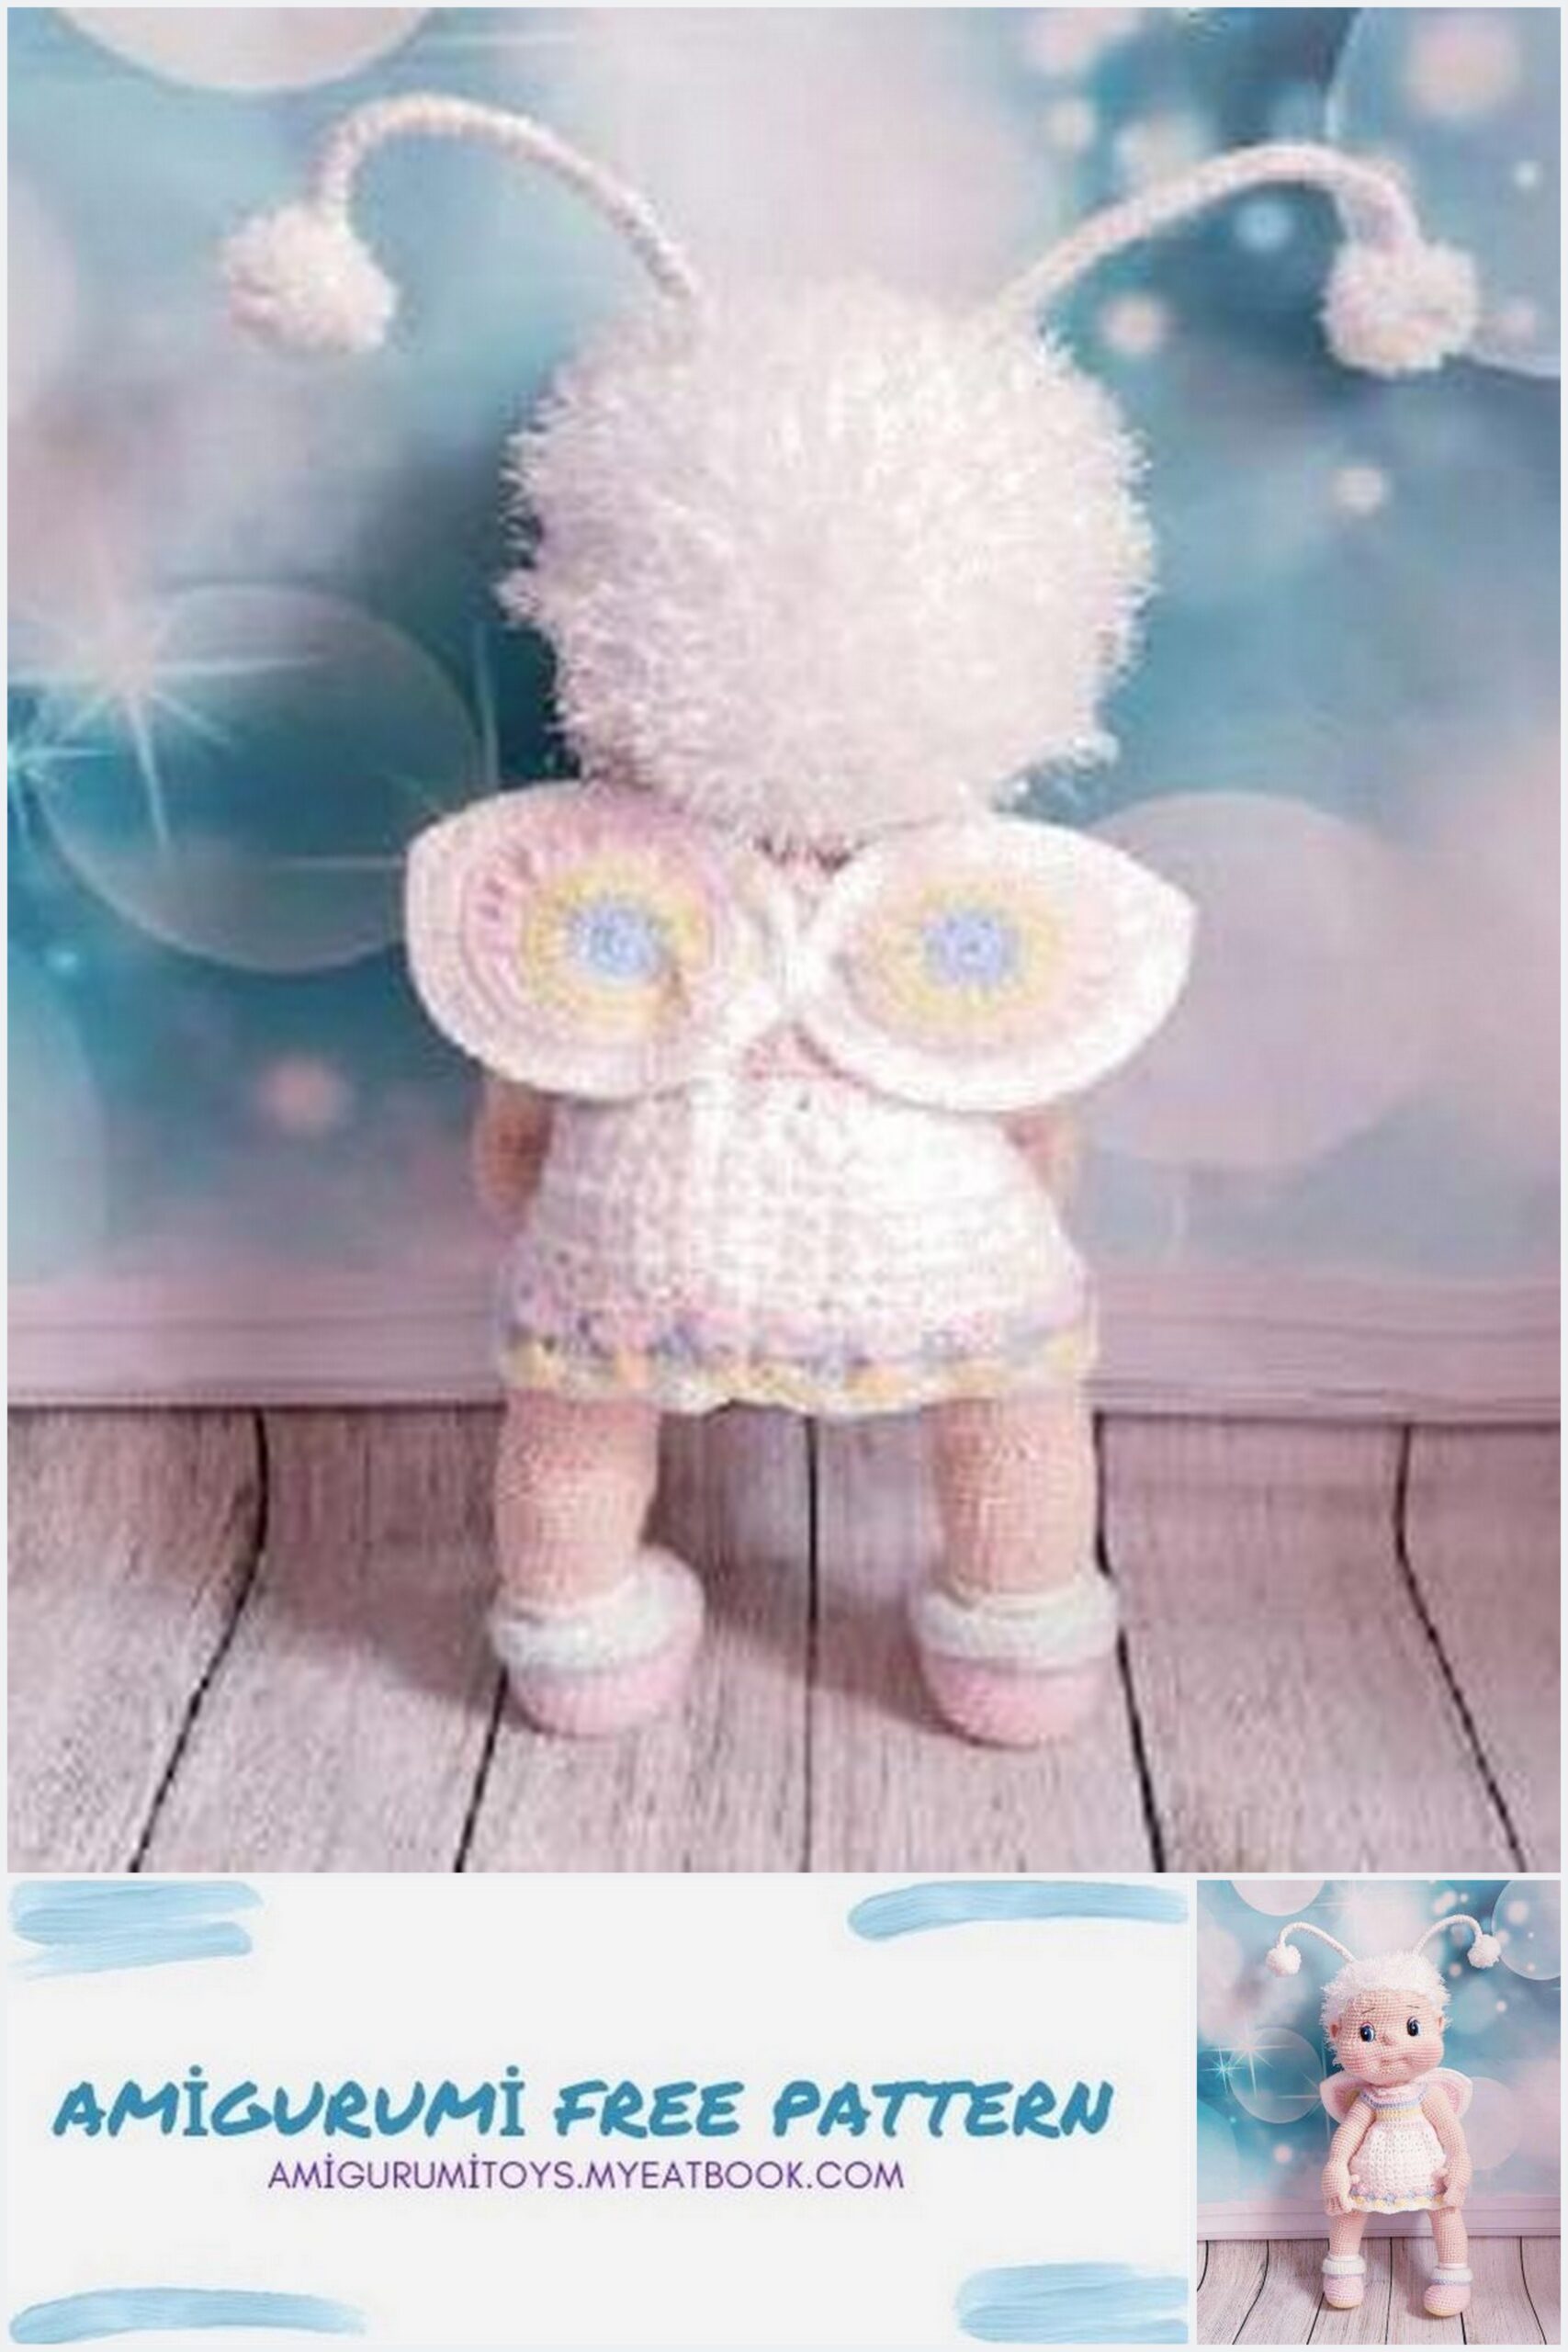
Wings x 4
Starting with blue yarn and a 2.50mm crochet hook: –
1) 10SC to MR (10)
2) (SC, İNC) x 5 (15)
3) (2SC, İNC) x 5, SL-ST (20)
Changeover to lemon yarn SL-ST and 2CH: –
4) for BLO: -20 İNC DC, SL-ST (40)
Change to mint yarn SL-ST and 1CH: –
5) for BLO: -40SC, SL-ST (40)
Changeover to pink yarn SL-ST and 1CH: –
6) for BLO: -9SC, HDC, СНН, İNCDC, 3DC, İNC С2Н, С2Н, İNC С2Н, İNC С3Н, С3Н, İNC С3Н,
İNC С2н, С2Н, İNC С2Н, 3DC, İNC СНН, СНН, HDC, 9SC, SL-ST (48)
Change to white yarn SL-ST and 1CH: –
7) for BLO: -24SC, (SC, CHN, SC) in one column, 24SC, SL-ST and 2CH (51)
8) (3DC, İNC) x 6, DC, (DC, C2H, DC) = one st, (3DC, İNC) x 6, SL-ST and CH (65) 9) 31SC, (SC, DC, SC) = in one st, 32SC, SL-ST (66)
Fasten and cut the thread, repeat the above pattern 3 more times, then do the following: –
Now you will need to place one wing on top of the other with the right side facing outward, using the left thread and a needle, sew both together along the edge. (See photo.)
After you finish this one more time, attach each wing to the back of the dress that is on the doll and sew in place. (See photo.):-
Note that in the above photo the hair is already attached to the head, but this image was just to show you how the Wings should look like, now we will focus on working with the hair, continue: –
Hair
Using White Yarn Weed and 3.50mm Crochet Hook: –
1) 6SC to MR (6)
2) 6İNC (12)
3) (SC, İNC) x 6 (18)
4) (2SC, İNC) x 6 (24)
5) (3SC, İNC) x 6 (30)
6) (4SC, İNC) x 6 (36)
7) (5SC, İNC) x 6 (42)
8) (6SC, İNC) x 6 (48)
9) (7SC, İNC) x 6 (54)
10) (8SC, İNC) x 6 (60)
11-14) 60SC (60)
15) 38SC, 1CH and turn (38) (working in turning rows): –
16-17) 38SC, 1CH and turn (38)
18) DEC, 34SC, DEC, 1CH and turn (36)
19) 2DEC, 28SC, 2DEC, 1CH and turn (32)
20-21) 32SC, 1CH and turn (32)
22) 2DEC, 24SC, 2DEC, 1CH and turn (28)
23) DEC, 24SC, DEC, 1CH and turn (26)
24) 2DEC, 18SC, 2DEC, 1CH and turn (22)
25-27) 22SC, 1CH and turn (22)
28) DEC, 18SC, DEC, SL-ST, leave thread for sewing! (twenty)
Pin to the head and sew in place, then the ears you made earlier sew on to each side of the head, once you do that we get to the antenna operation, so continue: –
Antenna x 2
Using silver or white shiny metallic yarn and a 2.50mm crochet hook: –
31CH, from the second loop from the hook: –
1) 30SC, 1CH and turn (30)
2) 30SC, 1CH and turn (30)
3) 30SC, SL-ST, Leave thread to sew on (30)
What you will now need to do is with your strong wire, wire cutters, do the following: – Cut 2 pieces of wire 18cm long, then wrap in electrical tape to secure, then the antennas you just tied sew around the lengths wires along. (See photo.)
As you can see in the photo, you need to leave some wire to fasten in the head, now you will need to make 2 white pom-poms or use 2 ready-made pom-poms, attach them to the end of each antenna, and then attach the antenna to the head. (See photo about how the antenna should look like): –
We hope you enjoyed making it as much as we enjoyed developing it.