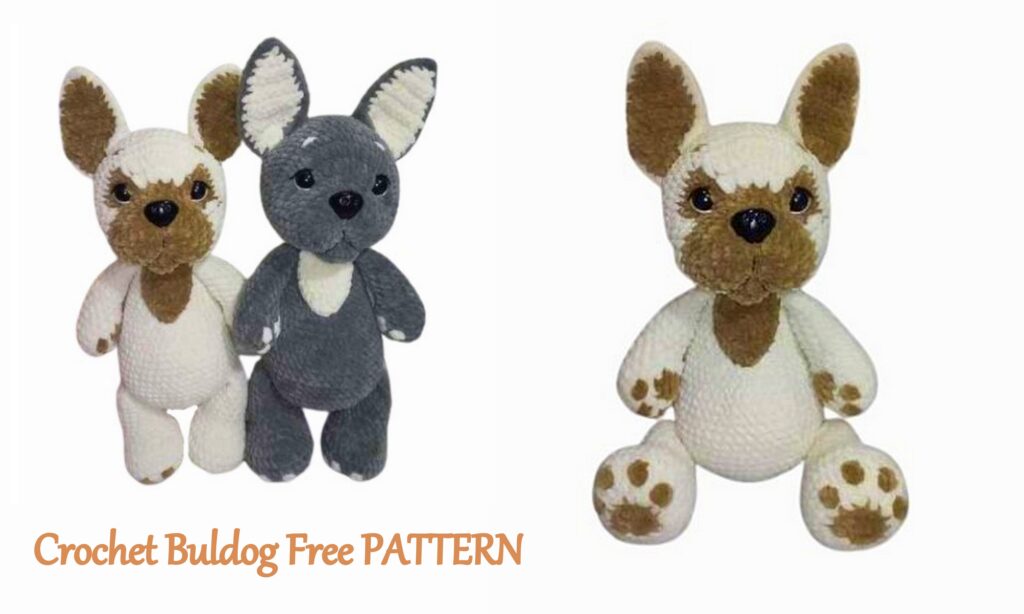
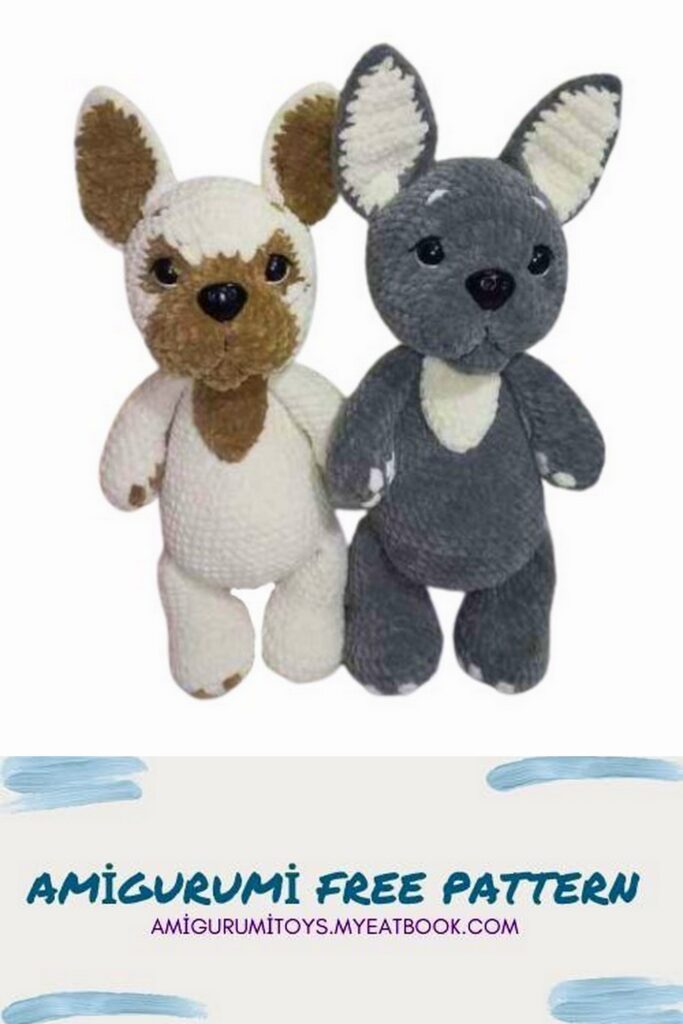
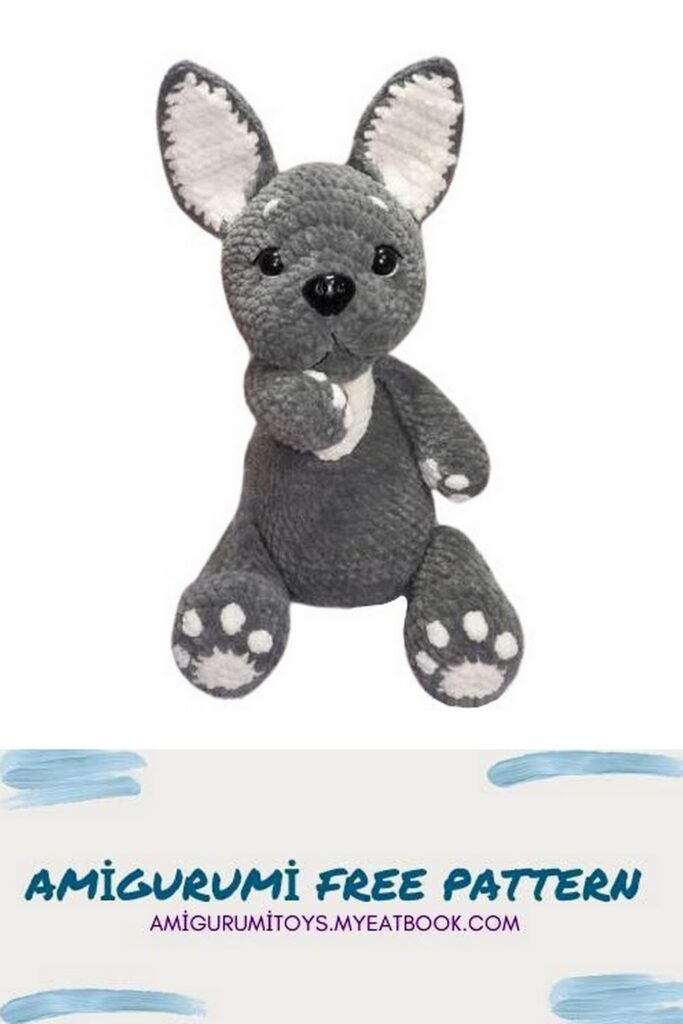
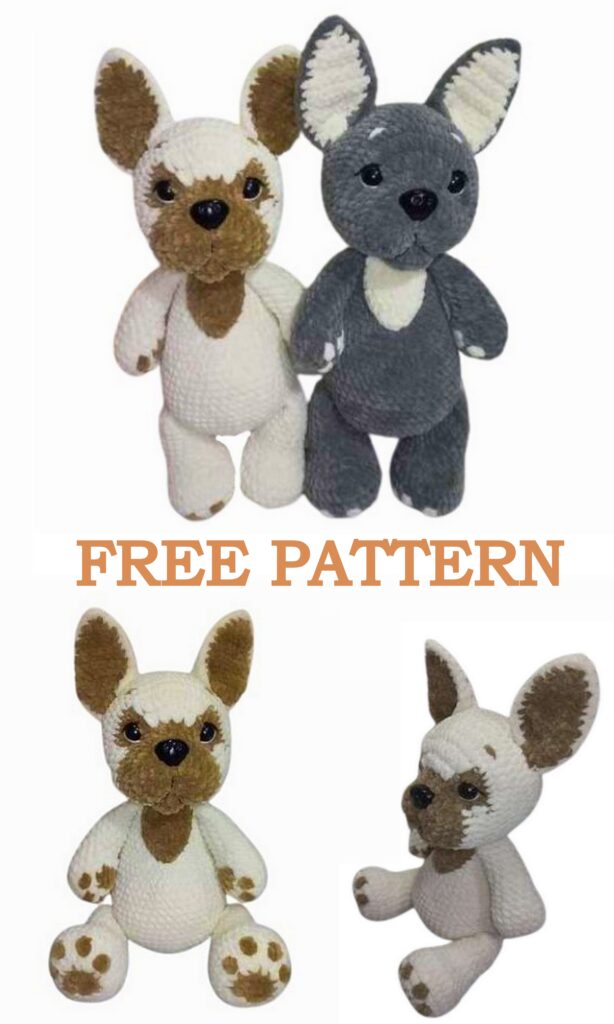
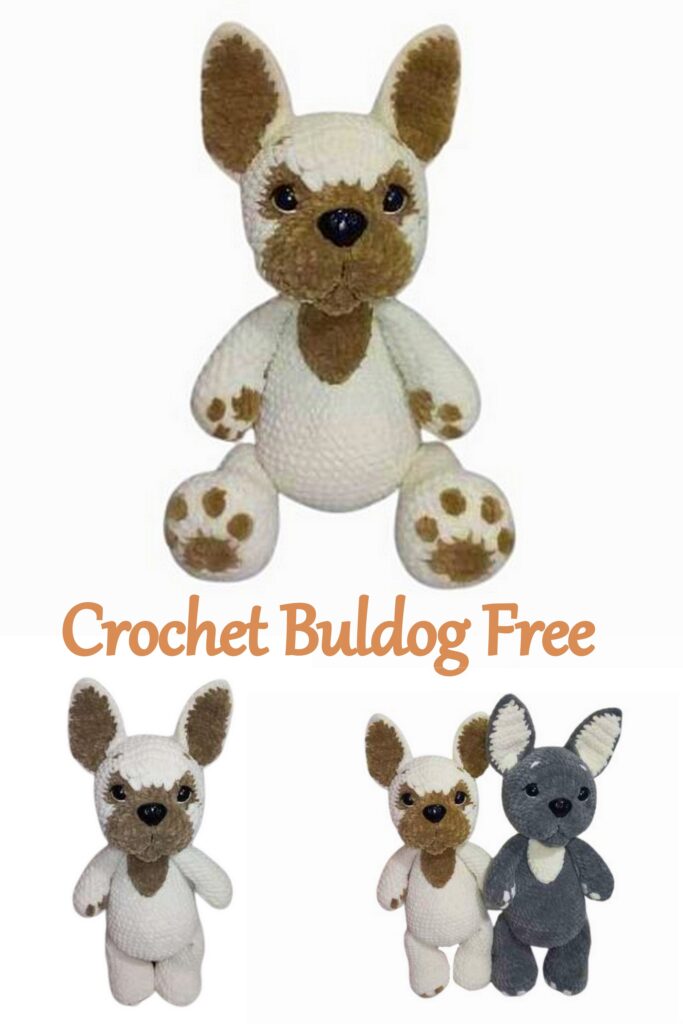
Welcome to my Amigurumi blog guys! We share this cute Crochet Buldog amigurumi pattern with you completely free of charge. You can continue reading to create a wonderful amigurumi pattern step by step. Have fun.
The height of the finished toy, taking into account the ears, when using the recommended materials is Crochet Buldog 37 – 38 cm. I would like to draw your
Crochet Buldog materials:
1. LaVita Yarn Velur yarn (120 m / 100 g):
The colors I used:
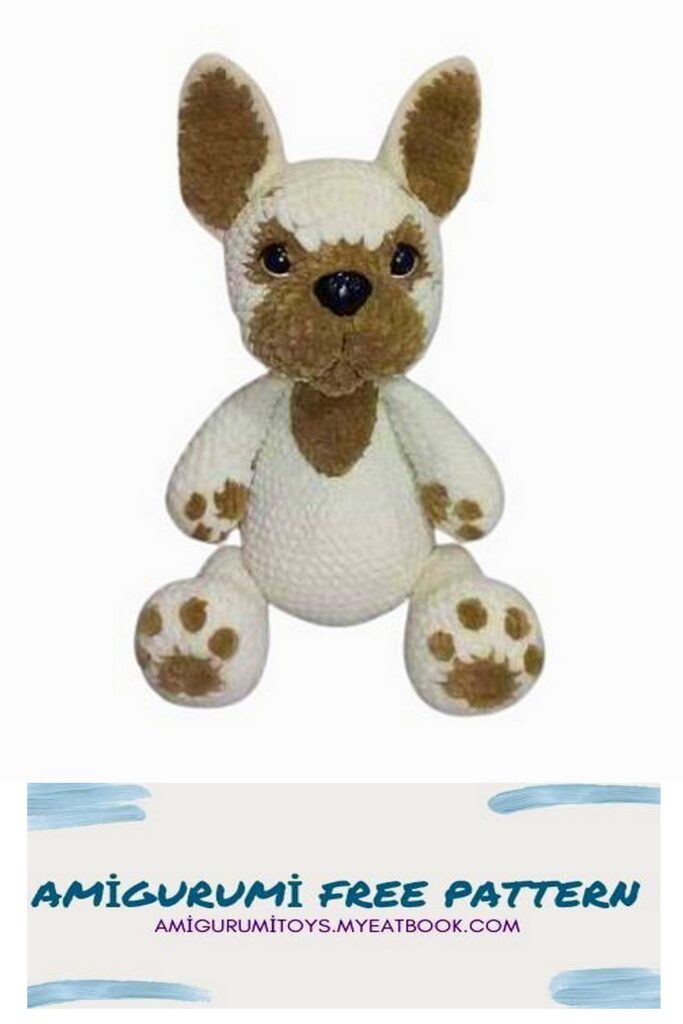
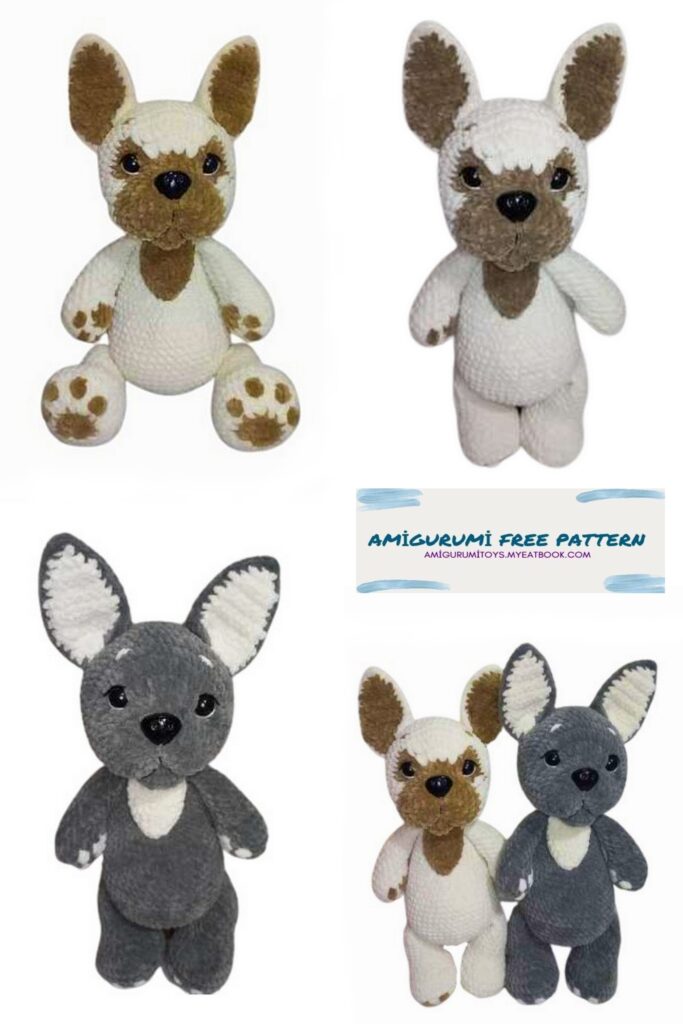
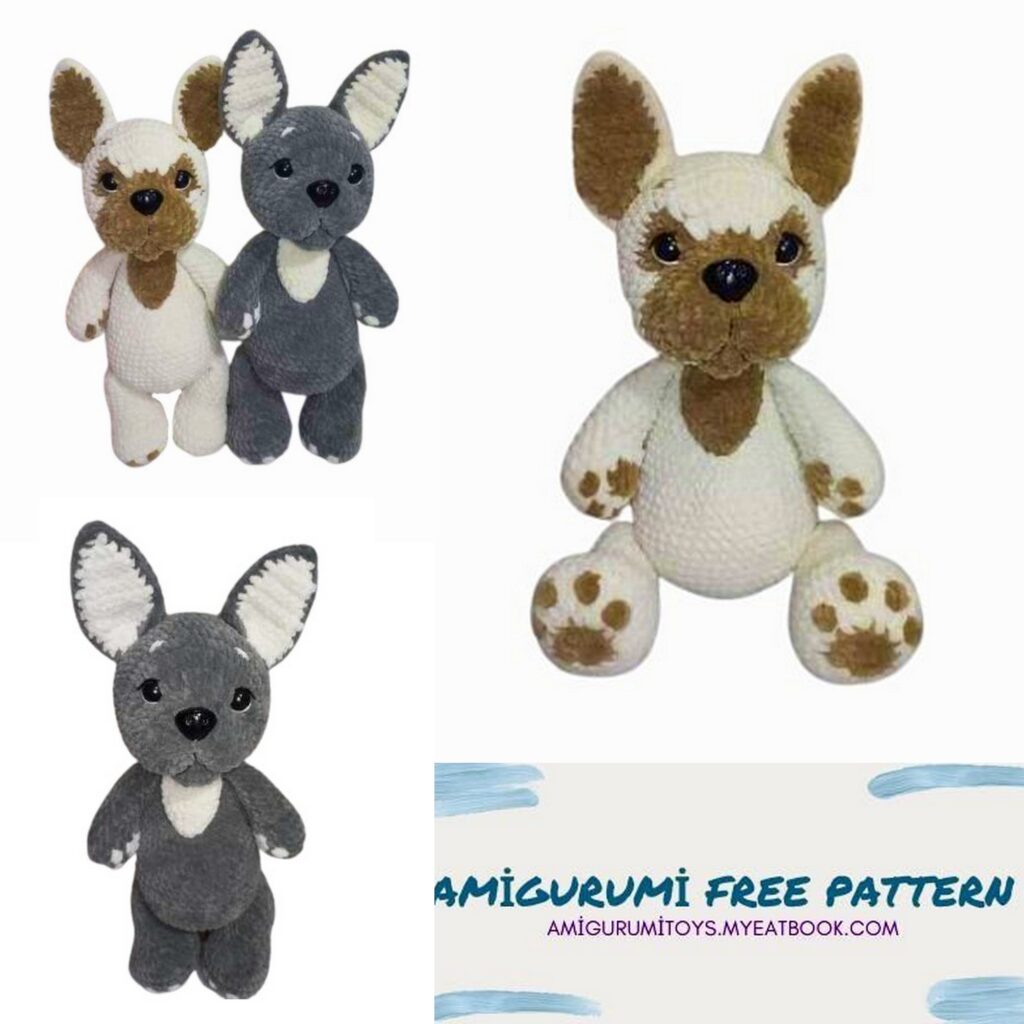
For a milky bulldog:
• Main color: 1011 (milky) – 2 skeins;
• Additional color: 1039 (brown-gray) – 0.5 skeins; For a gray bulldog:
• Main color: 6019 (gray) – 1.5 skeins;
• Additional color: 1011 (milky) – 0.5 skeins;
2. YarnArt Jeans yarn – a bit of black and white for the eyes and muzzle;
3. Eyes on a safe fastening, diameter – 16 mm
4. Nose, diameter – 20 mm
3. Hook (I use a 4 mm hook);
4. Filler (synthetic fluff, holofiber or synthetic ball);
5. Needle, marker, scissors, tailor’s pins;
Abbreviations
Ch – chain stitch;
BLO – knit through the back half-loop;
MR – amigurumi ring;
FLO – knit through the front half-loop;
İnc – increase;
Hdc – half double crochet;
Sc – single crochet;
Sl-st – slip stitch;
Dc – double crochet;
Dec – decrease;
(NUMBER) – the total number of columns in a row, or the number of identical rows;
(…) x NUMBER – repeat the action in brackets the specified number of times;
finger pad from two incomplete Sc – knitting description on pages 10-11 of the master class.
Crochet Buldog- Head
If you are knitting a bulldog with a muzzle from an additional color, then start knitting with a thread of an additional color. Knit in a spiral, stuffing with filler as you knit.
1) Cast on a chain of 4 Ch, from the second loop from the hook we knit İnc, 1 Sc, 4Sc into 1 loop, 1 Sc, İnc (10)
2) 2 İnc, 1 Sc, 4 İnc, 1 Sc, 2 İnc (18)
3) (1 Sc, İnc) x 2, 1 Sc, (1 Sc, İnc) x 4, 1 Sc, (1 Sc, İnc) x 2 (26)
4) 1 Sc, (İnc, 2Sc) x 2, 1 Sc, (İnc, 2 Sc) x 4, 1 Sc, İnc, 2 Sc, İnc, 1 Sc (34)
5) 34 Sc (1 row)
6) In this row we will shift the marker of the beginning of the row, knitting an incomplete row so that it ends at the bottom exactly in the middle of the muzzle, for me it is 26 Sc, for you it can be +- 1-2 columns. The description of the 7th and 8th rows is presented in two versions:
– the first version describes the change of the thread color to the main color thread for those who knit the muzzle with an additional color thread;
– the second version describes knitting without changing the thread color, for those who knit without changing the thread to another color.
Option 1
Next, for convenience: what needs to be knitted with an additional color thread
will be highlighted in bold with underlining.
7) 3 Sc, 9 Sc, 3 İnc from Hdc, 4 İnc from Hdc, 3 İnc from Hdc, 12 Sc (44)
8) 10 Sc, 2 Hdc, İnc from Hdc, (1 Hdc, İnc from Hdc) x 2, 1 Hdc, (İnc from Hdc, 1 Hdc) x 2, (1 Hdc, İnc from Hdc) x 2, 1 Hdc, (İnc from Hdc, 1 Hdc) x 2, increase of 1 Hdc in additional color and 1 Hdc in main color, 2 Hdc, 10 Sc (54)
Cut and fasten the thread of additional color, continue knitting with the thread of the main color.
Option 2
7) 12 Sc, 10 İnc from Hdc, 12 Sc (44)
8) 10 Sc, 2 Hdc, (İnc from Hdc, 1 Hdc) x 5, (1 Hdc, İnc from Hdc) x 5, 2 Hdc, 10 Sc (54)
9) – 15) 54 Sc (7 rows)
Insert the eyes between the 7th and 8th rows in the middle of the second increases from Hdc of the additional color, or in the middle of the 2nd and 8th increases from Hdc, if knitted with the main color thread (between the eyes 14 Hdc).
Insert the nose between the 3rd and 4th rows, but before securing the nose, tie a strong thread about 60 cm long around it, which will be used to tighten the muzzle.
16) (7 Sc, Dec) x 6 (48)
17) 3 Sc, Dec, (6 Sc, Dec) x 5, 3 Sc (42)
18) (5 Sc, Dec) x 6 (36)
19) 2 Sc, Dec, (4 Sc, Dec) x 5, 2 Sc (30)
20)(3 Sc, Dec) x 6 (24)
21) 1 Sc, Dec, (2 Sc, Dec) x 5, 1 Sc (18)
22)(1Sc, Dec) x 6 (12)
23) 6 Dec (6)
Cut the thread and tighten the hole with the remaining end of the thread by the front half loops.
Muzzle design
Eye tightening
We tighten with a separate thread, not the one that is attached to the nose.
1) Insert the thread with the needle in the middle from the bottom of the head approximately between the 11th and 12th rows (further in the text we will designate this place as dot). oh 0) and bring it out at point 1
2) Insert the needle at point 2 and bring it out from the bottom of the head, stepping back 1 column from point 0 (further in the text we will designate this place as point 01)
3) Insert the needle at point 0 and bring it out at point 3
4) Insert the needle at point 4 and bring it out at point 01
5) Pull the ends of the threads, tightening the eyes. Tie the ends of the threads together, do not hide them inside the head yet.
If desired, for reliability of tightening, you can repeat steps 1-4 again.
Tightening the muzzle
We tighten with a thread secured to the nose. Point 6 between 2 and 3
rows. Points 7 and 8 between 6 and 7 rows. The distance between 7 and 8 points is 6-10 columns.
1) Insert a needle with two ends of thread tied at the nose into point 6 and bring it out at point 5, slightly tightening this distance between points 5 and 6.
Next, we will tighten the sides of the muzzle with each end of the thread separately.
2) Insert a needle with one end of the thread into point 6 and bring it out at point 7.
3) Insert the same thread into point 6 and bring it out at point 5. Tighten the thread, tightening the muzzle.
4) Repeat steps 2 and 3 again and bring the thread out from the bottom of the head to point 0, tie this thread with the thread left over from tightening the eyes.
5) Insert a needle with the second end of the thread into point 6 and bring it out at point 8.
6) Insert the same thread into point 6 and bring it out at point 5. Tighten the thread, tightening the muzzle.
7) Repeat steps 5 and 6 again and bring the thread from the bottom of the head to point 0, tie this thread with the thread left from the tightening of the eyes.
Hide all the threads inside the head.
Use white YarnArt Jeans thread to mark the whites of the eyes from the bottom and sides.
Use black YarnArt Jeans thread to embroider the eyelashes and highlight the tightening of the muzzle.
It is better to embroider the eyebrows after you sew on the ears.
Right ear
Knit 2 identical parts in turning rows. Knit the first part with an additional color. Knit the second part with the main color.
1) 2 Sc in MR, Ch
2) 2 İnc, Ch (4)
3)İnc, 2 Sc, İnc, Ch (6)
4)- 5) 6 Sc, Ch (2 rows)
6) İnc, 4 Sc, İnc, Ch (8)
7) – 8) 8 Sc, Ch (2 rows)
9) İnc, 6 Sc, İnc, Ch (10)
10) Dec, 8 Sc, Ch (9)
11) 3 Sl-st, 2 Sc, 2 Hdc, Dec from Hdc, Ch (8)
12) 3 Hdc, 2 Sc, 3 Sl-st, Ch (8)
On the additional color piece, fasten and cut the thread, on the main color piece, do not cut the thread.
Attach the detail of the additional color to the detail of the main color and tie with single crochets for both details along two side sides of the details, in the upper corner knit 3 Sc. No need to stuff with filler.
Fasten the thread and cut, leaving a long end for sewing.
Left ear
Knit 2 identical details in turning rows. Knit the first detail with the additional color. Knit the second detail with the main color.
1) 2 Sc in MR, Ch
2) 2 İnc, Ch (4)
3)İnc, 2 Sc, İnc, Ch (6)
4)- 5) 6 Sc, Ch (2 rows)
6) İnc, 4 Sc, İnc, Ch (8)
7) – 8) 8 Sc, Ch (2 rows)
9) İnc, 6 Sc, İnc, Ch (10)
10) 8 Sc, Dec, Ch (9)
11) Dec from Hdc, 2 Hdc, 2 Sc, 3 Sl-st, Ch (8)
12) 3 Sl-st, 2 Sc, 3 Hdc, Ch (8)
On the additional color piece, fasten and cut the thread, on the main color piece, do not cut the thread.
Attach the additional color detail to the main color detail and tie with single crochet stitches for both details along the two side sides of the details, knit 3 Sc in the upper corner. No need to stuff with filler.
Fasten the thread and cut, leaving a long end for sewing.
From the side inner side, fold the ears in half to the middle
of the base, i.e. connect the corner (point 1) with the middle of the base (point 2)
(see photo below).
Sew the ears to the head between rows 13 and 14. The distance along the head between the outer sides of the ears is 22 stitches. Having sewn the ears to the base, you need to sew 3 more rows to the head along the inner side (see photo below)
Embroider the eyebrows.
Arms (2 pieces)
Crochet Buldog Free PatternKnit in a spiral, stuffing the detail with filler as you knit up to row 12. Start knitting with the main color. Further, for convenience, what needs to be knitted with a thread of an additional color will be highlighted in bold and underlined. 1) 6 Ch, from the second loop from the hook we knit: 4 Sc, 3 Sc in the last loop, on the back side of the chain 3 Sc, İnc (12)
2) İnc, 3Sc, 3 İnc, 3 Sc, 2 İnc (18)
3) 2 Sc, we knit the pad of the finger from two incomplete Sc as follows:
1. through the loop on the part we grab the thread of the additional color, on the hook we get 2 loops: 1 of the main and 1 of the additional color
2. with the hook we grab the thread of the additional color and knit 1 loop of the additional color on the hook, on the hook we get 2 loops: 1 of the main and 1 of the additional color
3. through the same loop on the part we grab the thread of the additional color, on the hook we get 3 loops: 1 of the main and 2 of the additional color
4. with the hook we grab the thread of the additional color and knit 1 loop additional color on the hook, there are 3 loops on the hook: 1 main and 2 additional colors
5. grab the thread of the main color with the hook and knit all
3 loops on the hook with the thread of the main color
One pad on the fingers is ready
Further in the description, all these 5 steps for knitting the pads of the fingers will be
designated as follows – “a pad of a finger from two incomplete Sc”.
We continue knitting 3 rows:
1 Sc, a pad of a finger from two incomplete Sc, 13 Sc (18)
4) 1 Sc, pad of finger from two incomplete Sc, 2 Sc with thread of main color – close with thread of additional color (close with thread of additional color -. through the loop on the detail we grab thread of main color, on the hook we get 2 loops of main color, with the hook we grab thread of additional color and knit 2 loops on the hook with this thread of additional color), 2Sc, pad of finger from two incomplete Sc, 11 Sc (18)
5) 2 Sc (in the second column we change thread color to additional color, i.e. close with thread of additional color (description see point 4)), 1 Sc for BLO, 2 Sc, 1 Sc for BLO – close with thread of main color (description see point 6), 12 Sc (18)
6) 2 Sc, 4 Sc with thread of additional color – close with thread main color (i.e. through the loop on the part we grab the thread of the additional color, on the hook we get 2 loops of the additional color, with the hook we grab the thread of the main color and knit 2 loops on the hook with this thread of the main color), 12 Sc (18)
Fasten the thread of the additional color and cut.
7) 4 Dec, 10 Sc (14)
8) 2 Dec, 10 Sc (12)
9) – 13) 12 Sc (5 rows)
14) (4Sc, Dec) x 2 (10)
15) Knit 5 Sc +/- 1-2 Sc, so that the row ends on the side of the handle, fold the part in half and knit 5 Sc for both edges of the part.
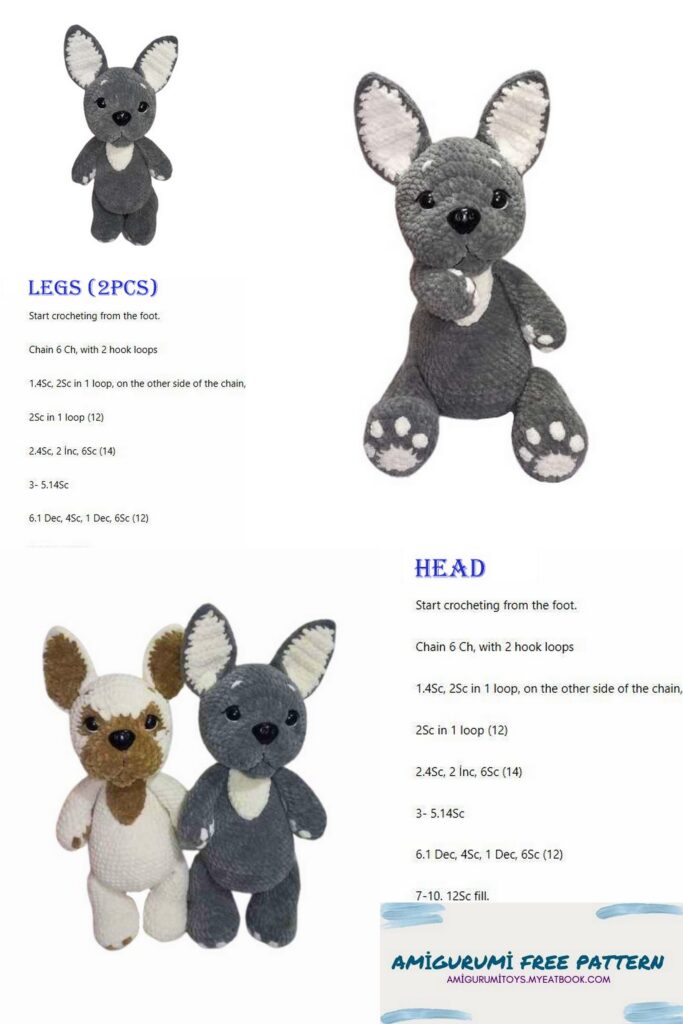
Crochet Buldog- Legs (2 pieces)
Knit in a spiral, stuffing the part with filler as you knit up to 15 – 16 rows. We begin knitting with an additional color. Further, for convenience, what needs to be knitted with a thread of an additional color will be highlighted in bold and underlined. 1) 8 Sc in MR
2) 5 İnc (change the thread to the main color thread in the last Sc), 3 İnc (16)
3) Behind FLO (1 Sc, İnc) x 8 (24)
4) 4 Sc, finger pad of three incomplete Sc behind BLO (knitted similarly to the finger pad on the hand, but only knit not 2 incomplete Sc, but 3 incomplete Sc), (İnc, 1 Sc) x 2, İnc, finger pad of three incomplete Sc behind BLO, 13 Sc (27)
5) 5 Sc, İnc, 1 Sc, finger pad of three incomplete Sc, 1 Sc, İnc, finger pad of three incomplete Sc, 2 Sc, İnc, 13 Sc (30)
Cut and secure the additional color thread.
6) – 8) 30 Sc (3 rows)
9) 5 Sc, 6 Dec (decreases go exactly in the middle in front of the foot, if yours is not so, then make shift loops, knitting or not knitting 1-2 Sc),
13 Sc (24)
10) 5 Sc, 3 Dec (decreases also go exactly in the middle in front of the foot), 13 Sc (21)
11) (5 Sc, Dec) x 3 (18)
12) – 17) 18 Sc (6 rows)
18) (7 Sc, Dec) x 2 (16)
19) Knit another 7 Sc +/- 1-2 Sc, so that the row ends in the front exactly in the middle of the leg, fold the piece in half and knit 8 Sc along both edges, cut the thread and fasten
Crochet Buldog- Tail
Knit with the main color thread along spirals, no need to stuff the part with filler.
1) 6 Sc in MR
2) (2 Sc, İnc) x 2 (8)
3) – 6) 8 Sc (4 rows), cut and secure the thread
Crochet Buldog- Body
Crochet Buldog Free Pattern Knit with the main color thread in a spiral, stuffing the body with filler as you knit.
1) 7 Sc in MR
2) 7 İnc (14)
3) (1 Sc, İnc) x 7 (21)
4) 1 Sc, İnc, (2 Sc, İnc) x 6, 1 Sc (28)
5) (3 Sc, İnc) x 7 (35)
6) 2 Sc, İnc, (4 Sc, İnc) x 6, 2 Sc (42)
7) 3 Sc, İnc, (6 Sc, İnc) x 5, 3 Sc (48)
8) 48 Sc (1 row)
Next, follow the row marker, it should go exactly in the middle of the back, if the row marker leads to the side, make shift loops.
9) 8 Sc, attach leg to body and knit 8 Sc across body with leg, 16 Sc, attach leg to body and knit 8 Sc across body with leg, 8 Sc (48)
10) 46 Sc, fold tail in half and attach to body, knit 2 Sc through loops of both sides of tail and loops on body (48)
11) 2 Sc across body with tail, 46 Sc (48)
12) – 17) 48 Sc (6 rows)
18) 15 Sc, (1 Sc, Dec) x 3, (Dec, 1 Sc) x 3, 15 Sc (42)
19) – 20) 42 Sc (2 rows)
21) 12 Sc, (1 Sc, Dec) x 3, (Dec, 1 Sc) x 3, 12 Sc (36)
22) – 23) 36 Sc (2 rows)
24) 5 Sc, Dec, (10 Sc, Dec) x 2, 5 Sc (33)
25) (9 Sc, Dec) x 3 (30)
26) 30 Sc (1 row)
27) 4 Sc, Dec, (8 Sc, Dec) x 2, 4 Sc (27)
28) (7 Sc, Dec) x 3 (24)
29) 4 Sc, attach handle to body and knit 5 Sc along body with handle, 6 Sc, attach handle to body and knit 5 Sc along body with handle, 4 Sc (24) Crochet Buldog Free Pattern
30) (4 Sc, Dec) x 4 (20)
31) 20 Sc (1 row), cut thread and fasten, leaving a long end for sewing
Crochet Buldog- Chest
Knit in turning rows with a thread of an additional color.
1) 2 Sc in MR, Ch (2)
2) 2 İnc, Ch (4)
3) İnc, 2 Sc, İnc, Ch (6)
4) – 9) 6 Sc, Ch (6 rows),
Tie the sides of the chest with single crochets, knit 3 Sc in the lower corner, fasten the thread and cut, leaving a long end for sewing
Crochet Buldog Assembling the toy
Crochet Buldog Free Pattern-Amigurumi Tutorial Sew the chest from the very top of the body in front and then sew the head to the body.