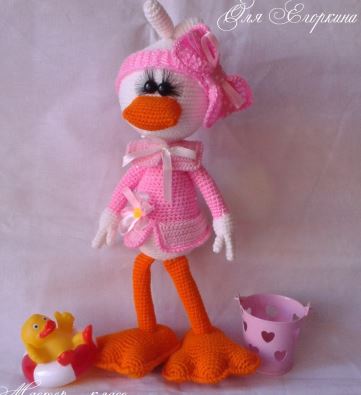
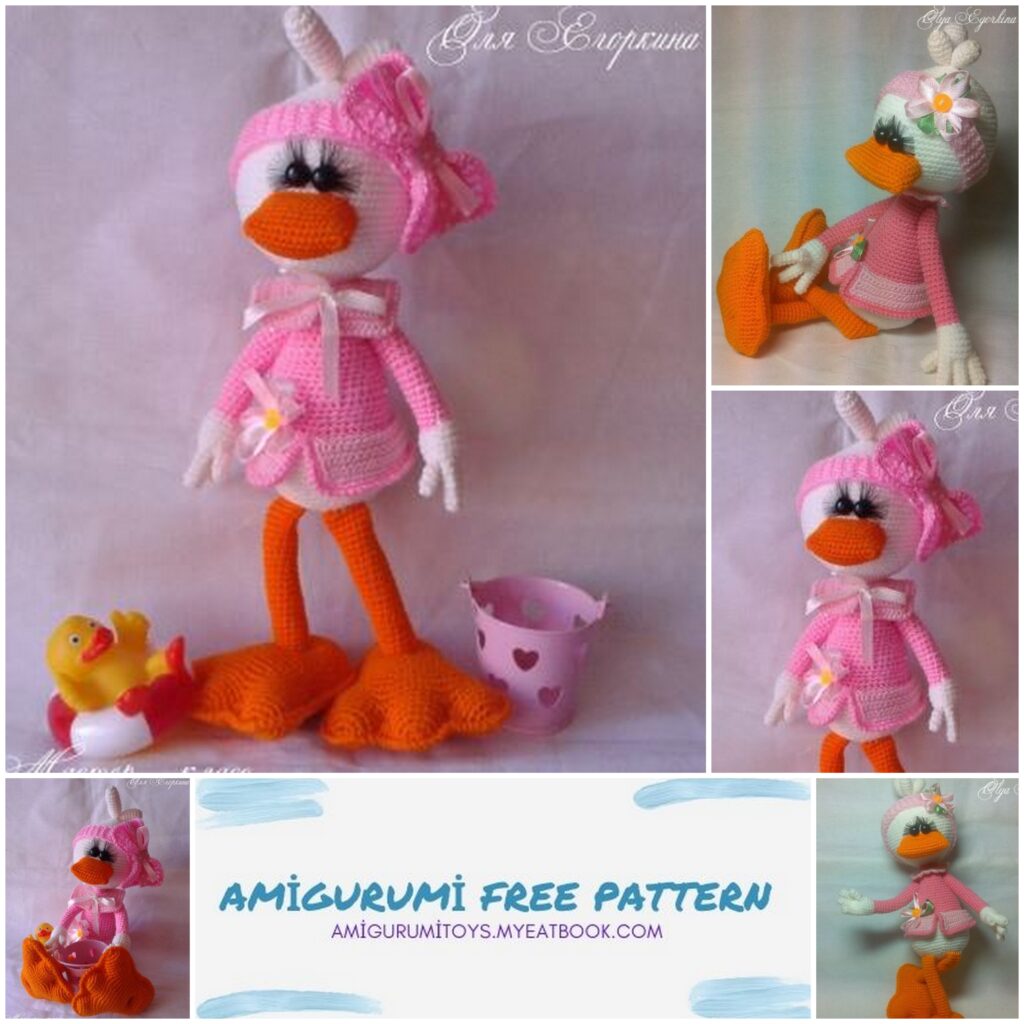
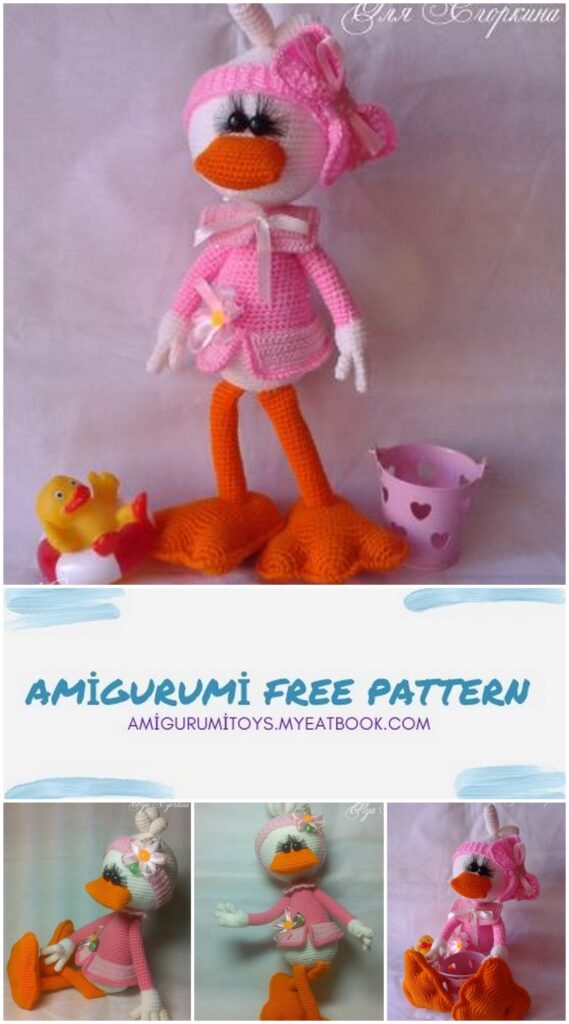
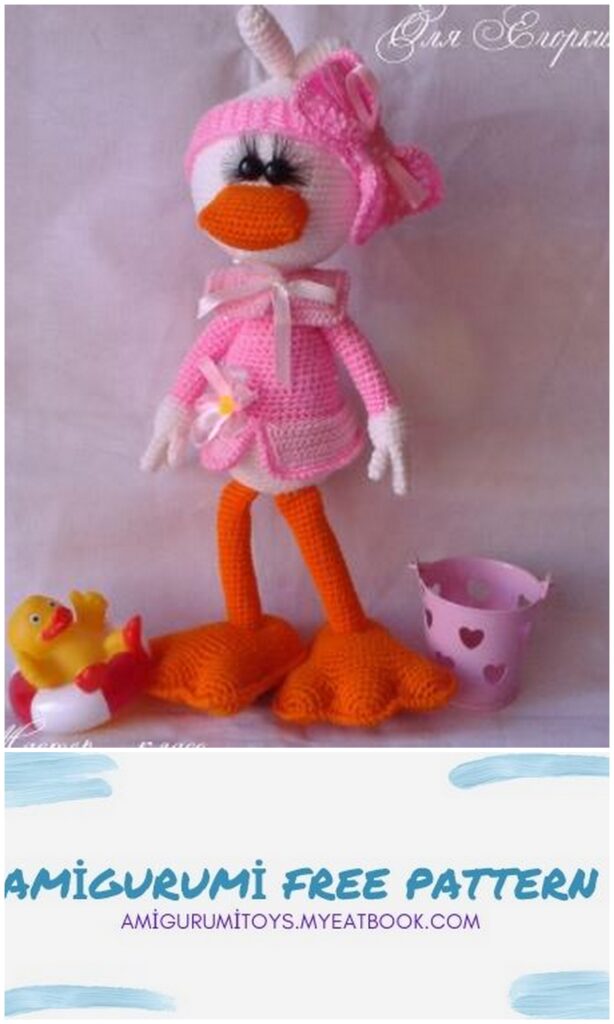
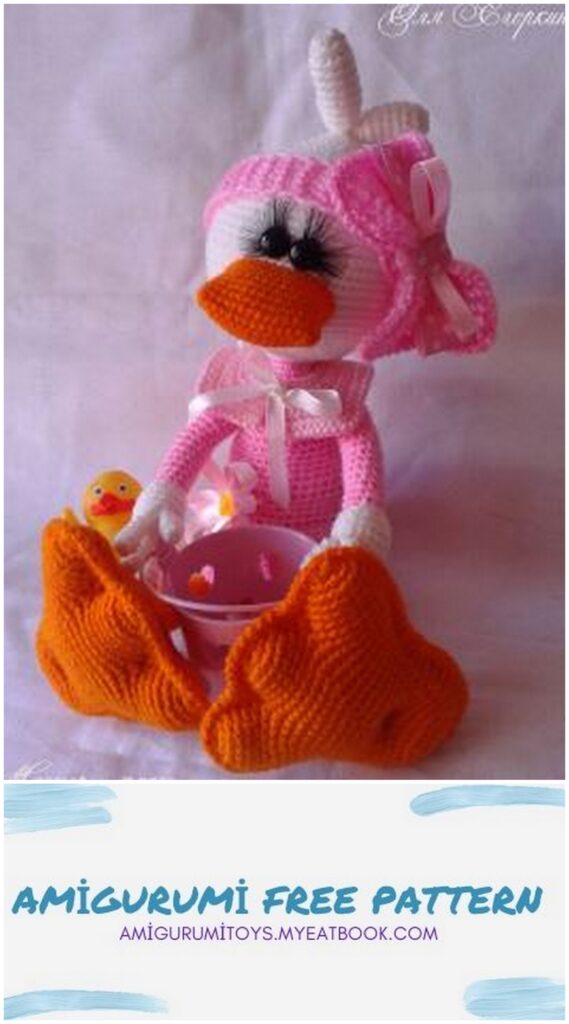
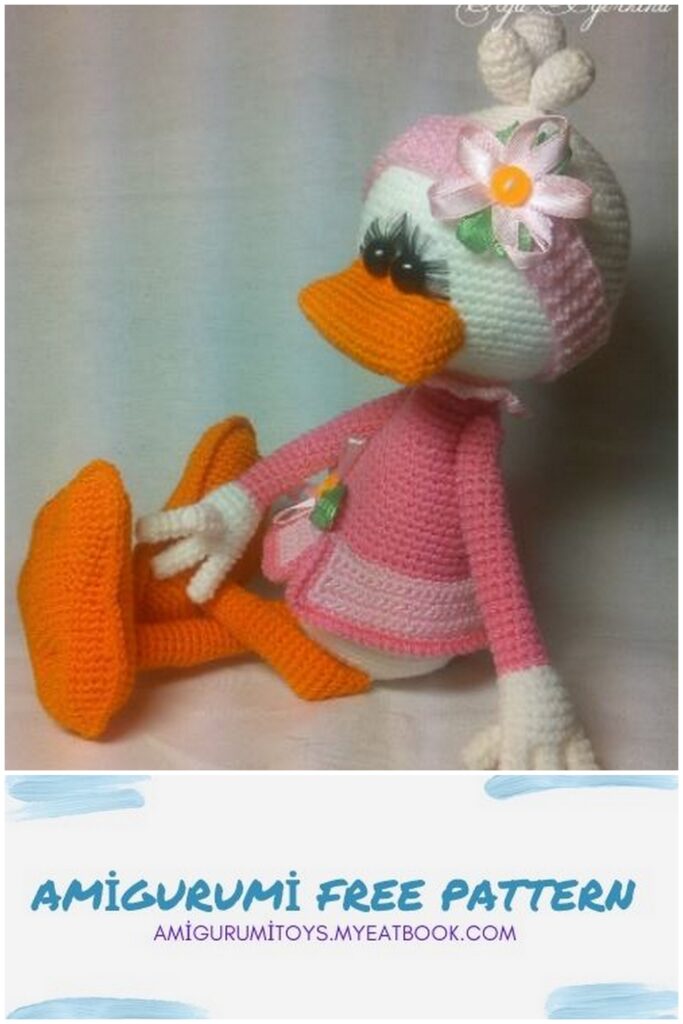
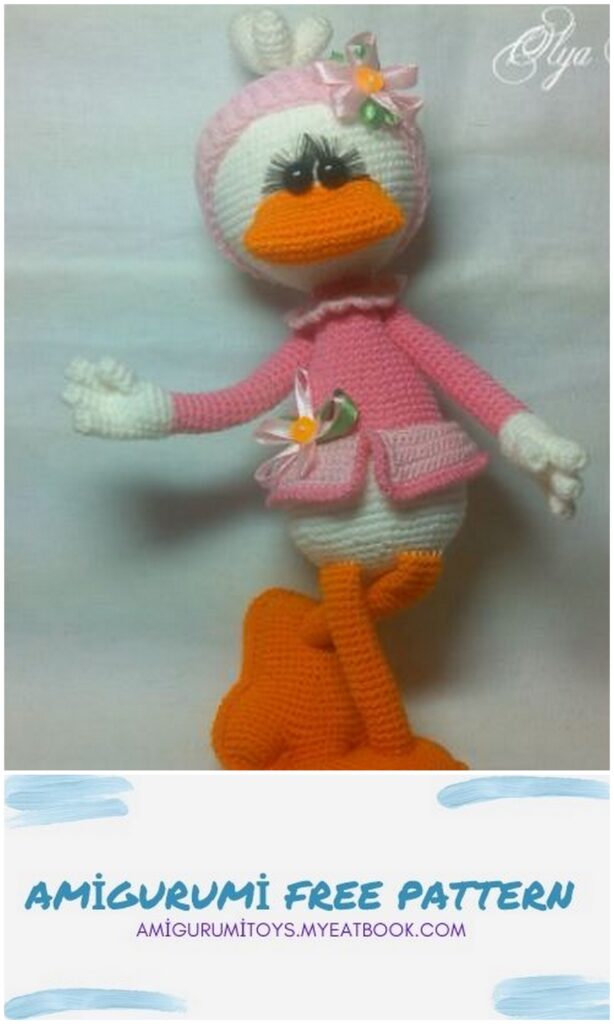
Amigurumi Ooty Ducks Ooty ducks
For work you will need:
– yarn of FOUR colors for body and clothes: white, light pink, hot pink, orange;
– a hook for your yarn;
– two black beads for the eyes or ready-made eyes or half-beads (if there are no beads, the eyes can be embroidered);
– synthetic winterizer or other filler of your choice;
– nylon thread for tightening;
– glue (if you glue the eyes and for the cilia);
– long needle, tailor’s pins;
– wire for the frame 45 cm (1 mm thick);
– cocktail tube;
– wire cutters or side cutters, round-nosed pliers for wire bending;
– artificial eyelashes (optional, if the toy is for a small child – do not glue the eyelashes);
– knitting needles;
– decor elements at your discretion (buttons, satin ribbons, etc.).
For knitting I use Acacia yarn (100% acrylic, 250m / 50 gr) and Alize yarn
Sal Simli with lurex (95% acrylic, 5% metallic, 460m / 100gr) for knitting a blouse, crochet hook
No. 1, needles 1.5. You can replace the yarn with lurex with a bright pink acacia.
If you take a different yarn, the size of the toy may differ from the indicated one.
NOTE!!!
I do not knit my toys in a spiral – I have each row starting with an air lifting loop and ending with a connecting post. This results in smoother parts and no need to use an offset loop.
For knitting, a hook is required that is significantly smaller than that indicated on the yarn label.
This will avoid the looseness of the canvas and the filler through it.
As a filler, I use synthetic winterizer and synthetic winterizer. Moreover, for one toy I can use both fillers at once. This is due to the fact that toys stuffed with synthetic fluff cannot hold the braces due to the short fibers.
This toy uses SINTEPON as a filler.
Knitting designations:
– single crochet (sc);
– Column with a crochet (dc);
– air loop (ch);
– connecting post (sl-st);
A place
connections ranks
– “Rachiy step” strapping method;
– dec. – dec, a single crochet is knitted, 1 loop of the previous row is skipped and again a single crochet;
– inc. – in the loop of the previous row, tie 2 loops.
LEVEL: INTERMEDIATE
The details fit in the order in which they appear in the description:
– Legs;
– Ponytails on the head;
– Head – beak – body – dress – tail;
– Hands;
– Decor elements.
The master class does not contain knitting lessons.
We knit legs
Orange yarn.
Close the 5ch chain into a ring.
Row 1: ch up, 6 sc in ring, sl-st.
Each next row starts with ch up and ends with sl-st.
Row 2: In each sc of the previous row, tie 2 sc (12).
İnc – knit two from one loop. We fill in the knitting process.
3 row: * 1 sc, inc *, ** – knit to the end of the row (18).
Rows 4-5: 18 sc, thread fasten, cut off.
Tie three identical parts, do not cut off the thread of the third.
We combine the parts into one:
Row 6: 9 sc for uncut piece, 9 sc for next piece, 18 sc for third piece, 9 sc for second piece, 9 sc for first piece (54).
Rows 7-9: 54 sc (54).
10 row: * 7 sc, dec *, ** – knit to the end of the row (48).
Row 11: 48 sc (48).
12 row: * 6 sc, dec *, ** – knit to the end of the row (42).
Row 13: 42 sc (42).
Row 14: * 5 sc, dec *, ** – knit to the end of the row (36).
Rows 15-23: 36 sc (36). To fill the resulting part, do not fill too tightly. Further
stuff in the knitting process.
24 row: * 4 sc, dec *, ** – knit to the end of the row (30).
25 row: * 3 sc, dec *, ** – knit to the end of the row (24).
26 row: * 2 sc, dec *, ** – knit to the end of the row (18).
27 row: * 1 sc, dec *, ** – knit to the end of the row (12).
28 row: dec. to the end of the row. Do not cut the thread.
We transform the leg into a duck leg. We tie it in a circle, trying to adhere to the middle of the foot thickness. When knitting, we stretch the thread between the rows. We knit evenly.
We tie in the direction indicated by the arrow.
1 row of harness (if you get a slightly different number of loops – not scary, the general view will not be affected by this): 34 sc, 3 dc in one loop between the fingers, 9 sc, 3 dc in one loop between the fingers, 33 sc, sl -st.
2nd row of harness: * ch, sl-st * – repeat to the end of the row.
We tie the leg. Place markers – pins between 10 and 11 rows (count from the end of knitting).
Similarly, knit the second leg – leg – fin.
Row 1: Cast on 14 stitches around the pin straight across the leg.
2-4 rows: 14 sc (14)
We will make a tightening on the leg – the fin, use a nylon thread. Insert the needle into a circle of 14 sc (leave 10-15 cm of thread sticking out for tying), pull out the legs – fins at the bottom, skip 2-3 columns, insert the needle into the sole and pull out into a circle of 14 sc, tighten a few knots, forming a tightening on the sole. Cut the threads, melt, hide inside the circle.
Rows 5-23: 14 sc (14). Fasten the thread, cut off, remove the tip inside the leg.
Fill not too tightly with filler. Do not fill 2 cm from the top, otherwise the leg will not dangle.
We knit ponytails-forelocks on the head
Close the 5ch chain into a ring.
Row 1: ch up, 6 sc in ring, sl-st.
Each next row starts with ch ascent and ends with sl-st.
Row 2: In each sc of the previous row, tie 2 sc (12).
İnc – knit two from one loop. We fill in the knitting process.
Rows 3 – 5: 12 sc (12).
6 row: dec, 10 sc (11).
7 row: dec., 9 sc (10). Fill.
8 row: dec. to the end of the row, fasten the thread, cut off, leave the end 15 cm for sewing.
Tie two identical pieces.
The third forelock should be slightly longer.
Close the 5ch chain into a ring.
Row 1: ch up, 6 sc in ring, sl-st.
Each next row starts with ch up and ends with sl-st.
Row 2: In each sc of the previous row, tie 2 sc (12).
İnc – knit two from one loop. We fill in the knitting process.
Rows 3-7: 12 sc (12).
8 row: dec, 10 sc (11).
Row 9: dec., 9 sc (10). Fill.
10 row: dec. to the end of the row, fasten the thread, cut off, leave the end 15 cm for sewing.
We knit the head – the body
We knit with white yarn. Close the 5ch chain into a ring.
1st row: ch lift, 6sc ring, sl-st.
Each next row starts with ch up and ends with sl-st.
Row 2: In each sc of the previous row, tie 2 sc (12).
İnc – knit two from one loop.
3 row: * 1 sc, inc *, ** – knit to the end of the row (18).
4th row: * 2 sc, inc *, ** – knit to the end of the row (24).
5 row: * 3 sc, inc *, ** – knit to the end of the row (30).
6 row: * 4 sc, inc *, ** – knit to the end of the row (36).
7 row: * 5 sc, inc *, ** – knit to the end of the row (42).
8 row: * 6 sc, inc *, ** – knit to the end of the row (48).
9 row: * 7 sc, inc *, ** – knit to the end of the row (54).
10 row: * 8 sc, inc *, ** – knit to the end of the row (60).
11 row: * 9 sc, inc *, ** – knit to the end of the row (66).
12 row: * 10 sc, inc *, ** – knit to the end of the row (72).
13 row: * 11 sc, inc *, ** – knit to the end of the row (78).
Rows 14 – 24: 78 sc (78)
We fasten the tails – forelocks on the head of our duck. Fasten in a way convenient for you, I just sew through the top hole of the head and fasten from the inside to several knots.
25 row: * 11 sc, dec *, ** – knit to the end of the row (72).
26 row: * 10 sc, dec *, ** – knit to the end of the row (66).
27 row: * 9 sc, dec *, ** – knit to the end of the row (60).
28 row: * 8 sc, dec *, ** – knit to the end of the row (54).
Row 29: * 7 sc, dec *, ** – knit to the end of the row (48).
30 row: * 6 sc, dec *, ** – knit to the end of the row (42).
Row 31: 42 sc (42).
32 row: * 5 sc, dec *, ** – knit to the end of the row (36).
Cooking the frame head – body
Stuff the head with 1/3 filler.
A skeleton is desirable as the head is quite heavy.
1. Take a wire and cut it into 2 pieces.
2. Take a cocktail stick, cut off the bending part of it.
3. Carefully insert the two wires into the cocktail stick.
4. Bend the protruding ends in different directions and use round-nose pliers to wrap the ends of the wire so that they do not come out during the operation of the toy. Wrap one end of the wire with padding polyester and insert into the head.
Add filler to the workpiece to fix the frame in the center of the workpiece:
33 row: * 4 sc, dec *, ** – knit to the end of the row (30).
34 row: * 3 sc, dec *, ** – knit to the end of the row (24).
Fill the part well with filler, the workpiece should be tight, the frame is fixed in the center.
At this stage, I make out the duck duck. I am doing this now, as I prefer that the threads, when sewing on parts, can be hidden inward and fastened so that they cannot be seen.
We knit a beak
Orange yarn.
Tie a chain of 14 ch.
Row 1: 2 sc into 2nd loop from hook, 11 sc, 4 sc into last loop of chain, 11 sc, 2 sc into last loop of row (30).
Rows 2-9: 30 sc (30).
Sew on the beak
The top row of the beak is between 20 and 21 rows, the bottom row is 7 rows down. Secure the beak with tailor’s pins and sew it on. When 1.5 cm remains unsewn, carefully fill the beak with filler through the remaining hole, not too tightly. Sew the hole all the way through.
We tie the head
35 row: * 2 sc, dec *, ** – knit to the end of the row (18).
34 row: 18 sc (18).
We glue the eyes and eyelashes. If you have sewn-on eyes, sew them with black cotton thread. Cilia – optional, if the toy is for a small child, cilia are not needed.
As a peephole, I use plastic eyes on the leg (I cut off the leg with side cutters) and false eyelashes.
You only need one eyelash, you need to divide it into three parts and use only two. First, the eyelash is gently glued to the eye, and then the eye is glued to the head.
Better to use super glue (but be very careful).
We turn to the yarn in BRIGHT – PINK COLOR. We knit the body.
Rows 35 – 36: 18 sc (18).
37 row: * 2 sc, inc *, ** – knit to the end of the row (24).
Rows 38 – 39: 24 sc (24).
40 row: * 3 sc, inc *, ** – knit to the end of the row (30).
Rows 41-44: 30 sc (30).
45 row: * 4 sc, inc *, ** – knit to the end of the row (36).
Rows 46-49: 36 sc (36).
50 row: * 5 sc, inc *, ** – knit to the end of the row (42).
Rows 51-54: 42 sc (42).
55 row: * 6 sc, inc *, ** – knit to the end of the row (48).
Rows 56-57: 48 sc (48).
58 row: 48 sc behind the back wall of the loops of the previous row (48).
We turn to white yarn.
Row 59: 48 sc (48).
60 row: * 2 sc, inc *, – knit to the end of the row (64).
Row 61: 64 sc (64).
Cut off the excess wire, it should be just below the waist.
62 row: Evenly bring the number of loops in a row to 66 (make 2 increases). (66).
Rows 63 – 64: 66 sc (66). Pack the part evenly little by little.
65 row: * 9 sc, dec *, ** – knit to the end of the row (60).
66 row: * 8 sc, dec *, ** – knit to the end of the row (54).
67 row: * 7 sc, dec *, ** – knit to the end of the row (48).
68 row: * 6 sc, dec *, ** – knit to the end of the row (42).
Row 69: * 5 sc, dec *, ** – knit to the end of the row (36).
We knit the legs.
Mark on the front of our girl 2 center loops (this will be the distance between
legs):
We count to the left and right from the marked loops by 7 columns to the left and right – these are the places for tying the legs.
70 row: We tie the row to the place where the right leg is attached, connect the edges of the leg (there are 14 columns in the leg, when folded in half, it turns out 7) and knit it on the marked seven columns, grabbing both halves. We knit two columns between the legs and knit the left leg in the same way as the right one. We tie the row to the end (36).
Fill in the resulting piece so that it is possible to continue knitting.
If you want more distance between the legs, make the distance between them in 4-5 loops.
71 row: * 4 sc, dec. *, ** – knit to the end of the row (30).
72 row: * 3 sc, dec. *, ** – knit to the end of the row (24).
Add filler as needed.
73 row: * 2 sc, dec. *, ** – knit to the end of the row (18).
74 row: * 1 sc, dec. *, ** – knit to the end of the row (12).
75 row: Decreases to the end of the row.
We tie a blouse
The yarn is light pink. We have left the front walls of the loops of row 58. Mark on them the two center loops on the duck’s belly. The duck is turned with its head towards itself, with a mosquito upward.
1 row: Begin to knit in the left marked loop in a circle for the left walls 48 sc, ch, turn (48).
2nd row: * 7 sc, inc *, ** – knit to the end of the row, ch, turn (54).
3rd row: 54 sc, ch, turn (54).
4th row: 54 sc, ch, turn (54).
5 row: * 8 sc, inc *, ** – knit to the end of the row, ch, turn (60).
6 row: 60 sc, ch, turn (54).
7 row: 60 sc, ch, turn (54).
8 row: we do not turn, we tie the hem of the blouse in a circle. Cut off the light pink thread.
9 row: Tie the hem of the blouse in a circle with bright pink yarn (start from the middle of the back)
10 row: * ch, sl-st * – to the end of the row.
We knit a ponytail
White yarn.
We knit the tail right on the butt of our duck. Place markers – pins between 6 and 7 rows of white (count from the top). There are 12 posts between the pins.
Row 1: Knit straight across the bottom in a circle 24 sc (the top row of the tail is the row where the markers are installed) (24).
Rows 2 – 3: 24 sc (24).
4th row: * 4 sc, dec *, ** – knit to the end of the row (20).
5 row: * 3 sc, dec *, ** – knit to the end of the row (16).
6 row: * 2 sc, dec *, ** – knit to the end of the row (12).
7 row: * 1 sc, dec *, ** – knit to the end of the row (8).
8 row: dec. to the end of the row. Fasten the thread. Cut off, hide.
We knit handles
4 details:
4 ch, close in a ring.
Row 1: 6 sc in ring (6).
Rows 2 – 5: 6 sc. Cut the thread.
2 parts (thumb):
4 ch, close in a ring.
Row 1: 6 sc in ring (6).
Rows 2-4: 6 sc. Cut the thread.
2 details:
4 ch, close in a ring.
Row 1: 6 sc in ring (6).
Rows 2 – 5: 6 sc. Do NOT cut the thread.
Left hand Right hand
Row 1: 3 sc on first toe, 3 sc on second toe, 6 sc on third toe, 3 sc on second toe, 3 sc on first toe (18).
Row 2: 18 sc (18).
We knit the thumb, first fold it in half (flatten it).
3rd row: 3 sc, capturing three posts
thumb, 15 sc (18).
Rows 4-6: 18 sc (18).
Row 1: 3 sc on first toe, 3 sc on second toe, 6 sc on third toe, 3 sc on second toe, 3 sc on first toe (18).
Row 2: 18 sc (18).
We knit the thumb, first fold it in half (flatten it).
Row 3: 5 sc, 3 sc, grabbing three thumb posts, 10 sc (18).
Rows 4-6: 18 sc (18).
7 row: * 1 sc, dec. *, ** – repeat to the end of the row (12). Fill your palm with filler.
We knit with bright pink yarn.
Rows 8 – 21: 12 sc (12). Stuff in the knitting process.
22 row: dec. to the end of the row.
Try on and carefully, using a nylon thread, sew the handles to our duck.
We knit accessories
1. Headband (knit in bright pink).
Cast on 7 loops on the needles and knit a strip of the desired length with garter stitch (try on in the process). Sew the bandage.
2. A bow on a bandage (knit in bright pink).
Cast on 14 stitches and knit 8 cm in garter stitch.
Tie a bow next to sc, then in Rach Step.
Decorate the bow with satin ribbon / ribbons as desired, pull off. Sew at the seam area of the dressing to close the seam.
You can also make a bow from satin ribbon / ribbons and sew on a button on the bottom of the blouse.
3. We knit a collar. Choose the color according to your preference. I knitted in pale pink.
The collar is knit in rotary rows, that is, each row ends with a ch rise and a turn.
Tie a chain of 33 stitches.
1st row: 32 sc along the chain.
2nd row: 4 sc, * 2 ch, 8 sc * (from ** repeat 3 times), 2 ch, 4 sc. Ch, turn.
Row 3: 4 sc, * 1 sc into arch from ch, 2 ch, 1 sc into arch from ch, 8 sc, * (from * to * repeat 3 times), 1 sc into arch, 2 ch, 1 sc into arch , 4 sc.
4th row: 5 sc, * 1 sc into arch from ch, 2 ch, 1 sc into arch from ch, 10 sc, * (from * to * repeat 3 times), 1 sc into arch, 2 ch, 1 sc into arch , 5 sc.
5th row: 6 sc, * 1 sc in the arch of ch, 2 ch, 1 sc in the arch of ch, 12 sc, * (from * to * repeat 3 times), 1 sc in the arch, 2 ch, 1 sc in the arch , 6 sc.
6th row: 7 sc, * 1 sc in arch of ch, 2 ch, 1 sc in arch of ch, 14 sc, * (from * to * repeat 3 times), 1 sc in arch, 2 ch, 1 sc in arch , 7 sc. Tie the collar next: * ch, sl-st *, (from * to * repeat to the end of the row) Put the collar around your duck’s neck, decorate with a satin ribbon, stretching it through the holes in the knitting.
Our duck is ready. Hope you enjoyed knitting the duck.
