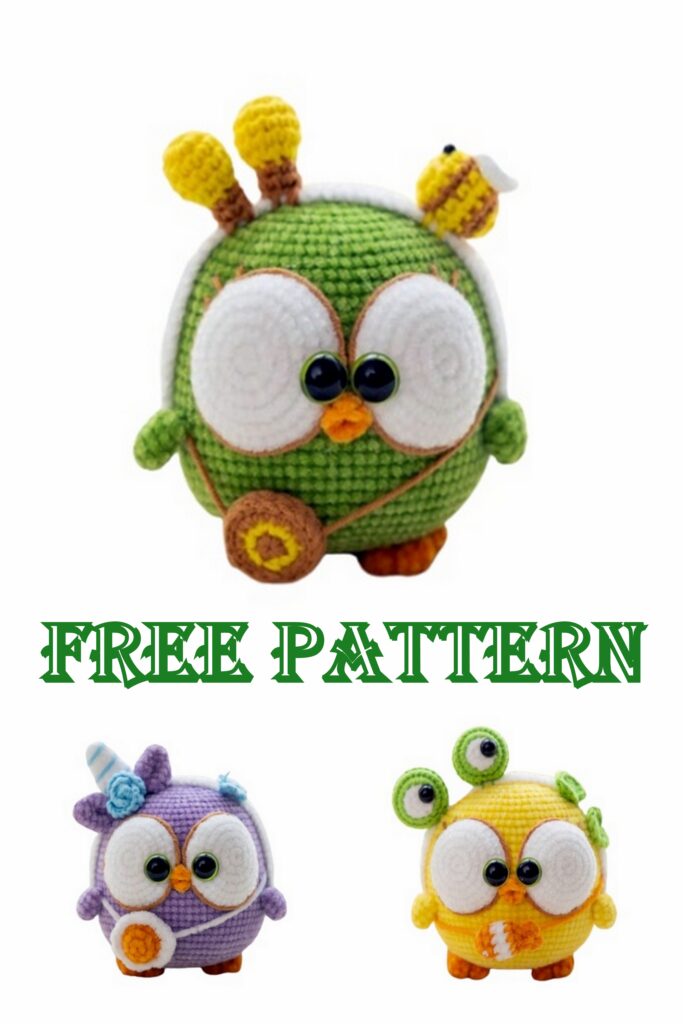
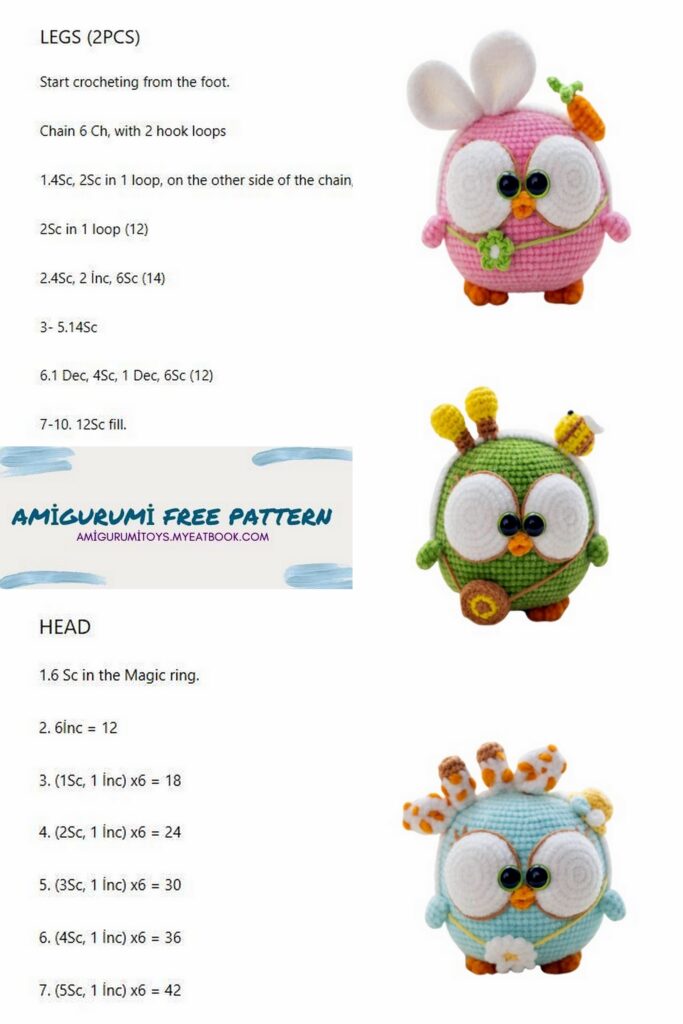
Plump bud green crochet pattern
Template details
The size:
The finished chicken is about 8 cm, 3.2 inches tall (excluding headband).
Required skill level:
Medium – suitable for intermediate knitters, requires patience, accuracy and basic crochet skills when assembling a doll.
Necessary materials:
⚫ Yarn A (1 skein) — yarn
Edelweiss №2, green bud №22
⚫ Yarn B (10 grams) — yarn
Edelweiss №2, white №01
⚫ Yarn C (5 grams) — Edelweiss yarn
No. 2, orange No. 32
⚫ Yarn D (5 grams) — milk cotton, 4 threads, bright yellow #12
⚫ Yarn E (5 grams) — 4 threads of milk cotton, tan #30
⚫ Stuffing toys (50 grams)
⚫ Scissors
⚫ yarn needle
⚫ Stitch marker
⚫ Alcohol glue
⚫ hook 2.0 mm
⚫ Two 12mm eyes with green edges
⚫ Four black flat eyes with a diameter of 4 mm.
Abbreviations (American term)
h = chain
dec = decrease: work 2 SC together
inc = increase: work 2 SC in the same stitch
st(s) = stitch(s)
SC = single crochet
tr = triple double crochet
dc= double crochet
hdc = half double crochet
BLO = Purl only
FLO = Knit only
sl = column
single crochet
pop = popcorn stitch (5 tbsp)
Notes:
⚫ In the st of the single crochet, work the head and end of each row with a single crochet and start each row with a chain, unless otherwise indicated (connected rows).
⚫ Remember the starting position of the first stitch with a mark or thread head in the process of knitting a crochet hook for counting Edelweiss yarn.
No. 2 is relatively dense.
⚫ Use a stitch marker to mark the beginning of each row.
⚫ All loops are performed in both loops, unless otherwise indicated in the diagram.
⚫ The beginning and end of the thread can be hidden in stitches or stuffing, you can also tie the thread, the main thing is that this does not spoil the appearance.
⚫ With the exception of those parts where special attention is paid to the place of stitching, sew the rest of the parts in the places that you think are suitable.
⚫ All patterns and photos are copyrighted. Please do not copy or redistribute this template, or claim it as your own. You can sell your finished toy if you want, but please list the KaiaCrochet store first.
⚫ We have been doing this business in China for ten years, but for various reasons, this is the first time we are putting it on the shelves abroad. So please feel free to contact us if you find any errors in the template or if you have any questions. We will try our best to solve the problem.
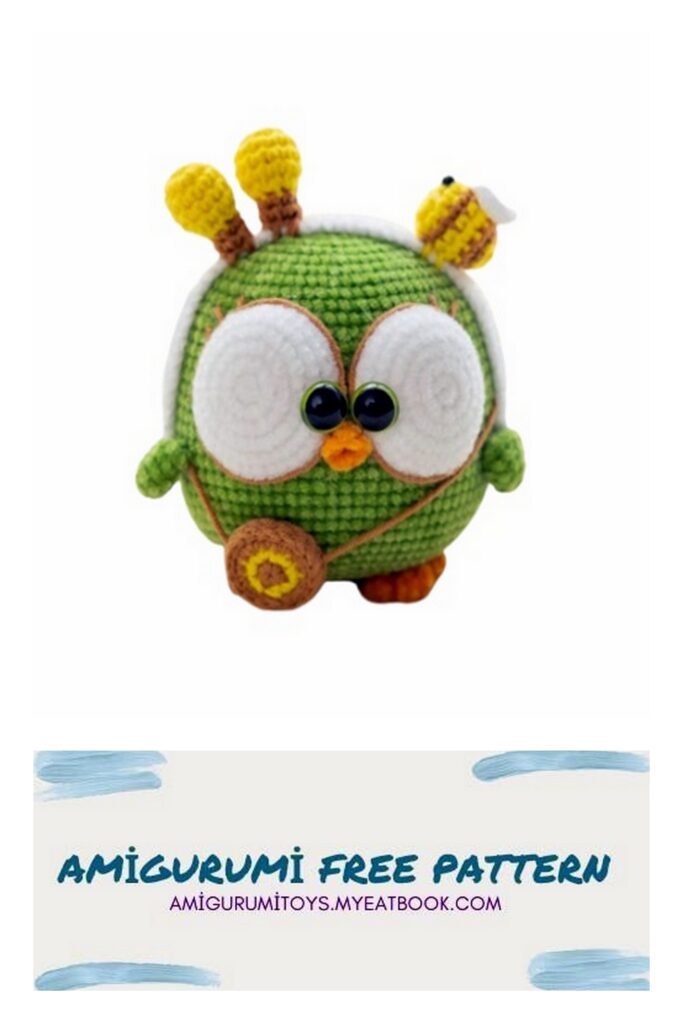
Bud green
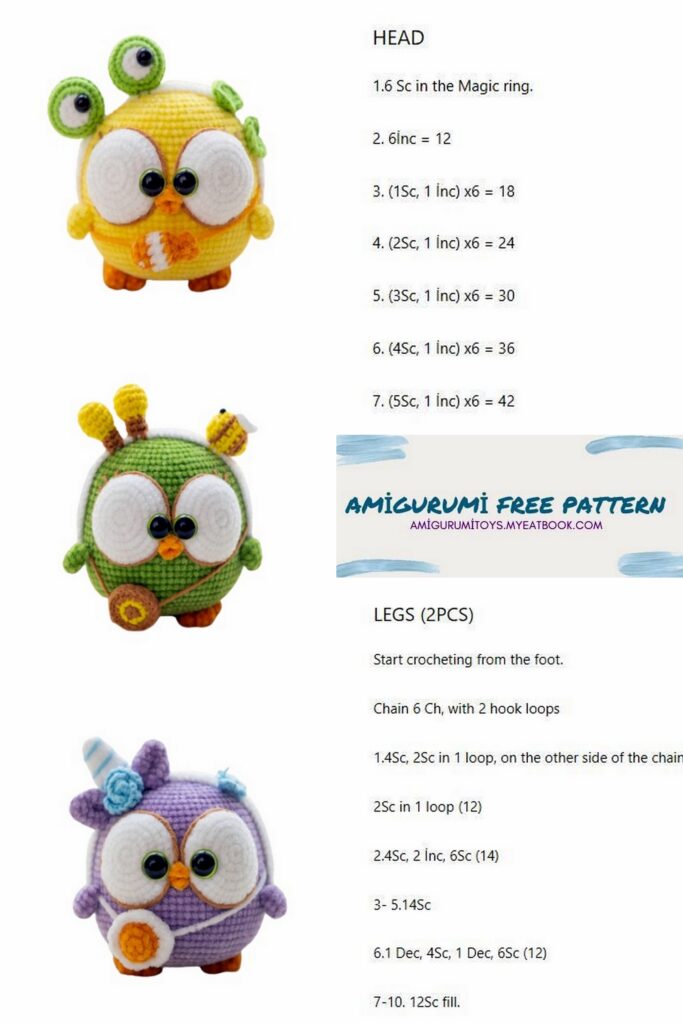
Head and body
Use yarn A
Skill Needed: Combined Rounds
Row 1: 8 sc into magic ring = 8
Row 2: 8 inc = 16
Row 3: (sc, inc) x 8 = 24
Row 4: (sc, inc, sc) x 8 = 32
Row 5: (3 sc, inc) x 8 = 40
Row 6: (sc, inc, 3 sc) x 8 = 48
row 7: (7 sc, inc) x 6= 54
row 8: (4 sc, inc, 4 sc) x 6= 60
row 9: (sc, inc, 8 sc) x 6 = 66
row 10: (21 sc, inc) x 3 = 69
Row 11: (11 sc, inc, 11 sc) x 3 = 72
Row 12-14: 72 SC = 72
Row 15: (8SC, inc, 15SC) x 3 = 75
Pin and bind at the end.
Note: The position of SL-ST in each row is the center of the wrong side of the main body, and the other side is the right side.
Row 16: 75 SC = 75
Row 17: (24 SC, inc) x3 = 78
Row 18-29: 78 SC = 78
Row 30: (11 SC, dec) x 6 = 72
Row 31: (7 sc, dec) x 8 = 64
Row 32: (sc, dec, 5 sc) x 8 = 56
Row 33: (3 sc, dec, 2 sc) x 8 = 48
Row 34: (4 sc, dec) x 8 = 40
Row 35: (sc, dec, 2 sc) x 8 = 32
Row 36: (2 sc, dec) x 8 = 24, cast on
Row 37: Dec 12 = 12
Row 38: 6 dec = 6
Wing x 2
Use yarn A
Skill Needed: Combined Rounds
Row 1: 6 sc in magic ring = 6
Row 2: (sc, inc) x 3 = 9
Row 3: 9 SC = 9
Row 4: (sc, inc, sc) x 3 = 12
Row 5: 12 sc = 12
Slip stitch to finish and leave a 20cm tail for sewing on. No need to hit.
Having flattened the armholes of the two wings, sew them between the 22nd and 23rd rows of the main body symmetrically on both sides of the body.
On the right side of the main body, the lateral distance between the nearest ends of the two wings is 27 st.
The whites of the eyes
Use yarn B
Skill Needed: Combined Rounds
Row 1: 8 sc into magic ring = 8
Row 2: 8 inc = 16
Row 3: (sc, inc) x 8 = 24
Row 4: (sc, inc) x 12 = 36
Row 5-6: 36 sc = 36
Fasten off and leave a 30cm tail for sewing.
Sew the whites of the eyes to the right side of the body between the 12th and 23rd rows and stuff them as they are sewn (you can fix the position with a bead needle).
The lateral distance between the nearest ends of the whites of the eyes is 1 st, and each
white of the eye with an interval of 12 st of the transverse distance.
With the tip of the needle, apply a circle of glue to the periphery of the whites of the eyes, glue the periphery of the whites of the eyes with yarn E and hide the end inside the main body.
Then with a thread of the same color, knit 3 lines between 11 and 13 rows.
over the outer side of the whites of the eyes like eyelashes, and each line is 2 to 3 loops long.
Mouth
Use yarn C
Skill Needed: Combined Rounds
1st row: 4 ch, SC in the second chain from the hook, DC, SC, 1 CH, SL-ST in the first CH,
SC, 1 CH, SC, SL-ST into the third CH.
Fasten off and leave a 20cm tail for sewing.
Sew the mouth between rows 19-20 of the main body and between
two whites of the eyes.
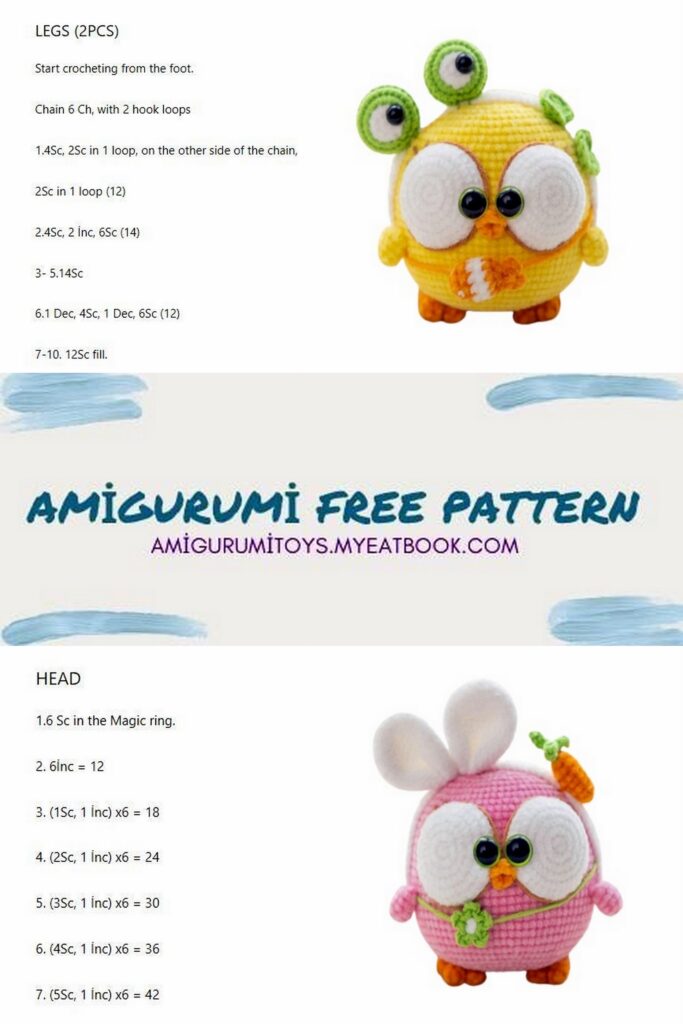
Claw x 2
Use yarn C
Skill Needed: Combined Rounds
Row 1: 6 sc into magic ring = 6
Row 2-3: 6 SC = 6
Row 4: SC, CH, 2 SC, CH, SC = 6
Row 5-6: 6 SC = 6
Fasten off and leave a 20cm tail for sewing. No need to hit.
Two paws are sewn respectively between 32 and 36 rows of the main part and symmetrically on both sides of the bottom of the main part.
hair band
Use yarn B
1st row: 52 ch, sc in the second chain from the hook, (1 ch, skip 1 ch, sc, 1 ch)
repeat to starting position
Fasten off and leave a 15cm tail for sewing.
Note: Place the right side of the hair band outward, the middle on
the top of the main body and sew both ends of it to the top and outer
sides of the wings, respectively.
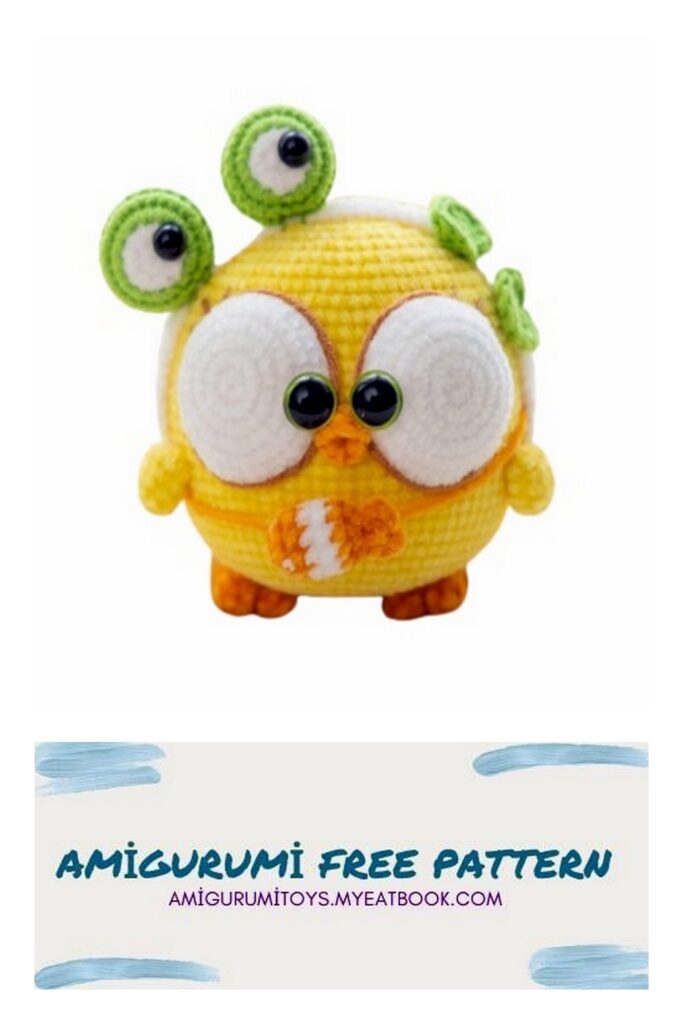
Antennas x 2
Use Yarn D
Skill Needed: Combined Rounds
Row 1: 6 sc into magic ring = 6
Row 2: 6 inc = 12
Row 3-5: 12 sc = 12
Fasten off and leave a 20cm tail for sewing.
Sew two antennae next to each other at the level of the hair band in 3-8
rows on the right side of the head of the main body.
Row 6: 6 dec = 6
use yarn E.
Row 7-8: 6 SC = 6, work a little at a time.
bee main body
Skill Needed: Combined Rounds
Use Yarn D
Row 1: 6 sc into magic ring = 6
Row 2: 6 inc = 12
Row 3: 12 sc = 12
Yarn E.
Row 4: 12 sc = 12
Yarn D.
Fasten off and leave a 20cm tail for sewing.
Row 5-6: 12 sc = 12
Yarn E
Row 7: 12 SC = 12, cast on
thread D.
8 row: 6 dec = 6
wing x 2
Use yarn B
Row 1: 6 sc into magic ring = 6
Round 2: 6 inc = 12. Fasten off and leave a tail of 20 cm to sew two wings to the body of the bee between rows 4 and 6.
Insert two eyes in front of the wings on the main body of the 2nd row bee, with a gap of 1 sc wide between the two eyes.
Sew a bee to the hair band at the top left side of the main part of 7-9 rows.
Bag
Skill Needed: Combined Rounds
Use yarn E
Row 1: 6 sc into magic ring = 6
Use yarn D.
Circle 2: 6 inc = 12
use yarn E
Row 3: (sc, inc) x 6 = 18
Crochet two parts, back to back, right sides out.
Use Yarn E, meanwhile slip a row of single crochets (18 single crochets) over the two parts of the third row.
Fasten and leave a tail 30 cm long for sewing on the strap of the bag.
(Sew one end of the strap over the left wing and sew the other end under the right wing.)