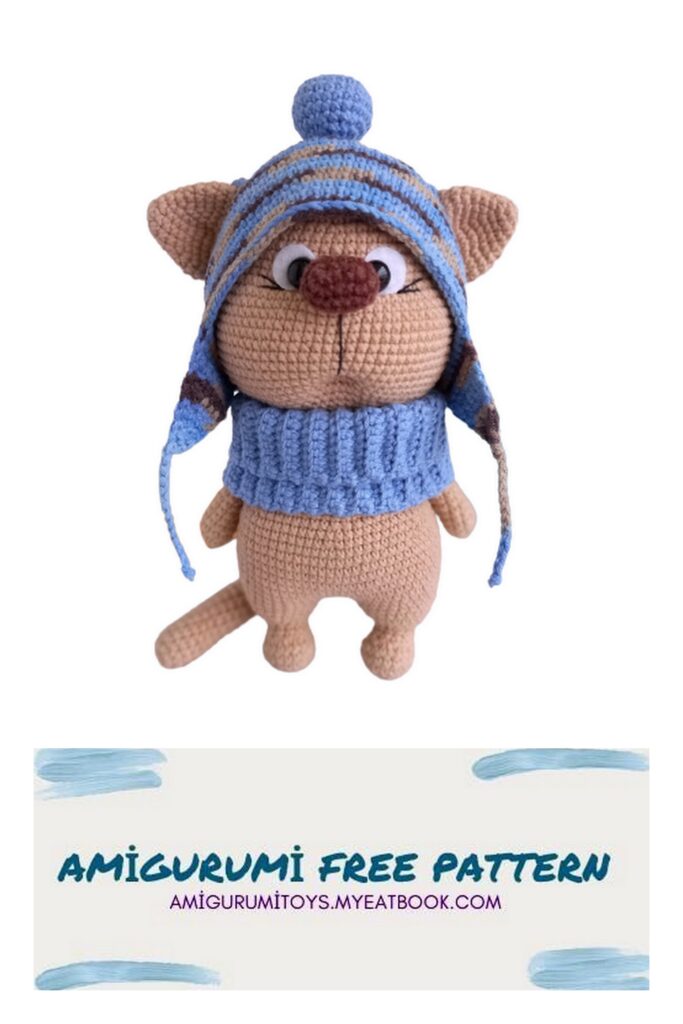
This description includes a complete description of the process of knitting toys, hats, snood, intermediate photos of details.
The toy is knitted from the bottom up, in half-cross stitches, in a spiral, (unless otherwise indicated). The hat and snood are crocheted, with checkmarks.
The upper paws, tail and nose are tied in, the head and ears are sewn on.
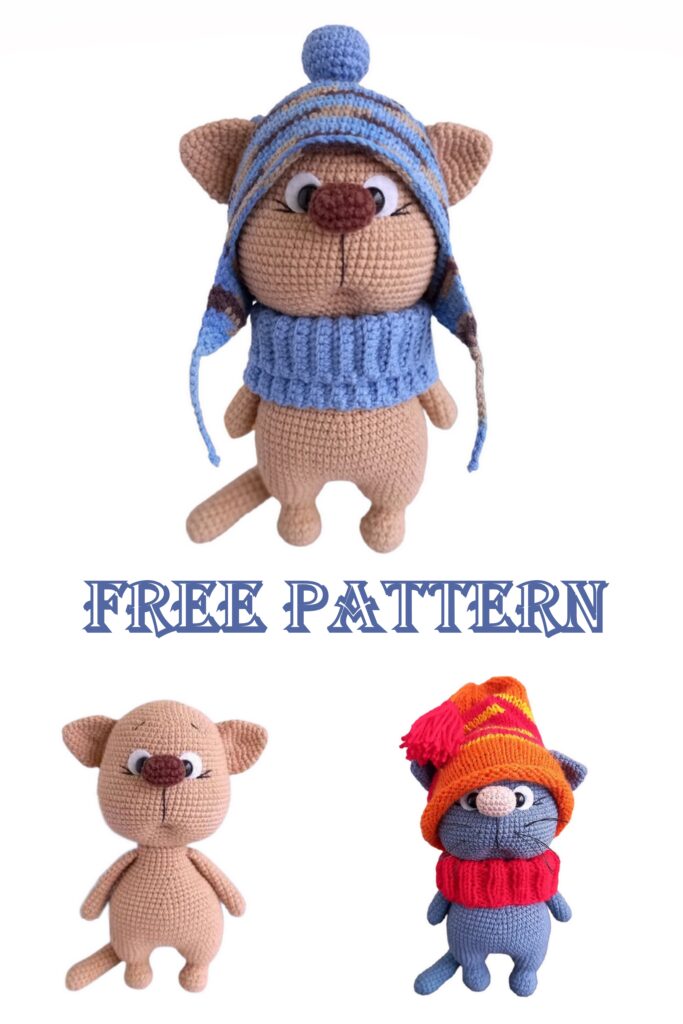
When using these materials, the height of the finished toy is about 20 cm.
Mark the beginning of each row with a contrasting thread, thinner than the one you are knitting the toy with.
The description does not contain tutorials and is intended for those who already have basic crochet skills.
Required materials and tools:
1. Hook suitable for your yarn.
2. YarnArt JEANS yarn of any colors you choose. I have #07 main and #70 for the nose.
3. A little black or dark brown thread to decorate the muzzle. Take it thinner than the main one from which you will knit a toy. I used “Openwork” from “Pekhorka” No. 02 (black 280 m / 50 gr.) Do not take the entire thickness of YarnArt JEANS for embroidery, it will look rough on the muzzle. You can split it.
4. Filler.
5. Eyes on a secure fastening 10 mm, either sewn on or glued on (beads, half beads – your choice).
6. White felt circles with a diameter of 15 mm for proteins.
7. Strong thread for tightening.
8. Fishing line or waxed mustache thread (optional).
9. Needle for sewing on parts, scissors, pins, marker thread.
10. For a hat and a snood, I took Yarnart Jeans Crazy No. 7202 and YarnArt JEANS No. 15
Abbreviations
MR – amigurumi ring
sc – single crochet
ch – air loop
inc – increase
dec – decrease
sl-st – connecting post
(…)*X – repeat X times indicated in brackets
The number after the = sign means the total number of loops in the row
upper paws
1 row: 5 sc in MR
2 row: 5 inc = 10
3-16 rows = 10 sc
Stuff only the bottom part. Fold in half and knit 5 sc behind both walls. Fasten the thread and cut.
We will tie the paws.
Tail
1 row: 6 sc in MR
2 row: 6 inc = 12
3-27 rows = 12 sc
Stuff lightly while knitting. Fold in half and knit 6 sc behind both walls. Fasten the thread and cut.
We will tie the tail.
Nose
We dial 5 ch, from the second loop from the hook we knit:
1 row: inc, 2 sc, 4 sc in 1 loop, 2 sc, inc = 12
2nd row: 2 inc, 2 sc, 4 inc, 2 sc, 2 inc = 20
3-4 rows: 20 sc
5th row: Dec 10
Fasten the thread and cut.
We will tie the nose
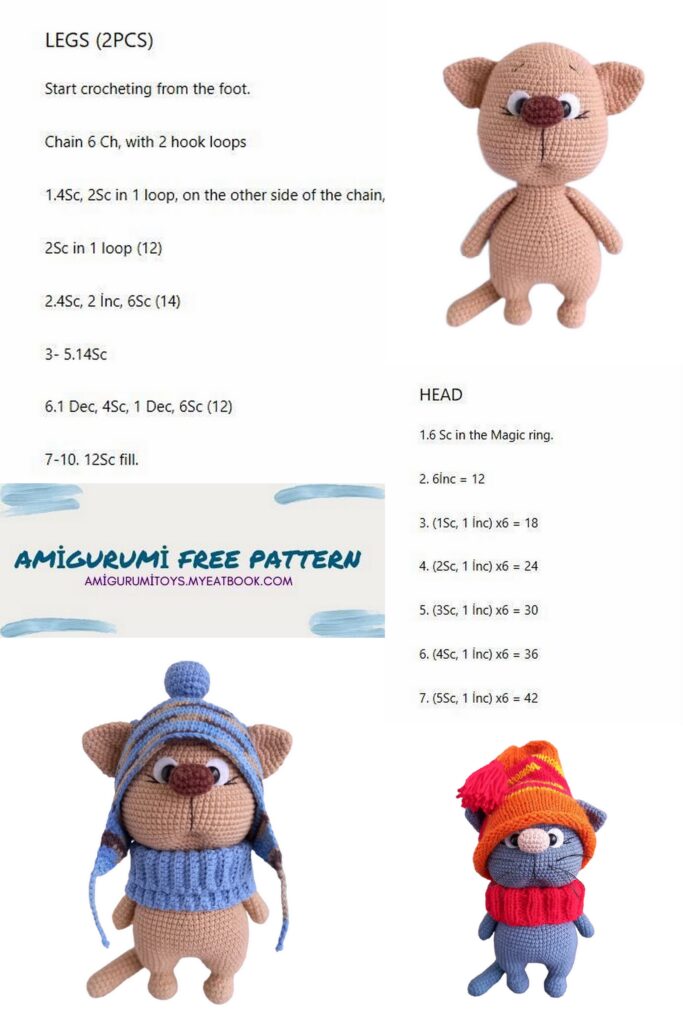
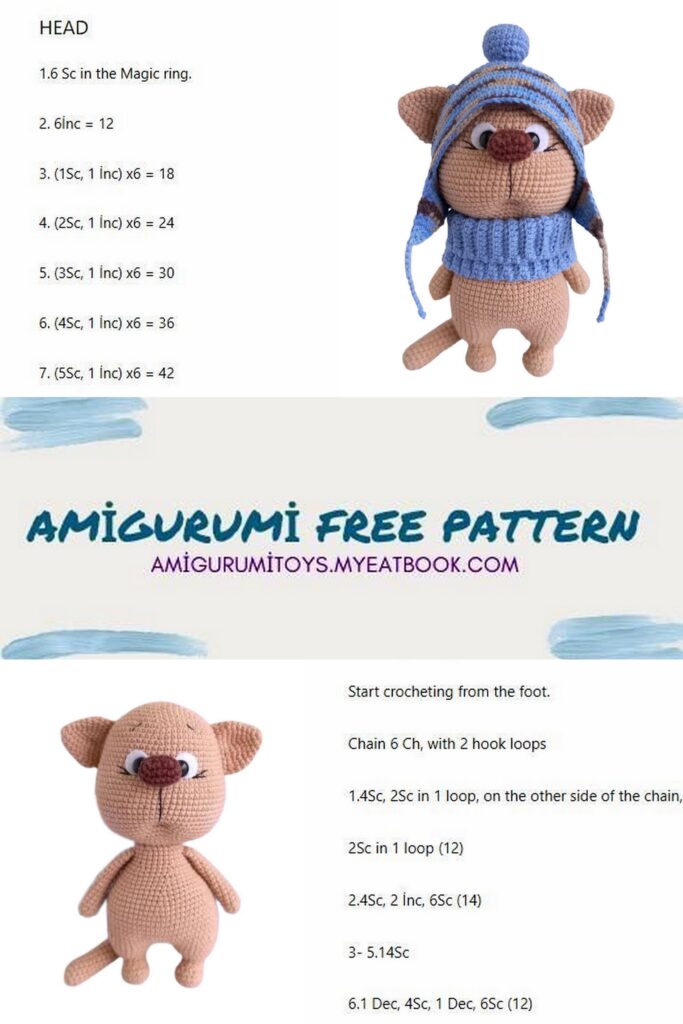
Head
1 row: 6 sc in MR
2 row: 6 inc = 12
3 row: (1 sc, inc) * 6 = 18
4 row: (2 sc, inc) * 6 = 24
5 row: (3 sc, inc) * 6 = 30
6 row: (4 sc, inc) * 6 = 36
7 row: (5 sc, inc) * 6 = 42
8 row: (6 sc, inc) * 6 = 48
9 row: (7 sc, inc) * 6 = 54
10 row: (8 sc, inc) * 6 = 60
11-12 rows: 60 sc
13 row: (9 sc, inc) * 6 = 66
14-18 rows: 66 sc
In the next row, we will tie out the cheeks and tie in the nose.
19 row: 19 sc, (1 sc, inc) * 6, 5 sc with 5 nose loops, (inc, 1 sc) * 6, 18 sc = 78
20 row: 37 sc, 5 sc on the remaining loops of the nose, 36 sc = 78
Stuff the nose slightly.
21-30 rows: 78 sc
If you are using eyes on a secure mount, then install them at this stage. Between 17 and 18 rows. Between installation sites 6-7 sc (center the eyes on the nose).
We take circles of felt, carefully so that there is no wrinkling, fold in half and make small cuts, shifting slightly from the center to the edge.
We turn the circles and make perpendicular cuts (as a result, we get a crosswise pattern). We insert eyes into them and fix them in the canvas.
Later, after tightening, the felt can be carefully fixed with glue.
31 row: (11 sc, dec) * 6 = 72
32 row: (7 sc, dec) * 8 = 64
33 row: (6 sc, dec) * 8 = 56
34 row: (5 sc, dec) * 8 = 48
35 row: (4 sc, dec) * 8 = 40
36 row: (3 sc, dec) * 8 = 32
37 row: (2 sc, dec) * 8 = 24
We stuff the head tightly, but without too much zeal
Keep in mind that there will be stretch marks. We fix the thread and hide it inside.
Ears
1 row: 6 sc = 6
2 row: (1 sc, inc) * 3 = 9
3 row: (2 sc, inc) * 3 = 12
4 row: (3 sc, inc) * 3 = 15
5 row: (4 sc, inc) * 3 = 18
6 row: (2 sc, inc) * 6 = 24
7 row: (3 sc, inc) * 6 = 30
8 row: 30 sc
9 row: 2 sc, 8 dec, 12 sc = 22
10 row: 3 sc, fold in half, knit 11 sc behind both walls of the ear.
Fasten the thread, leave about 45-50 cm for sewing, cut.
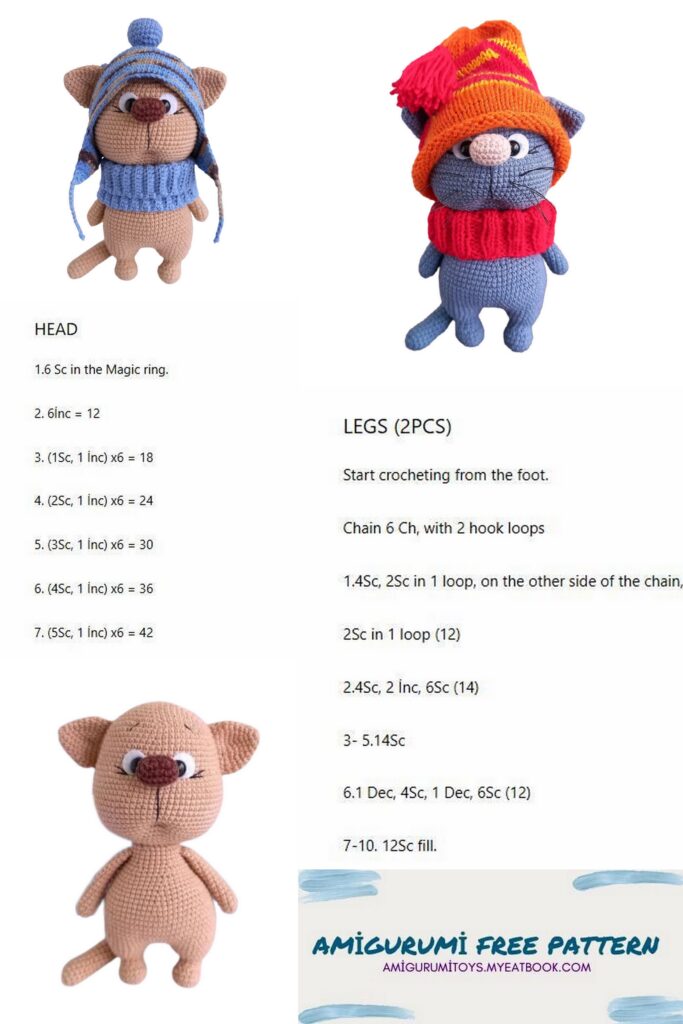
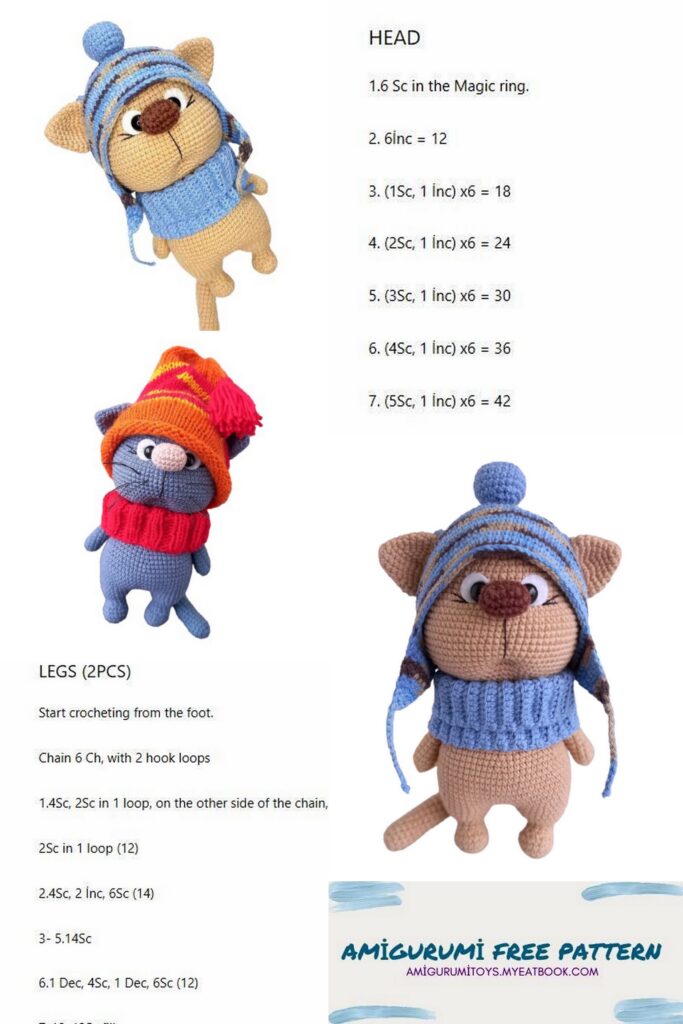
Lower legs
1 row: 6 sc in MR
2 row: 6 inc = 12
3 row: (1 sc, inc) * 6 = 18
4-5 rows: 18 sc
6 row: 3 sc, 6 dec, 3 sc = 12
7-8 rows: 12 sc
9 row: (1 sc, inc) * 6 = 18
10 row: 18 sc
11 row: (2 sc, inc) * 6 = 24
12 row: 24 sc
On the first leg, temporarily fix the thread and cut it, leaving about 30 cm. We do not cut it on the second. We put the paws side by side and determine the degree of “clubfoot” of the future toy.
We knit several additional columns along the second foot to the junction, to the inside (I have 6 sc, your degree of displacement may differ from mine).
We return to the first foot and knit the same number of additional columns.
We do this so that the legs are the same height. Now we can fasten the thread and cut it short. We remove the marker threads. On the first paw, we count back the number of additional columns you added, increased by 2 times. In my case, it is 12. This is the junction of the first paw with the second.
Body
We stuff the body tightly, in the process of knitting.
We knit a chain of 3 v / n, connect the paws.
1 row: 24 sc in the first leg, 3 sc in a chain of ch, 24 sc in the second leg, 3 sc in a chain of ch.
Total number of loops in a row = 54
We put a marker thread.
2 row: (8 sc, inc) * 6 = 60
3 row: 60 sc
4 row: (9 sc, inc) * 6 = 66
5-8 rows: 66 sc
9 row: = 66 sc. In this row we knit a tail.
For the tail to be in the center, I knitted 62 sc in the 9th row, then 5 sc along with the tail, and captured 1 loop of the next row. We put the marker in the 9th row after the 66th loop.
Please note that your knitting offset may vary. Position the ponytail in the back center.
10-11 rows: 66 sc
12 row: (9 sc, dec) * 6 = 60
13 row: 60 sc
14 row: (8 sc, dec) * 6 = 54
15 row: 54 sc
16 row: (7 sc, dec) * 6 = 48
17 row: 48 sc
18 row: (6 sc, dec) * 6 = 42
19 row: 42 sc
20 row: (5 sc, dec) * 6 = 36
21 row: 36 sc
22 row: (4 sc, dec) * 6 = 30
23 row: 30 sc
In the 24th row we will knit the upper paws. Stuff the main part of the calf quite tightly, but not completely. Leave about 1 cm so that when knitting the legs you are comfortable and the filler does not fall between the posts. Determine the knitting points strictly on the sides: 5 sc each with the paws, 10 sc between them.
Given my offset, I ended up with this:
24th row: 7 sc, 5 sc with foot, 10 sc, 5
sc together with foot, 3 sc = 30
25 row: 30 sc
26 row: (3 sc, dec) * 6 = 24
Knit a few more columns (I got 1 sc and sl-st in the next loop) and fasten the thread at the back in the center of the back.
Leave about 50 cm for sewing on the head. Remove the marker thread.
Stuff the part tightly to the end. When sewing on the head, do not forget to knock the filler into the neck.
For convenience, you can fix the head to the body with a knitting needle.
Decor. Drawstrings Let’s start with the drawstrings. Mark with pins on the muzzle 6 points.
Define the middle of the muzzle. This can be done conveniently by placing a thread, needle or needle down from the center of the nose.
We put marks between 30 and 31 rows. Between pins 3 sc.
Between the 18th and 19th rows, we mark 4 more points from the outer and inner corners of the eyes. From the inner corners, this is the beginning and end of the knitted spout. Between internal and external points 2 sc.
We insert the needle at point 1, leave the end of the thread about 25-30 cm, we bring it out at point 2. Then we go to point 3, we bring it out at point 6.
We correct the thread so that it is under the eye and a felt circle, tighten it, tie it into 2 knots. Without cutting the thread, we enter at point 6, bring it out to point 5, then to point 4, we bring it out at point 1. We tighten it, we tie it into a couple of knots. hide the threads inside the head. The last knot can be smeared with universal transparent glue (I have Moment Crystal).
Sew on the ears
The upper part of the ears is sewn at a level between 10 and 11 rows from the crown. The distance between the ears along the 11th row is 32 loops, (I counted the increase as 2 loops). That is, 16 loops to the sides of the center of the muzzle.
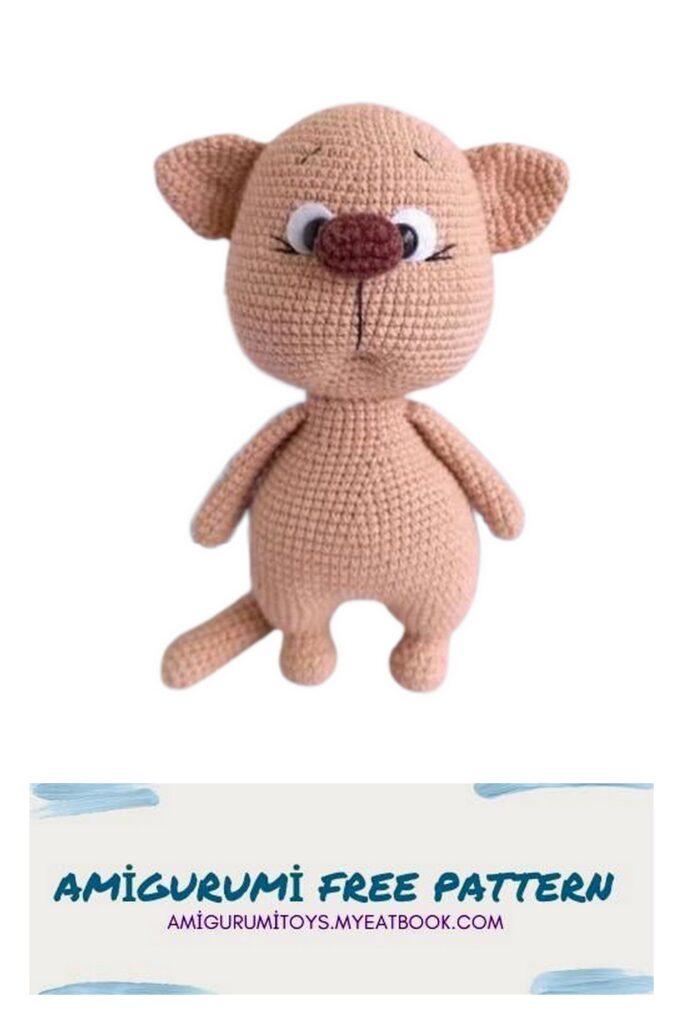
With a thin black thread we embroider eyebrows, “folds” above the cheeks and a strip from the nose to the mouth.
Optionally, you can attach or embroider a mustache.
On the first version of my cat, I fixed with the help of an auxiliary thread (according to the principle of wig stitching) a mustache made of a thin waxed thread of 0.5 mm.
It holds its shape well and does not sag over time.
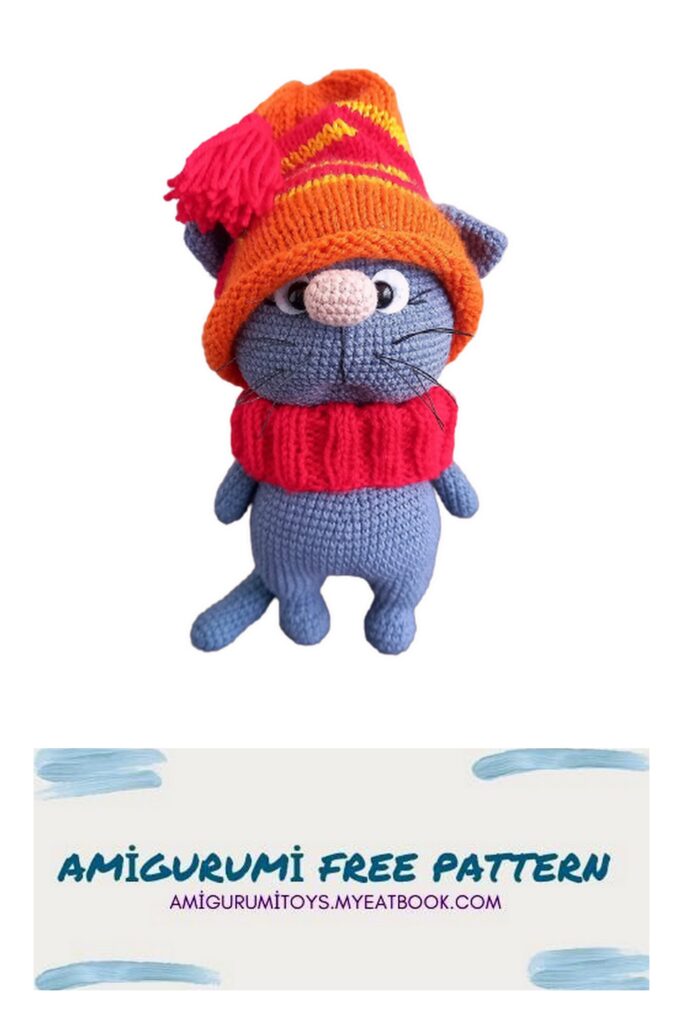
If you have knitting skills, you can knit any funny hat for your cat.
For those who do not use knitting needles, I offer a crochet accessory option.
crochet hat
The hat is knitted SLIGHTLY, from top to bottom, with “ticks”.
Consider your knitting density. You may need a larger hook number. Try on the hat while knitting. If you sewed on the ears at your discretion, keep this in mind when knitting holes for them.
1 row: 6 sc in MR
2 row: 6 inc = 12
3 row: (1 sc, inc) * 6 = 18
4 row: (2 sc, inc) * 6 = 24
5 row: (3 sc, inc) * 6 = 30
6 row: (4 sc, inc) * 6 = 36
7 row: (5 sc, inc) * 6 = 42
8 row: (6 sc, inc) * 6 = 48
9 row: (7 sc, inc) * 6 = 54
10 row: (8 sc, inc) * 6 = 60
11 row: (9 sc, inc) * 6 = 66
12 row: (10 sc, inc) * 6 = 72
13 row: (11 sc, inc) * 6 = 78
14 row: 17 sc, a chain of 10 ch, skip 10 sc of the previous row, 24 sc, a chain of 10 ch, skip 10 sc of the previous row, 17 sc = 78
15-24 rows: 78 sc
25 row: 78 sl-st
Now put a hat on the cat and determine the places for knitting the “ears”. I have between the ears, in front 34 sc.
We chose a place, now we knit in rotary rows, clinging the loops to the edge of the cap on the front side:
1-2 rows: 10 sc
3 row: 2 decreases along the edges = 8
4 row: 8 sc
5 row: 2 decreases along the edges = 6
6 row: 6 sc
7 row: 2 decreases along the edges = 4
8 row: 4 sc
9 row: 2 decreases along the edges = 2
10 row: 2 sc
11 row: 1 dec
Next, we do not cut the thread, we knit a cord from air loops to any length you need. Tie a knot at the end, cut the thread. I additionally fix the place where the thread was cut with a drop of transparent glue.
Pompon:
1 row: 6 sc in MR
2 row: 6 inc = 12
3 row: (1 sc, inc) * 6 = 18
4 row: (2 sc, inc) * 6 = 24
5-7 row: 24 sc
8 row: (2 sc, dec) * 6 = 18
9 row: (1 sc, dec) * 6 = 12
10 row: 6 dec = 6
We tighten the remaining loops with a needle, fasten and sew the pompom to the hat with a few stitches.
We hide the thread inside the pompom.
Snood
We collect a chain of 20 ch + lifting loop. We knit in rotary rows for the back half loops to the length you need. I have it 20 cm. We close with connecting posts.
Your cat is ready!