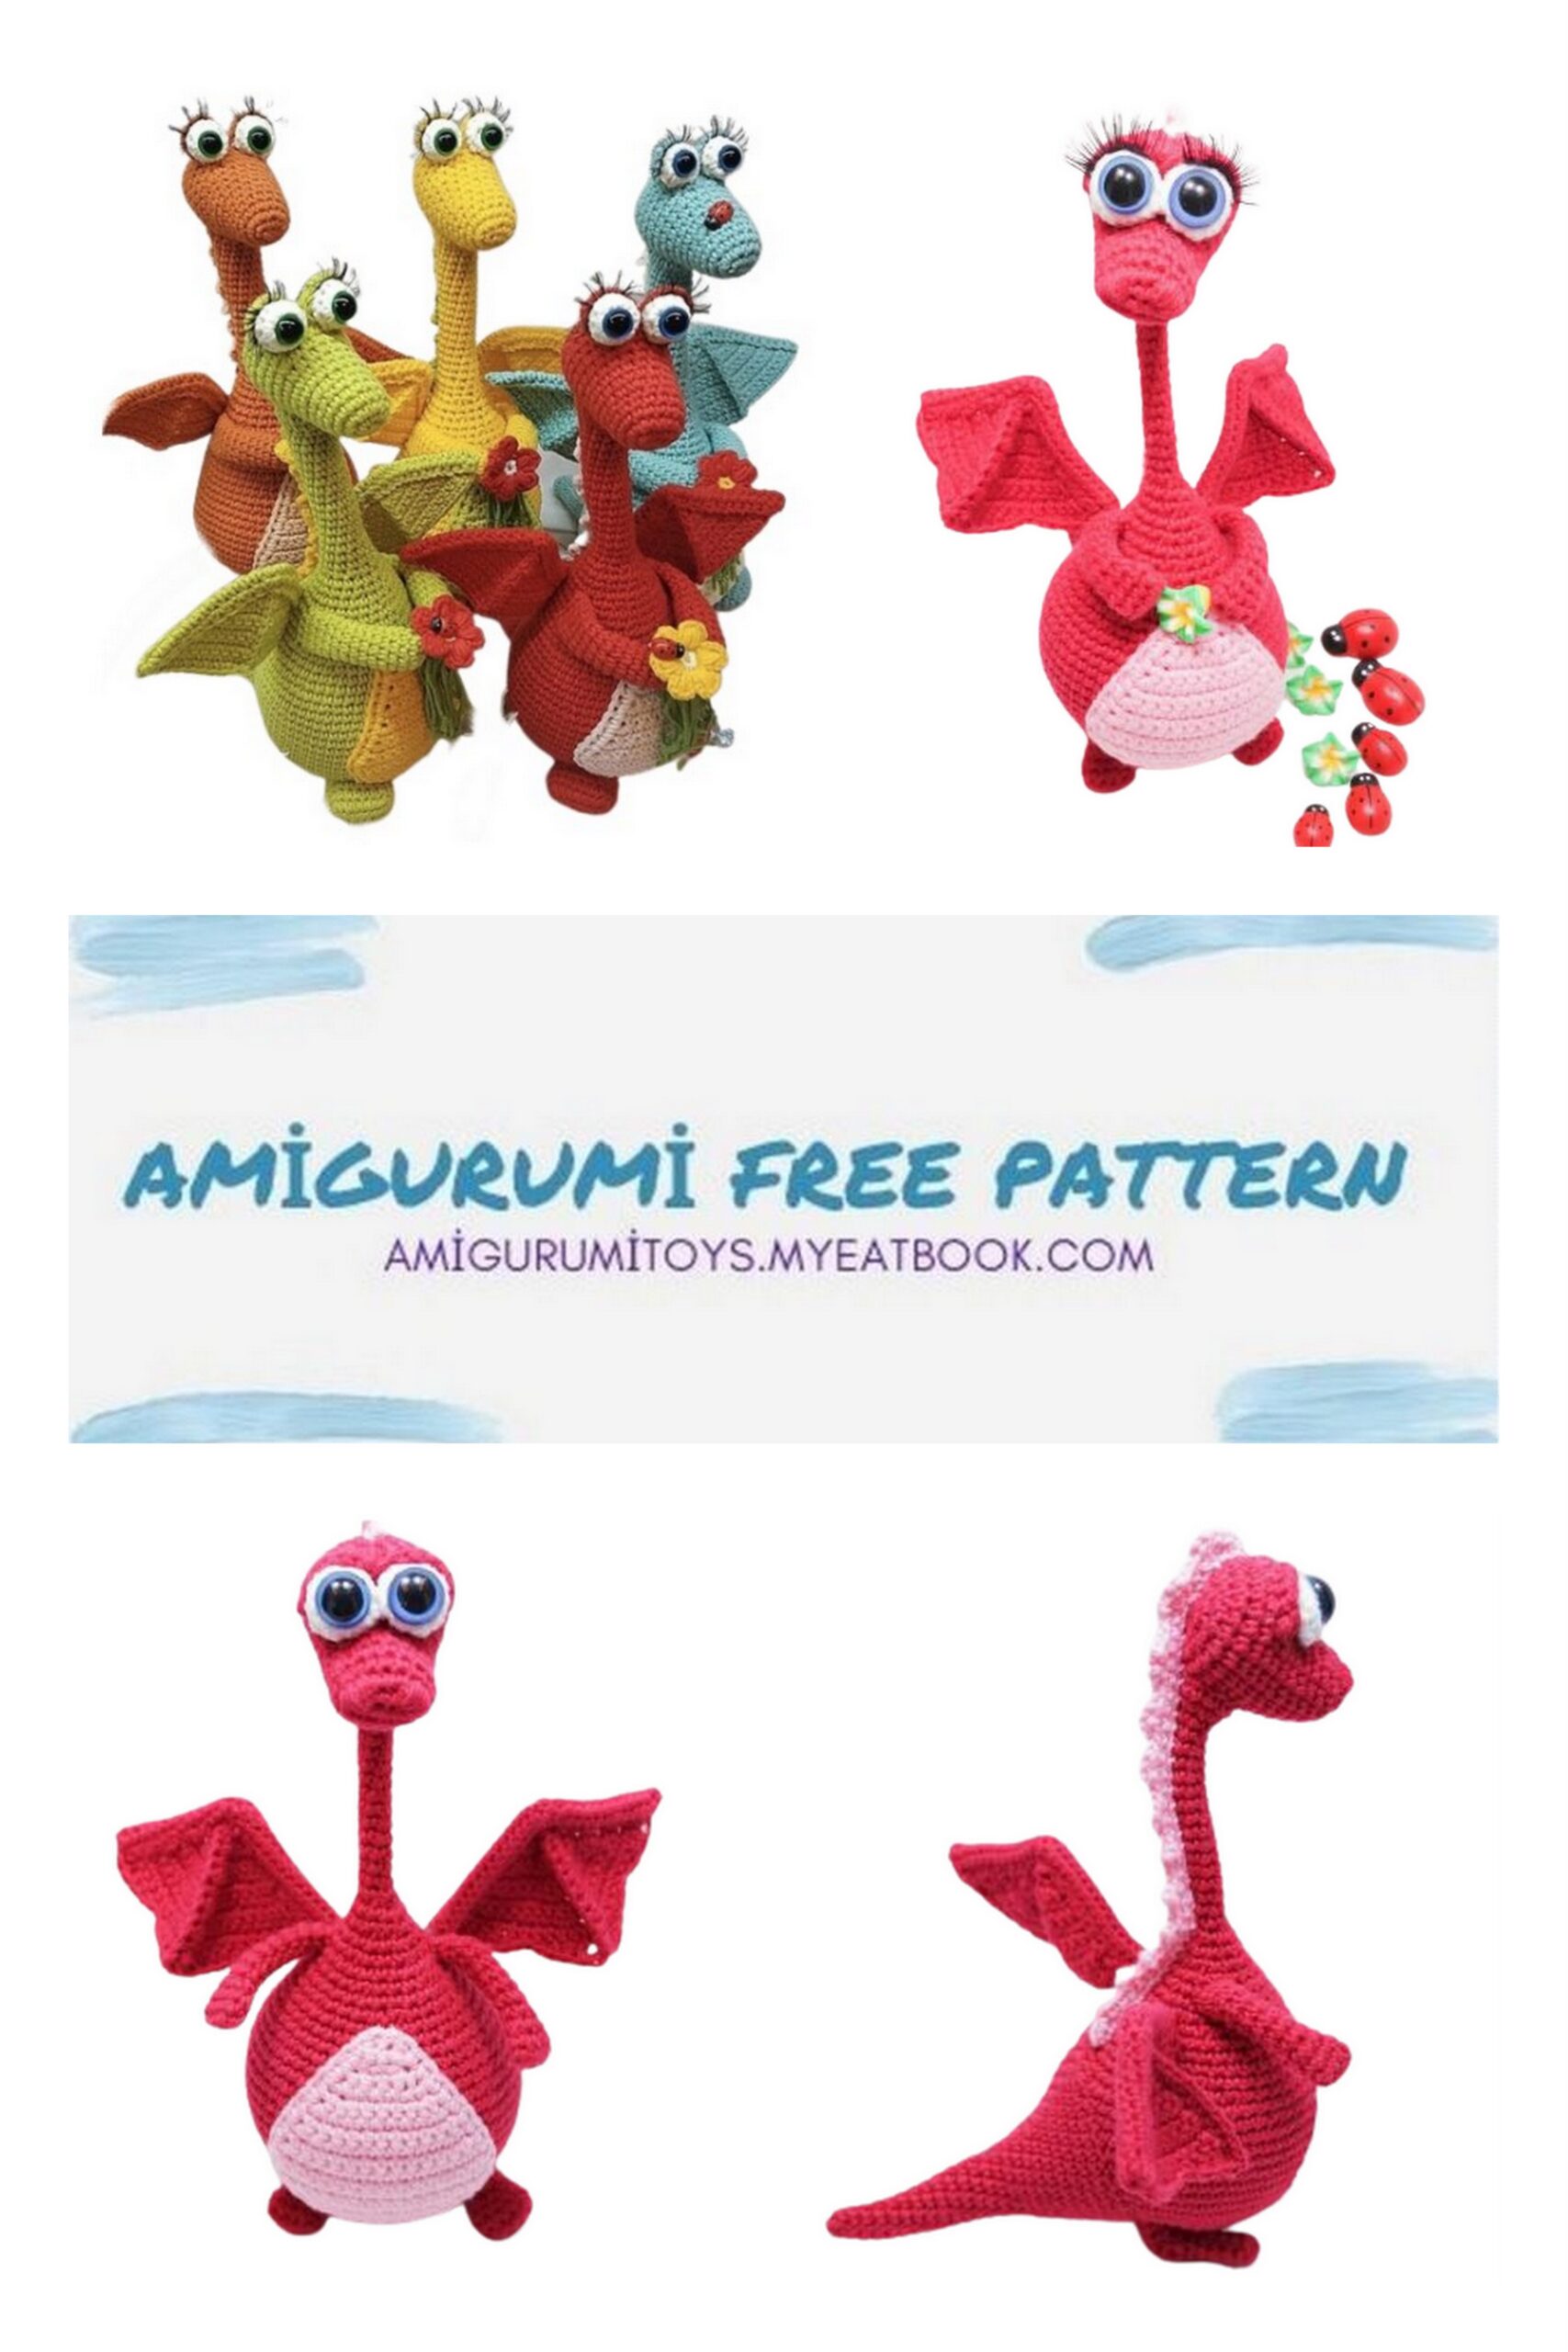
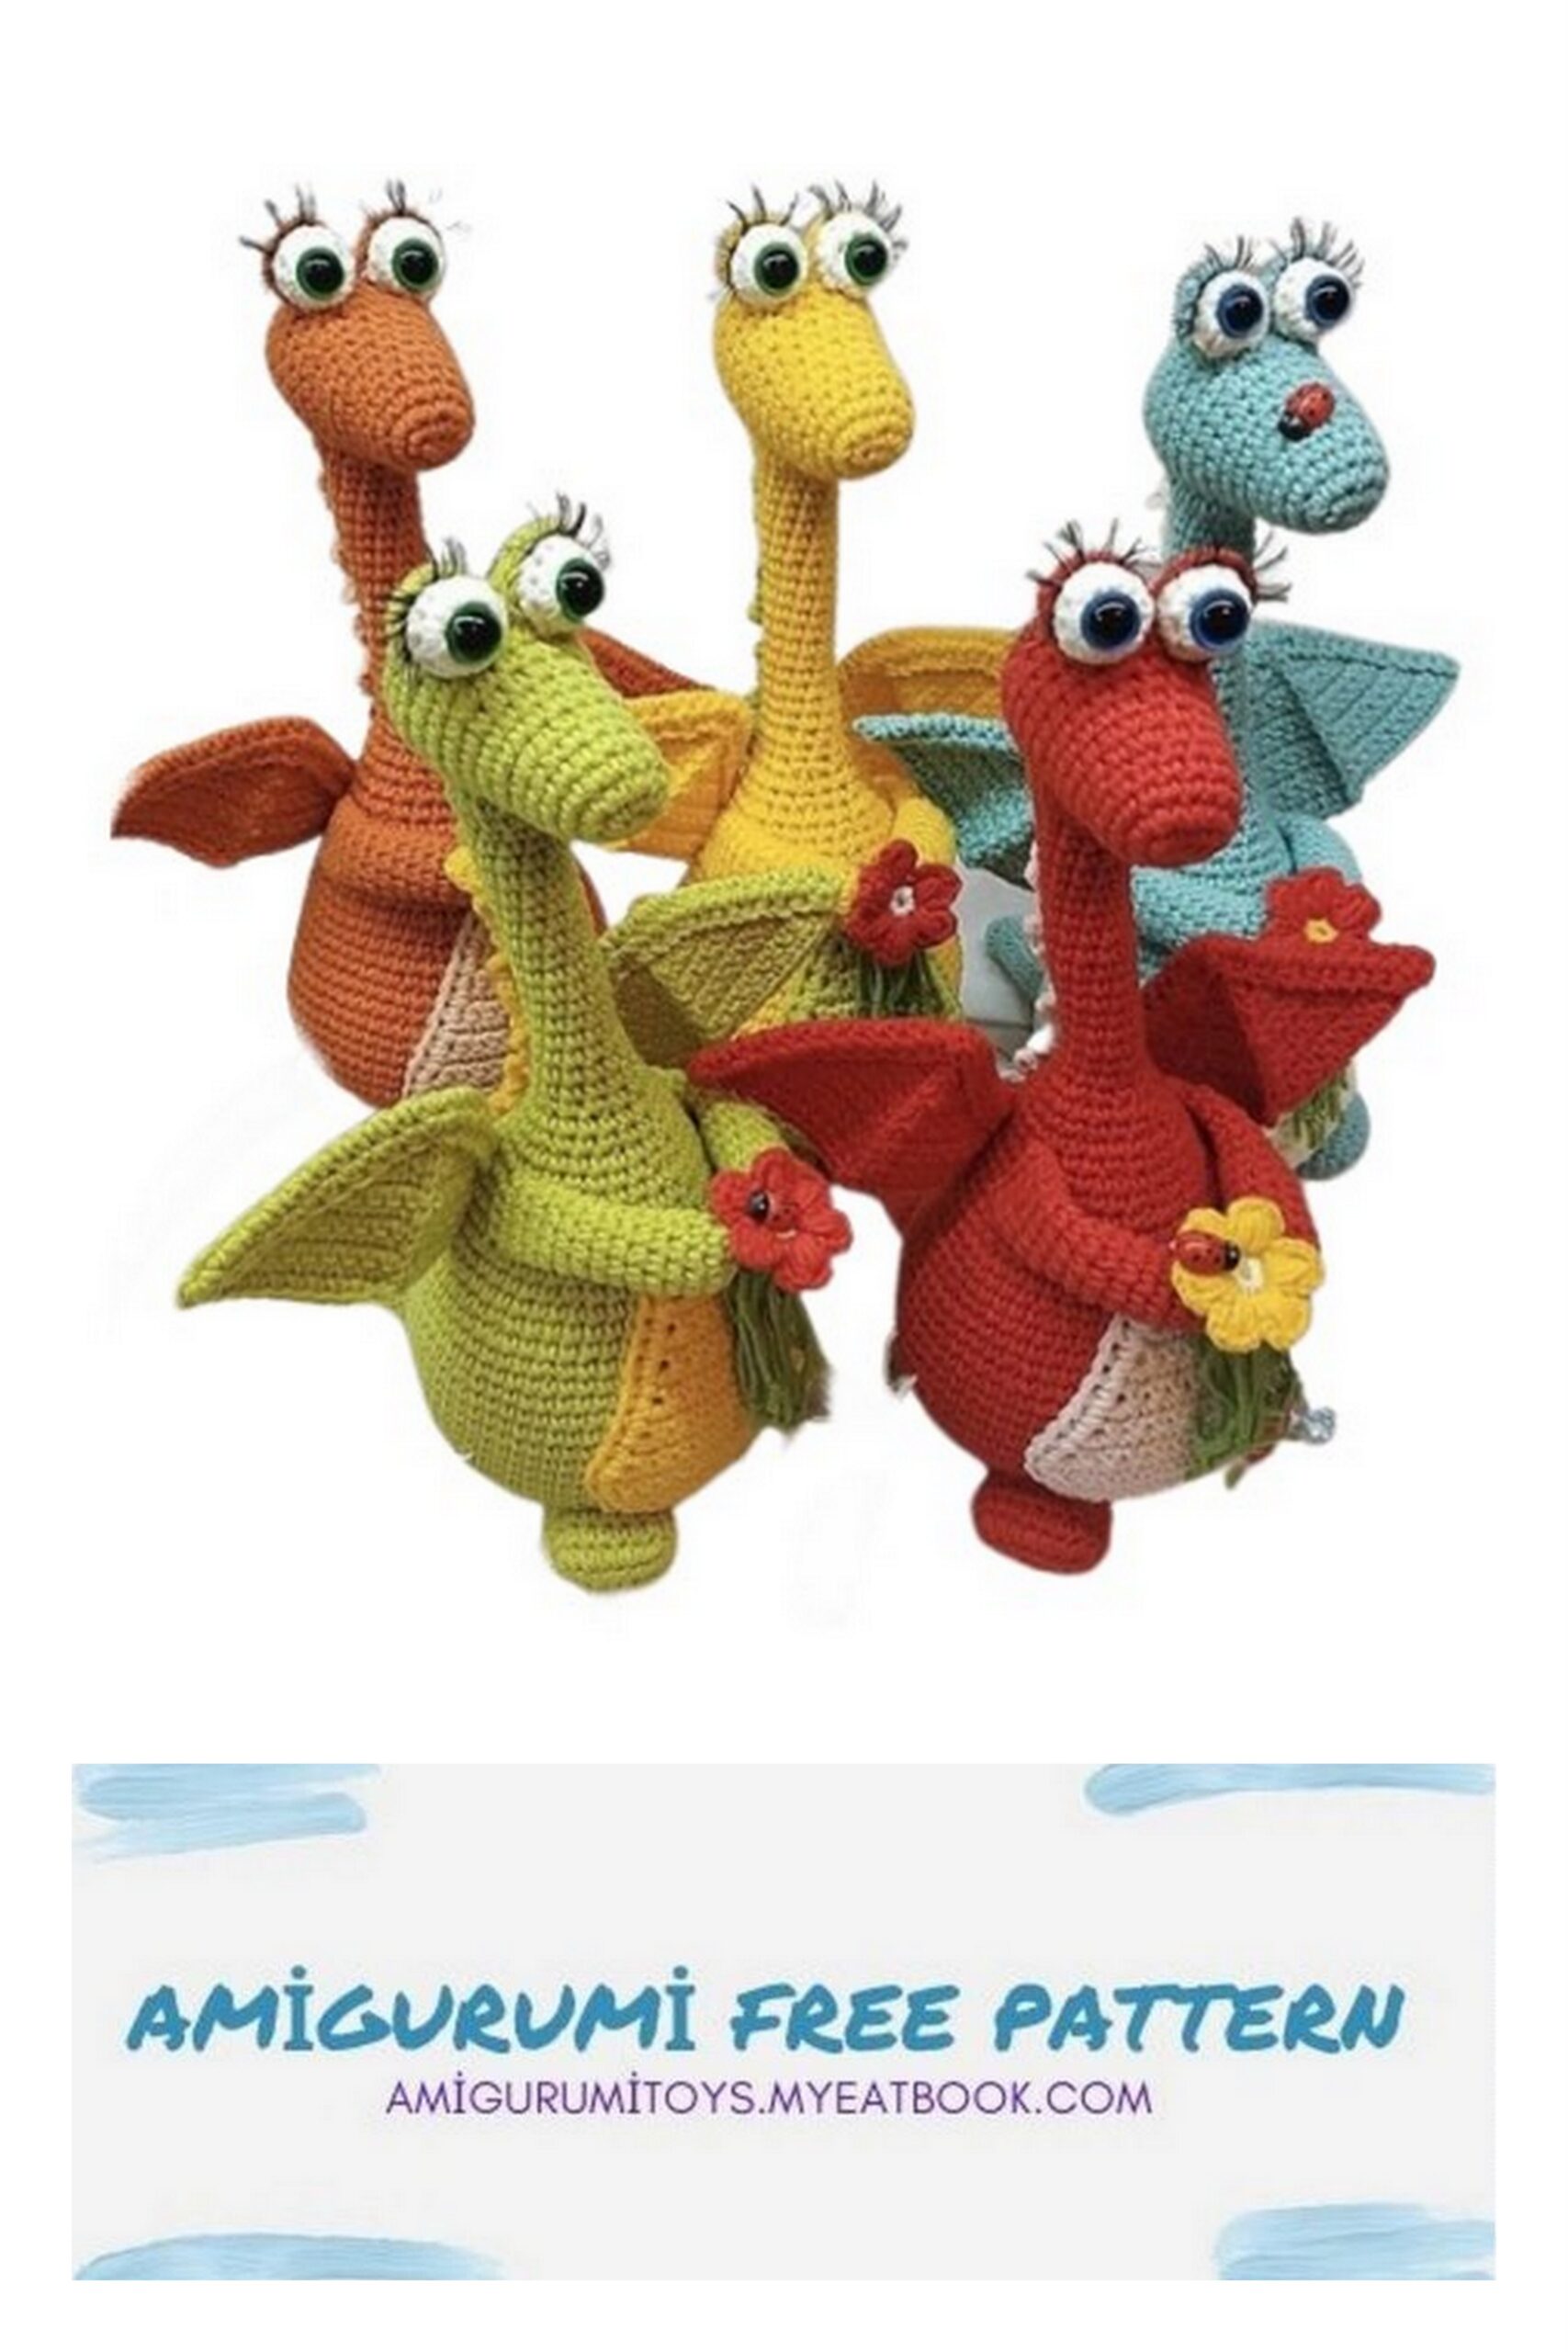
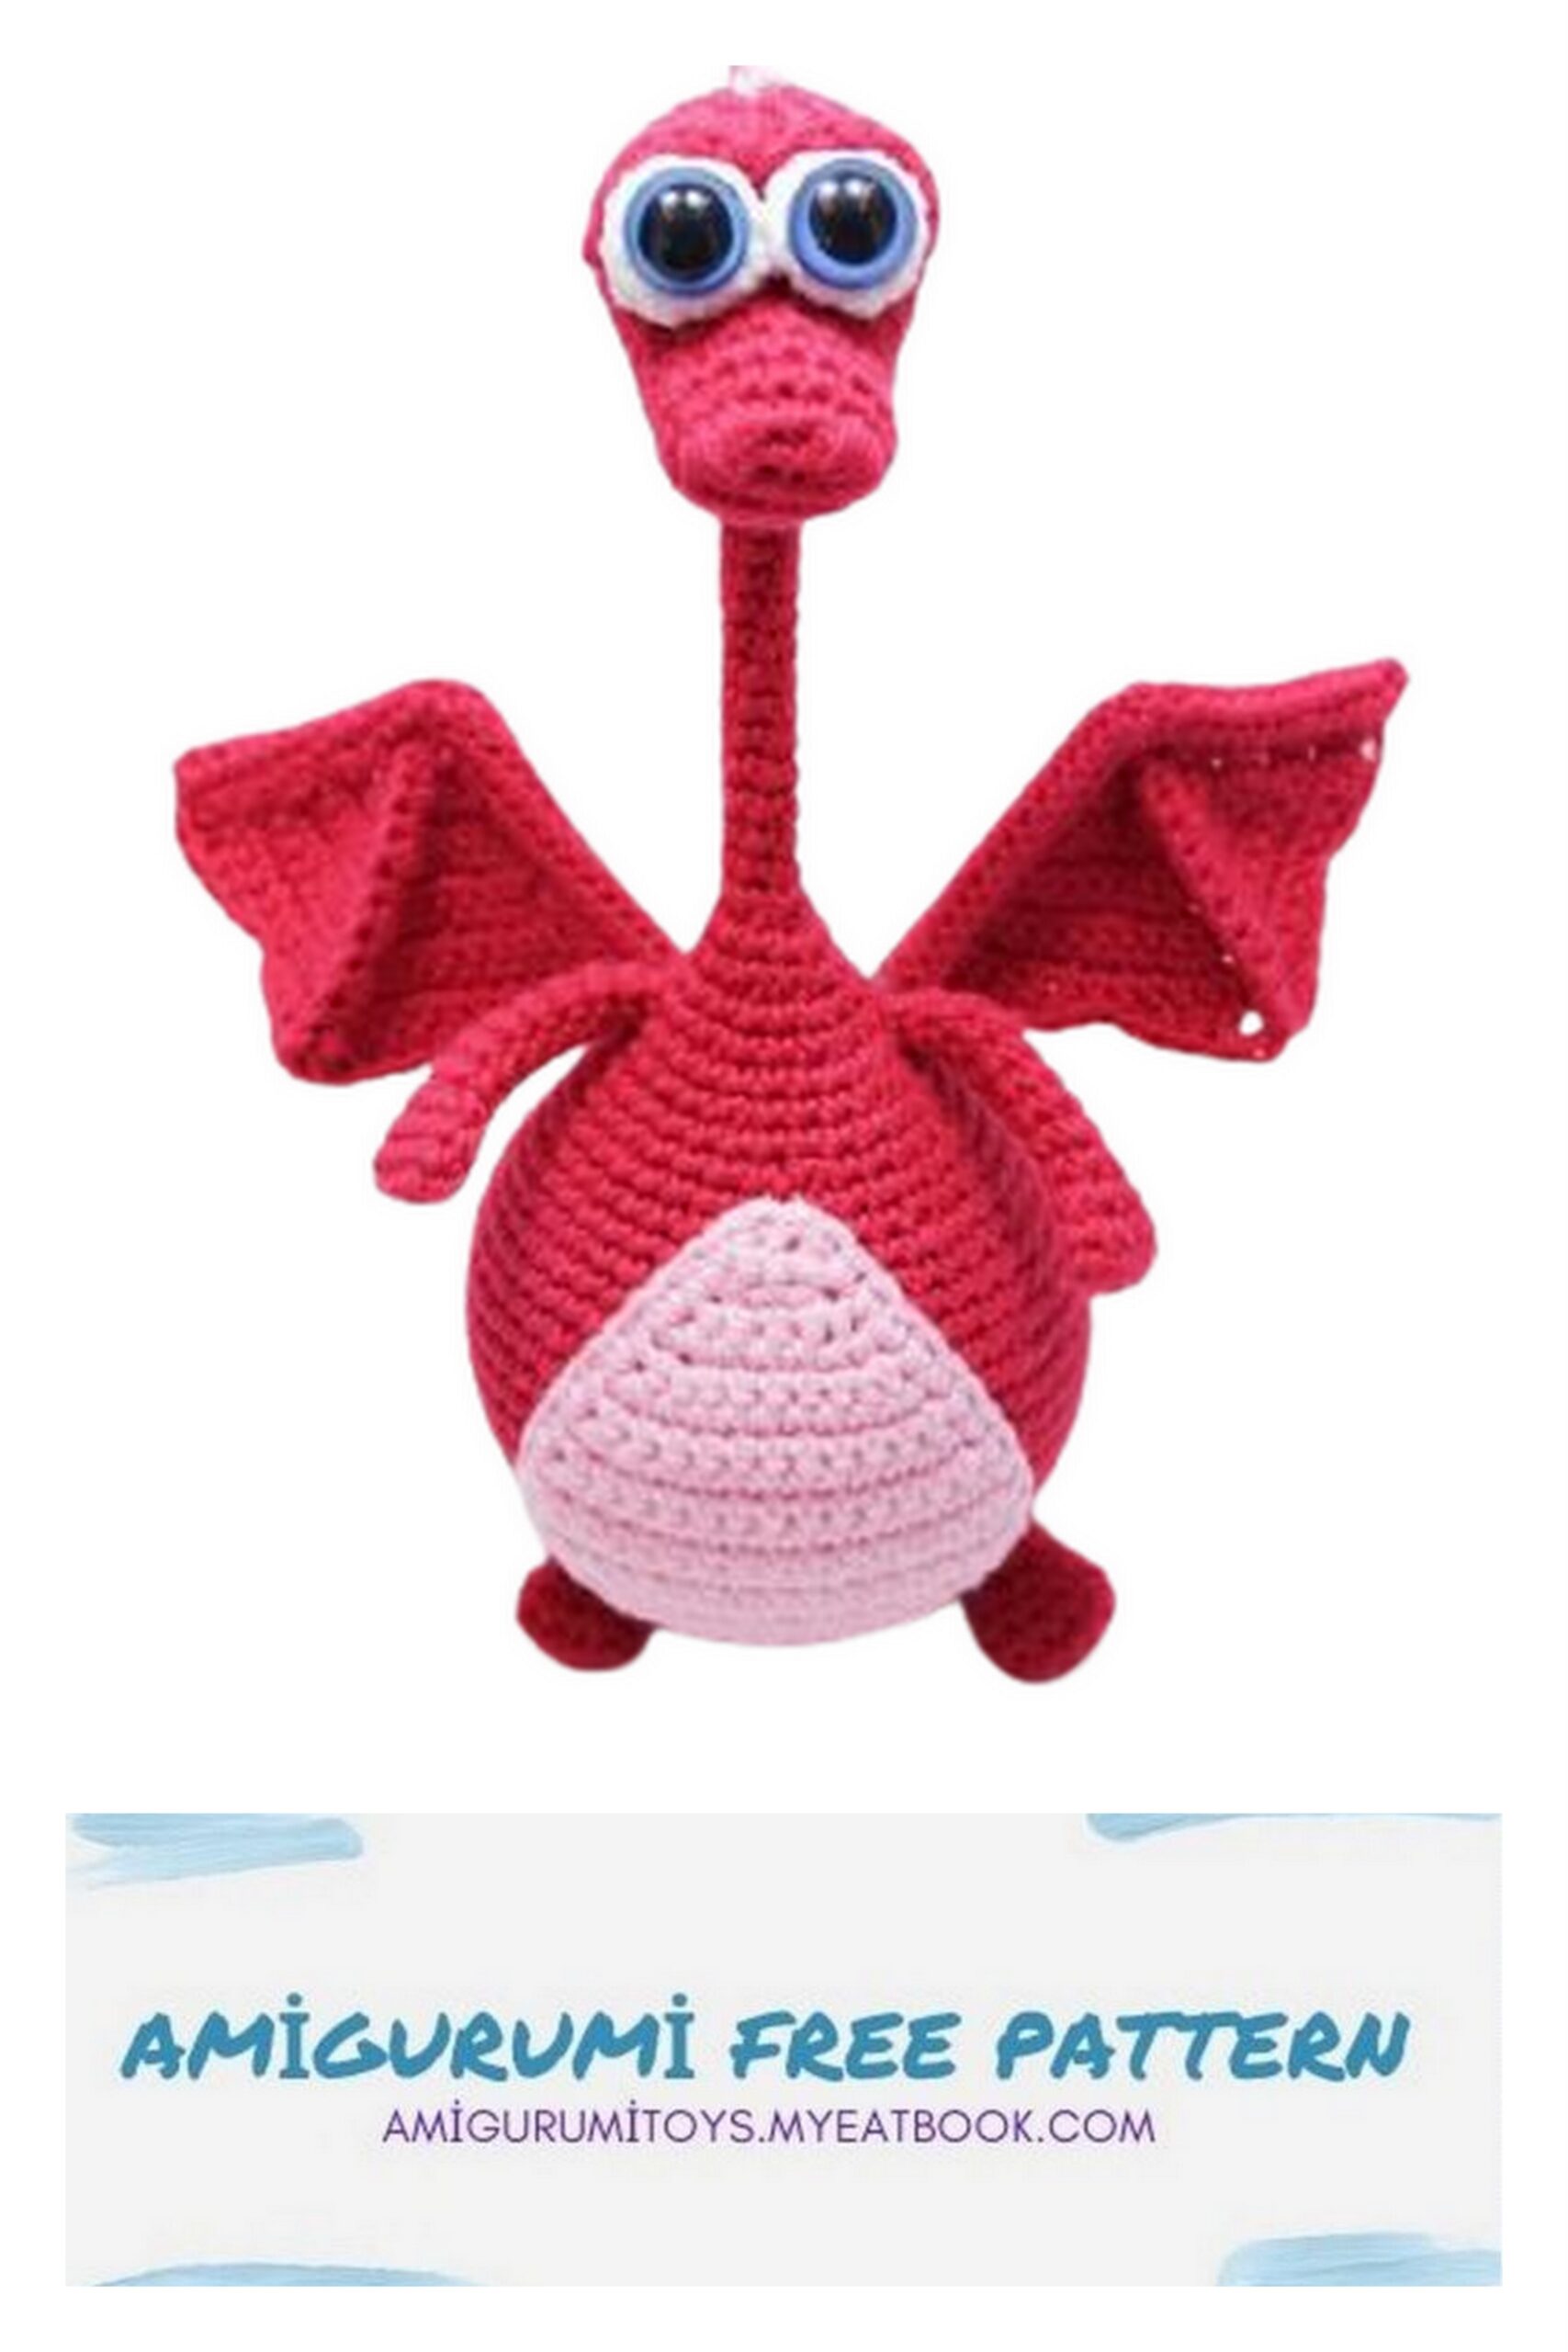
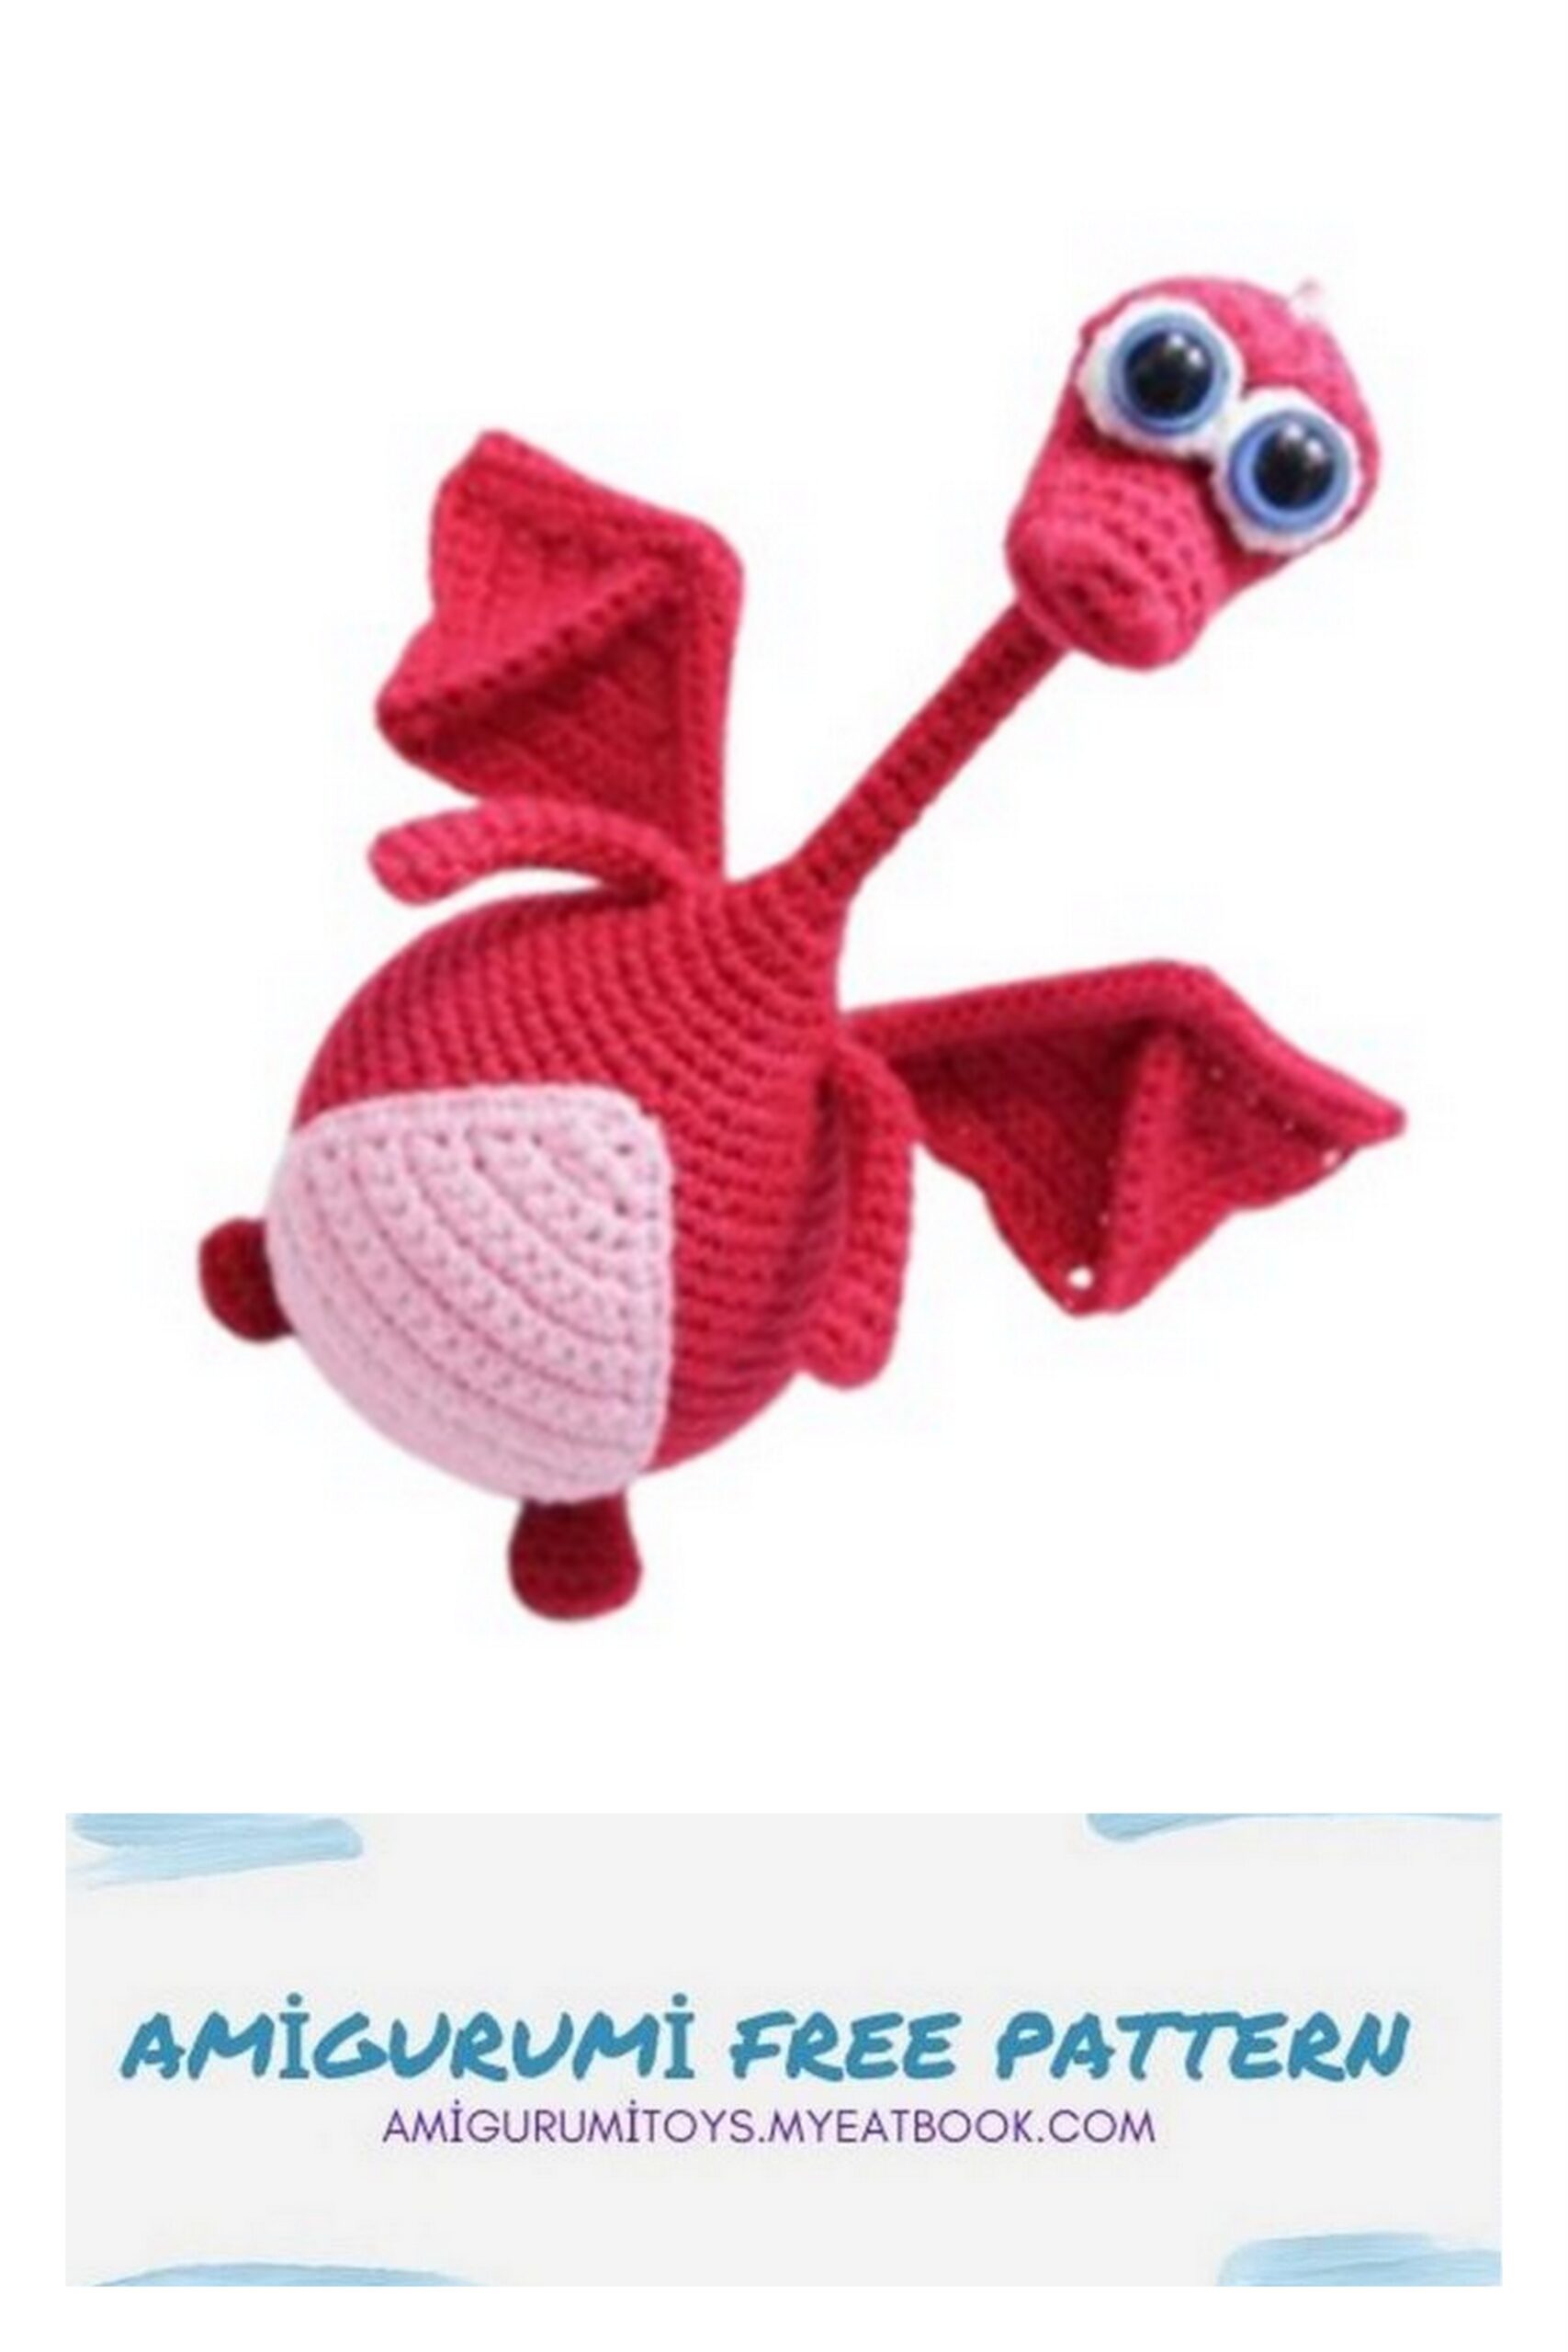
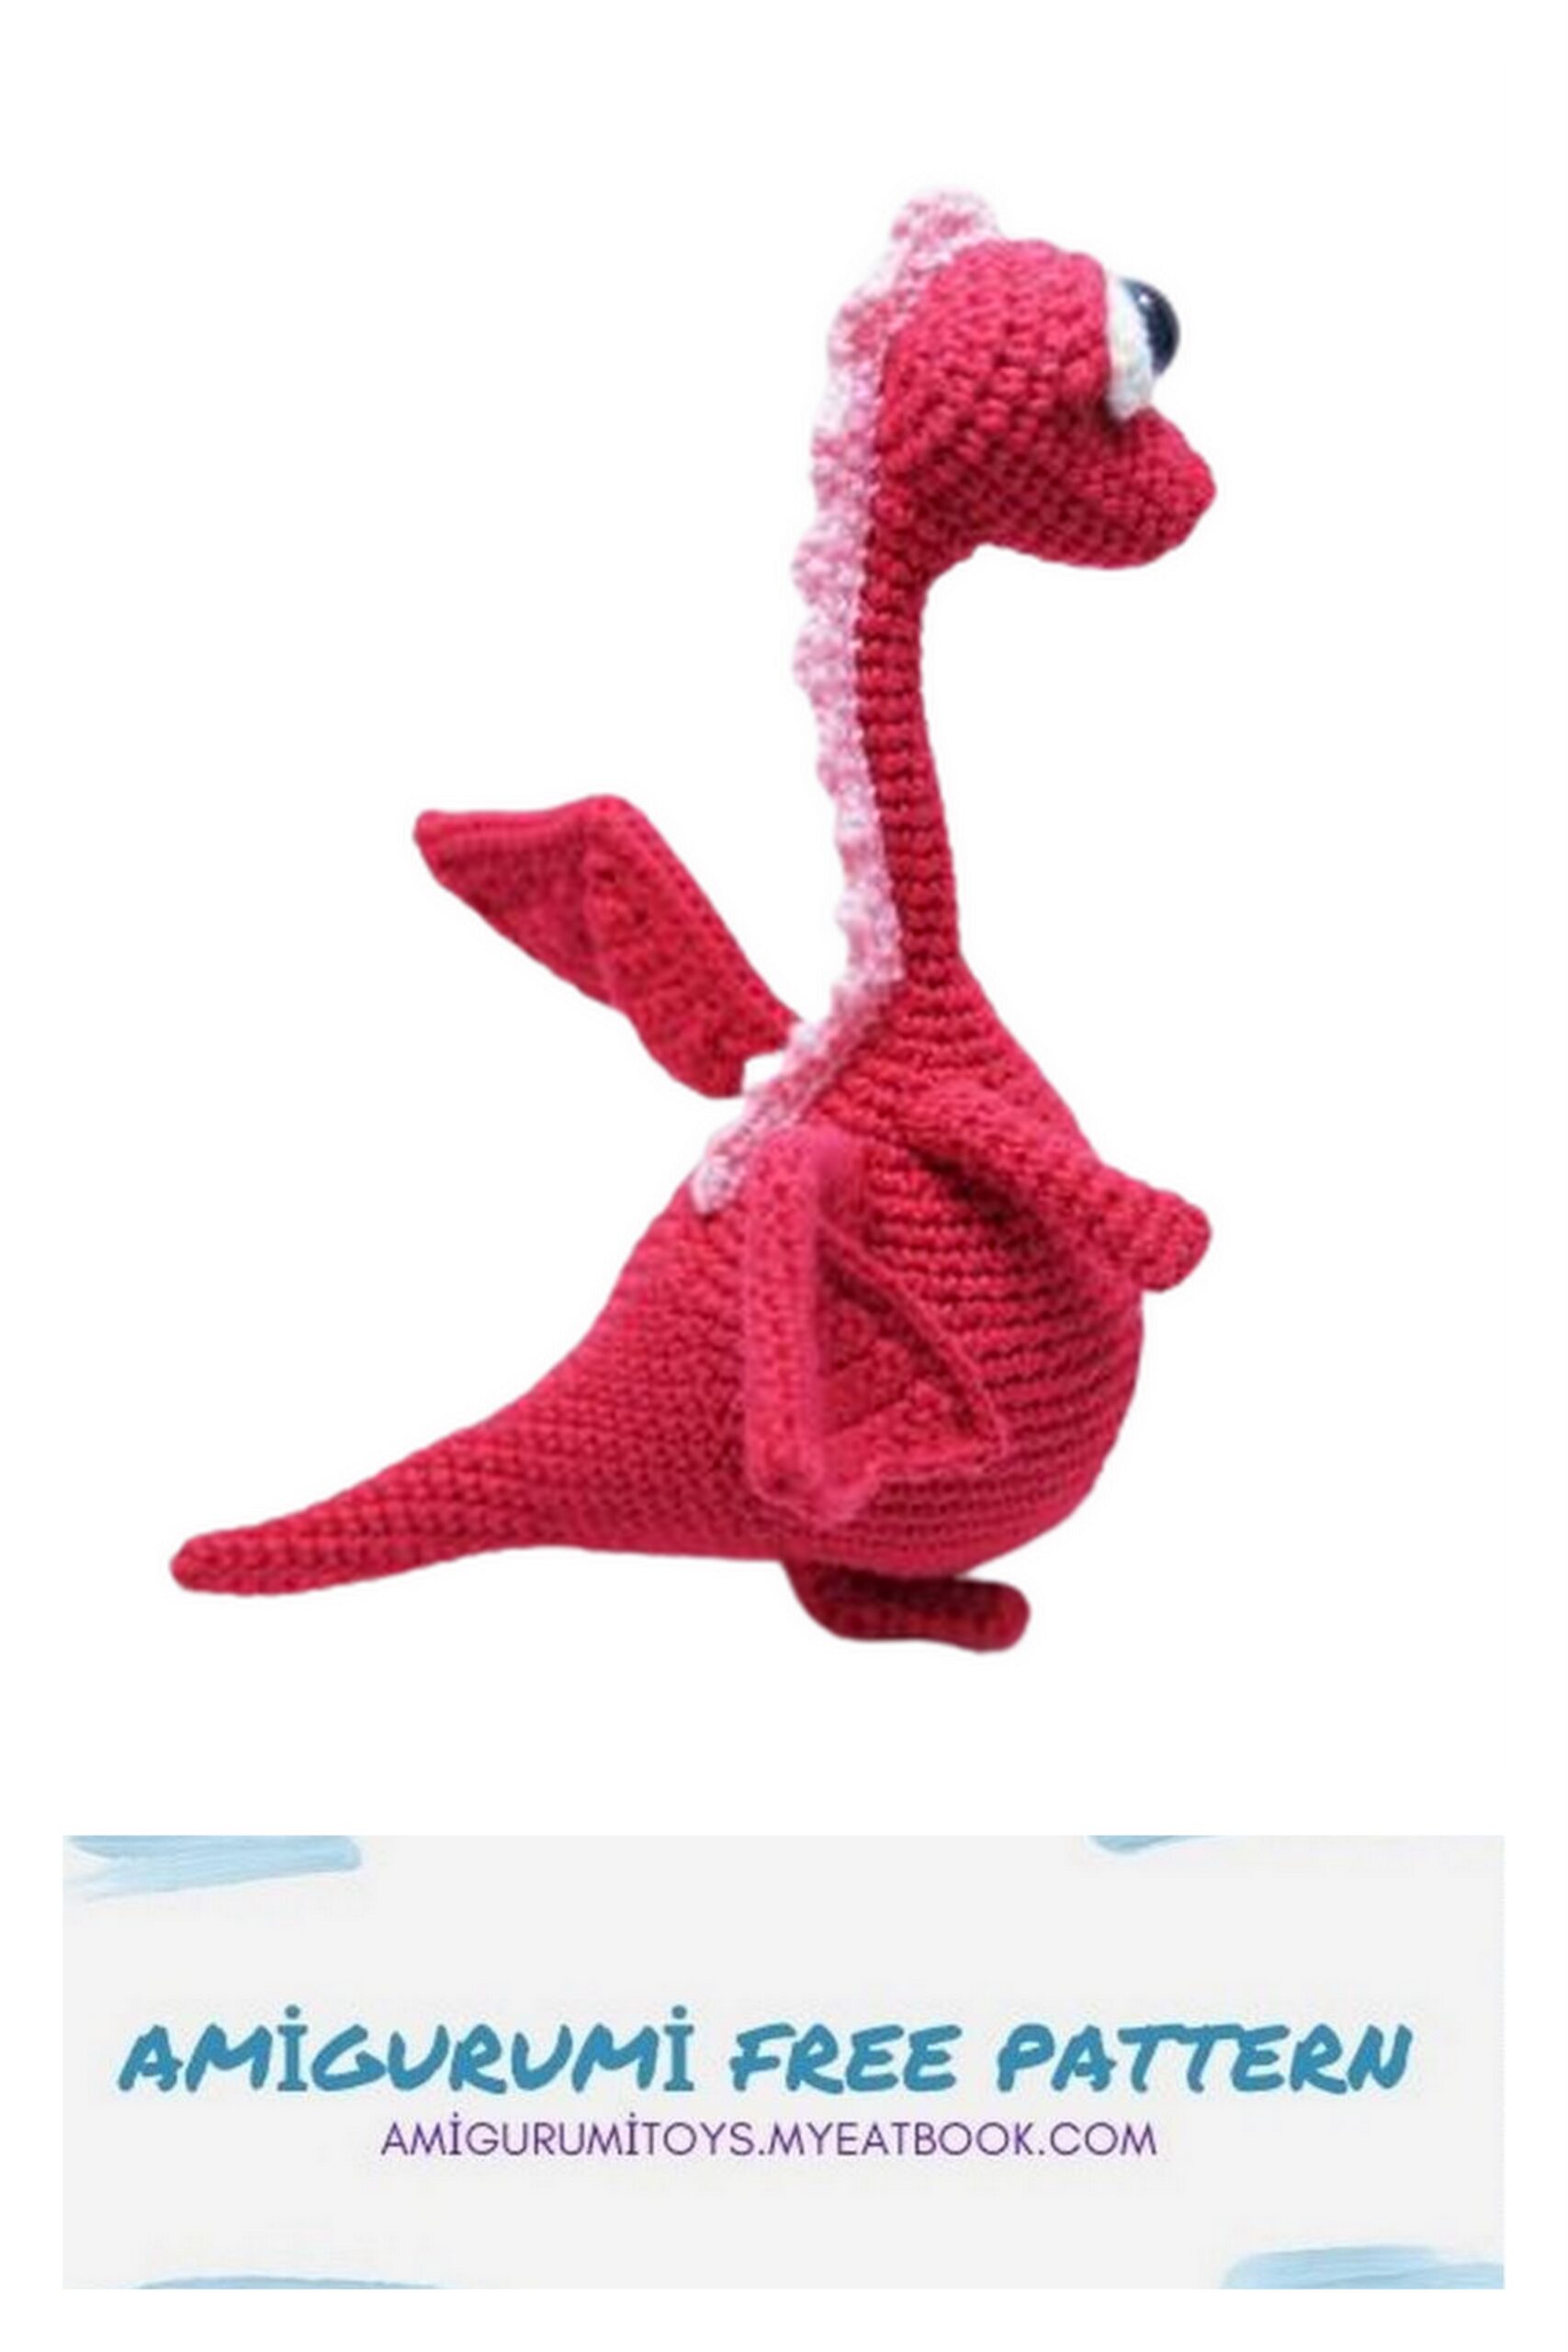
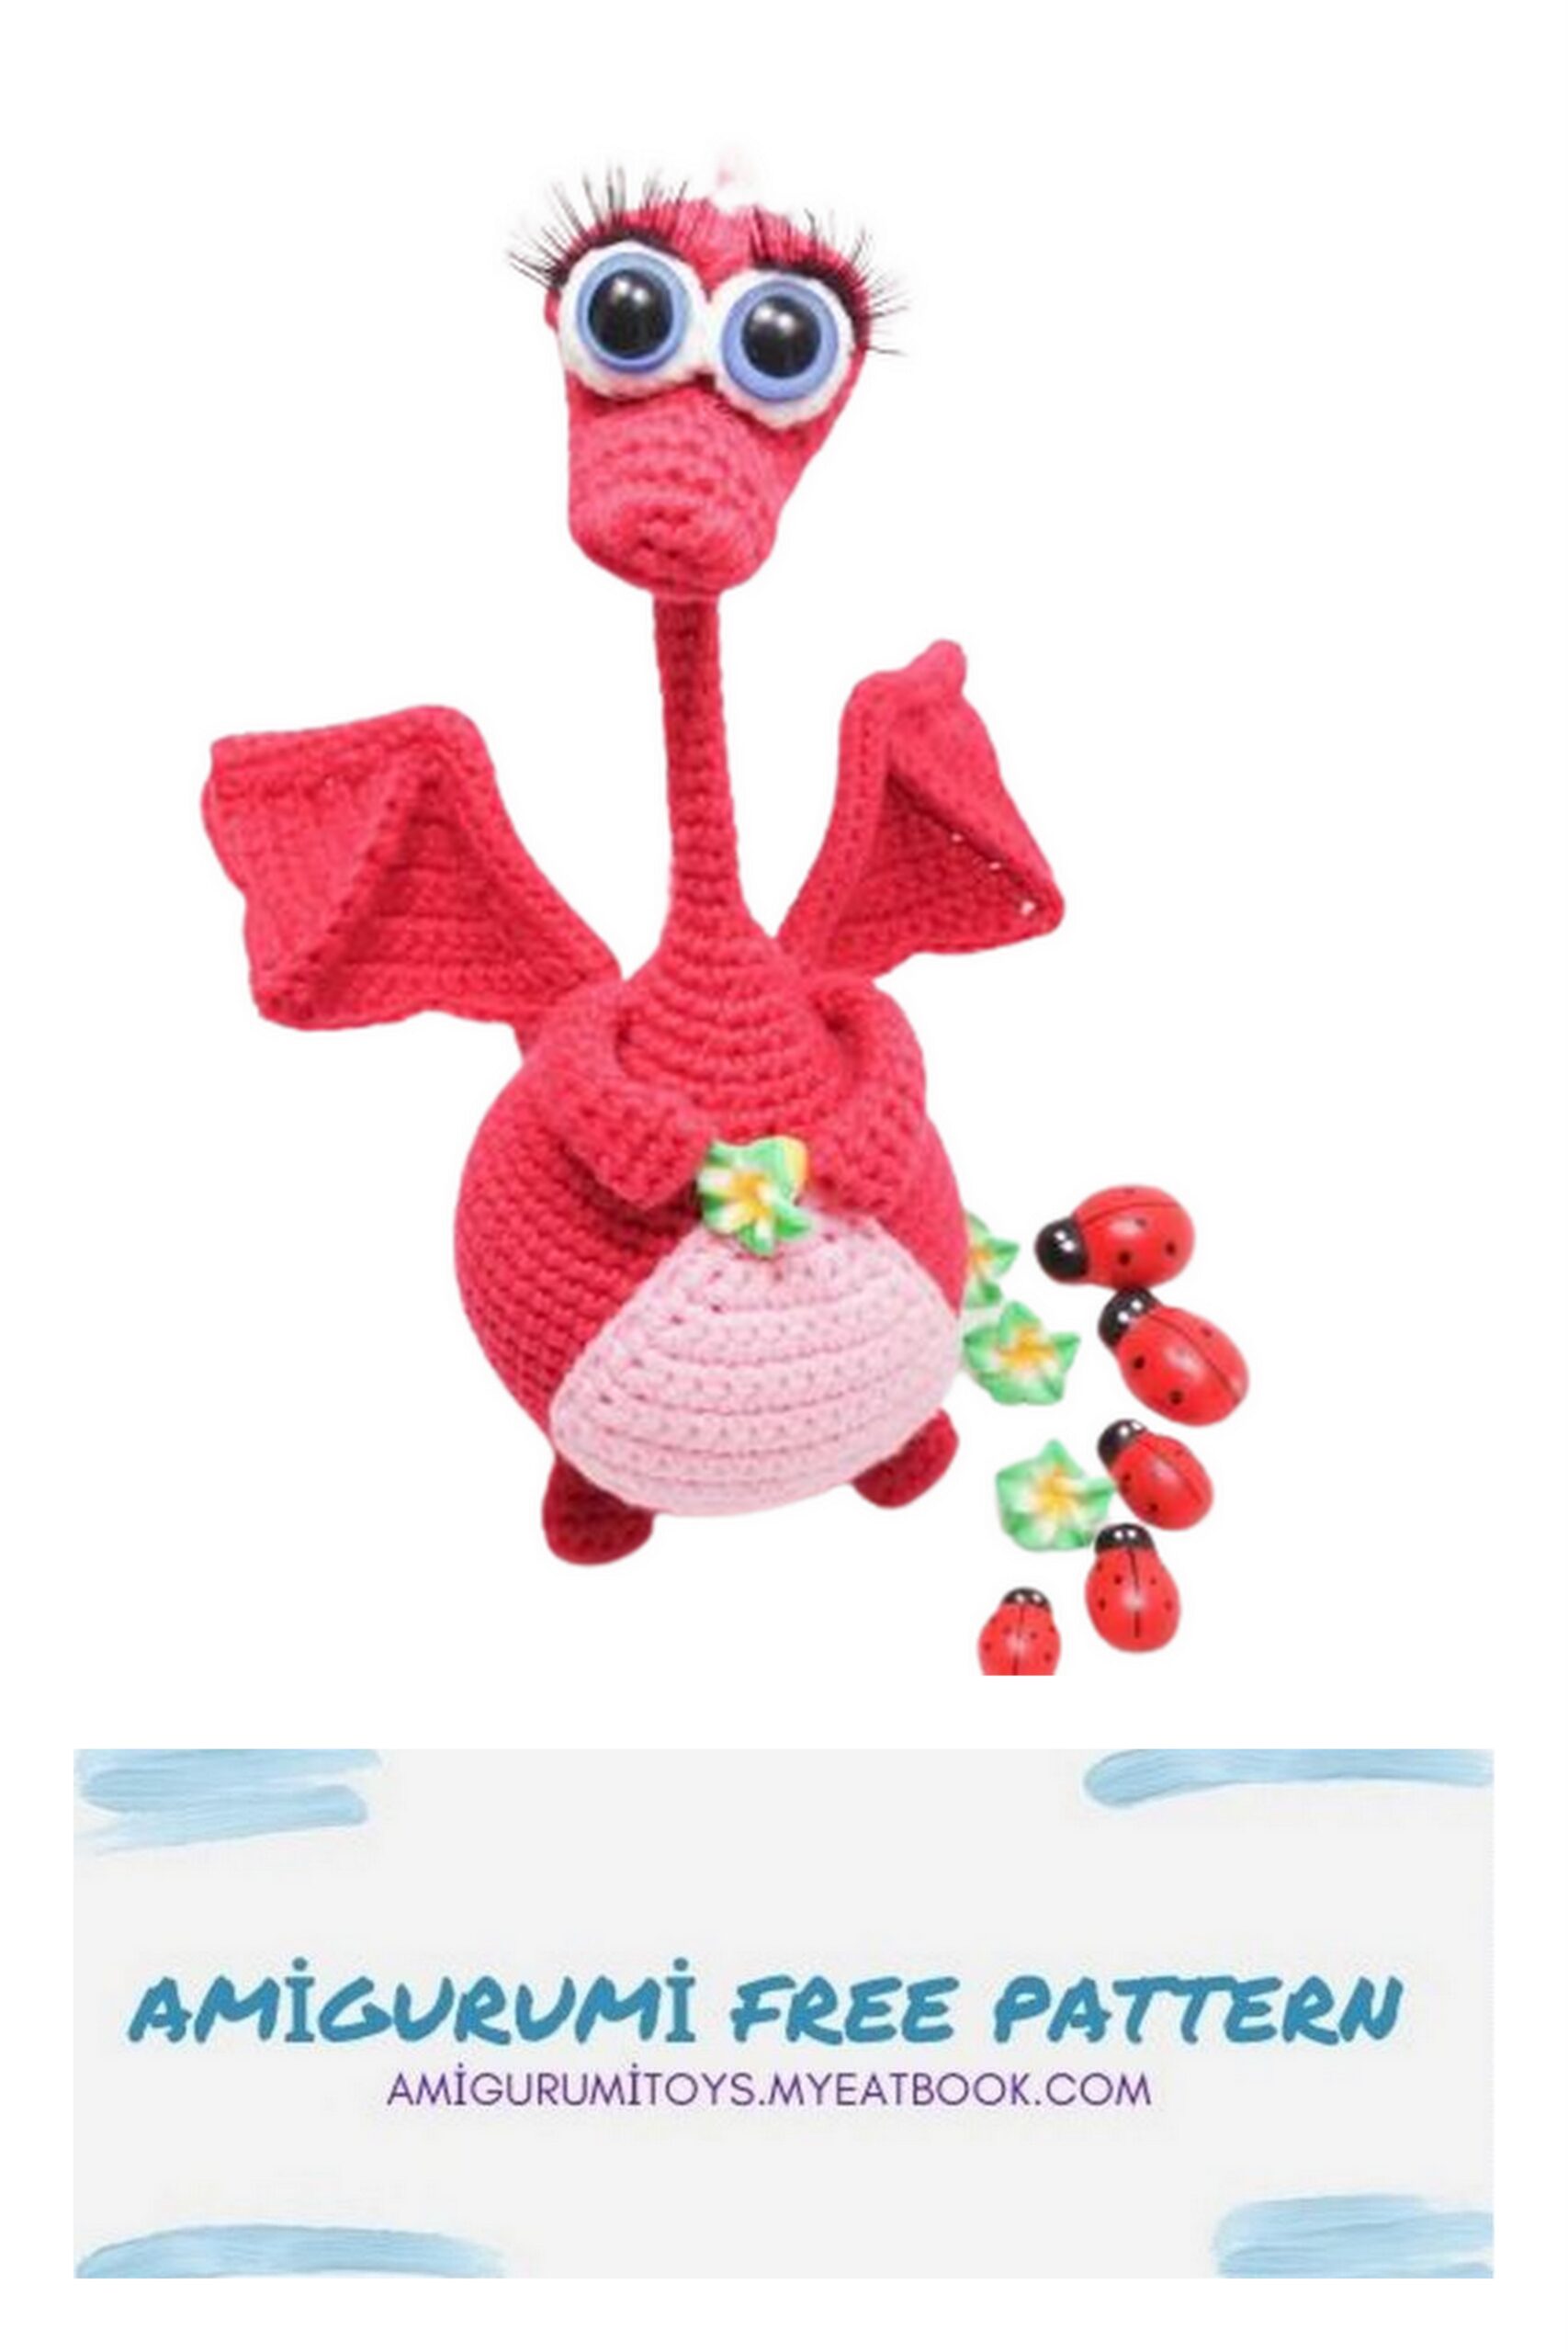
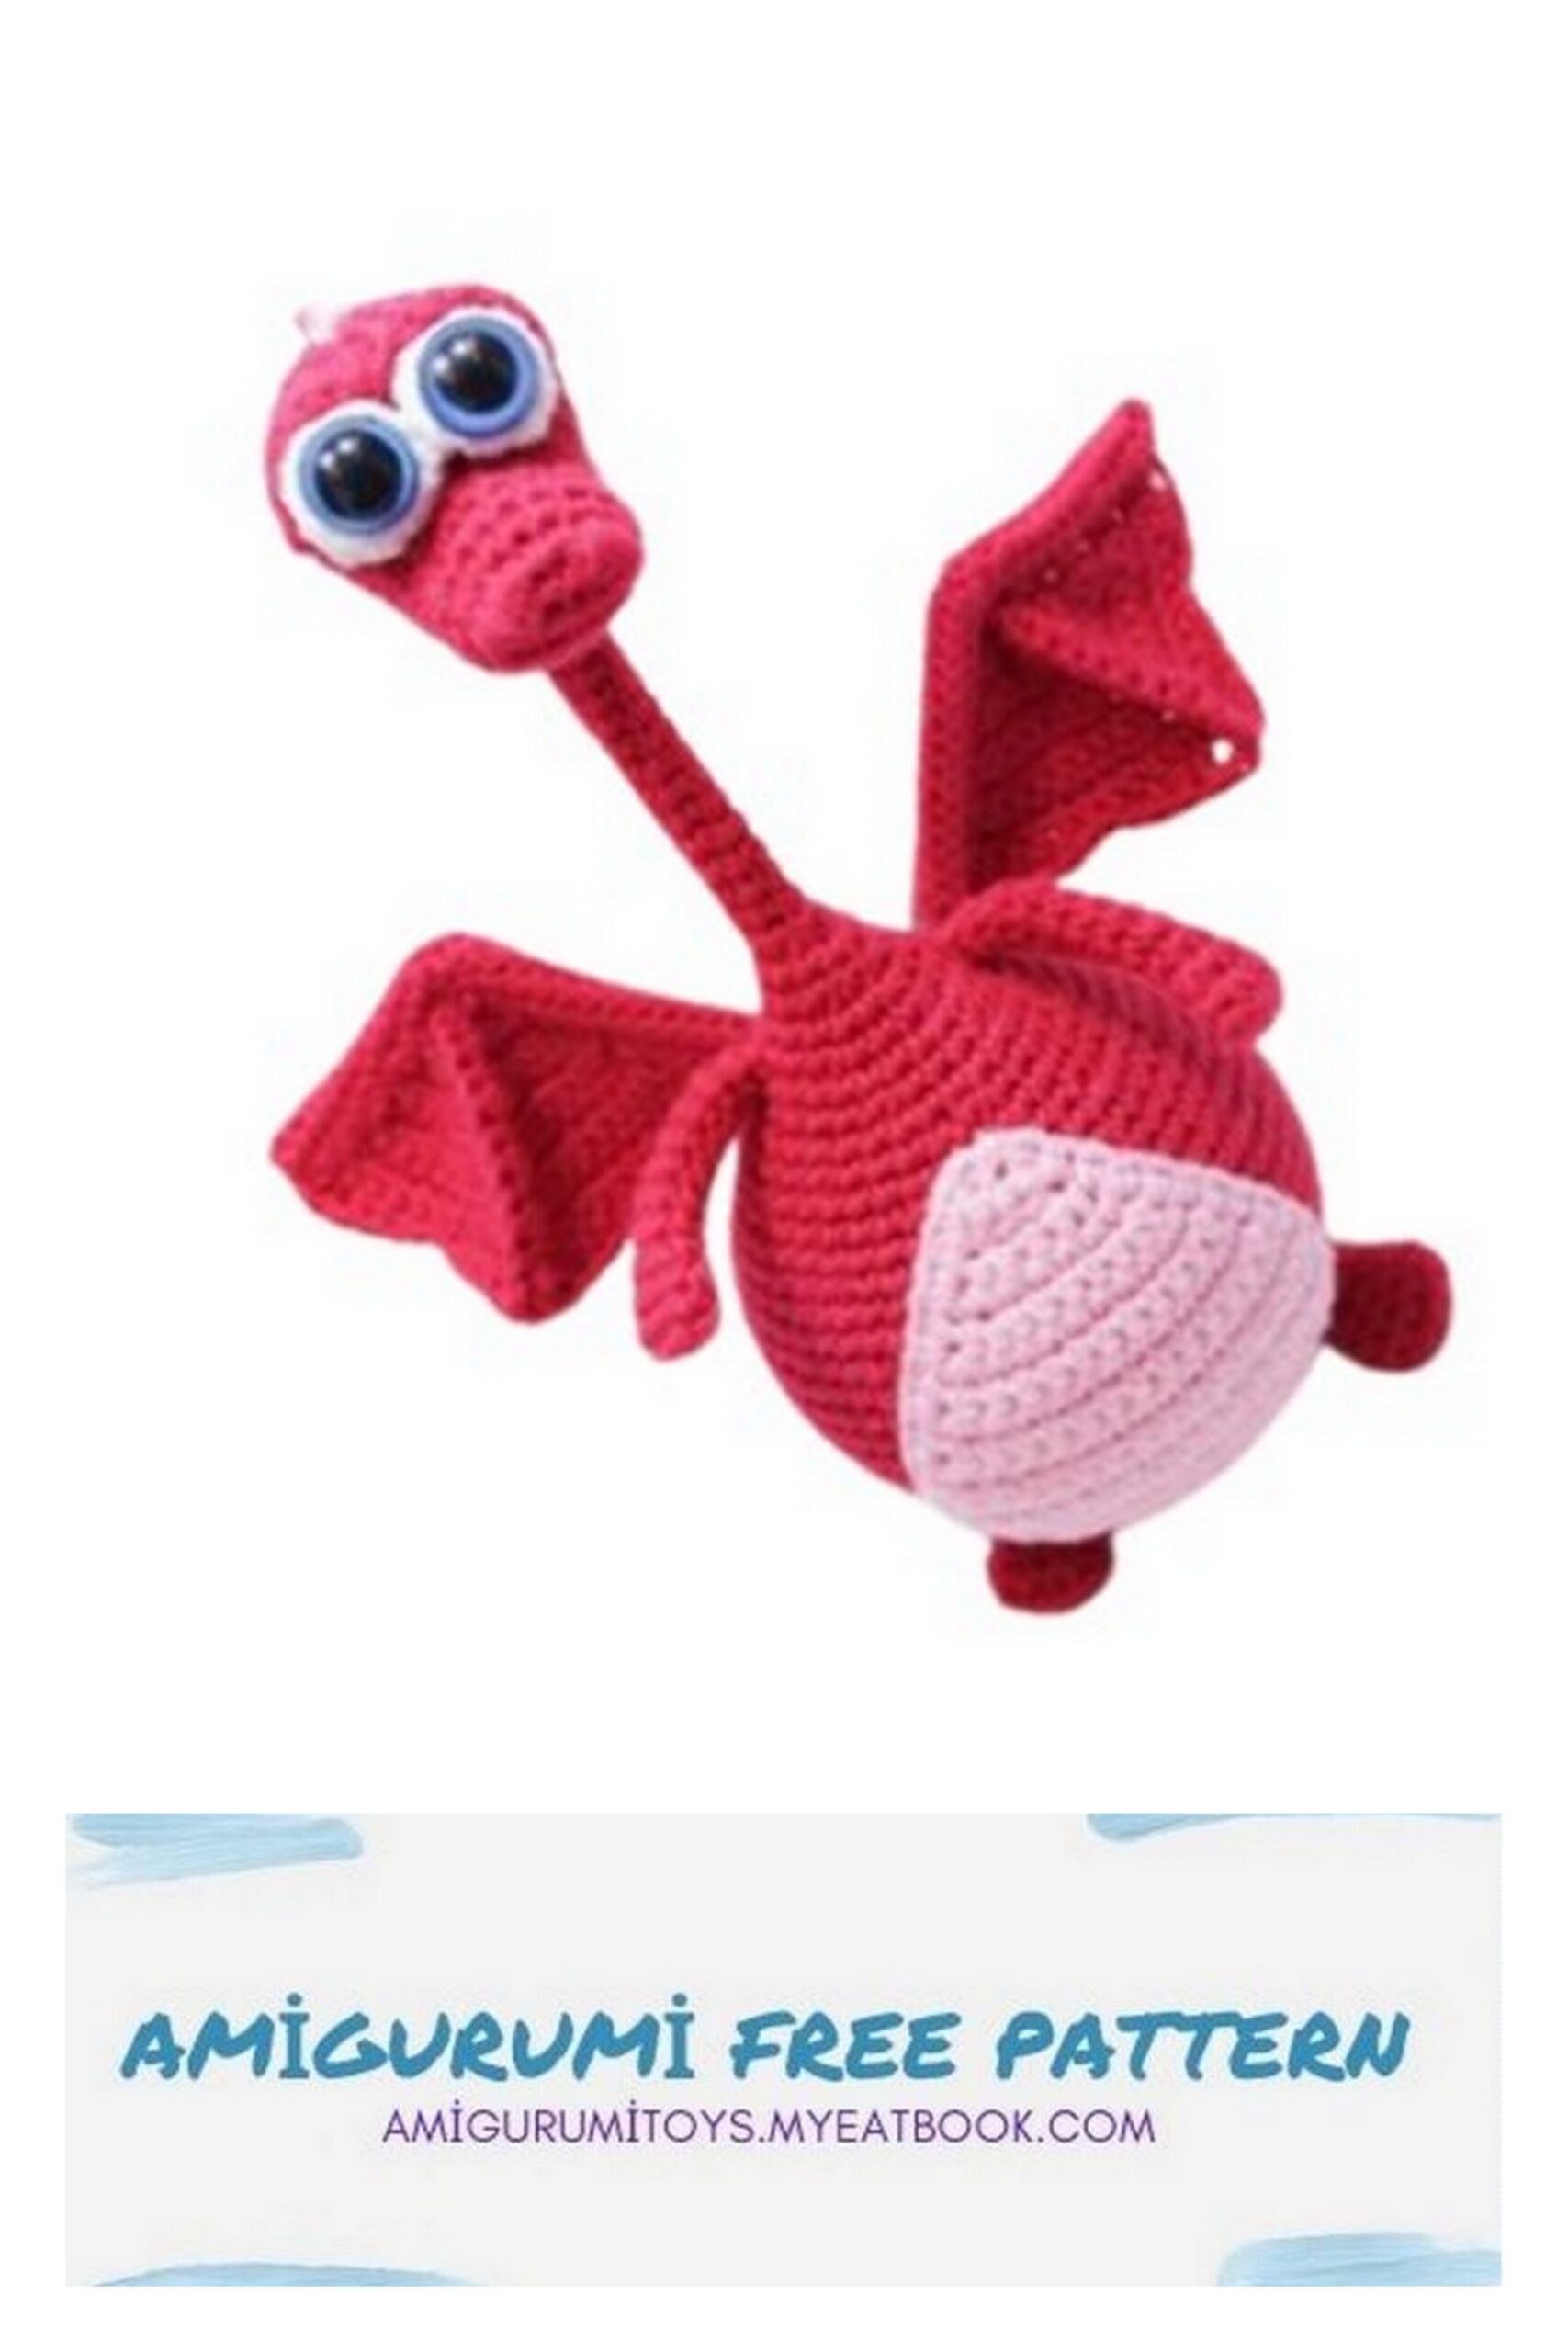
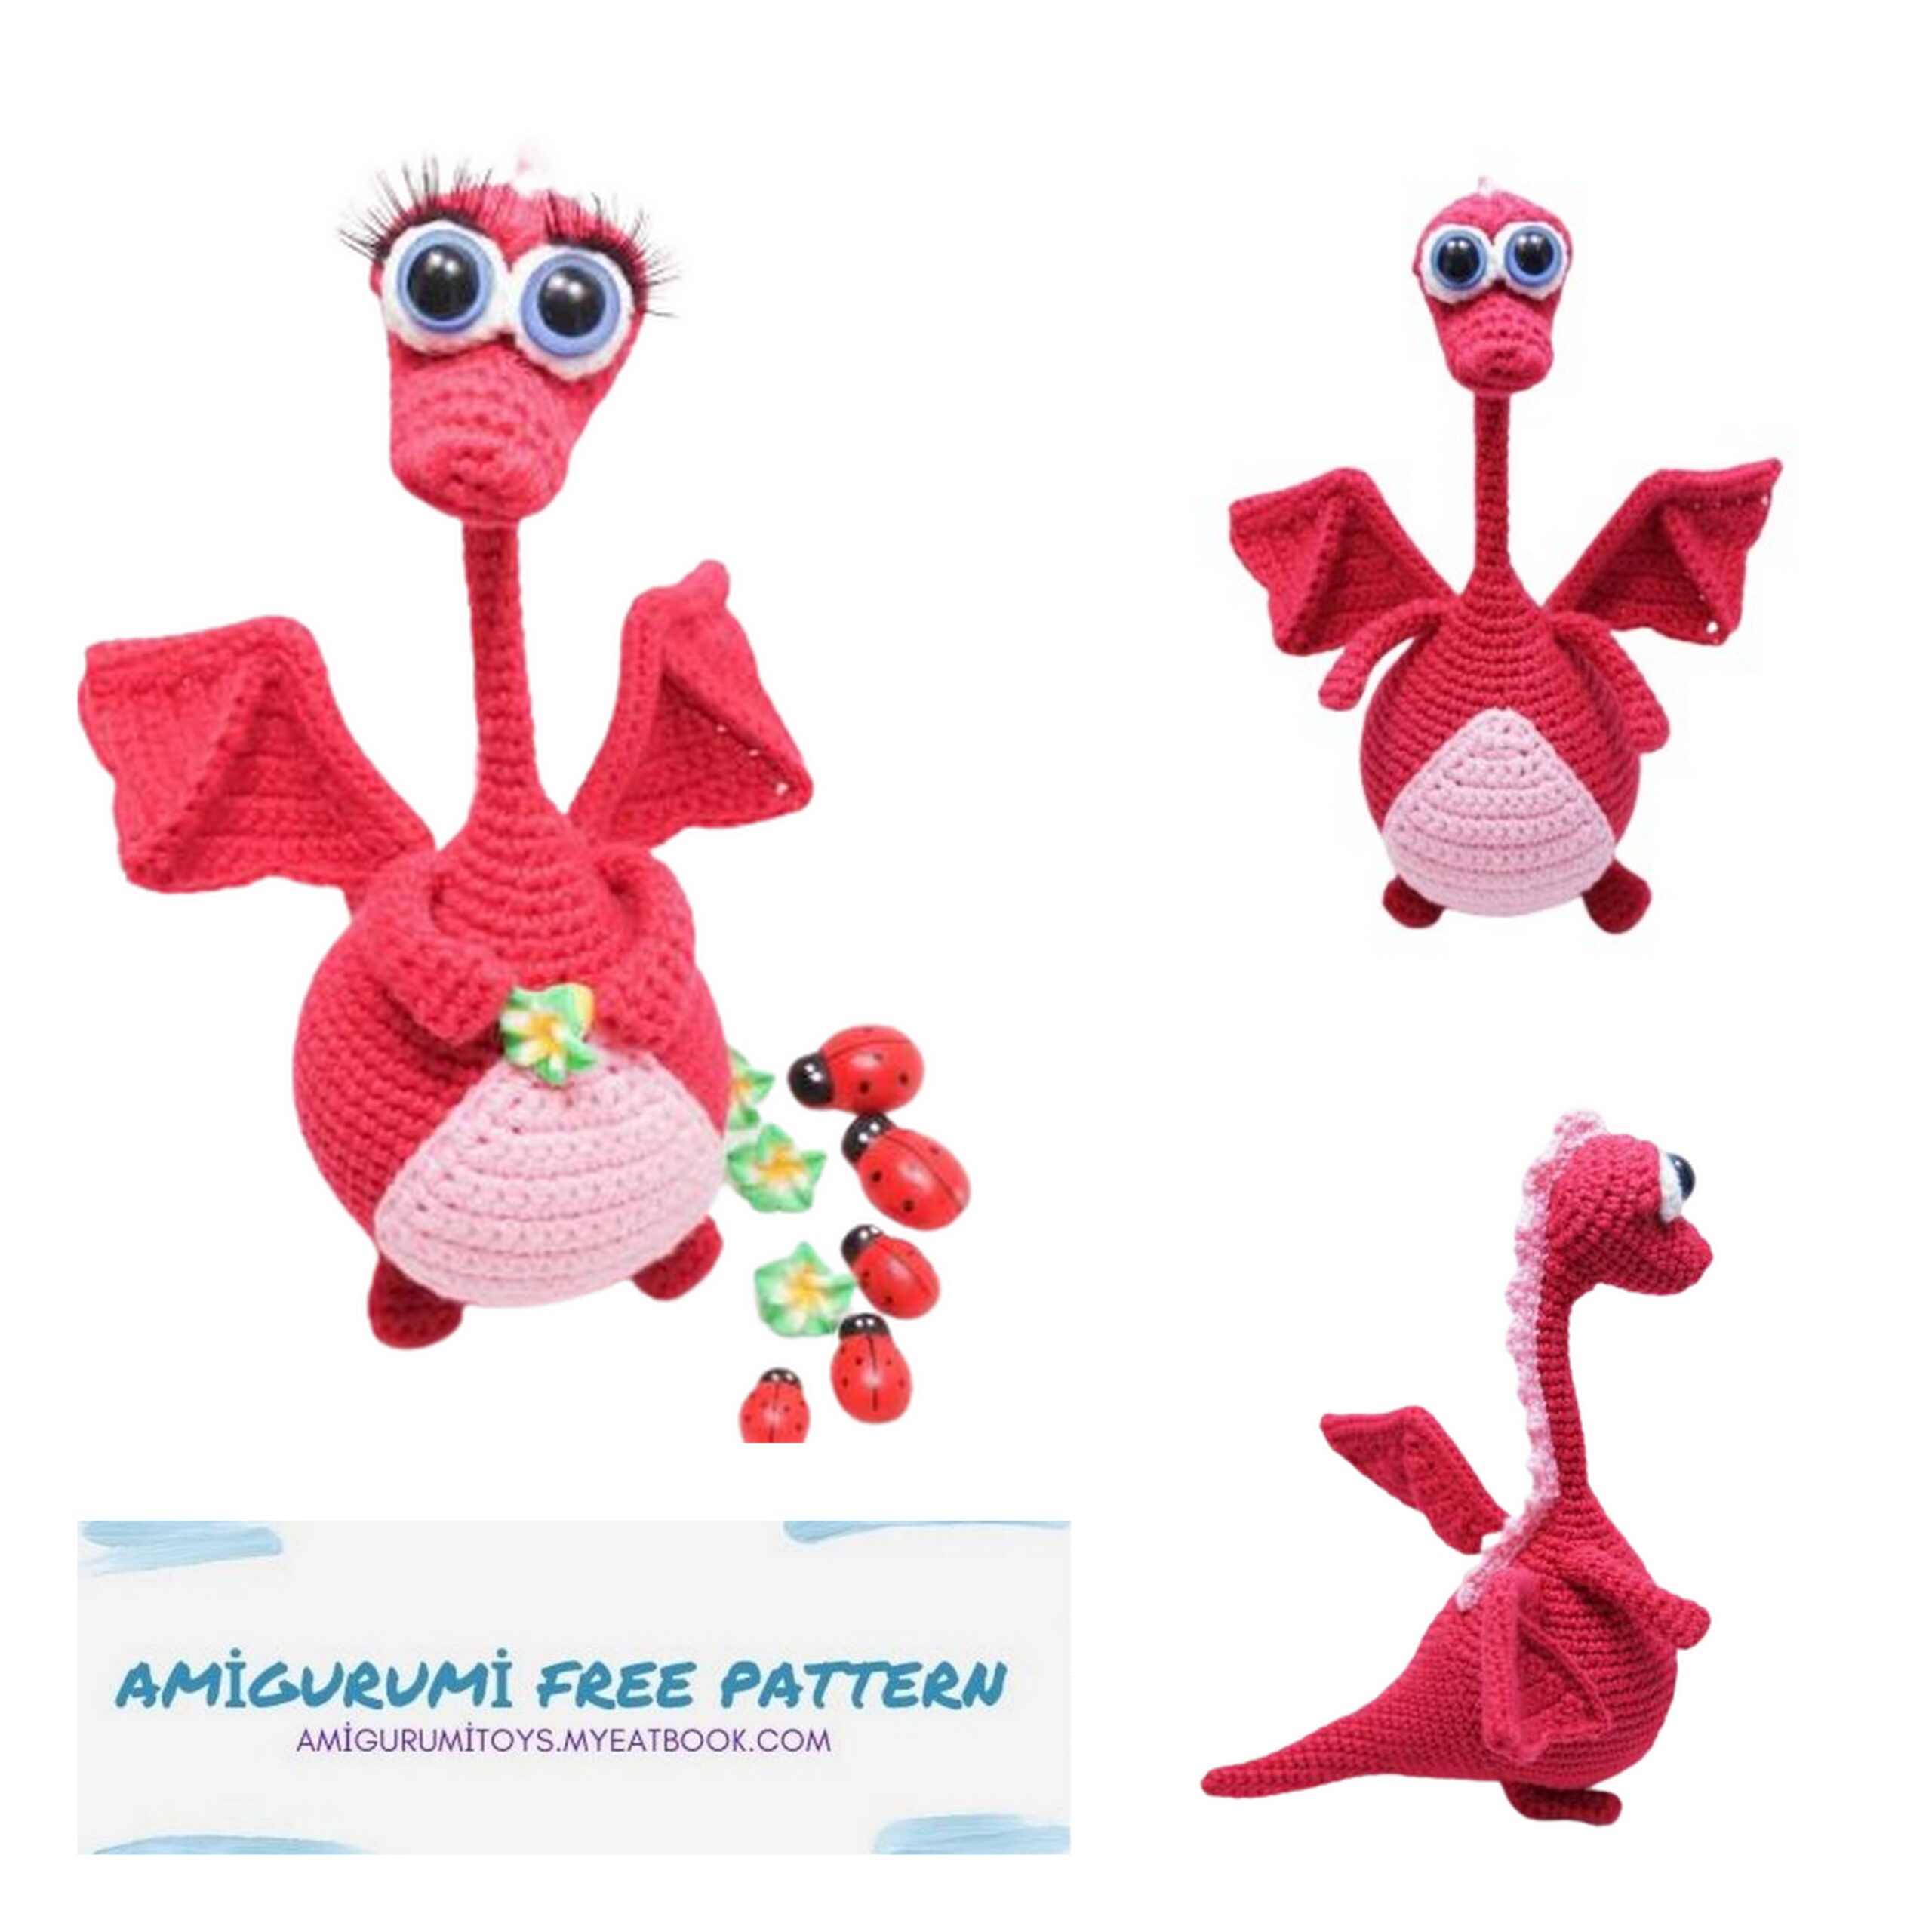
We continue to share the most beautiful and free amigurumi patterns for you. You can visit our website for Amigurumi Dragon Free Pattern and more patterns. amigurumi dragon free
“The Dragon”
Terms
CH = air loop
SC = single crochet
SL-ST= connecting loop
st = column
DC = double crochet
HDC = half double crochet
DEC = decrease
İNC = addition
( ) = repeat between ( ) number of times
MATERIAL
Yarn: “LIRA” Vita Cotton
Footage: 150 m
Weight: 50 gr
Color:
Red: No. 5024
Pink: No. 5005
White: No. 5001
Hook: 2.5mm (or according to the yarn you use)
12 mm safety eyes
Filler
0.5-0.6 mm steel wire 70 cm
Artificial eyelashes
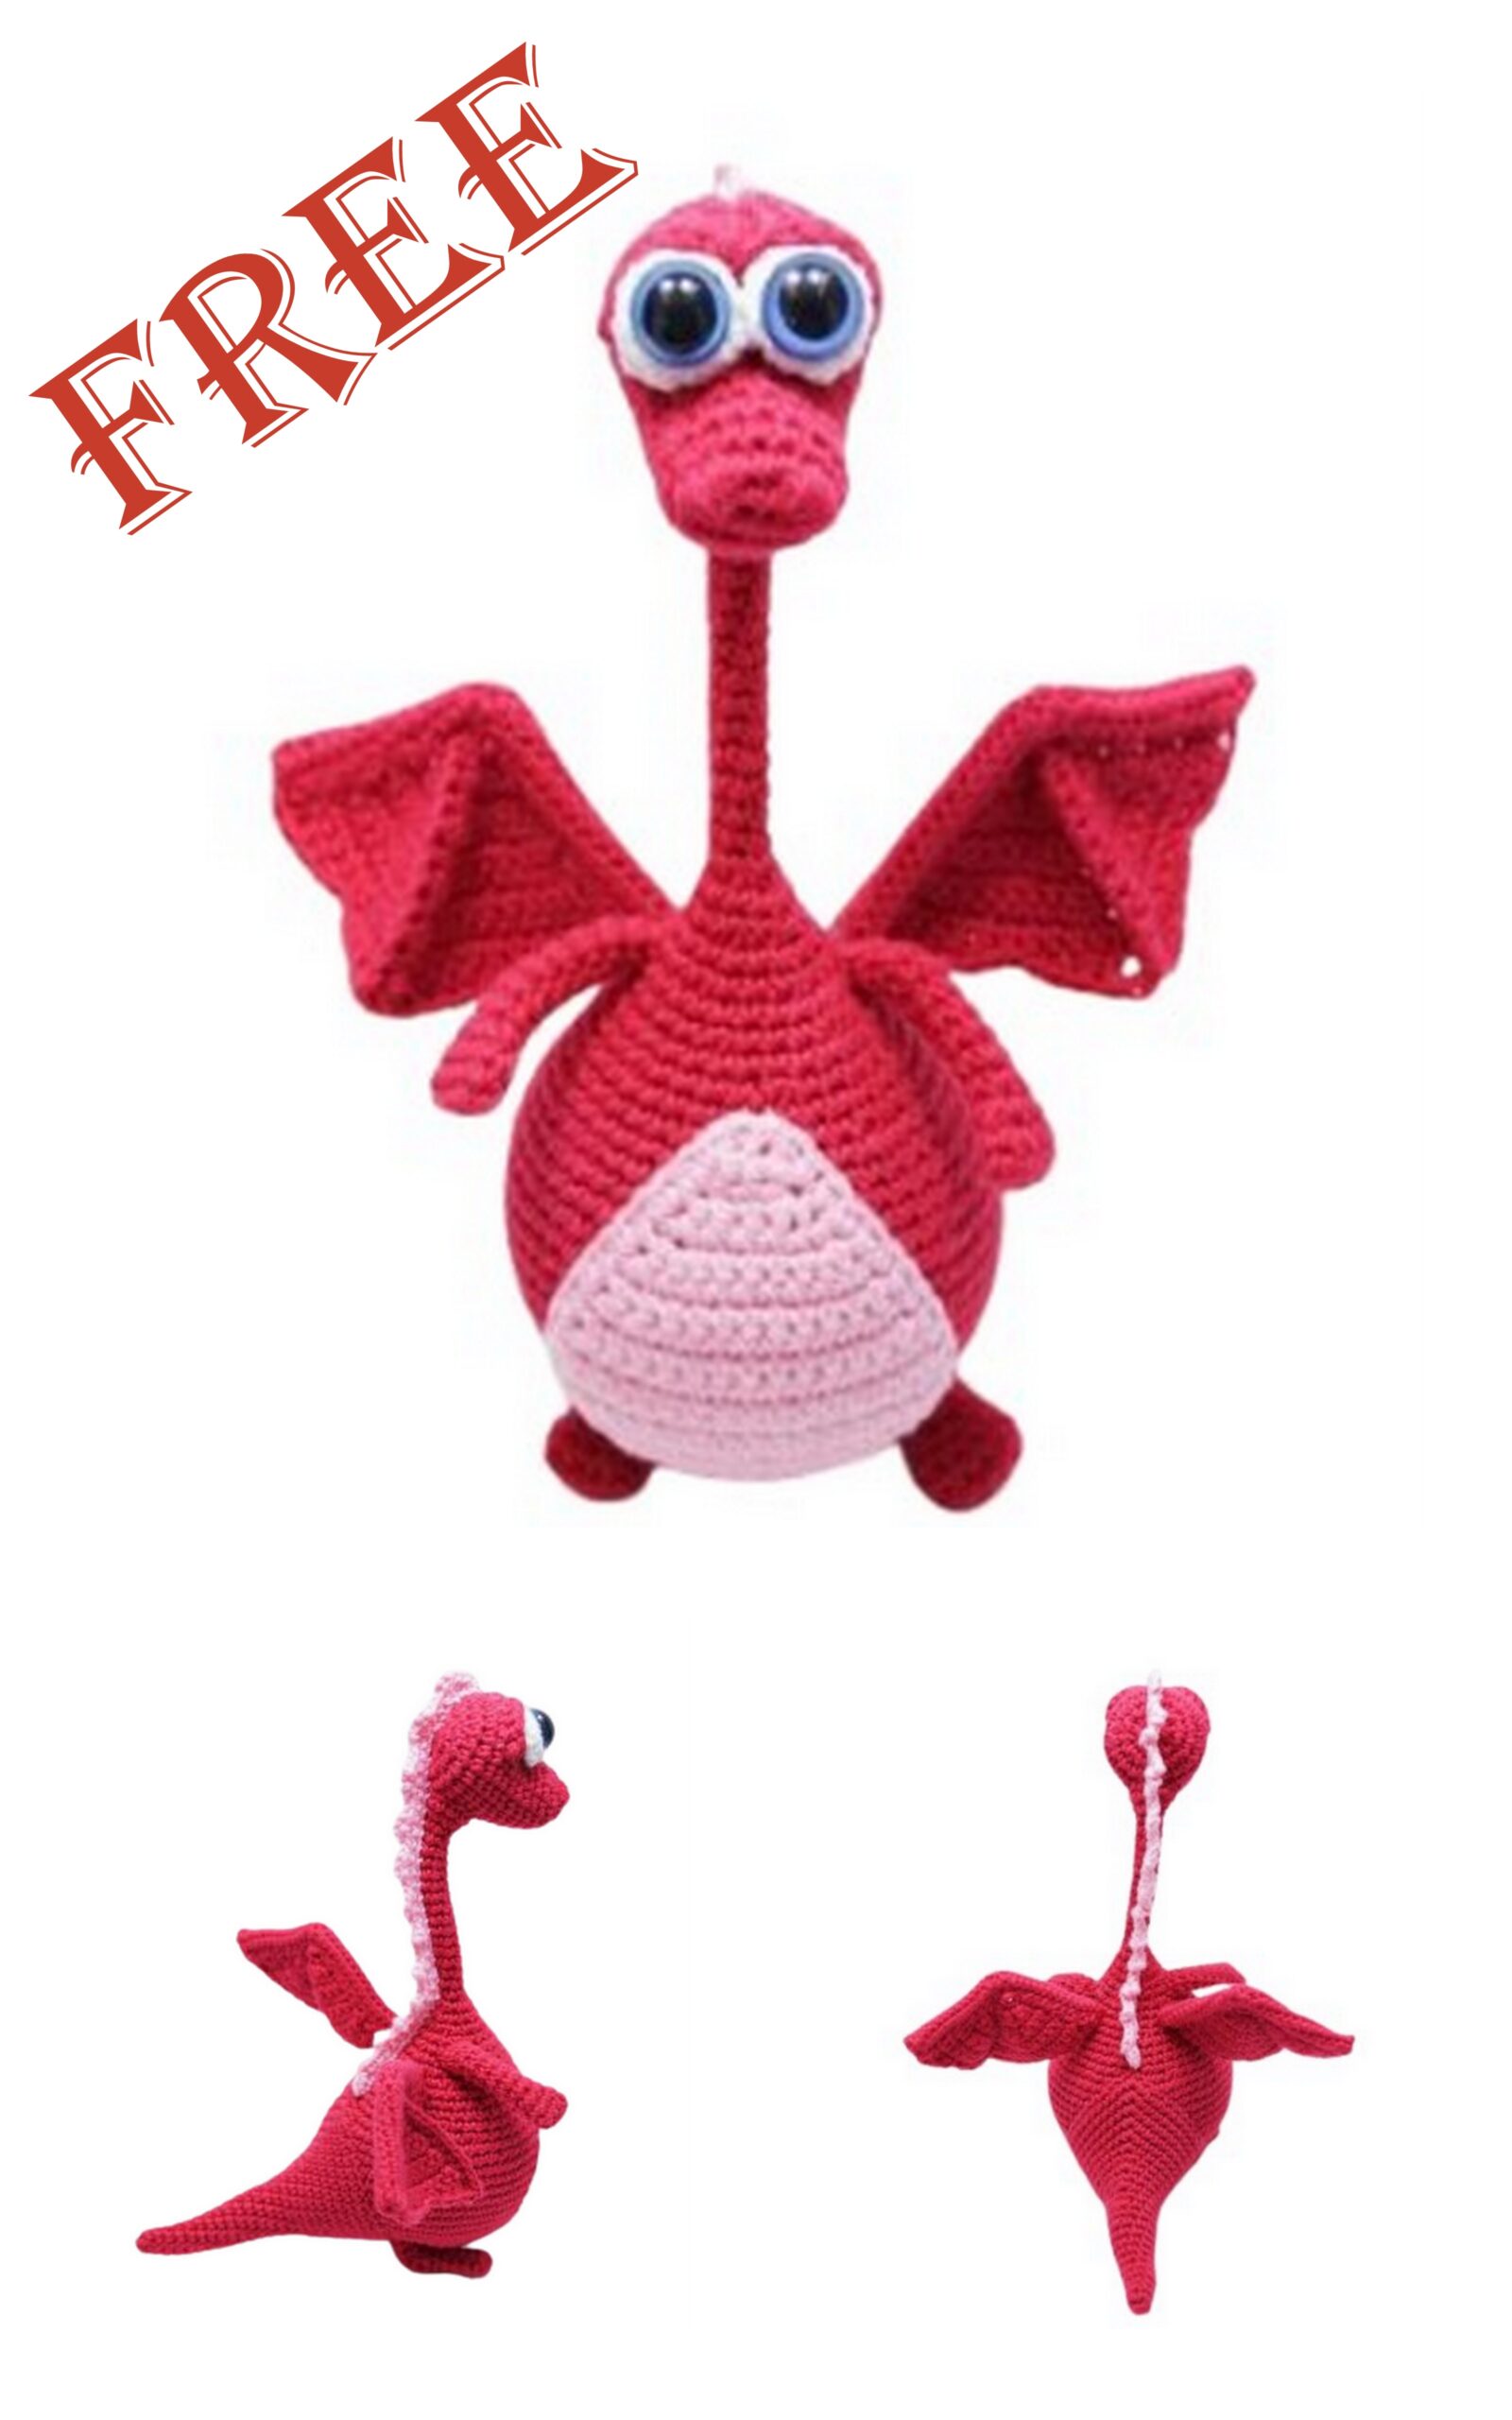
Legs
red
Chain CH4 + CH1
Row 1: İNC in 2 sts from hook, 2SC, 3SC in last st, other side of chain, 3SC [10]
Rows 2-3: SC in each st = [10]
Row 4: (DEC, SC 3) rep 2x = [8]
Row 5: SC in each st = [8]
Row 6: SC 2, DEC, SC 4 = [7]
Row 7: SC, CH1, turn, SC 4 = [4]
Row 8: CH1, turn, SC 4, DEC (1 st of 7th row and 1 st of 6th row – (see photo below), SC, DEC (6th row and 7th row) [7]
Rows 9-10: SC in each st[7]
Finish.
For the leg frame, a wire 20 cm long is required. It is better to use steel wire with a thickness of about 0.5-0.6 mm. I use a brush. Fold a little at one end of the wire and insert into the legs, bend the wire where the heel is.
Arms
red
Starting with chain CH3 + CH1
Row 1: 2SC in 2 sts from hook, 1SC, 3SC in 1 st, turn on reverse side of chain, 2SC [8]
Rows 2-3: SC in each st = [8]
Row 4: (DEC, SC 2) rep 2x = [6]
Rows 5-12: SC in each st = [6]
Finish.
Mark the length of the wire 15 cm. Make a hook at one end 2 cm long and insert together.

Body
red
Row 1: 6 SC in KA = [6]
Row 2: İNC in each st = [12]
Row 3: (SC, İNC) repeat 6 times = [18]
Row 4: (SC 2, İNC) repeat 6 times = [24]
Row 5: (SC 3, İNC) repeat 6 times = [30]
Row 6: (SC 4, İNC) repeat 6 times = [36]
Row 7: SC in each st = [36]
Row 8: (SC 5, İNC) repeat 6 times = [42]
Row 9: (SC 6, İNC) repeat 6 times = [48]
Row 10: SC in each st = [48]
Row 11: (SC 7, İNC) repeat 6 times = [54]
Rows 12-18: SC in each st = [54]
Row 19: (SC 7, DEC) repeat 6 times = [48]
Row 20: SC in each st = [48]
Row 21: (SC 6, DEC) repeat 6 times = [42]
Row 22: SC in each st = [42]
Row 23: (SC 5, DEC) repeat 6 times = [36]
Row 24: SC in each st = [36]
Row 25: (SC 4, DEC) repeat 6 times = [30]
Row 26: SC in each st = [30]
Row 27: (SC 3, DEC) repeat 6 times = [24]
Row 28: SC in each st = [24]
Row 29: (SC 2, DEC) repeat 6 times = [18]
Row 30: SC in each st = [18]
Row 31: (SC, DEC) repeat 6 times = [12]
The thread is not cut. Insert the wire leg into the body:
The location of the first leg is between the 5th and 6th rows of the body.
The location of the second leg is between the 5th and 6th rows of the body, the distance from the first leg is 10 columns.
We draw both ends of the wire in the neck of the body.
Insert the wire with your hands into the body between 25 and 26 rows. Pull the ends of the wire into the neck. All 4 “twist” together and fill the body tightly.
We continue to knit the body:
Row 32: SC in each st = [12]
Row 33: DEC repeat 6 times = [6]
Rows 34-46: SC in each st = [6]
Row 47: İNC repeat 6 times = [12]
Row 48: SC in each st = [12]
Finish.
Insert a wire about 7 cm long and cut. At the end of the wire, make a 2 cm bend length.
Eyes
White
Row 1: 10 SC in KA do not tighten – leave room for plastic eyes [10]
Row 2-3: SC in each st = [10]
Finish.
Insert the plastic eyes into the KA. Insert the thread of the remaining yarn into the needle and pull the needle under each of the loops in a row from the right side, behind the front wall of the loop and pull off.
Head
red
Starting with chain CH5 + CH1
Row 1: 1SC in 2 sts from hook, 3SC, 3SC in 1 st, on reverse side of chain, 3SC, İNC [12]
Row 2: İNC, SC 3, (İNC) repeat 3 times, SC 3, (İNC) repeat 2 times = [18]
Rows 3-7: SC in each st = [18]
Row 8: SC 3, (İNC) rep 4 times, SC 11 = [22]
Row 9: SC 6, (İNC) repeat 2 times, SC 16 = [24]
Row 10: SC 5, CH1, skip 1 st, SC 4, CH1, skip 1 st, SC 15 = [24]
Rows 11-14: SC in each st = [24]
Insert the protective eyes into the holes made in the 10th row. Fix the eyes on the inner rubber clips. The white thread is not cut.
Row 15: (DEC, SC 2) repeat 6 times = [18]
Row 16: (SC, DEC) repeat 6 times = [12]
Row 17: (DEC) repeat 6 times = [6]
Leave the thread 30 cm long and cut. Tighten the hole. The thread is not cut.
You need to sew proteins together. To do this, take the end of the white thread from any eyes.
Pull the thread through the whites of the eyes and pull the thread (see photo). Hide the end of the thread in the head.
Stretching of the muzzle. Take the end of the red thread and stretch it between 5 and 6 next (see diagram and photo below). Then pull the thread through the loop between the eyes.
Pull the thread to the first point, stepping back to the first 5th row. Pull the thread to the back of the head and pull up the head. Do not cut the thread (you will embroider the nostrils with it).
We embroider nostrils (see photo).
Eyelids
Fasten off between 10 and 11 rows and work – CH2, DC in the next st, HDC in each of the next 4 sts, SC in the next st in the row below the main row ov (between the eyes), HDC in each of the next 4 sts, DC in the next st. Leave a thread 15 cm long and cut.
Hide one end of the thread. They also do tightening between the eyes (where the middle is). Hide the thread inside the head and cut.
Tail
red
Row 1: 6 in MR = [6]
Rows 2-3: SC in each st = [6]
Row 3: SC, 3SC in 1 st, SC 4 = [8]
Rows 4-5: SC in each st = [8]
Row 6: SC 2, 3SC in 1 st, SC 5 = [10]
Rows 7-8: SC in each st = [10]
Row 9: SC 3, 3SC in 1 st, SC 6 = [12]
Rows 10-11: SC in each st = [12]
Row 12: SC 4, 3SC in 1 st, SC 7 = [14]
Row 13: SC in each st = [14]
Row 14: SC 5, 3SC in 1 st, SC 8 = [16]
Row 15: SC, İNC, SC 9, İNC, SC 4 = [18]
Row 16: SC 7, 3SC in 1 st, SC 10 = [20]
Row 17: İNC, SC 15, İNC, SC 3 = [22]
Row 18: SC, İNC, SC 7, 3SC in 1 st, SC 7, İNC, SC 4 = [26]
Row 19: SC 2, 3SC in 1 st, (SC 8, 3SC in 1 st) repeat 2 times, SC 5 = [32]
Row 20: SC in each st = [32]
Row 21: SC 14, 3SC in 1 st, SC 17 = [34]
Row 22: SC 3, 3SC in 1 st, (SC 11, 3SC in 1 st) repeat 2 times, SC 6 = [40]
Row 23: SC 18, 3SC in 1 st, SC 21 = [42] Finish.
Pin the tail, fill and sew to the body.
Insert the wire into the head between 12 and 13 rows. Sew the head to the neck.
RIGHT WING
red
The wings consist of three parts – a large and small wing, wing ribs.
Big Wing:
Starting with chain CH1 + CH1
Row 1: 2SC in 2 sts from hook = [2]
Row 2: CH1, turn, İNC repeat 2 times = [4]
Row 3: CH1, turn, İNC, SC 2, İNC = [6]
Row 4: CH1, turn, SC in each st = [6]
Row 5: CH1, turn, İNC, SC 4, İNC = [8]
Row 6: CH1, turn, SC in each st = [8]
Row 7: CH1, turn, İNC, SC 6, İNC = [10]
Row 8: CH1, turn, SC in each st = [10]
Row 9: CH1, turn, İNC, SC 8, İNC = [12]
Row 10: CH2, turn, DC , HDC 3, SC, SL-ST, SC, HDC 3, DC = [12]
Finish.
Small Wing:
Starting with chain CH1 + CH1
Row 1: 2SC in 2 sts from hook = [2]
Row 2: CH1, turn, İNC repeat 2 times = [4]
Row 3: CH1, turn, İNC, SC 2, İNC = [6]
Row 4: CH1, turn, SC in each st = [6]
Row 5: CH1, turn, İNC, SC 4, İNC [8]
Row 6: CH1, turn, SC in each st = [8]
Row 7: CH1, turn, İNC, SC 6, İNC [10]
Row 8: CH2, turn, DC, HDC 2, SC, SL-ST 2, SC, HDC 2, DC = [10]
The thread is not cut, it will connect the small wing to the large one Connect the small wing with SC. The thread is cut and hide.
Left wing
red
Small wing:
Starting with chain CH1 + CH1
Row 1: 2SC in 2 sts from hook = [2]
Row 2: CH1, turn, İNC repeat 2 times = [4]
Row 3: CH1, turn, İNC, SC 2, İNC = [6]
Row 4: CH1, turn, SC in each st = [6]
Row 5: CH1, turn, İNC, SC 4, İNC [8]
Row 6: CH1, turn, SC in each st = [8]
Row 7: CH1, turn, İNC, SC 6, İNC [10]
Row 8: CH2, turn, DC, HDC 2, SC, SL-ST 2, SC, HDC 2, DC = [10]
Finish.
Big Wing:
Starting with chain CH1 + CH1
Row 1: 2SC in 2 sts from hook = [2]
Row 2: CH1, turn, İNC repeat 2 times = [4]
Row 3: CH1, turn, İNC, SC 2, İNC = [6]
Row 4: CH1, turn, SC in each st = [6]
Row 5: CH1, turn, İNC, SC 4, İNC = [8]
Row 6: CH1, turn, SC in each st = [8]
Row 7: CH1, turn, İNC, SC 6, İNC = [10]
Row 8: CH1, turn, SC in each st = [10]
Row 9: CH1, turn, İNC, SC 8, İNC = [12]
Row 10: CH2, turn, DC, HDC 3, SC, SL-ST 2, SC, HDC 3, DC = [12]
The thread is not cut, it will connect the large wing to the small one.
Connect the big wing to the small one using SC. We cut the thread and hide it.
Wing edge (2 pcs.):
Hook 1.5mm. The front side will be inside the rib.
red
Row 1: 5 in KA = [5]
Rows 2-12: SC in each st = [5]
Row 13: DC 3, SC 2 [5]
Row 14: DC 3, SC 2 [5]
Rows 15-27: SC in each st = [5]
Do not tighten the hole, leave a thread 25 cm long and cut.
Sew the wings to the edge. Insert a wire 13 cm long.
Right wing:
Left wing:
Insert the wire into the body between the 26th and 27th rows. The distance between the wings is 6-7 loops. Sew on the wings.
crest
pink
Starting with chain CH40 + CH1
Row 1: 1SC in 2 sts from hook, 1SC, CH3, (1SC) repeat 3 times, CH 3, 1SC, (CH3, (1SC)-3 times)) repeat 10 times, 1SC. Air loops form a wave, do not skip the main loops of the row. Finish, do not cut the thread.
Stomach
pink
Starting with chain CH2 + CH1
Row 1: 2SC in 2 sts from hook, İNC = [4]
Row 2: CH1, turn, SC in each st = [4]
Row 3: CH1, turn, İNC, SC 2, İNC = [6]
Row 4: CH1, turn, SC in each st = [6]
Row 5: CH1, turn, İNC, SC 4, İNC = [8]
Row 6: CH1, turn, İNC, SC 6, İNC = [10]
Row 7: CH1, turn, SC, İNC, SC 6, İNC, SC = [12]
Row 8: CH1, turn, SC in each st = [12]
Row 9: CH1, turn, İNC, SC 10, İNC = [14]
Rows 10-13: CH1, turn, SC in each st = [14]
Row 14: CH1, turn, DEC, SC 10, DEC = [12]
Row 15: CH1, turn, DEC, SC 8, DEC = [10]
Row 16: CH1, turn, SC in each st == [10]
Row 17: CH1, turn, DEC, SC 6, DEC = [8]
Row 18: CH1, turn, DEC, SC 4, DEC = [6]
Row 19: CH1, turn, DEC, SC 2, DEC = [4]
Row 20: CH1, turn, (DEC) rep 2 times = [2]
Row 21: CH1, Bind SL-ST around the entire abdomen. Finish. amigurumi dragon free
Eyelashes
For eyelashes, I used false eyelashes from the store – they come in the form of strips with glue. Cut 1 eyelash into 2 parts.
Use pins to lift eyelids: amigurumi dragon free
We glue the eyelashes with dot glue and again return the eyelids to their original position: amigurumi dragon free