Friends, hello everyone! ❤
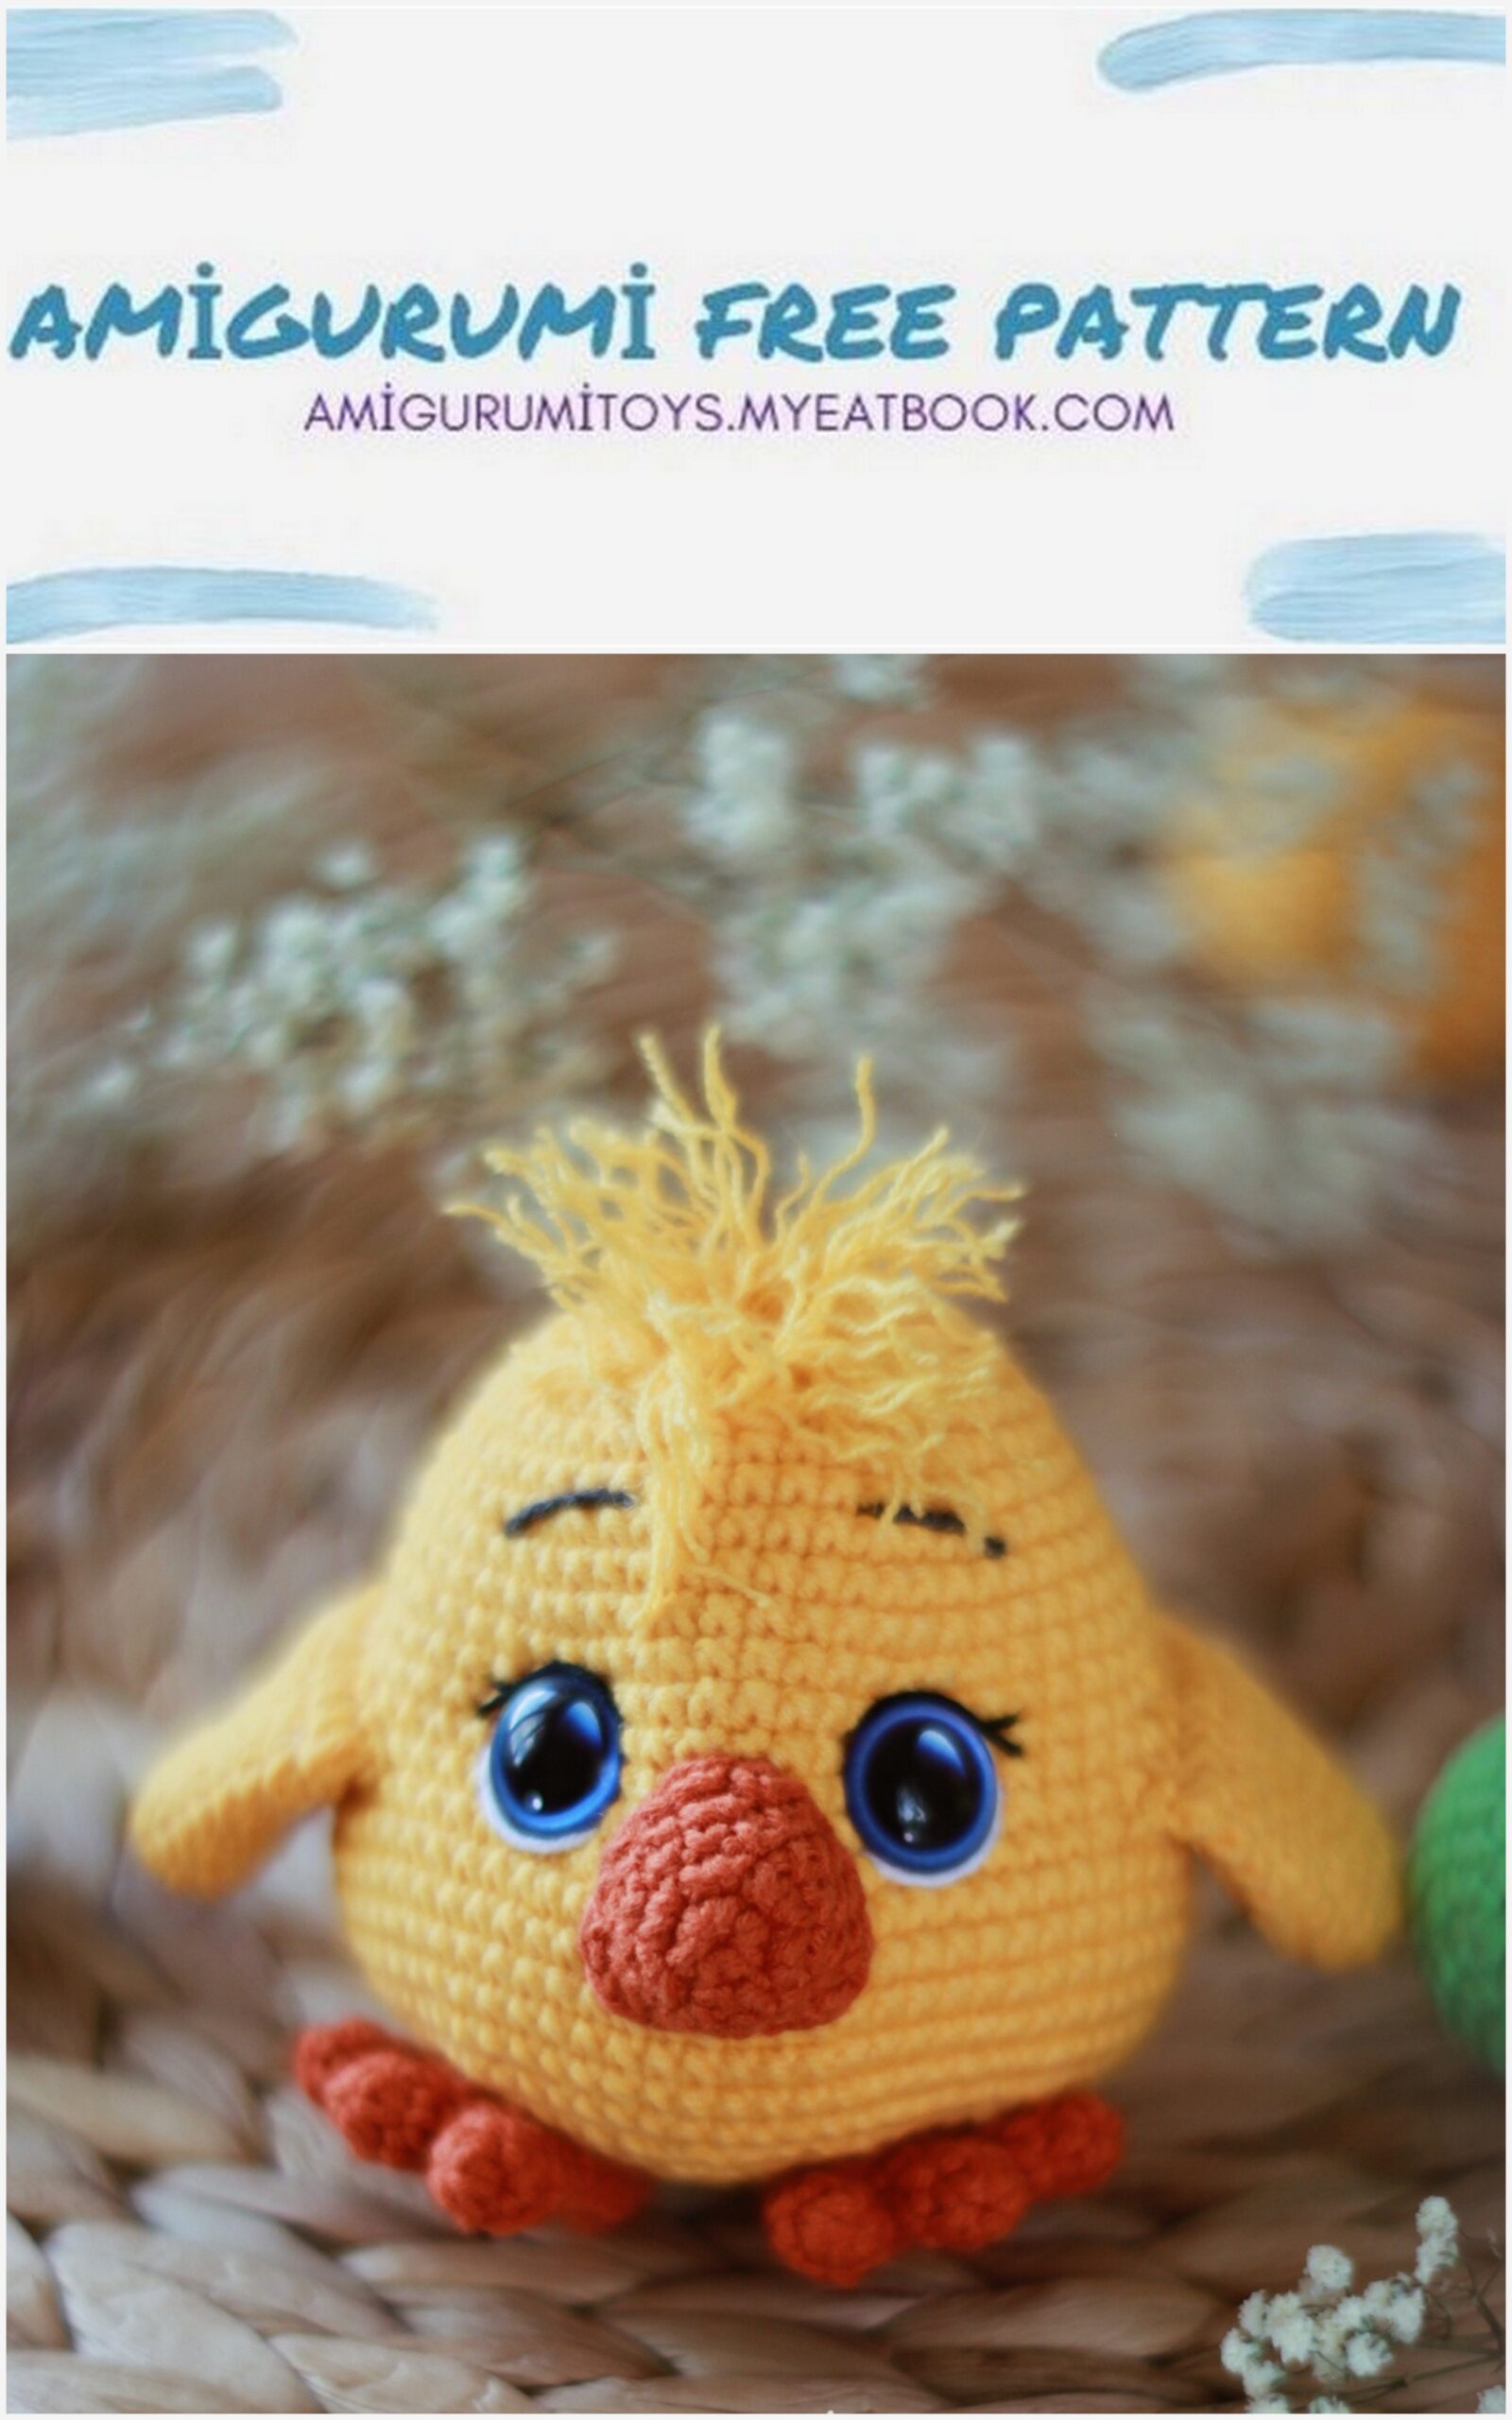
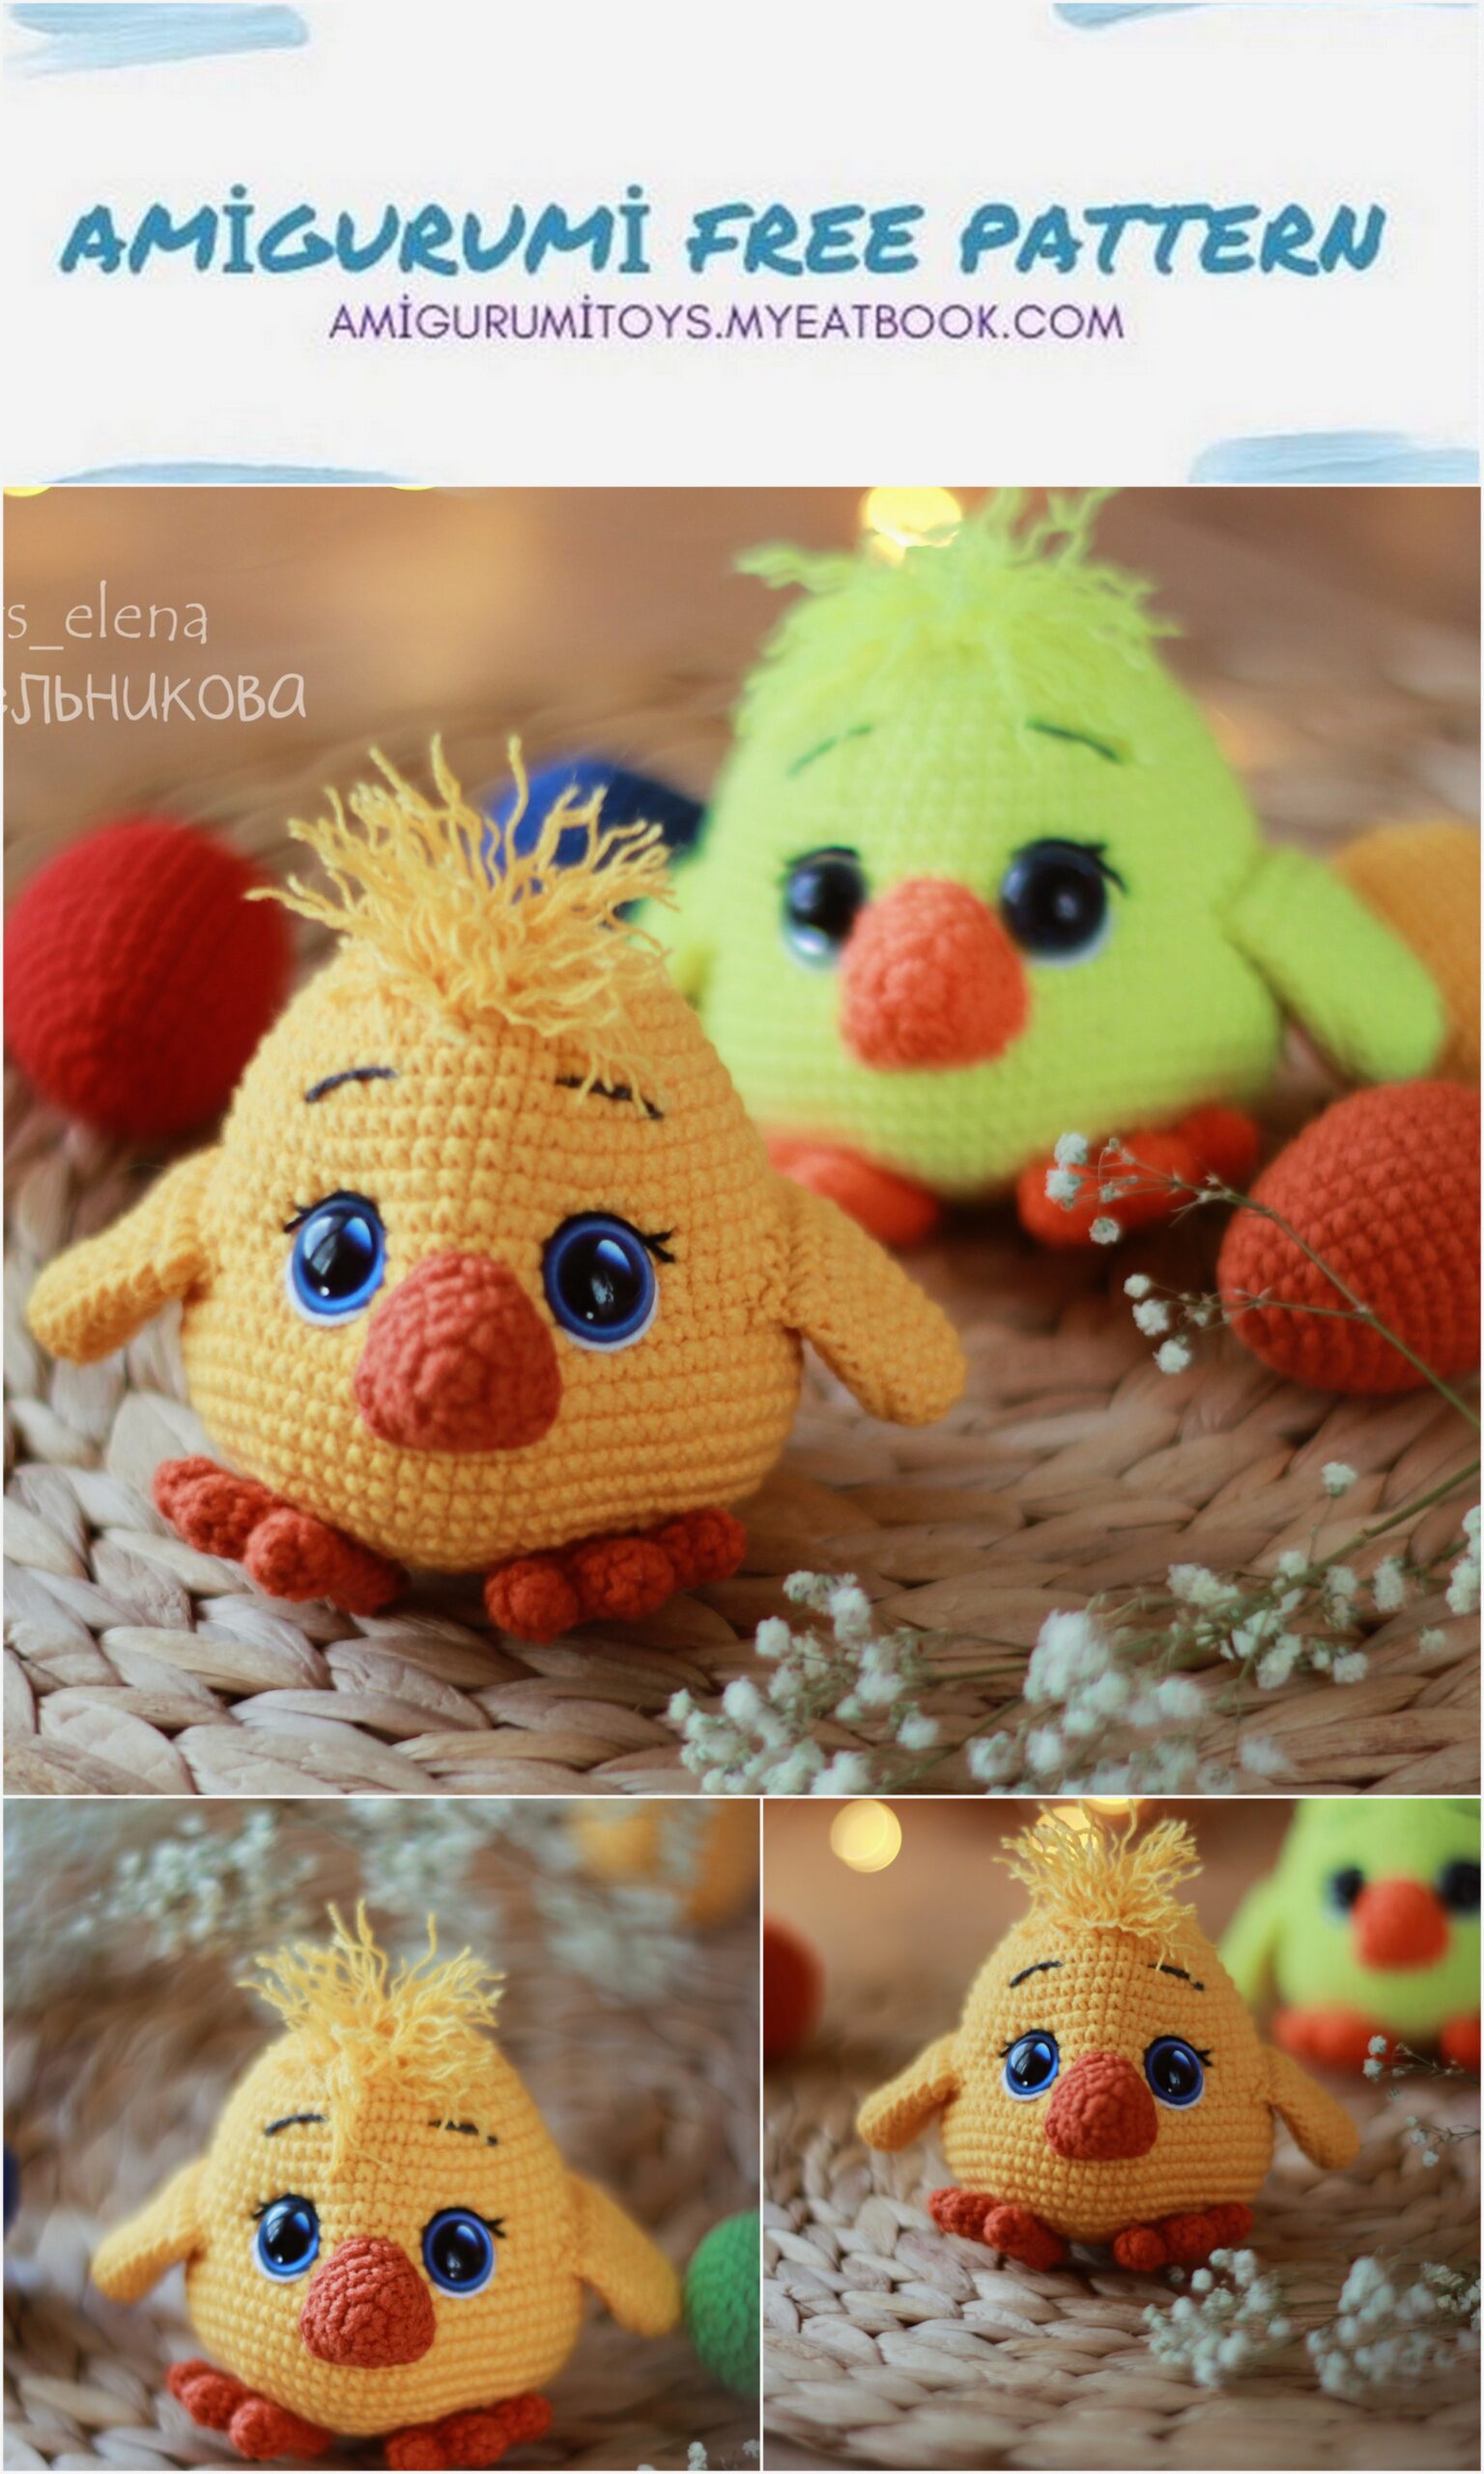
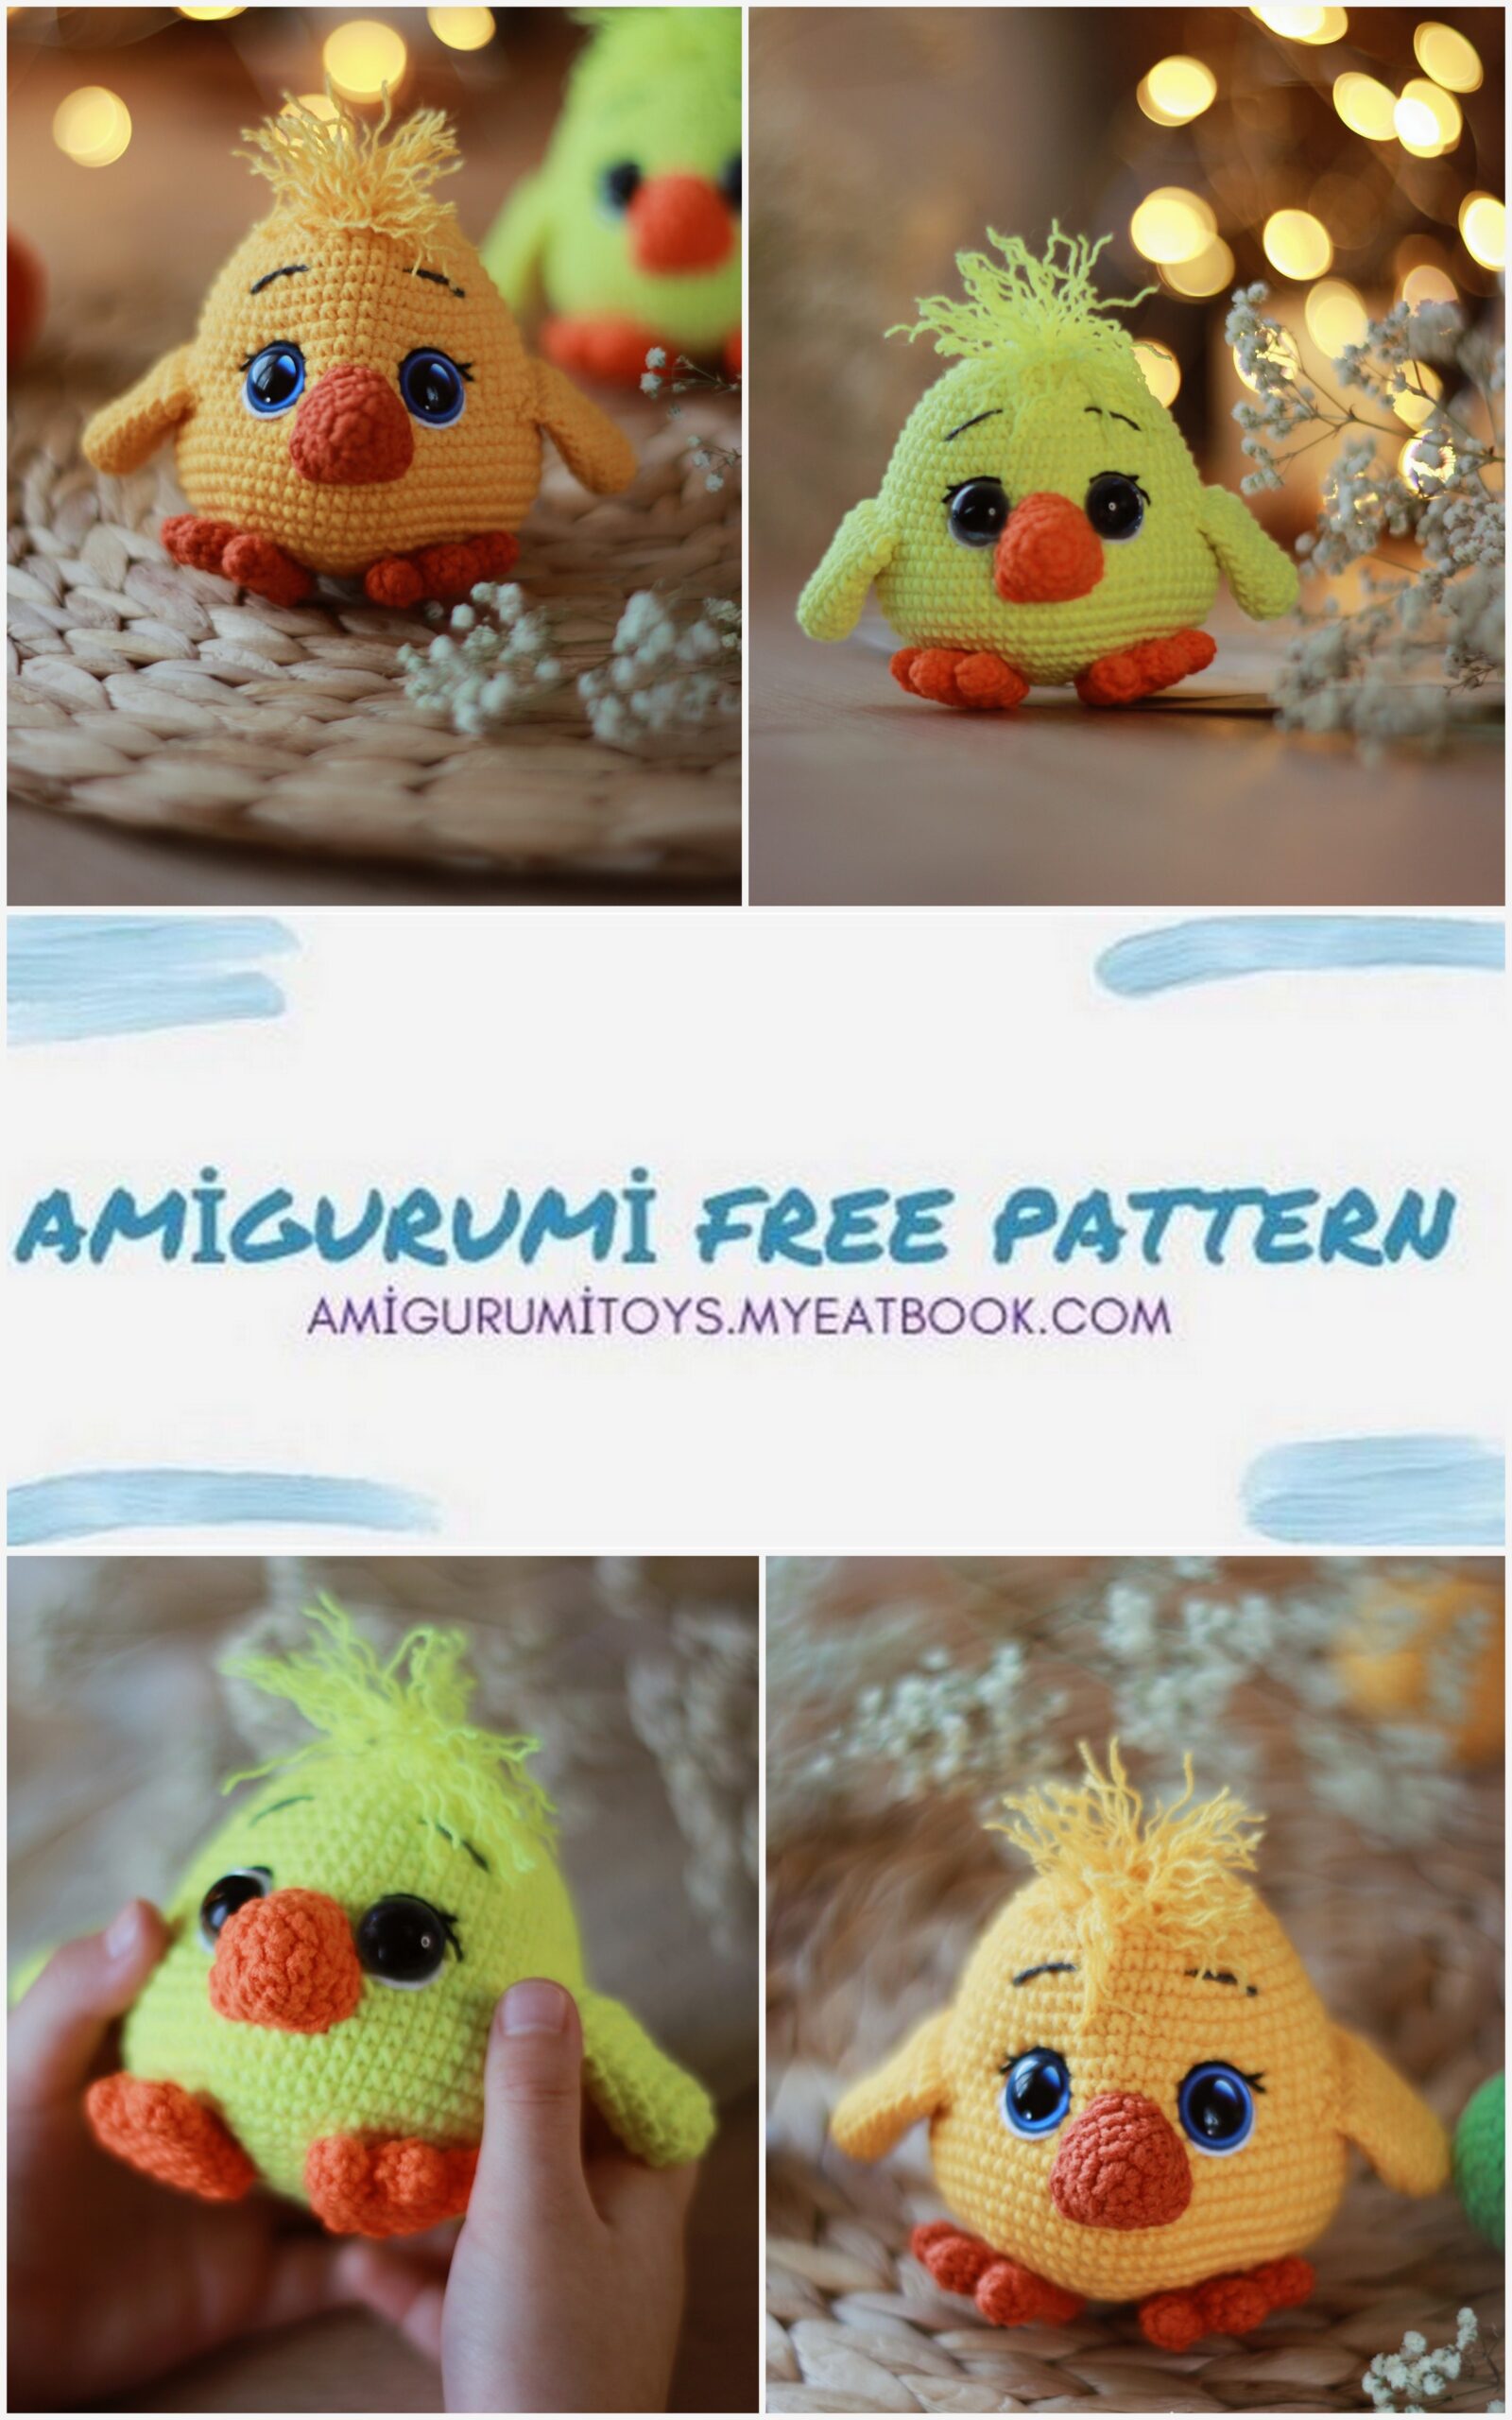
I am happy to give you a free description of the chicken ?
materials
• Yarn
– YarnArt Jeans (50g/160m), color (35) – yellow
– YarnArt Jeans (50g/160m), color (85) – terracotta
• Filler
• Tools: hook 1.75 mm, scissors, needle for
stitching parts, glue
• Eyes 14 mm
• Fine black and white thread for embroidery expressiveness peephole
When using these materials, the size toys is about 9 cm
!Be sure to take good mood, no way without it)))

Legend:
MR – amigurumi ring
CH – air loop
SC – single crochet
İNC – increase
DEC – decrease
SL-ST – connecting post
(…) – the number in brackets indicates the number of loops in the row
(…)*n – repeat n times the value in parentheses
Head/Body
Knit with yellow yarn.
1 row: 6 SC in MR
2 row: 6 İNC (12)
3 row: (1 SC, İNC) * 6 (18)
4 row: 1 SC, İNC, (2 SC, İNC) * 5, 1 SC (24)
5 row: (3 SC, İNC) * 6 (30)
6 row: 2 SC, İNC, (4 SC, İNC) * 5, 2 SC (36)
7 row: 36 SC
8 row: (5 SC, İNC) * 6 (42)
9 row: 42 SC
10 row: 3 SC, İNC, (6 SC, İNC) * 5, 3 SC (48)
11-12 row: 48 SC (2 rows)
13 row: (7 SC, İNC) * 6 (54)
14-15 row: 54 SC (2 rows)
! If you paste
safety eyelets.
We insert eyes on a secure mount between 15 and 16 rows, the distance between the eye is 9 loops (SC).
16 row: 4 SC, İNC, (8 SC, İNC) * 5, 4 SC (60)
17 row: 60 SC
18 row: (9 SC, İNC) * 6 (66)
19-24 row: 66 SC (6 rows)
25 row: (4 SC, DEC) * 11 (55)
26 row: (3 SC, DEC) * 11 (44)
27 row: (2 SC, DEC) * 11 (33)
28 row: (9 SC, DEC) * 3 (30)
Fill the part tightly with filler.
29 row: (3 SC, DEC) * 6 (24)
30 row: (2 SC, DEC) * 6 (18)
31 row: (1 SC, DEC) * 6 (12)
32 row: 6 DEC
We tighten all the loops.
Wings
Knit with yellow yarn.
1 row: 6 SC in MR
2 row: 6 İNC (12)
3rd row: 12 SC
4 row: (3 SC, İNC) * 3 (15)
5 row: 15 SC
6 row: (4 SC, İNC) * 3 (18)
7 row: 18 SC
8 row: (5 SC, İNC) * 3 (21)
9 row: 21 SC
Put together and knit 10 SC. Part not fill.
Paws
Start knitting with fingers.
1 row: 6 SC in MR
2 row: 6 SC Knit 3 fingers. On the third finger, we do not cut the thread, but continue to knit further. We connect fingers:
3 row: 3 SC on the 2nd finger, 6 SC on the 1st finger, 3 SC on the 2nd finger, 6 SC on the 3rd finger (18)
4 row: (4 SC, DEC) * 3 (15)
5 row: 15 SC
6 row: (3 SC, DEC) * 3 (12)
7th row: 12 SC
8 row: 6 DEC
We tighten all the loops. We do not stuff the details.
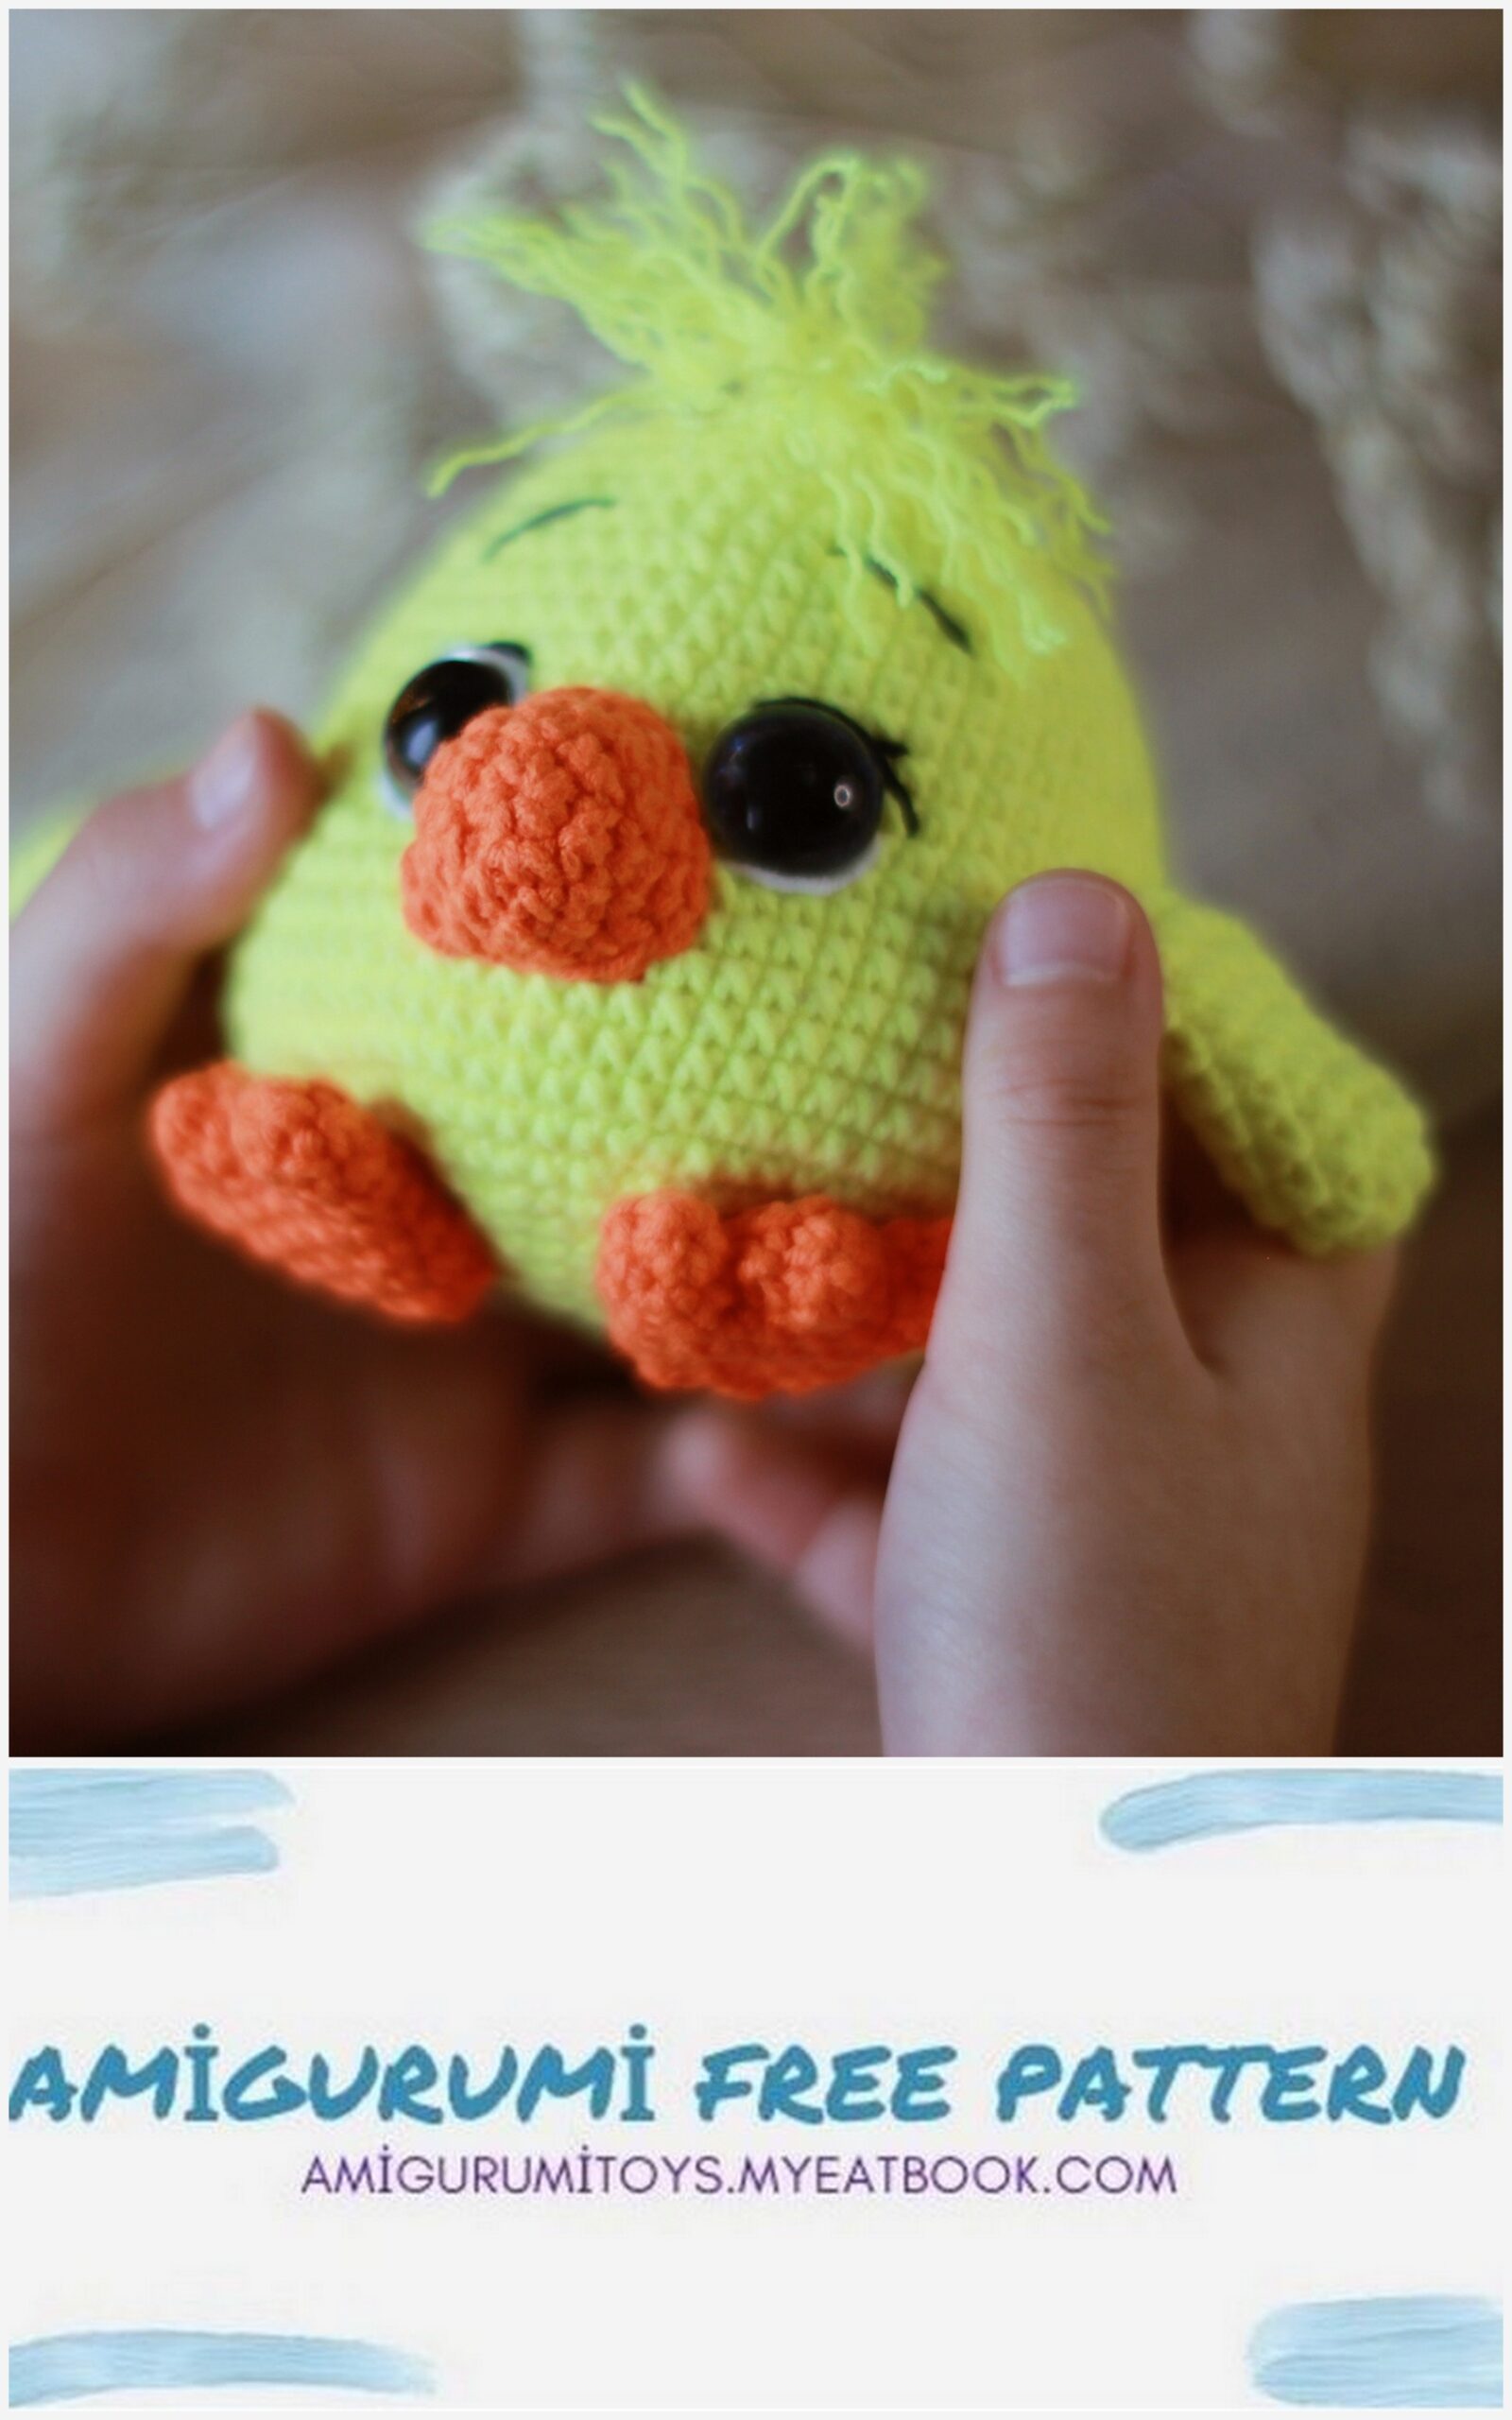
Beak
We knit with terracotta yarn.
1 row: 6 SC in MR
2 row: 6 İNC (12)
3rd row: 12 SC
4 row: (3 SC, İNC) * 3 (15)
5 row: (3 SC, 2 İNC) * 3 (21)
Fasten and cut the thread leaving a long thread for stitching.

Assembly and decoration
We make a tightening. We mark with needles (pins) the places where we will make an eye tightening. Between 15 and 16 rows, the distance between needles (pins) is 9 loops (SC).
Eyes 14 mm, I used carbochons. We glue the eyes in places of the tightening.
Sew on the beak. When sewing on the beak, it needs to be filled with a little filler.
We embroider with white and black threads around the eye, for expressiveness (see photo).
We sew paws.
Sew wings on the sides.
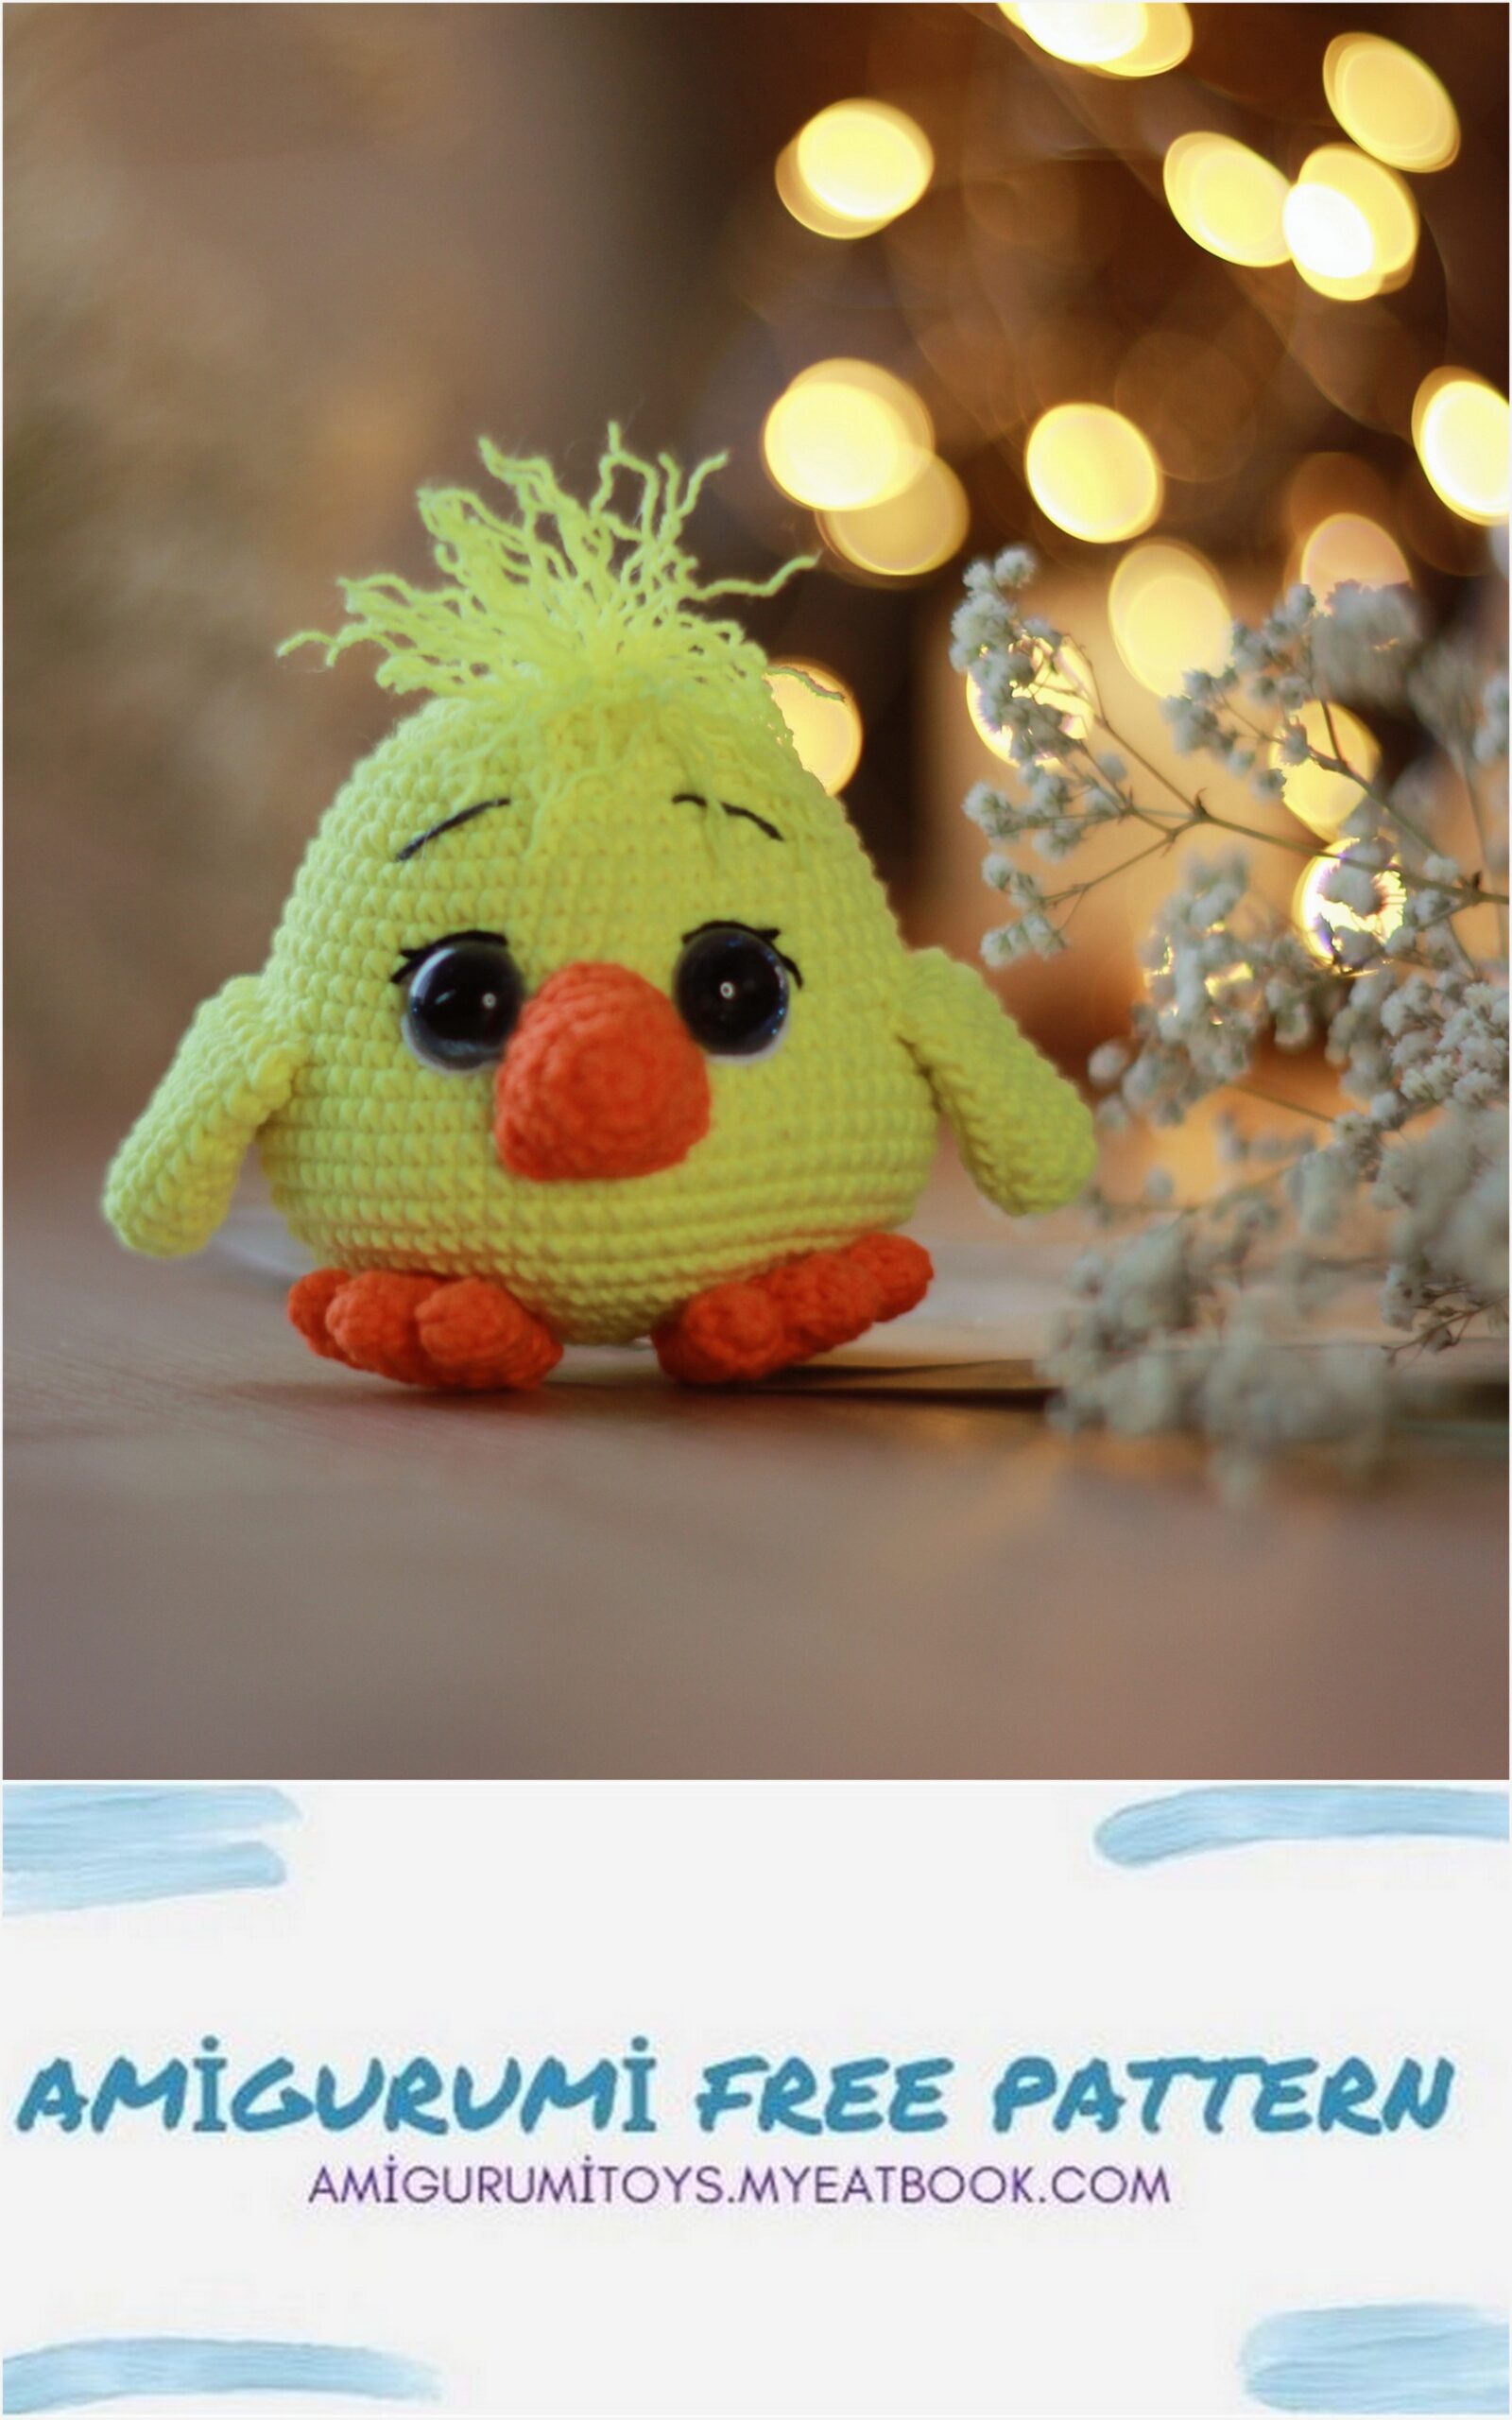
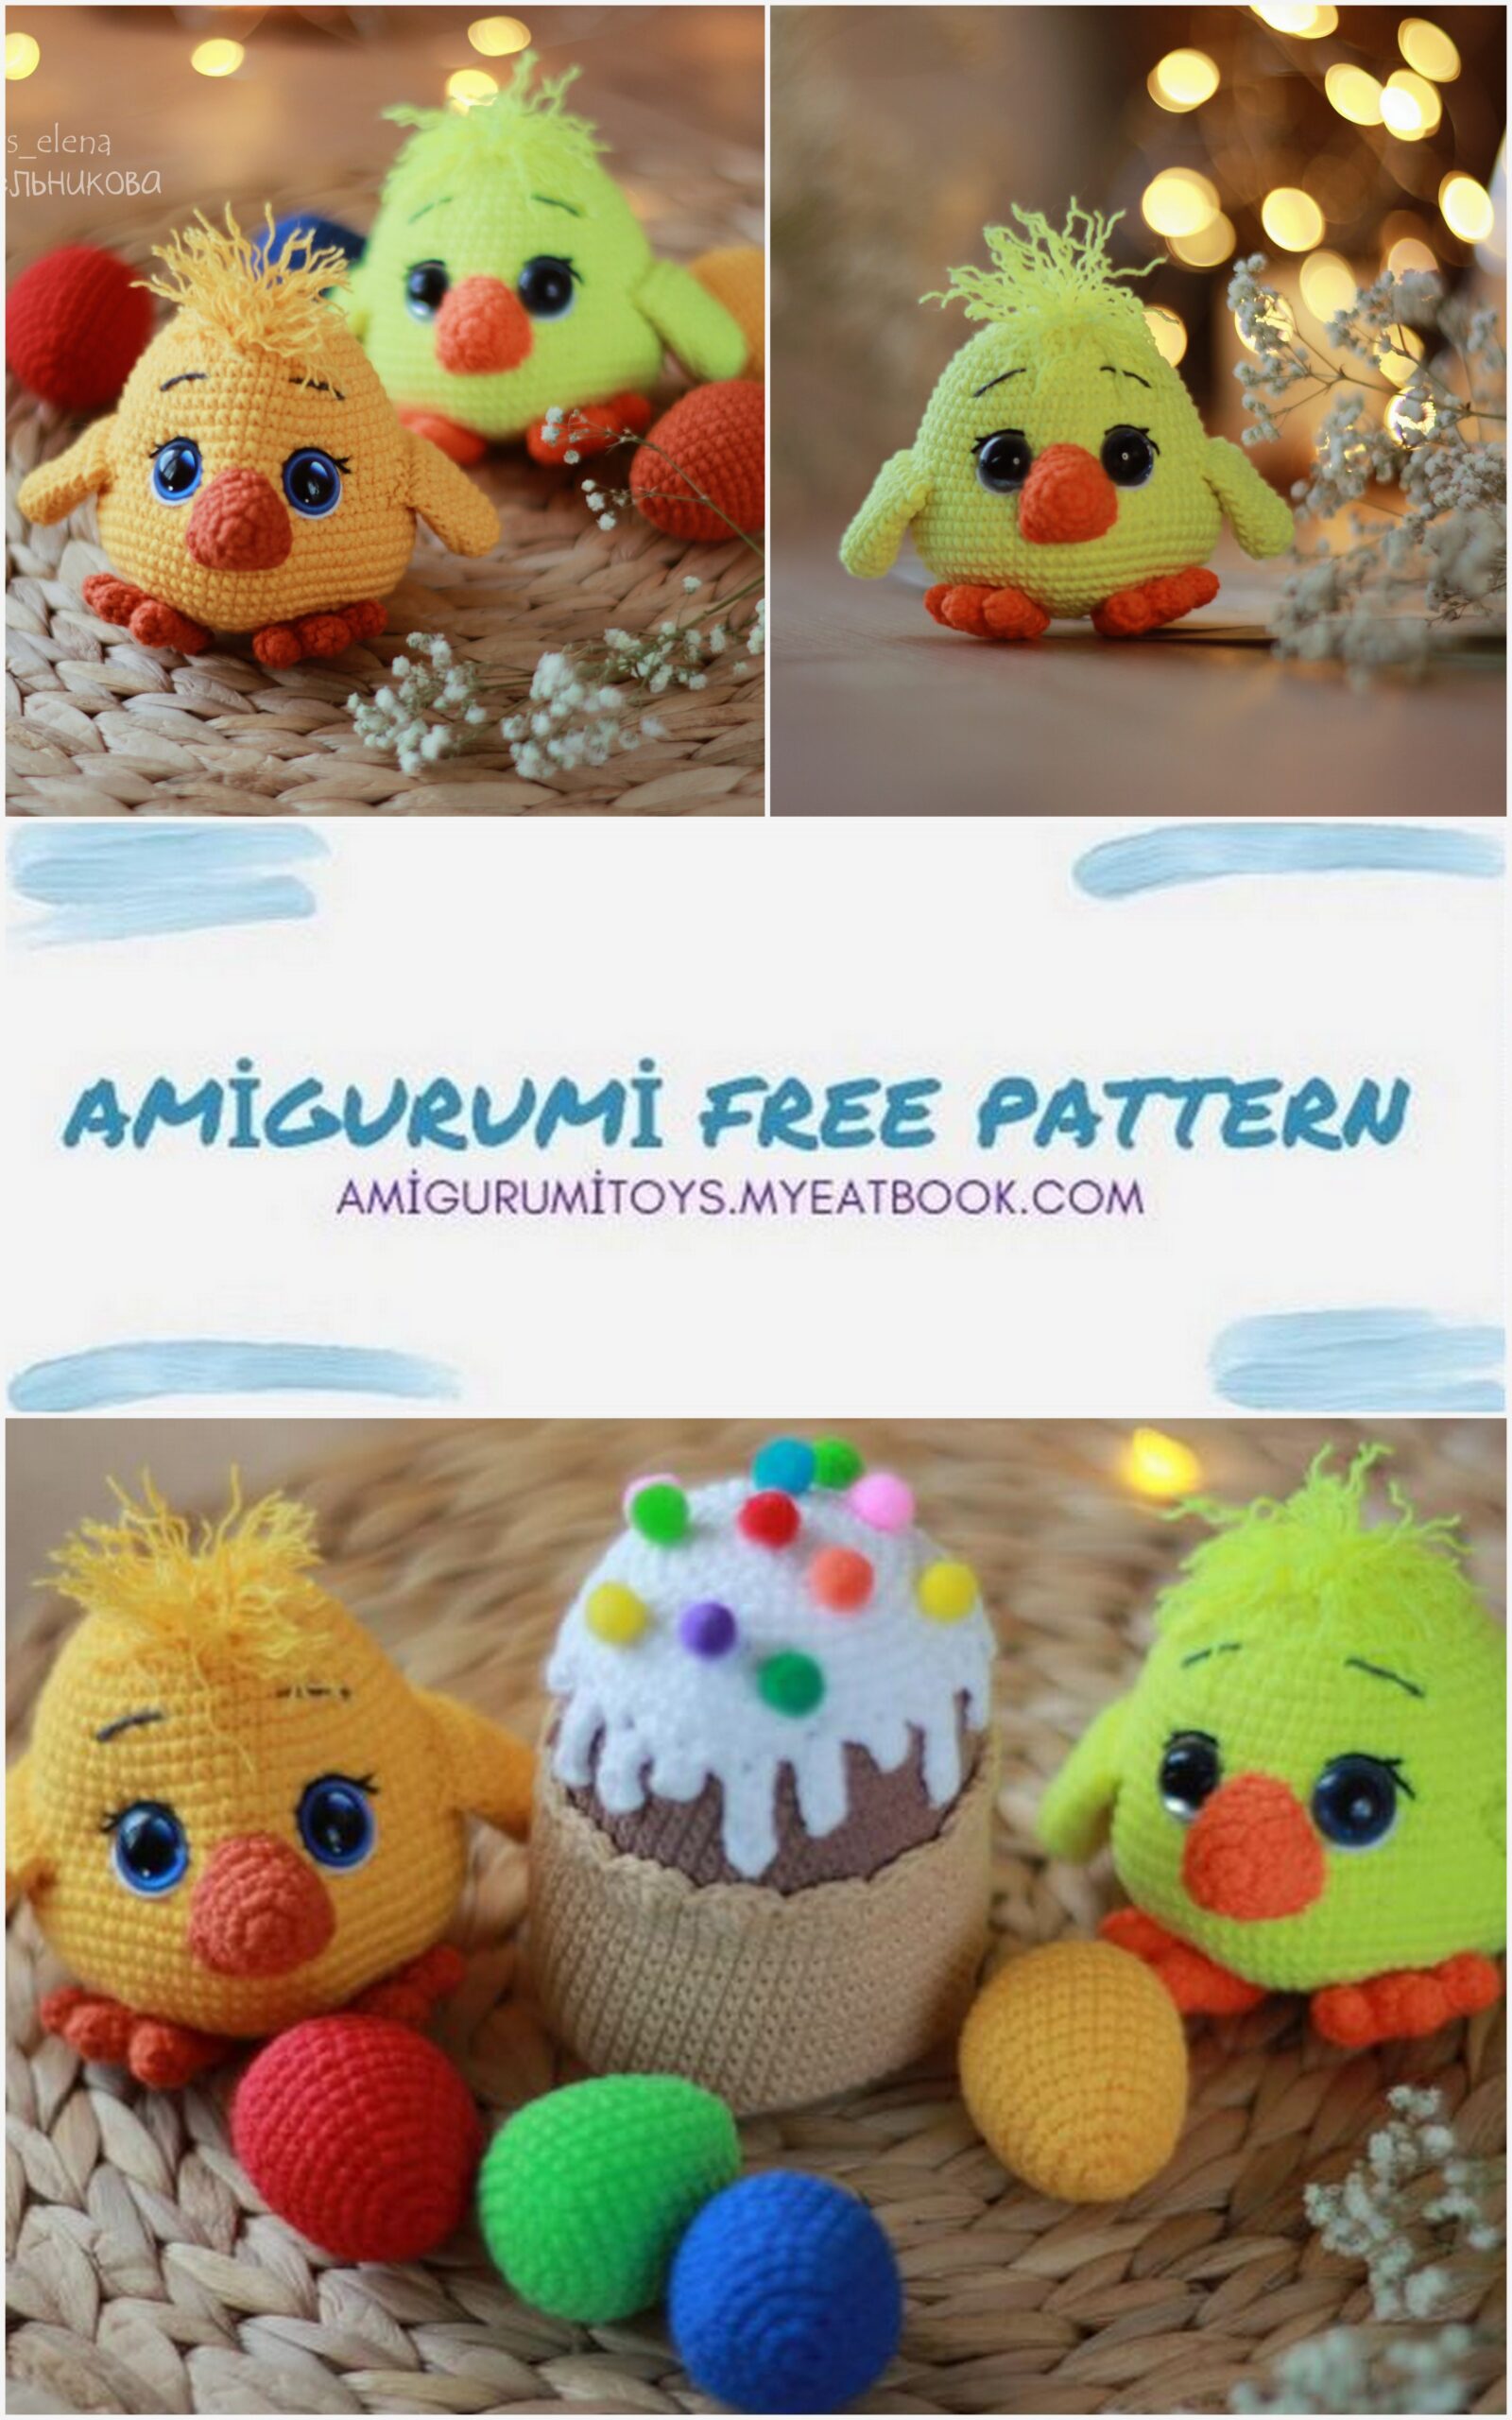
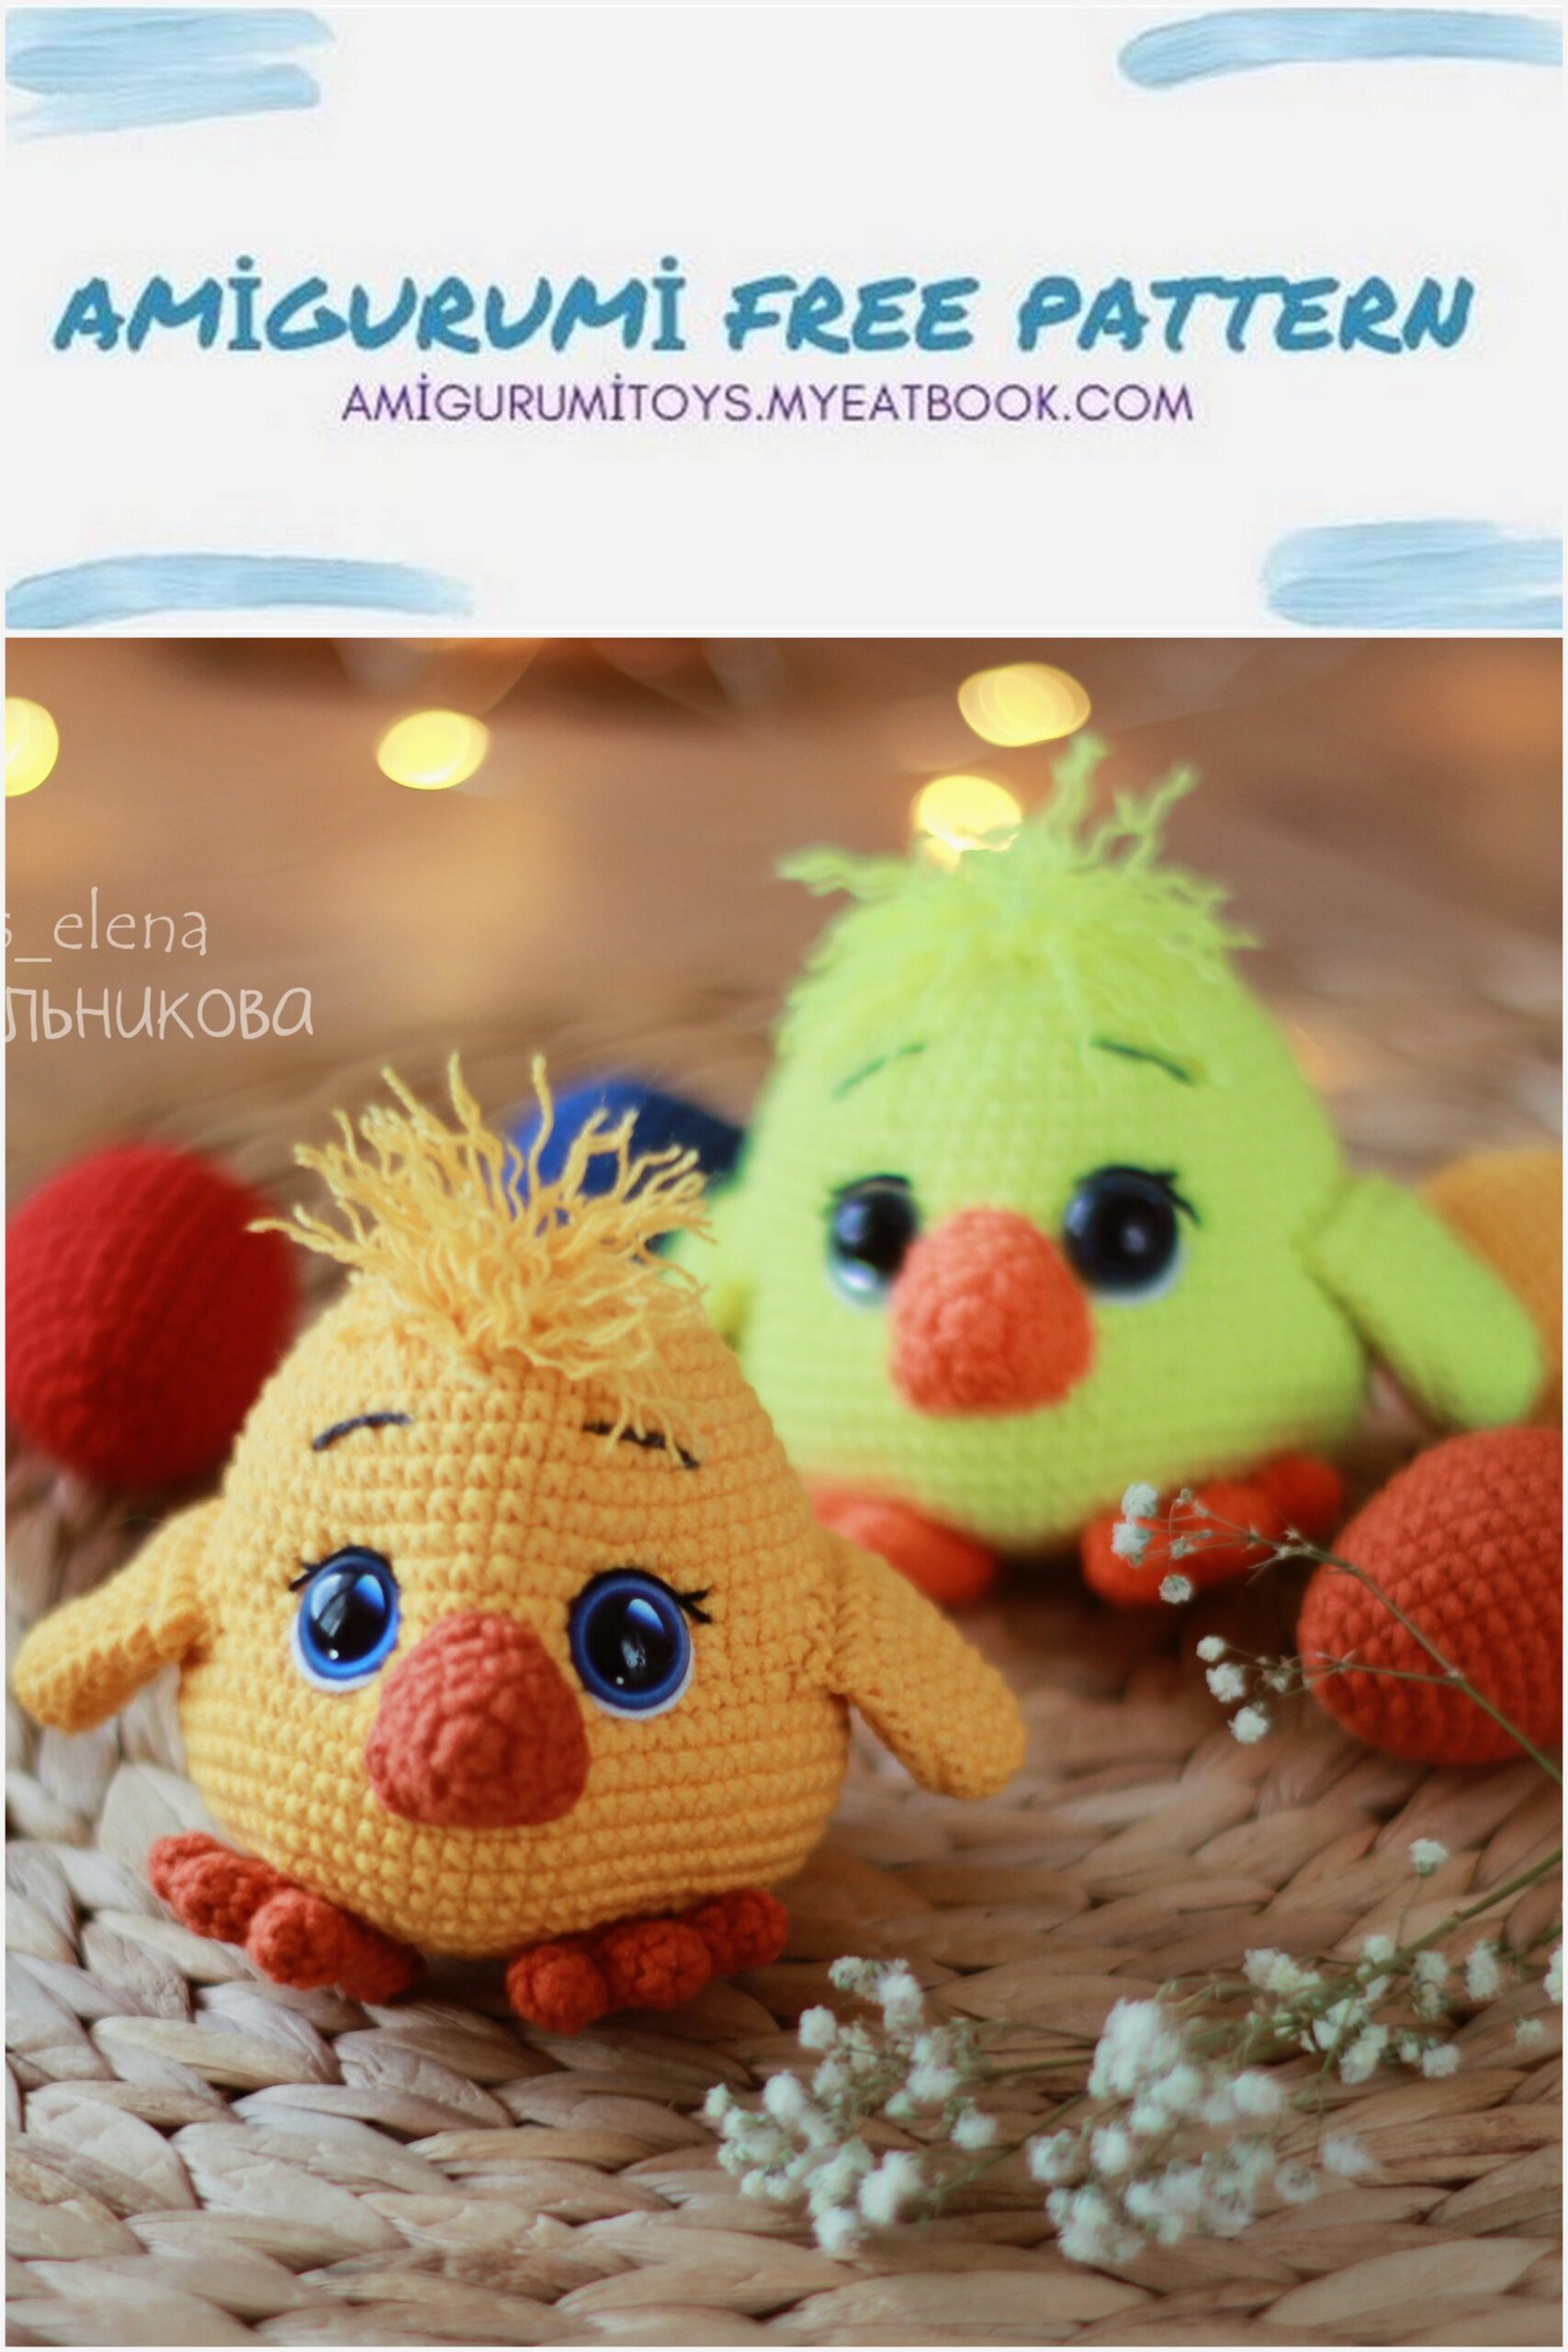
We make a chick. We cut the strings 5 cm long.
We fasten the threads on the crown with a hook. We let them go.
We embroider eyebrows.
Your chicken is ready!
Give love and kindness when knitting toys!
Thank you friends for