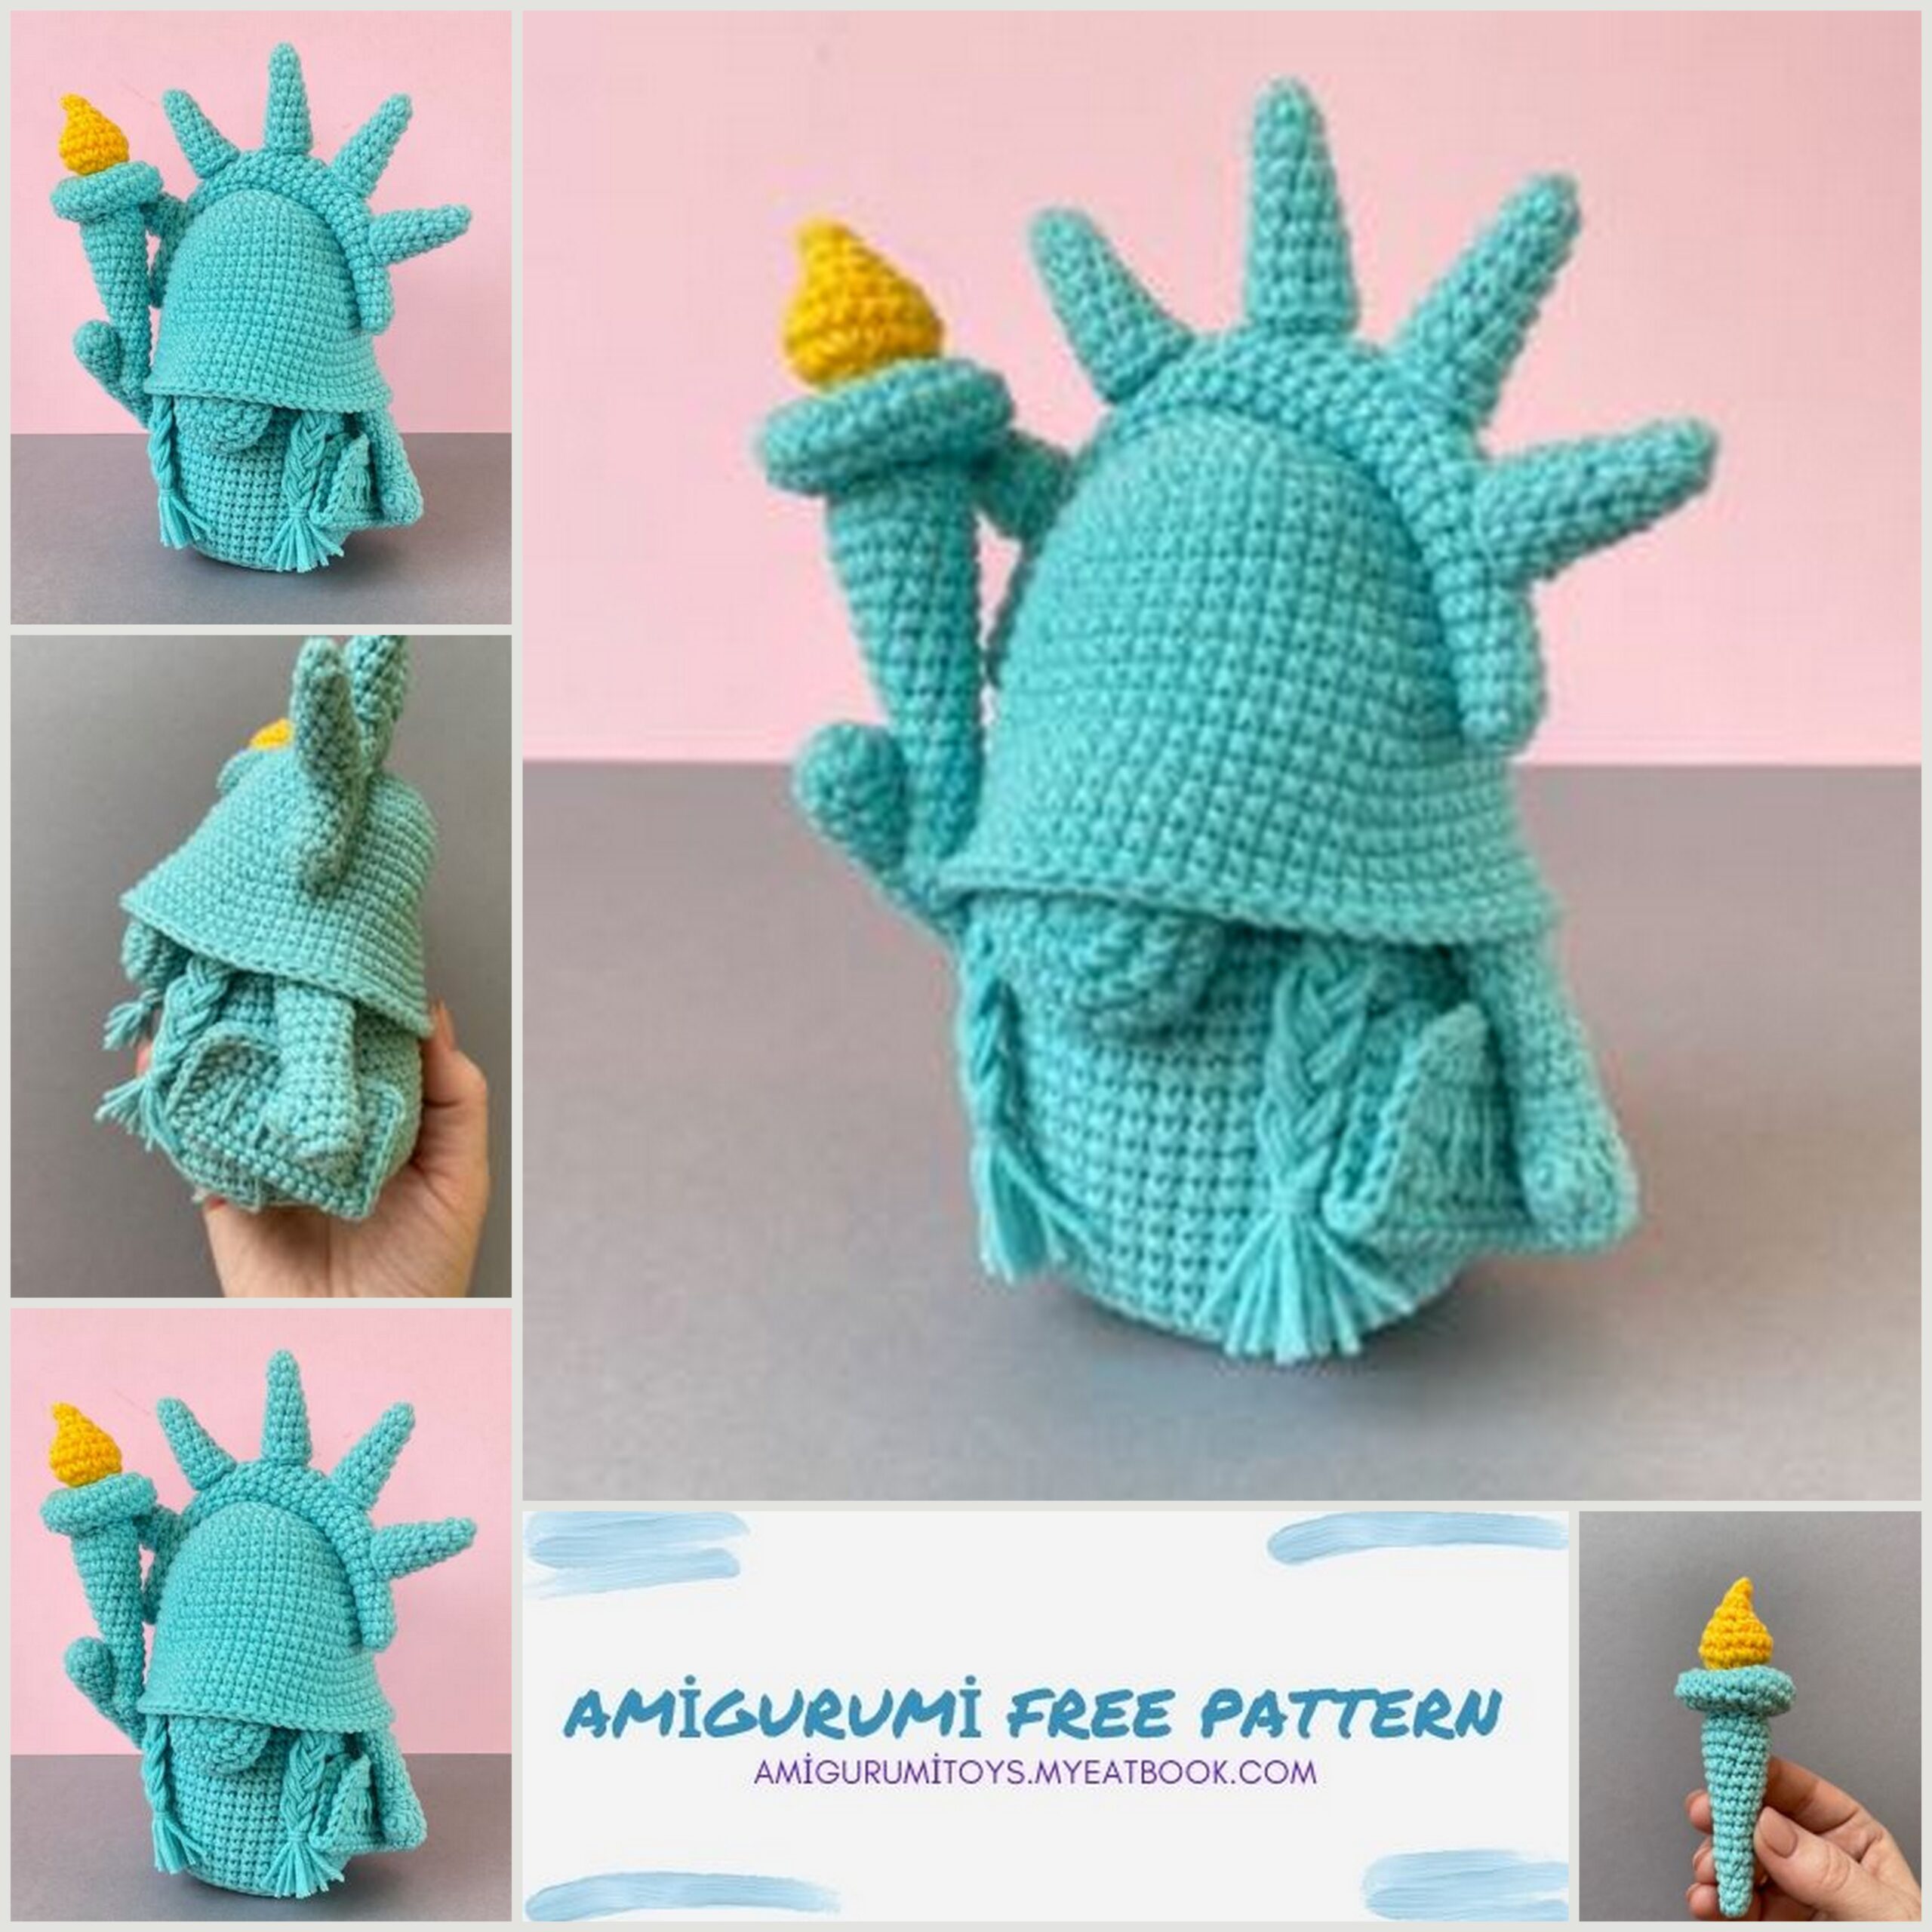
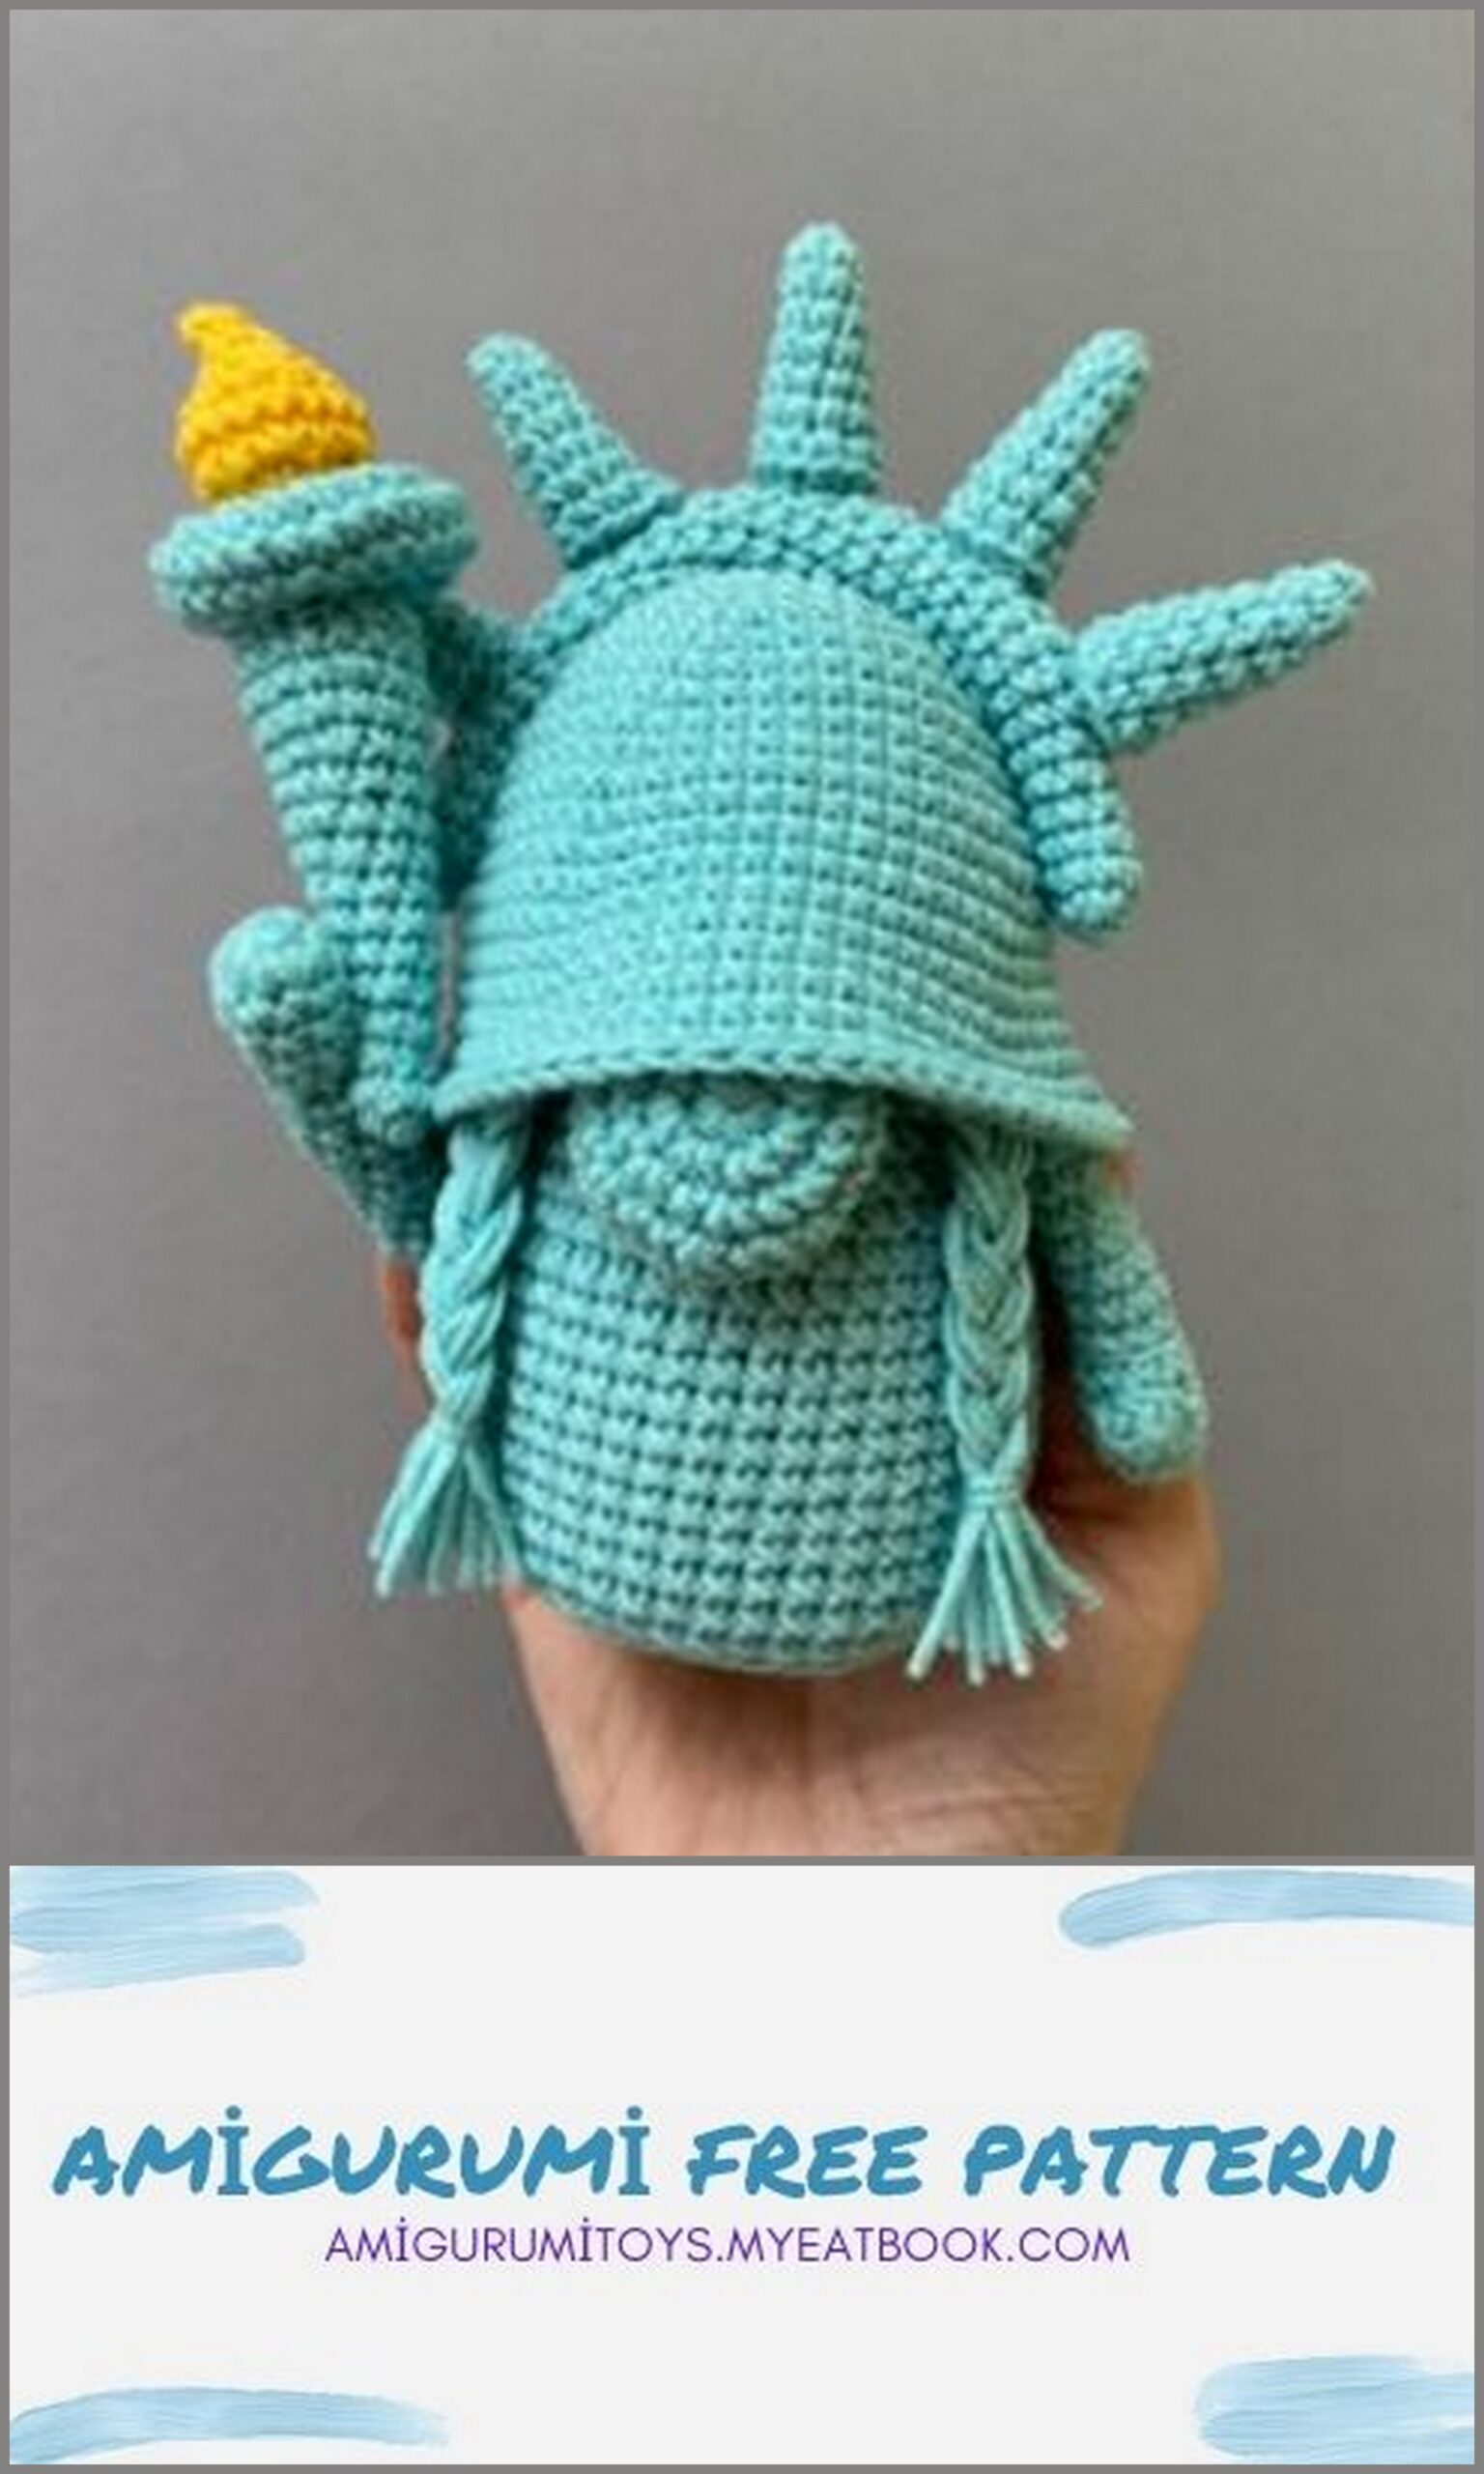
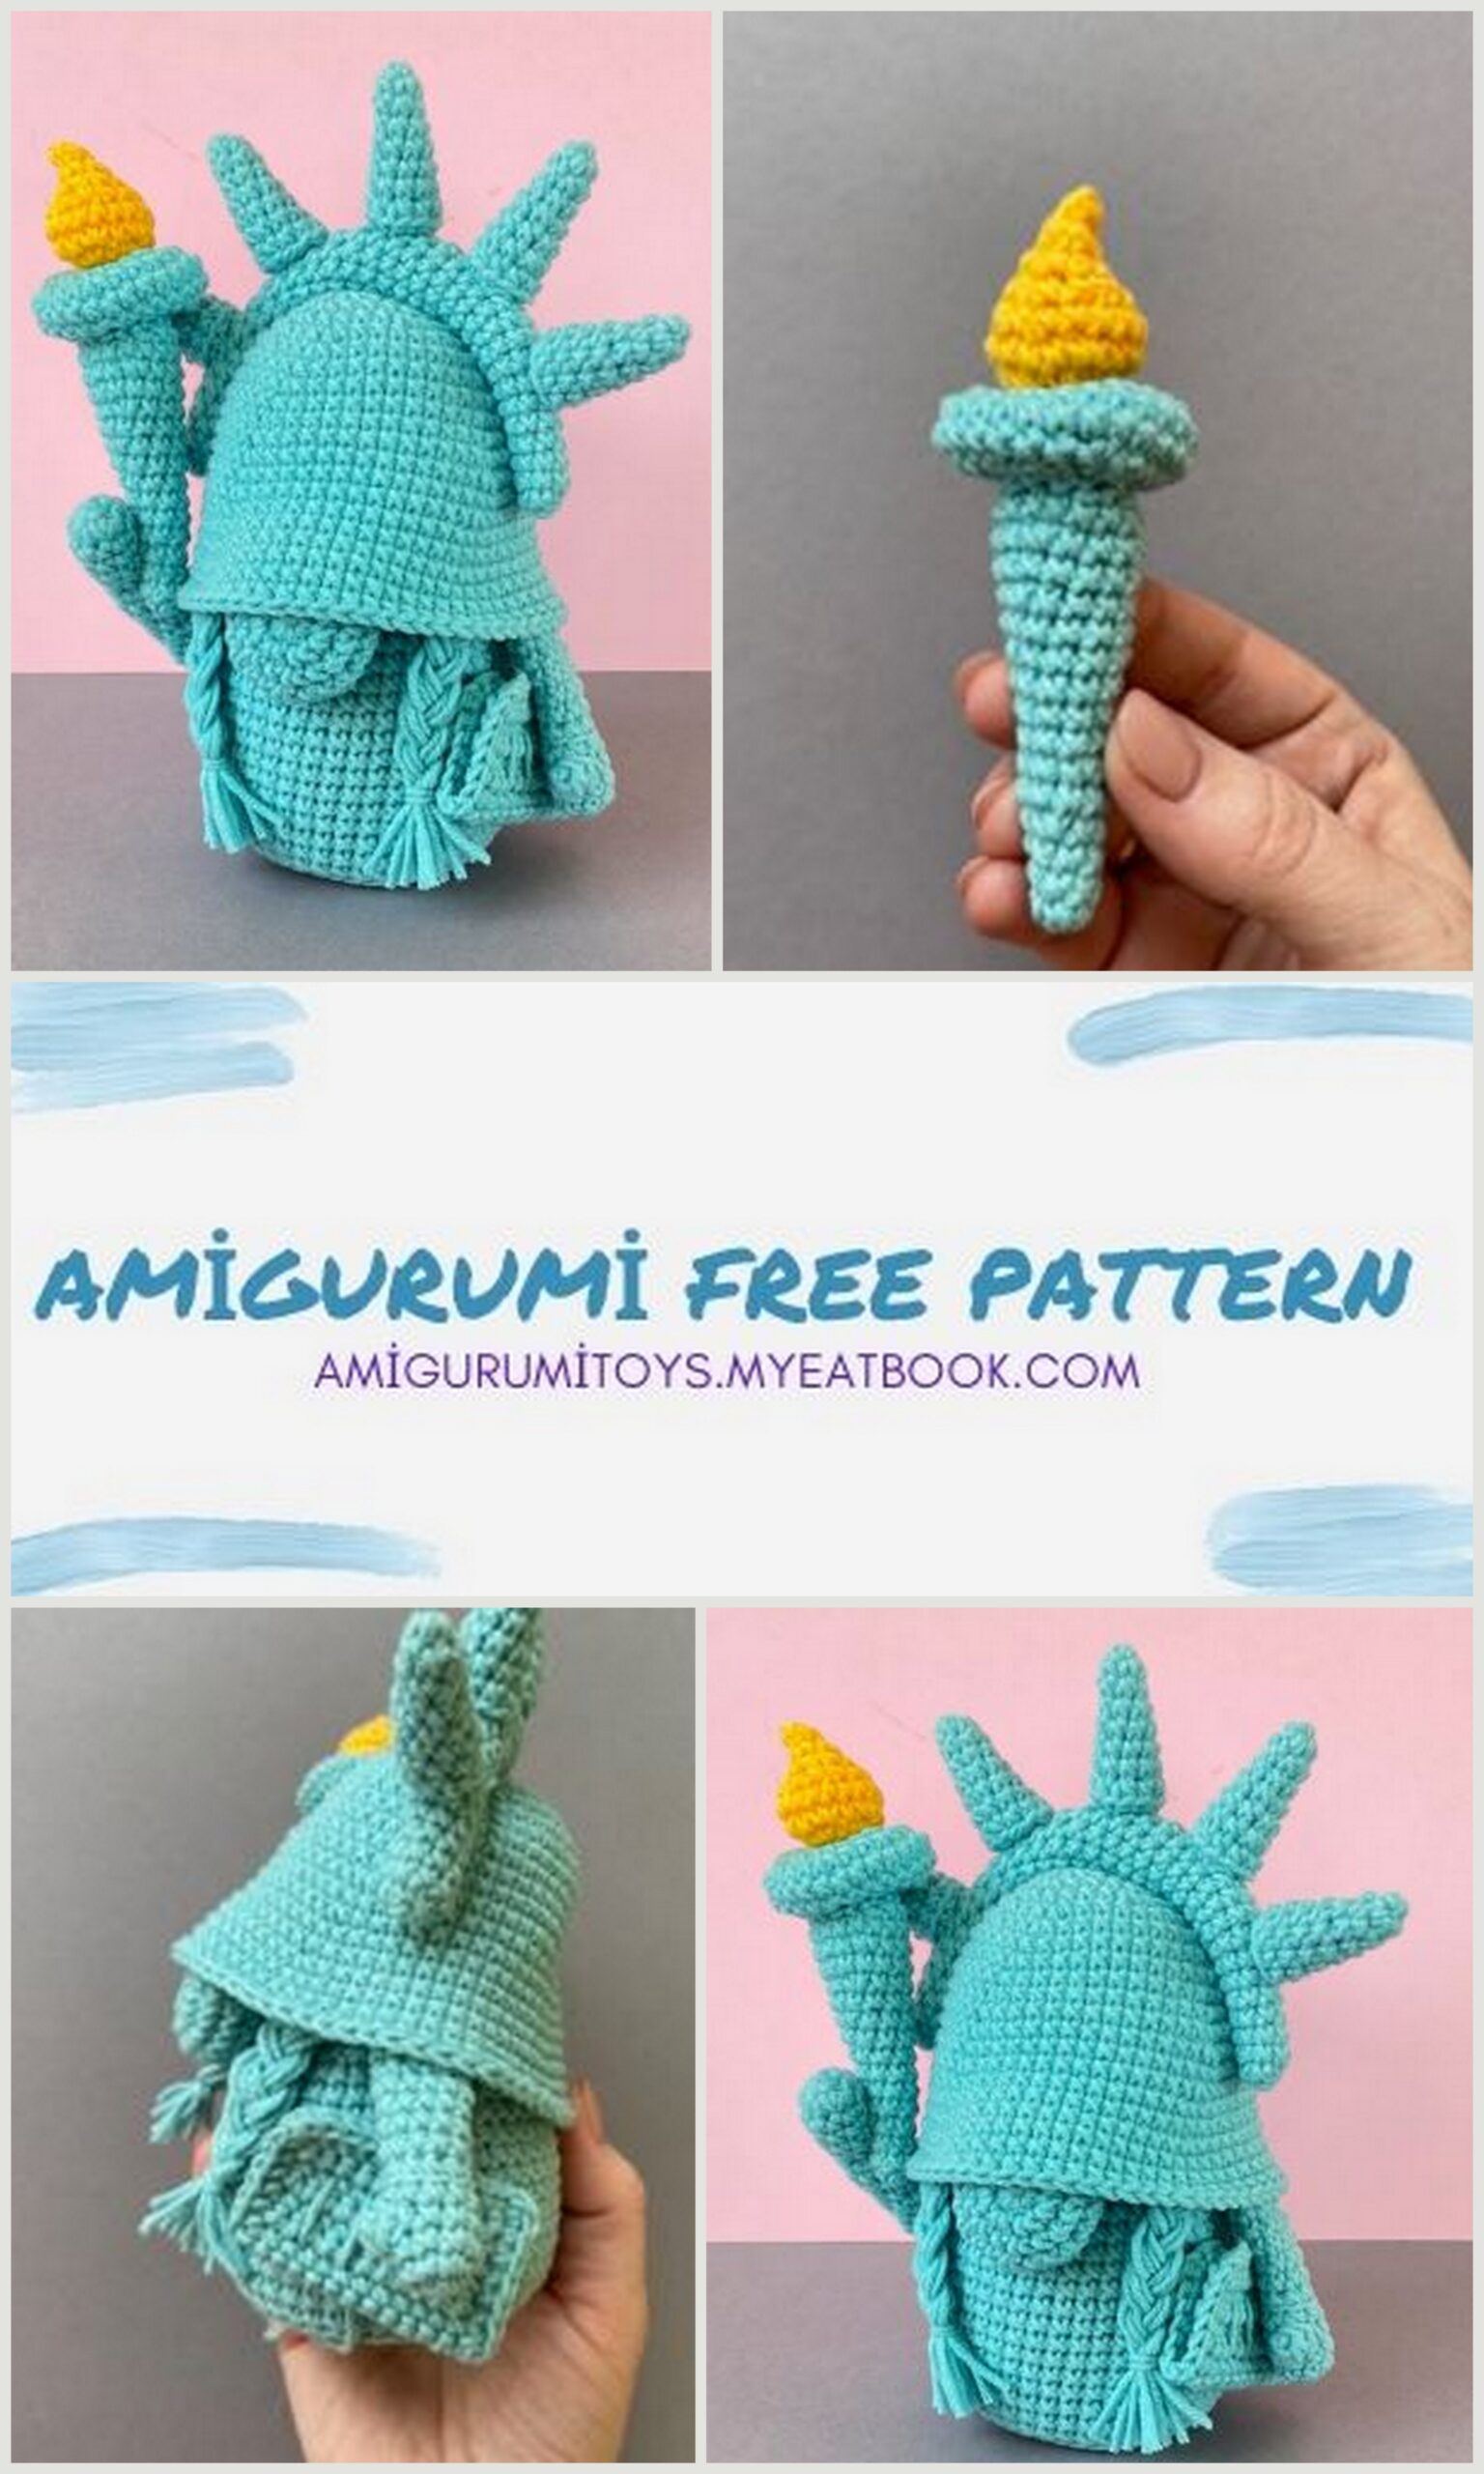
Amigurumi Statue of Liberty Gnome Free Pattern Statue of Liberty Gnome.
Materials needed:
1. Yarn Art Jeans, 55% cotton, 45% acryl, 50g/160m, next colors:
• mint № 81
• yellow № 35
2. Crochet hook 2 mm or 2.25 mm (US: B, UK:14)
3. Fiberfill, thick sewing needle, pins.
4. Piece of cardboard approx. 3 on 3 inch for one gnome’s base.
If you follow this advice your gnomes will be 20 cm/7,8 inch.
Abbreviations:
ch – chain stitch
sc – single crochet
sl st – slip stitch
inc – increase, 2 sc in the next stitch
dec – decrease, single crochet 2 stitches together (16) – number of stitches in a round (inc, sc)*N – repeat N times
3dcCL – a cluster of 3 double stitches.
A cluster of stitches, made into the same stitch or chain space that are joined together at the top.
1.Body
Start with making a round base. Work in
continuous rounds without slip stitches.
Rnd 1: 7 sc in the MR
Rnd 2: 7 inc (14)
Rnd 3: (inc, 1 sc)*7 (21)
Rnd 4: (inc, 2 sc)*7 (28)
Rnd 5: (inc, 3 sc)*7 (35)
Rnd 6: (inc, 4 sc)*7 (42)
Rnd 7: (inc, 5 sc)*7 (49)
Cut off the base of cardboard.
Rnd 8: BLO 49 sc
Rnd 9-19: sc in each stitch around 11 rounds.
Insert the cardboard base.
Rnd 20: dec, 47 sc (48)
Rnd 21: (dec, 14 sc)*3 (45)
Rnd 22: 45 sc
Rnd 23: (dec, 13 sc)*3 (42)
Rnd 24: BLO 42 sc
Rnd 25: (dec, 5 sc)*6 (36)
Rnd 26: (dec, 4 sc)*6 (30)
Rnd 27: (dec, 3 sc)*6 (24)
Rnd 28: (dec, 2 sc)*6 (18)
Stuff the body evenly and firmly with the fiberfill.
Rnd 29: (dec, 1 sc)*6 (12)
Add some more fiberfill.
Rnd 30: 6 dec (6)
Cut off the yarn, leave a long end.
Close the top using a needle, hide the end into the body.
2.Hat
Work in continuous rounds without sl st.
Rnd 1: 6 sc in the MR
Rnd 2: 6 inc (12)
Rnd 3: (inc, 1 sc)*6 (18)
Rnd 4: (inc, 2 sc)*6 (24)
Rnd 5: (inc, 3 sc)*6 (30)
Rnd 6: (inc, 4 sc)*6 (36)
Rnd 7: (inc, 8 sc)*4 (40)
Rnd 8: (inc, 9 sc)*4 (44)
Rnd 9: 44 sc
Rnd 10: (inc, 10 sc)*4 (48)
Rnd 11: 48 sc
Rnd 12: (inc, 11 sc)*4 (52)
Rnd 13: 52 sc
Rnd 14: (inc, 12 sc)*4 (56)
Rnd 15: 56 sc
Rnd 16: (inc, 13 sc)*4 (60)
Rnd 17-18: sc in each stitch around 2 rounds
Rnd 19: (inc, 14 sc)*4 (64)
Rnd 20-22: sc in each stitch around 3 rounds
Cut off the yarn.
Finish in an invisible way: thread the end of yarn through the needle, skip one stitch and guide the yarn into the next stitch as shown on the photo.
Insert the needle back in the same stitch where the yarn end is coming from. Pull the yarn and fasten the obtained stitch on the wrong side of detail.


Crown.
Rnd 1: 8 sc in the MR
Rnd 2-7: sc in each stitch around 6 rounds
Rnd 8: inc, 7 sc (9)
Rnd 9-14: sc in each stitch around 6 rounds
Rnd 15: inc, 8 sc (10)
Add a little filler inside.
Rnd 16-19: sc in each stitch around 4 rounds
Rnd 20: dec, 8 sc (9)
Rnd 21-26: sc in each stitch around 6 rounds
Rnd 27: dec, 7 sc (8)
Rnd 28-33: sc in each stitch around 6 rounds
Add a little filler inside.
Close the top using a needle, hide the end into the detail.
Spikes.
Make 5 spikes.
Rnd 1: 4 sc in the MR
Rnd 2: (inc, 1 sc)*2 (6)
Rnd 3: 6 sc
Rnd 4: inc, 5 sc (7)
Rnd 5: inc, 6 sc (8)
Rnd 6: inc, 7 sc (9)
Rnd 7: inc, 8 sc (10)
Rnd 8: inc, 9 sc (11)
Cut off the yarn, leave a long tail. Stuff the detail.
Sew the spikes to the crown as shown on the photo.
Sew the crown to the top of hat as shown on the photo.
3.Arms
Rnd 1: 8 sc in the MR
Rnd 2: (inc, 3 sc)*2 (10)
Rnd 3: 10 sc
Rnd 4: 4 sc, 3dcCL, 5 sc (10)
(3dcCL – a cluster of 3 dc)
Rnd 5: 10 sc
Rnd 6: BLO 10 sc
Rnd 7-13: sc in each stitch around 7 rounds.
Stuff the bottom part of left arm
(hand) with fiberfill. Stuff right arm evenly and firmly.
Fold so that the stitches of the last round line each other.
Crochet opposite stitches with 4-5 sc.
Cut off the yarn, leave a long tail.
4.Nose
Rnd 1: 7 sc in the MR
Rnd 2: 7 inc (14)
Rnd 3: (inc, 1 sc)*7 (21)
Rnd 4: (inc, 2 sc)*7 (28)
Rnd 5: 28 sc
Rnd 6: (dec, 2 sc)*7 (21)
Rnd 7: (dec, 1 sc)*7 (14)
Rnd 8: 7 dec (7)
Add some fiberfill.
Close the top using a needle.
5.Book
Work in turning rows.
Chain 13, start with the 2nd loop from the hook.
R1: 12 sc
R2-16: ch 1, 12 sc
Do not cut off the yarn, go on single
crocheting around, insert the hook into the chains of each row.
Pay attention to the edge, not to make it tighten.
If the edge is tighten you should add more sc in the round.
Fold the book in half.
6. Torch (First beacon of enlightenment)
Detail 1.
Rnd 1: 6 sc in the MR
Rnd 2: 6 sc
Rnd 3: inc, 5 sc (7)
Rnd 4: 7 sc
Rnd 5: inc, 6 sc (8)
Rnd 6: 8 sc
Rnd 7: inc, 7 sc (9)
Rnd 8: 9 sc
Rnd 9: inc, 8 sc (10)
Rnd 10: 10 sc
Rnd 11: (inc, 4 sc)*2 (12)
Rnd 12: 12 sc
Rnd 13: (inc, 5 sc)*2 (14)
Rnd 14: 14 sc
Rnd 15: (inc, 6 sc)*2 (16)
Rnd 16: 16 sc
Cut off the yarn, finish in an invisible way.
Stuff the detail.
Detail 2.
Rnd 1: 7 sc in the MR
Rnd 2: 7 inc (14)
Rnd 3: (inc, 1 sc)*7 (21)
Rnd 4: (inc, 2 sc)*7 (28)
Rnd 5-6: sc in each stitch around 2 rounds
Rnd 7: (dec, 2 sc)*7 (21)
Rnd 8: (dec, 1 sc)*7 (14)
Rnd 9: 7 dec (7)
Add a little filler inside. Close the top using a needle.
Sew the detail 2 to the top of detail 1.
Fire.
With yellow yarn.
Rnd 1: 6 sc in the MR
Rnd 2: 6 inc (12)
Rnd 3: (inc, 1 sc)*6 (18)
Rnd 4: 18 sc
Rnd 5: (dec, 1 sc)*6 (12)
Rnd 6: (dec, 1 sc)*4 (8)
Rnd 7: 8 sc
Add some fiberfill.
Rnd 8: 4 dec (4)
Close the top using a needle.
Sew the fire to the top of torch as shown on the photo.
7.Assembly and decoration
Attach left arm, and nose to the body with some pins between 23 and 24 rounds of the body (to the free loops of 23 round).
For pigtails cut off the yarn, tie a piece of yarn to the free 3 loops of 23 round, repeat for second pigtail.
Put on the hat. The top of left arm and nose should be placed under the hat. Move them the way you like.
Take off the hat, sew the arm and nose to the body.
Put on the hat and attach it with hidden stitches.
Sew the right arm to the 15th round of body as shown on the photo.
Sew the torch to the right arm and book to the left arm.
Congratulations! Your Gnome is ready)