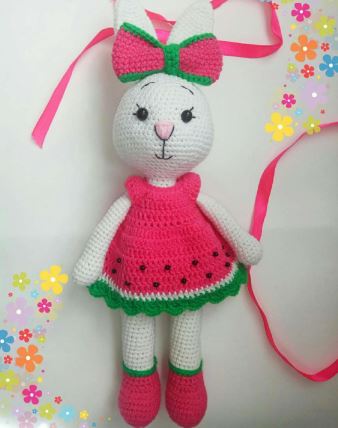
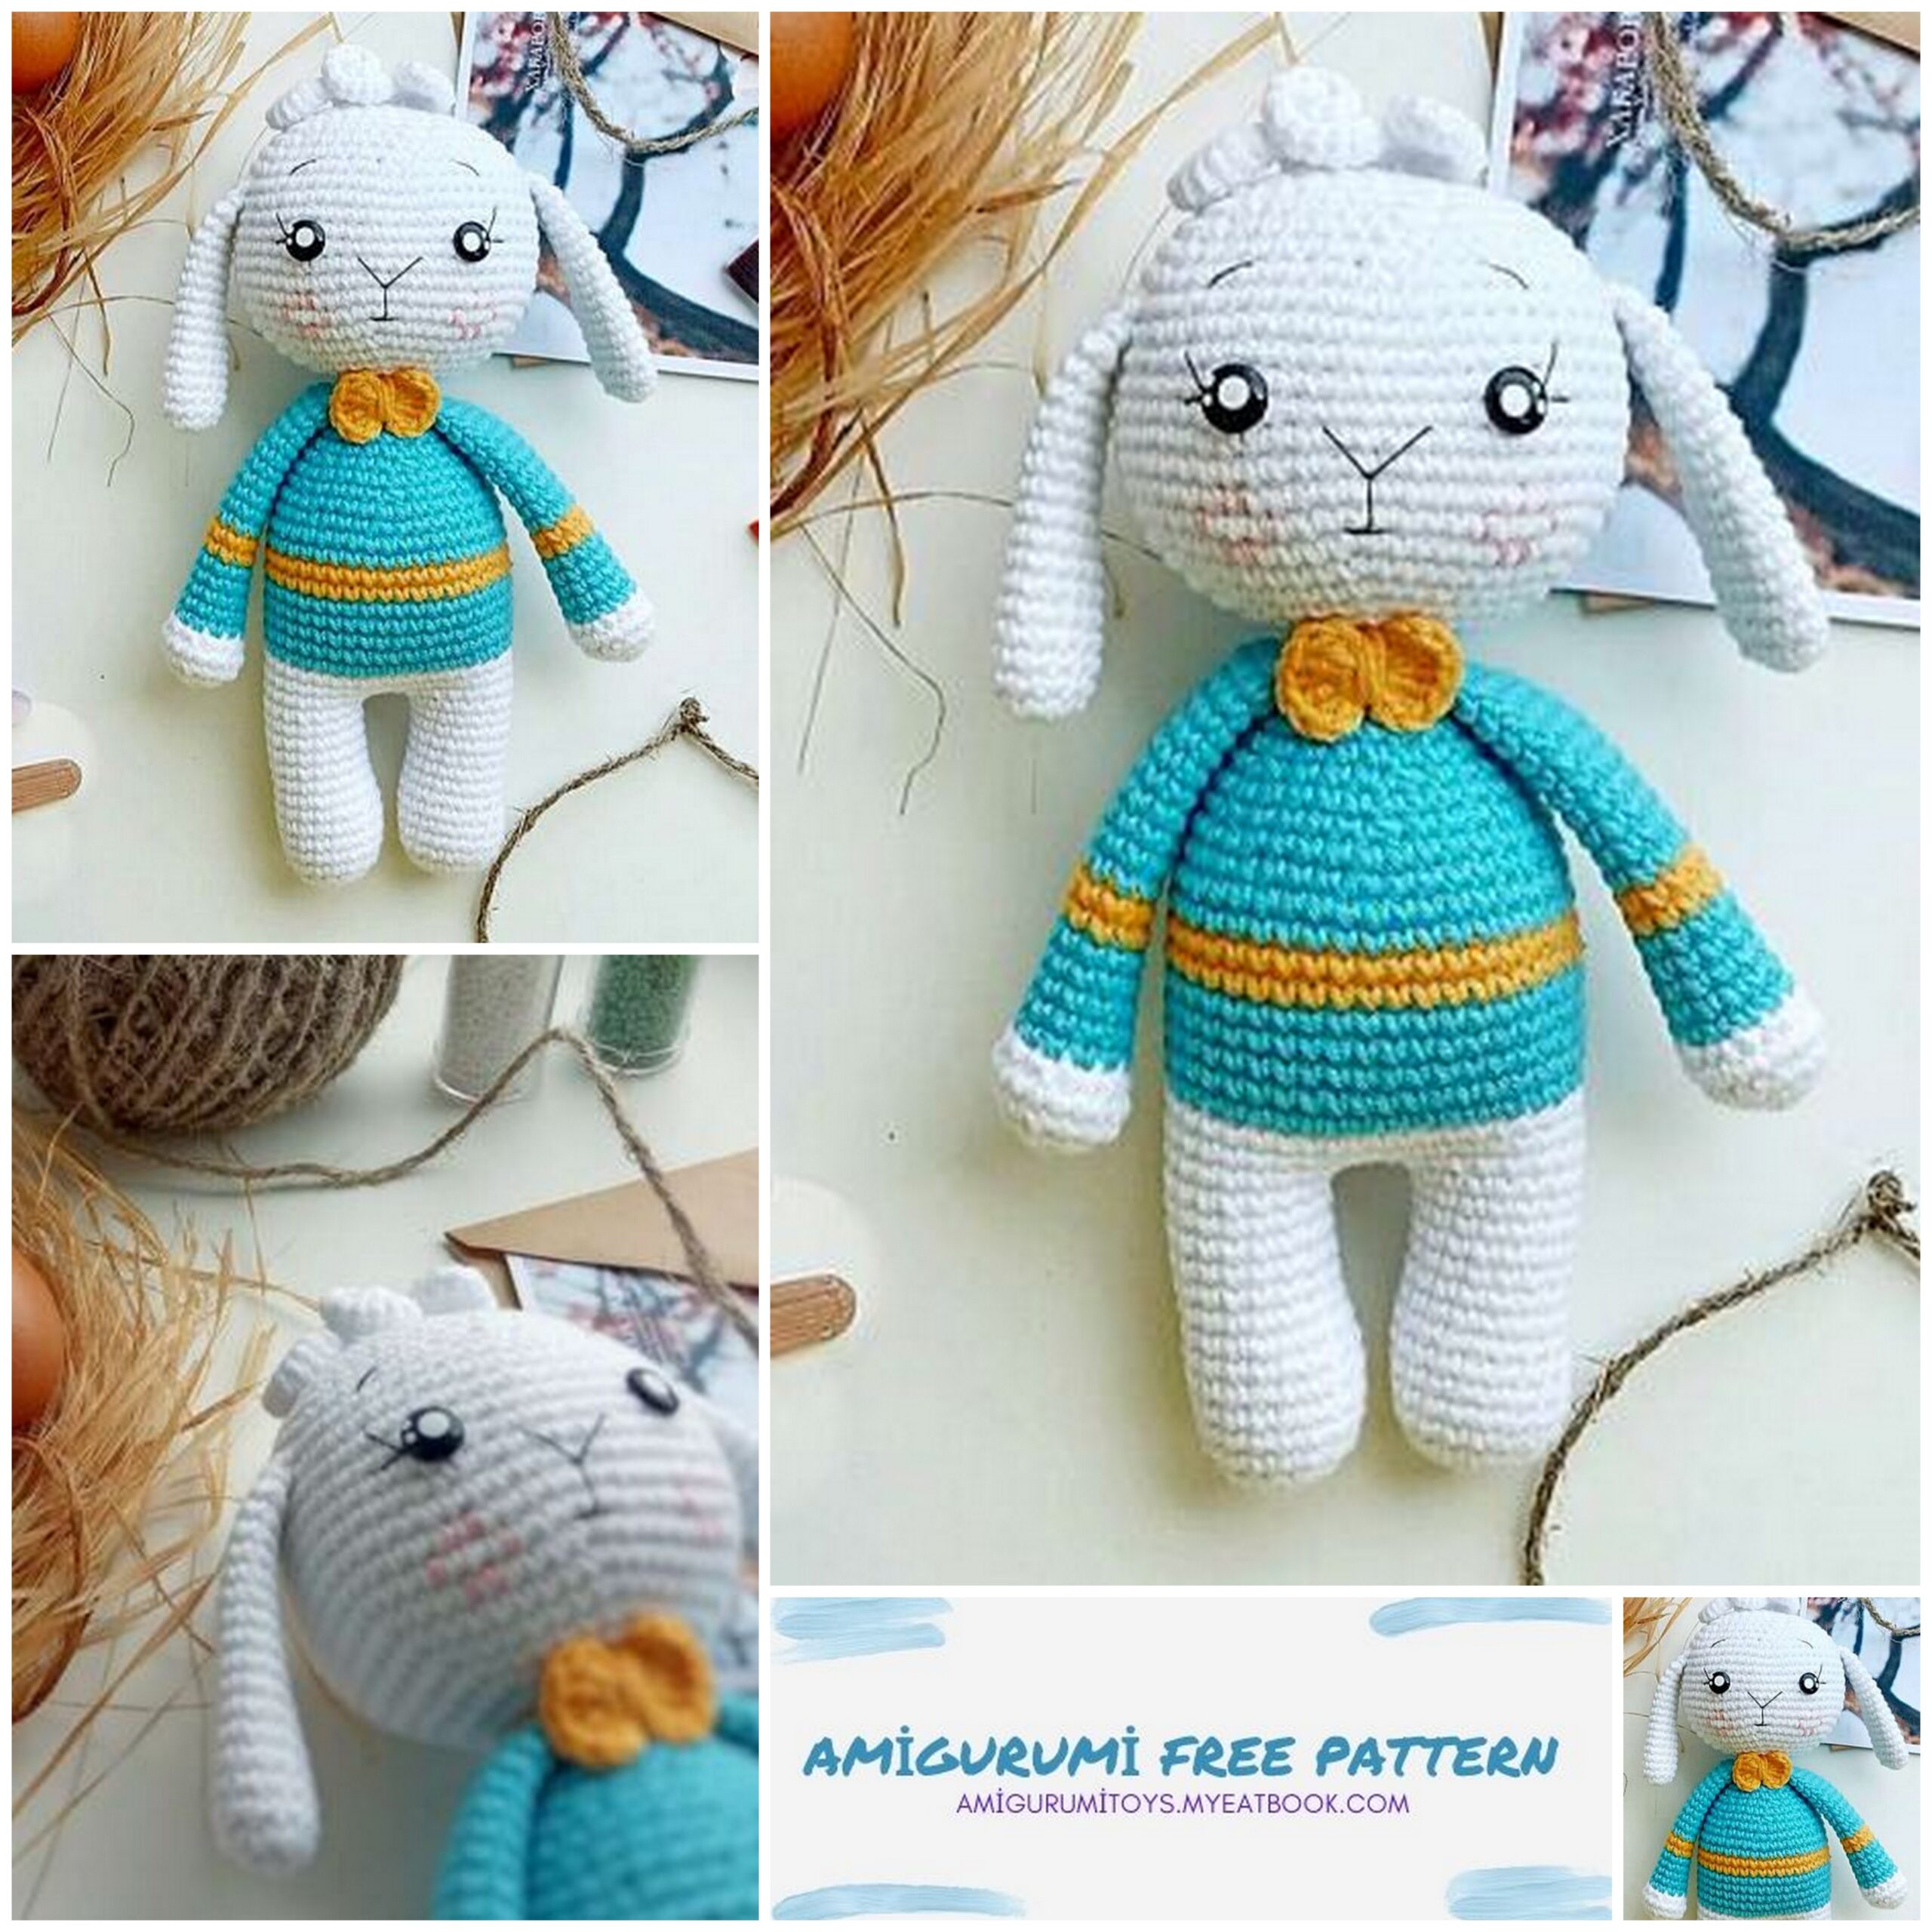
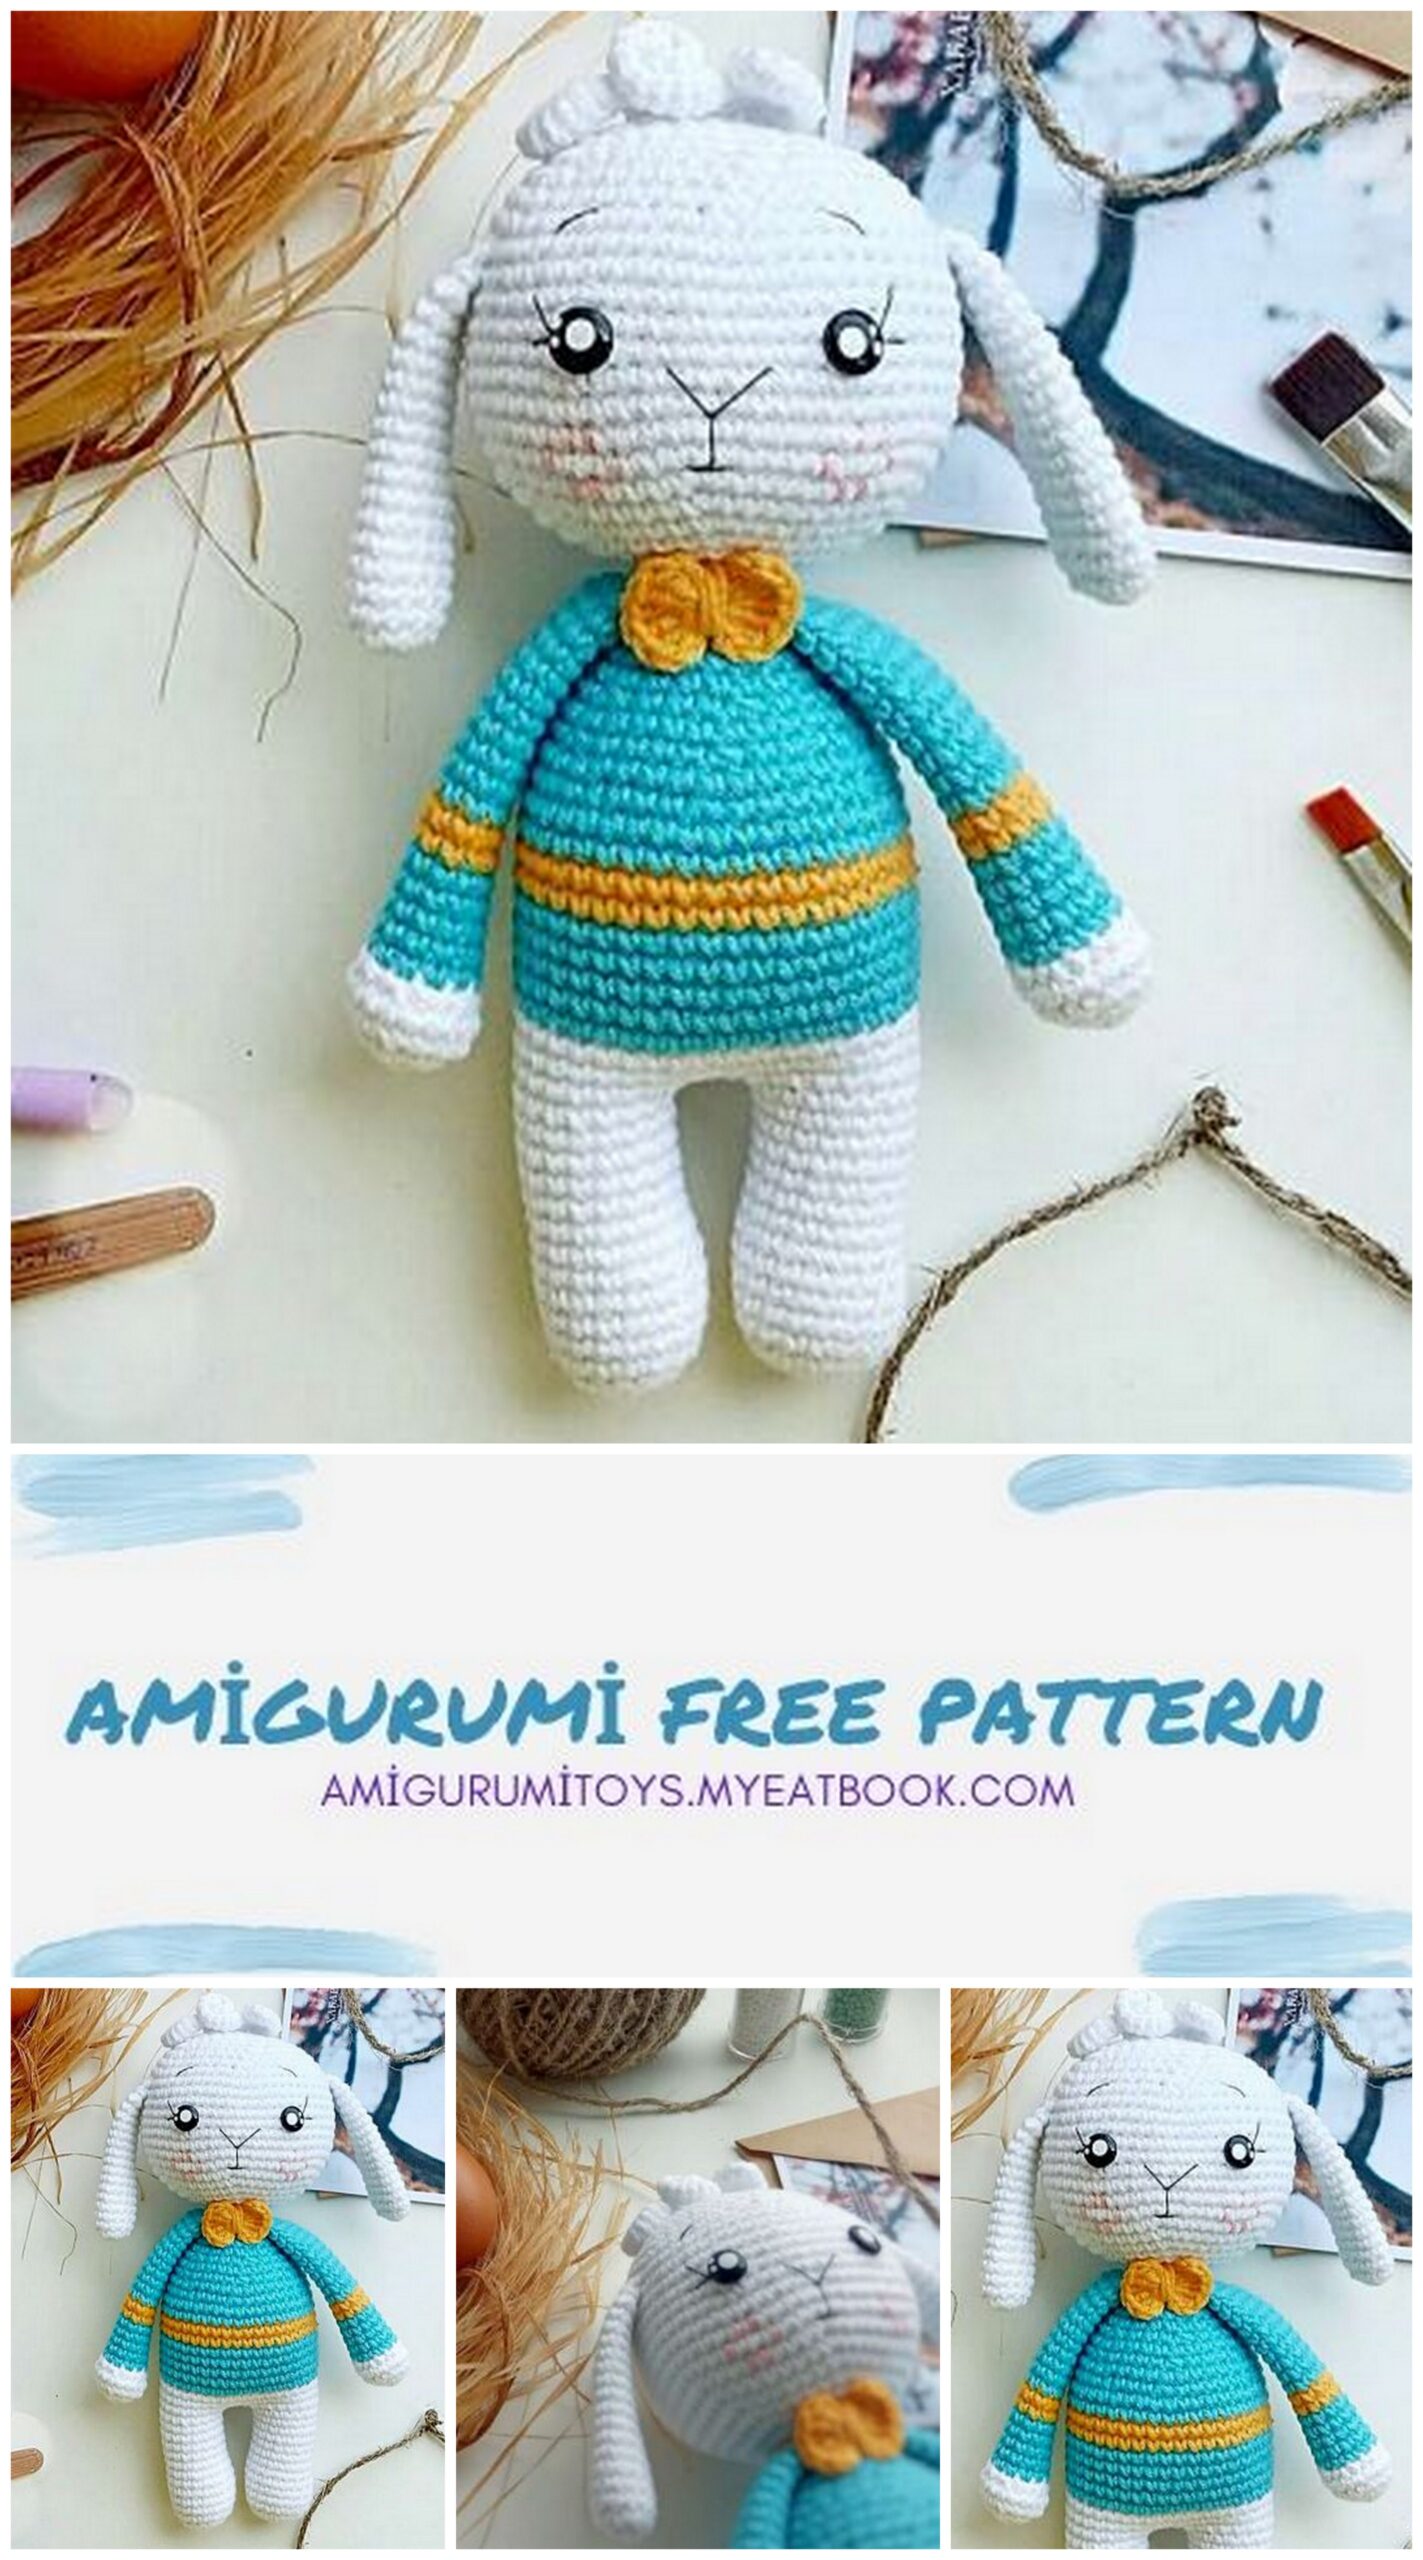
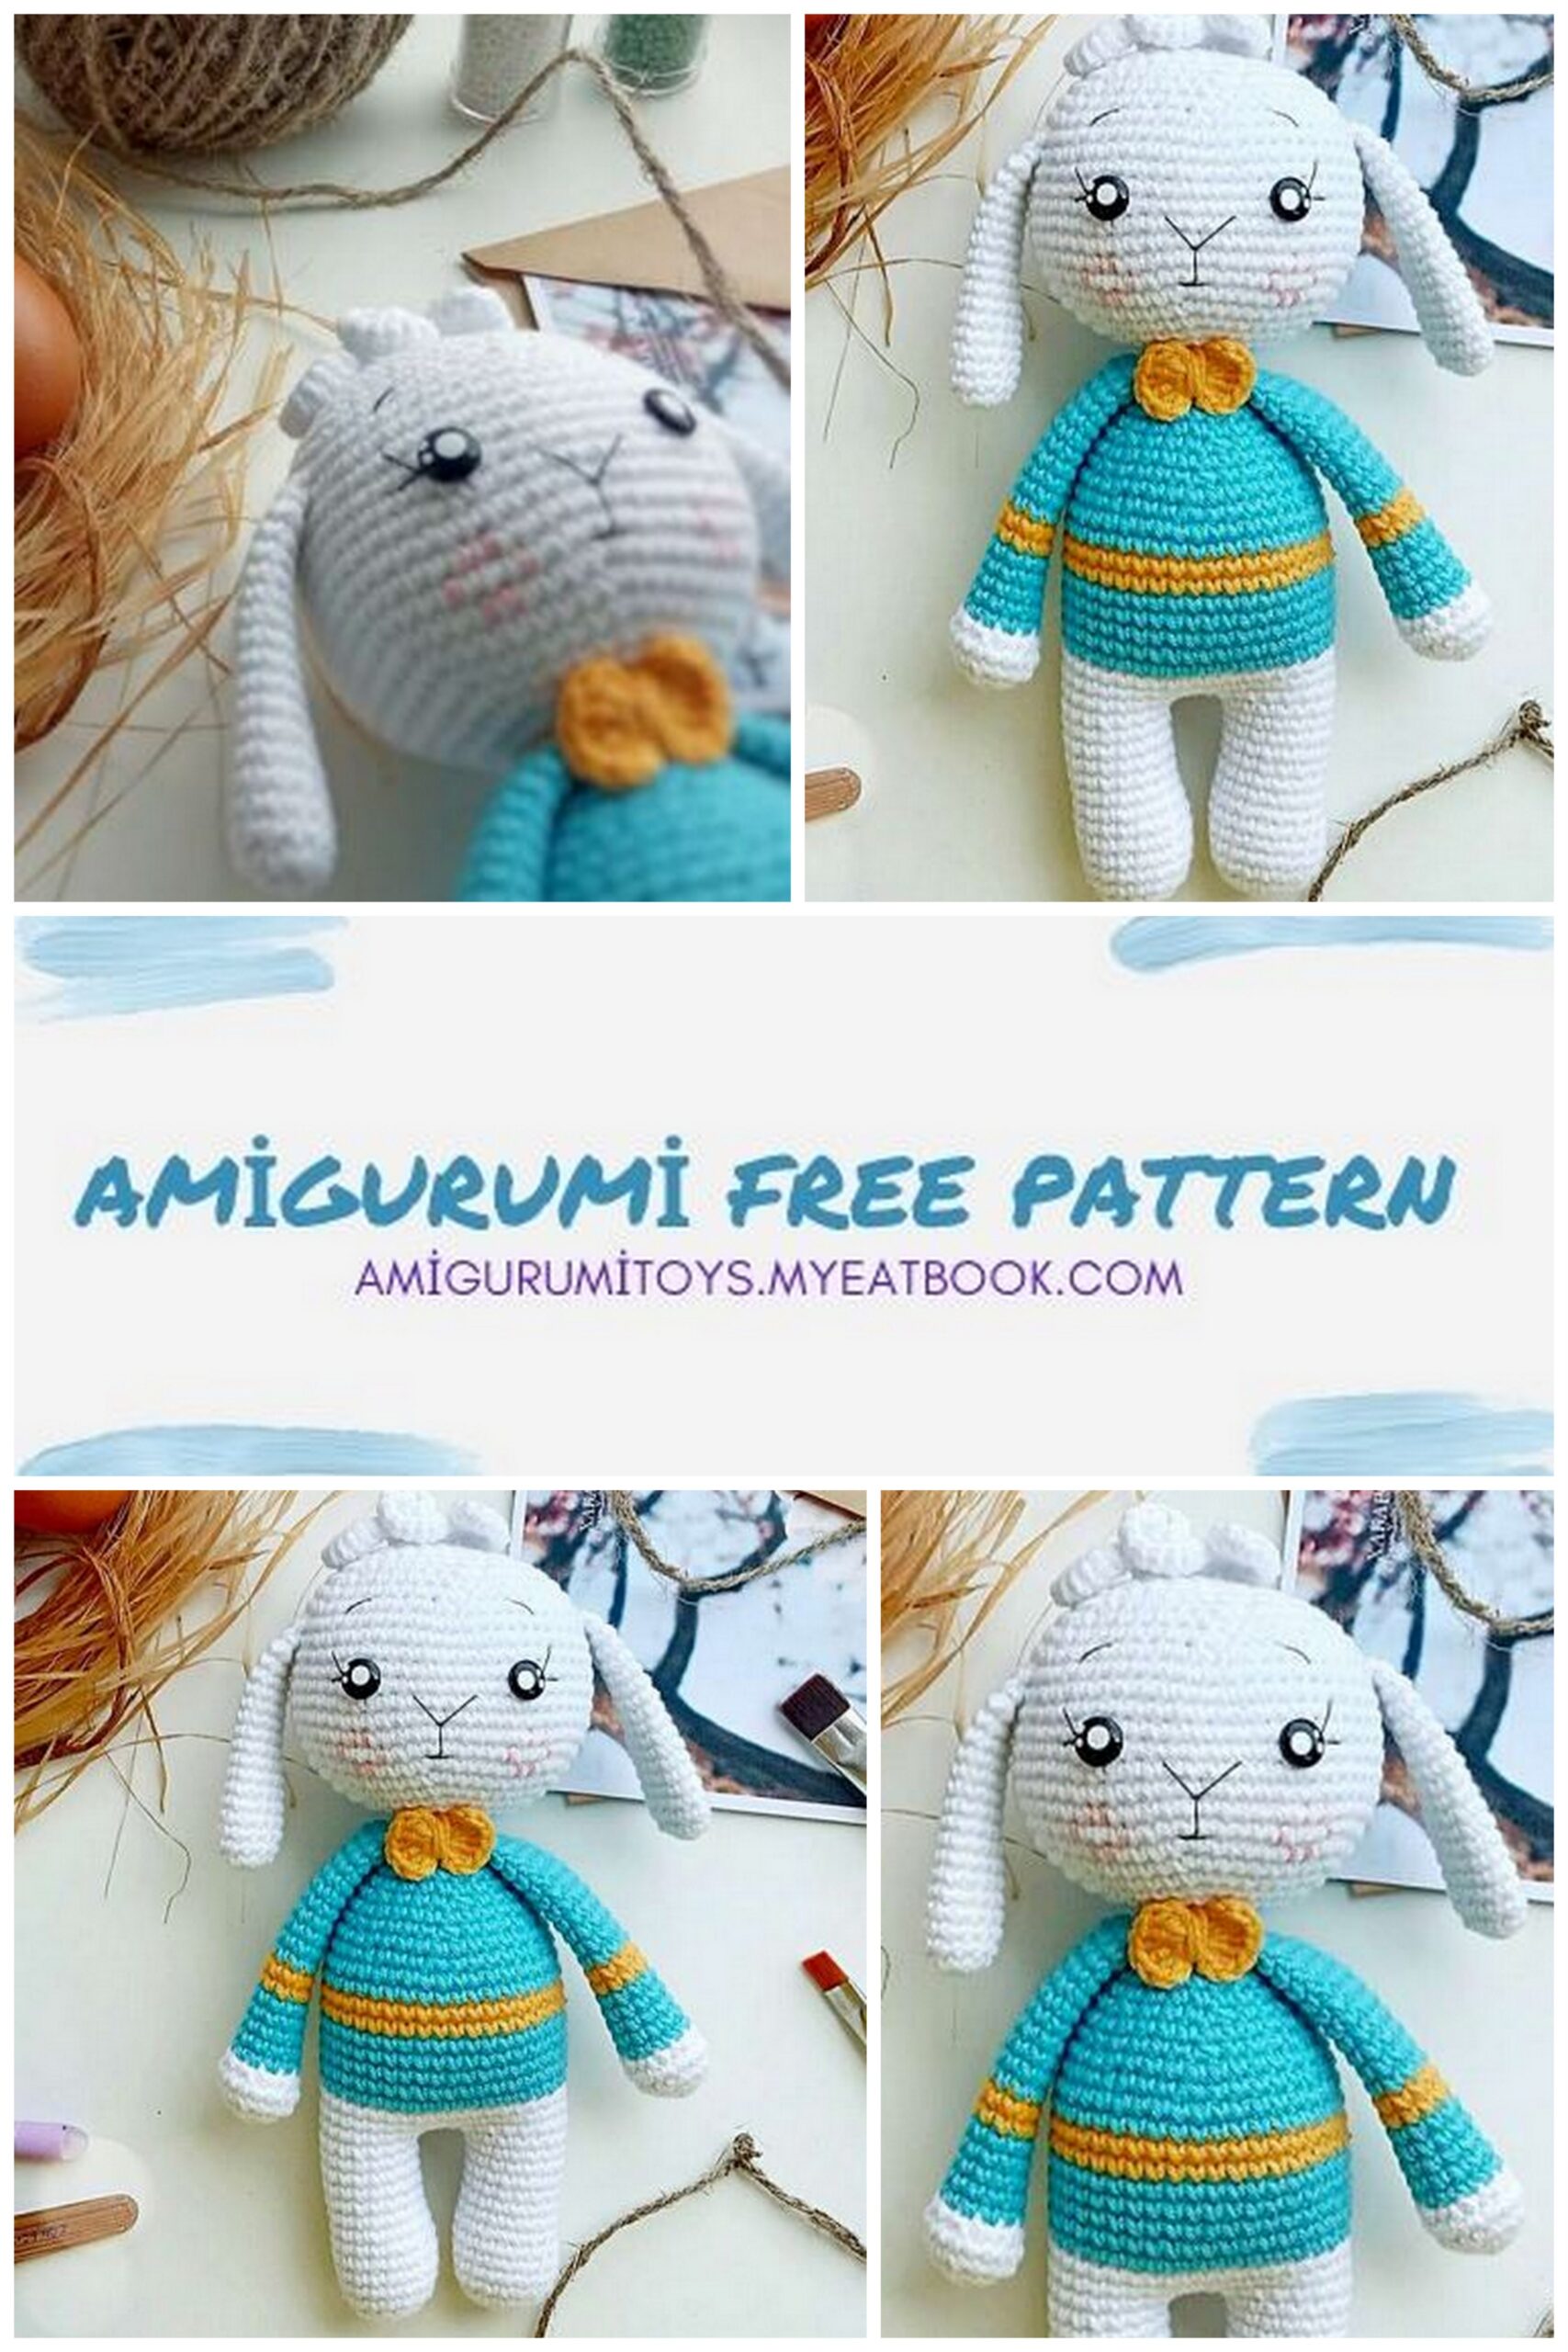
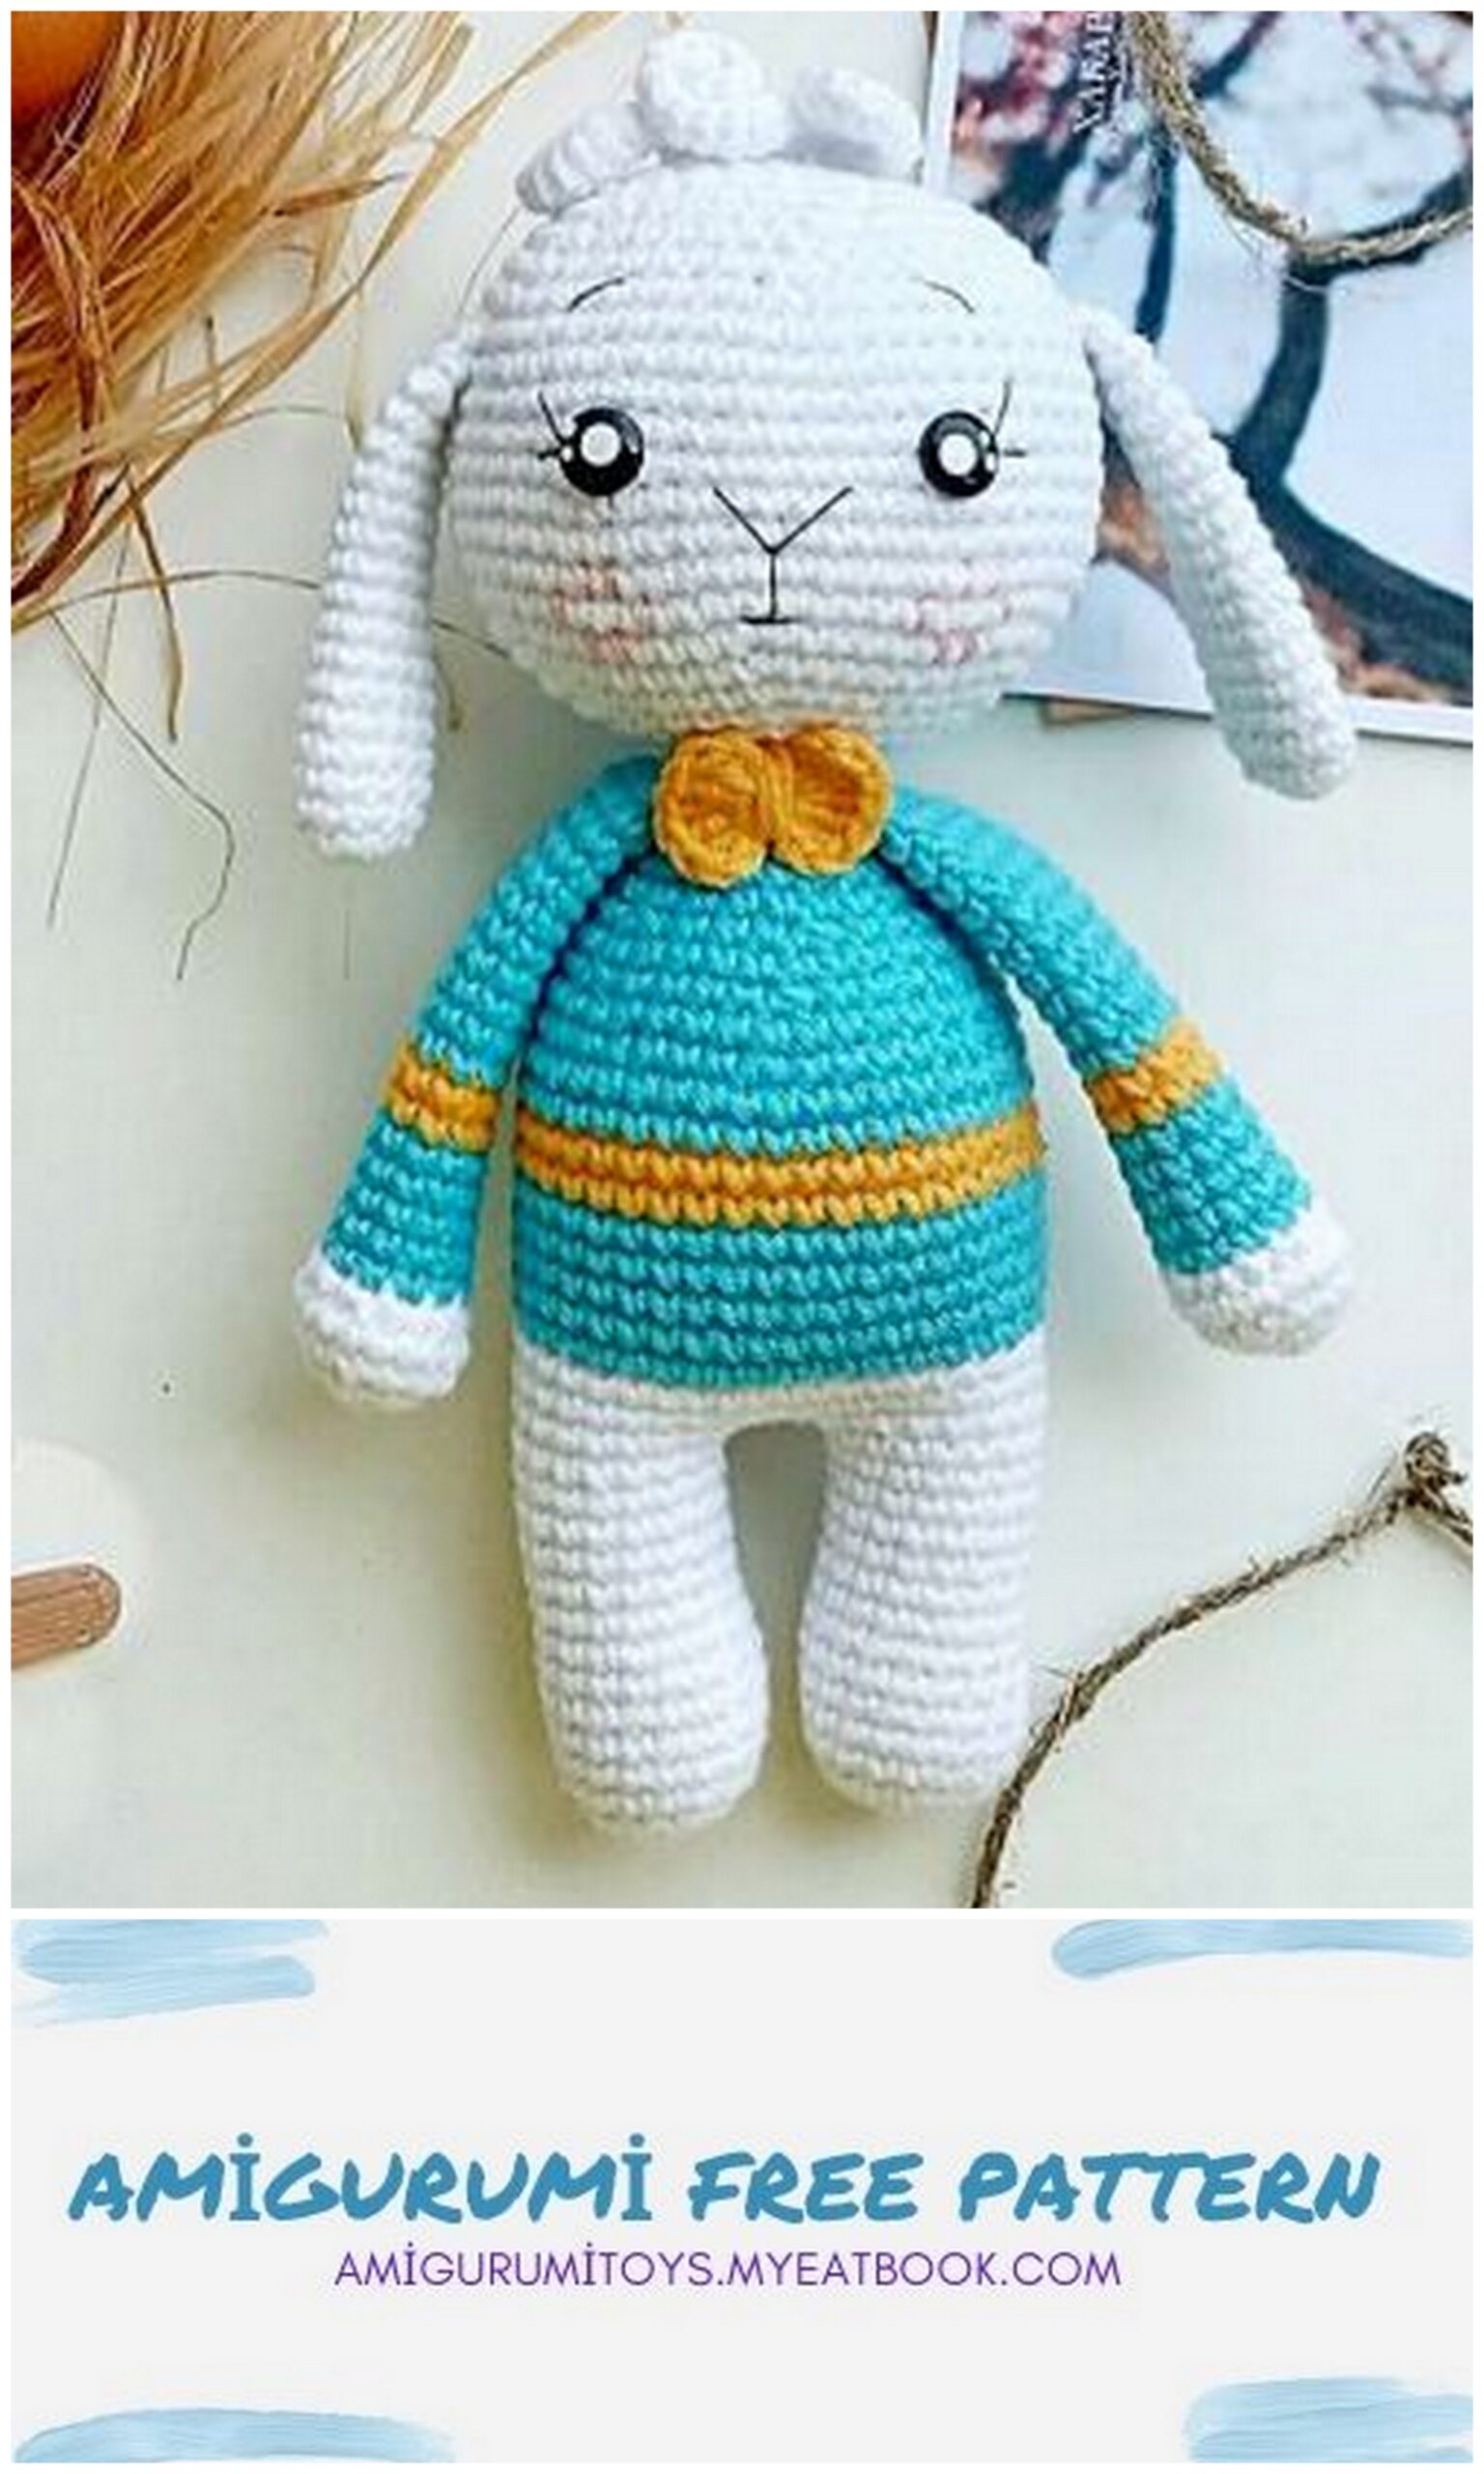
Amigurumi Bunny Free Pattern
You can visit my youtube channel for Amigurumi Flower Rabbit:
Dear friends, I welcome you as a guest!
I present to your attention my free description for a cute bunny.
This kid will become a faithful friend and companion in exciting games for your child.
Necessary materials:
Yarn-YarnArt Jeans (you can also
use Alize Cotton Gold).
Colors: basic No. 62 (white), No. 33 (blue),
No. 35 (yellow)
Hook 2-2.5 (use a suitable hook for your knitting density)
Synthetic fluff / holofiber filler
Scissors
Wide eye needle (for sewing on and embroidery)
Threads-floss (for the design of the muzzle)
Screw eyes No. 8-10
Legend:
MR ring amigurumi
SC single crochet
DC column with 1 crochet
İNC-increase (2SC in one loop)
DEC-decrease (knit 2SC together)
SL-ST- connecting post
CH-air loop
(SC, İNC) *
n times-repeat in parentheses
number / times.
* The toy is knitted entirely, starting from the legs, then knitting goes into the body and head.
In the process, handles are knitted. The ears and tail are sewn on during assembly.
Toy 16cm high (depends on the selected yarn, hook number and knitting density).
Knitting goes in a spiral, without lifting loops.
Knitting description:
Handles (starting in white):
6SC MR
6İNC -12SC
(1SC, İNC) * 6 -18SC
repeat 18 SC
(1SC, DEC) * 6 -12SC
*
change the color of the yarn (in my case, to blue)
repeat 12SC-5 rows
*
change the color of the yarn (in my case, to yellow)
repeat 12SC-2 rows
* We put the filler only in the lower part of the handles. Change the color of the yarn (in my case, blue)
repeat 12SC-10 rows
* Fold the edges, knit 5 SC behind both sides.
Cut the thread. Secure. Link the 2nd part according to the description.
Ears (white):
* We do not fill. Fold the edges, knit on both sides
5 SC. Cut the thread, leaving a long end for sewing. Secure. Also tie the 2nd part.
Description author
Knitting description:
6SC MR
6İNC -12SC
Repeat 12SC-15 rows.
Ponytail (white):
6SC MR
* Tighten the ring, cut the thread, leaving a long end for sewing. Anchor
Knitting description:
Legs-body (white):
6SC MR
6İNC -12SC
(1SC, İNC) * 6 -18SC
Rep 18SC-11 rows.
* On this, cut the thread on one leg.
Similarly, we knit the second; leave the thread and continue to knit further. We collect another 3 CH and attach it to the first leg – you should get 42SC.
Repeat 42SC-3 rows.
*
change the color of the yarn (in my case to blue). Do not forget to fill as you knit
Repeat 42SC- 5 rows
*
change the color of the yarn (in my case, to yellow)
Knitting description:
Repeat 42SC- 2 rows
change the color of the yarn (in my case, to blue)
Repeat 42SC- 2 rows
(5SC, DEC) * 6- 36SC repeat 36SC
(4SC, DEC) * 6-30SC repeat 30SC
(3SC, DEC) * 6-24SC repeat 24SC-2 rows
(2SC, DEC) * 6-18SC
* In the next row we will knit handles.
Arrange them symmetrically to each other and knit by grabbing both SC (body and handles).
Repeat 18SC
change the color of the yarn (in my case, to white)
(1SC, DEC) * 6-12SC
12 İNC- 24SC
(3SC, İNC) * 6-30SC
(4SC, İNC) * 6- 36SC
(5SCİNC) * 6- 42SC
(6SC, İNC) * 6- 48SC
(7SC, İNC) * 6- 54SC
(8SC, İNC) * 6-60SC
Repeat 60SC – 9 rows
without cutting the threads, we continue to knit.
Head (white):
we insert eyes between 5 and 6 rows (rows without additions). distance between eyes 8 SC
(8SC, DEC) * 6- 54SC
(7SC, DEC) * 6- 48SC
(6SC, DEC) * 6- 42SC
(5SC, DEC) * 6- 36SC
(4SC, DEC) * 6-30SC
(3SC, DEC) * 6-24SC
* during knitting, do not forget to fill
(2SC, DEC) * 6-18SC
(1SC, DEC) * 6-12SC
6 decreases pull off the hinges, close the hole.
cut the thread, fasten, hide the end in the body.
continuation
Assembly and design:
* Fasten the tail at the back, just below the rows of the blouse, sew on.
* Place the ears, just above the line of the eyes, on the sides. Sew on.
* Using nitkimulin to arrange the muzzle.
Assembly and design:
in MR we type:
2CH, 5 DC, 2CH, SL-ST, 2CH, 5DC, 2CH, s
Wrap the thread from the ball a couple of times in the middle to give a clearer shape. Cut the thread, leaving a long end. Bring to the wrong side. Secure. Sew on or tie on the body.
Bow tie (in yellow):
Assembly and design:
one))
* Tie diagram
On the crown, parallel to the line of the eyes, mark 3 points (as in the photo). Attach yarn, grabbing the SC stitches on the head, knitting will go from right to left.
Dial
16CH, with 2 loops from the hook, knit 15SC along the chain from
CH, 2 SL-ST;
16 CH, with 2 loops from a hook 15SC on a chain of CH, 2SL-ST;
16 CH, with 2 loops from a 15SC hook on a chain of CH, SL-ST.
Cut the thread. Secure. Hide the ends in the body of the toy.
Hairstyle (white):
Assembly and design:
The bunny is ready!
I look forward to seeing photos of your work!


If you have any questions, write to Direct