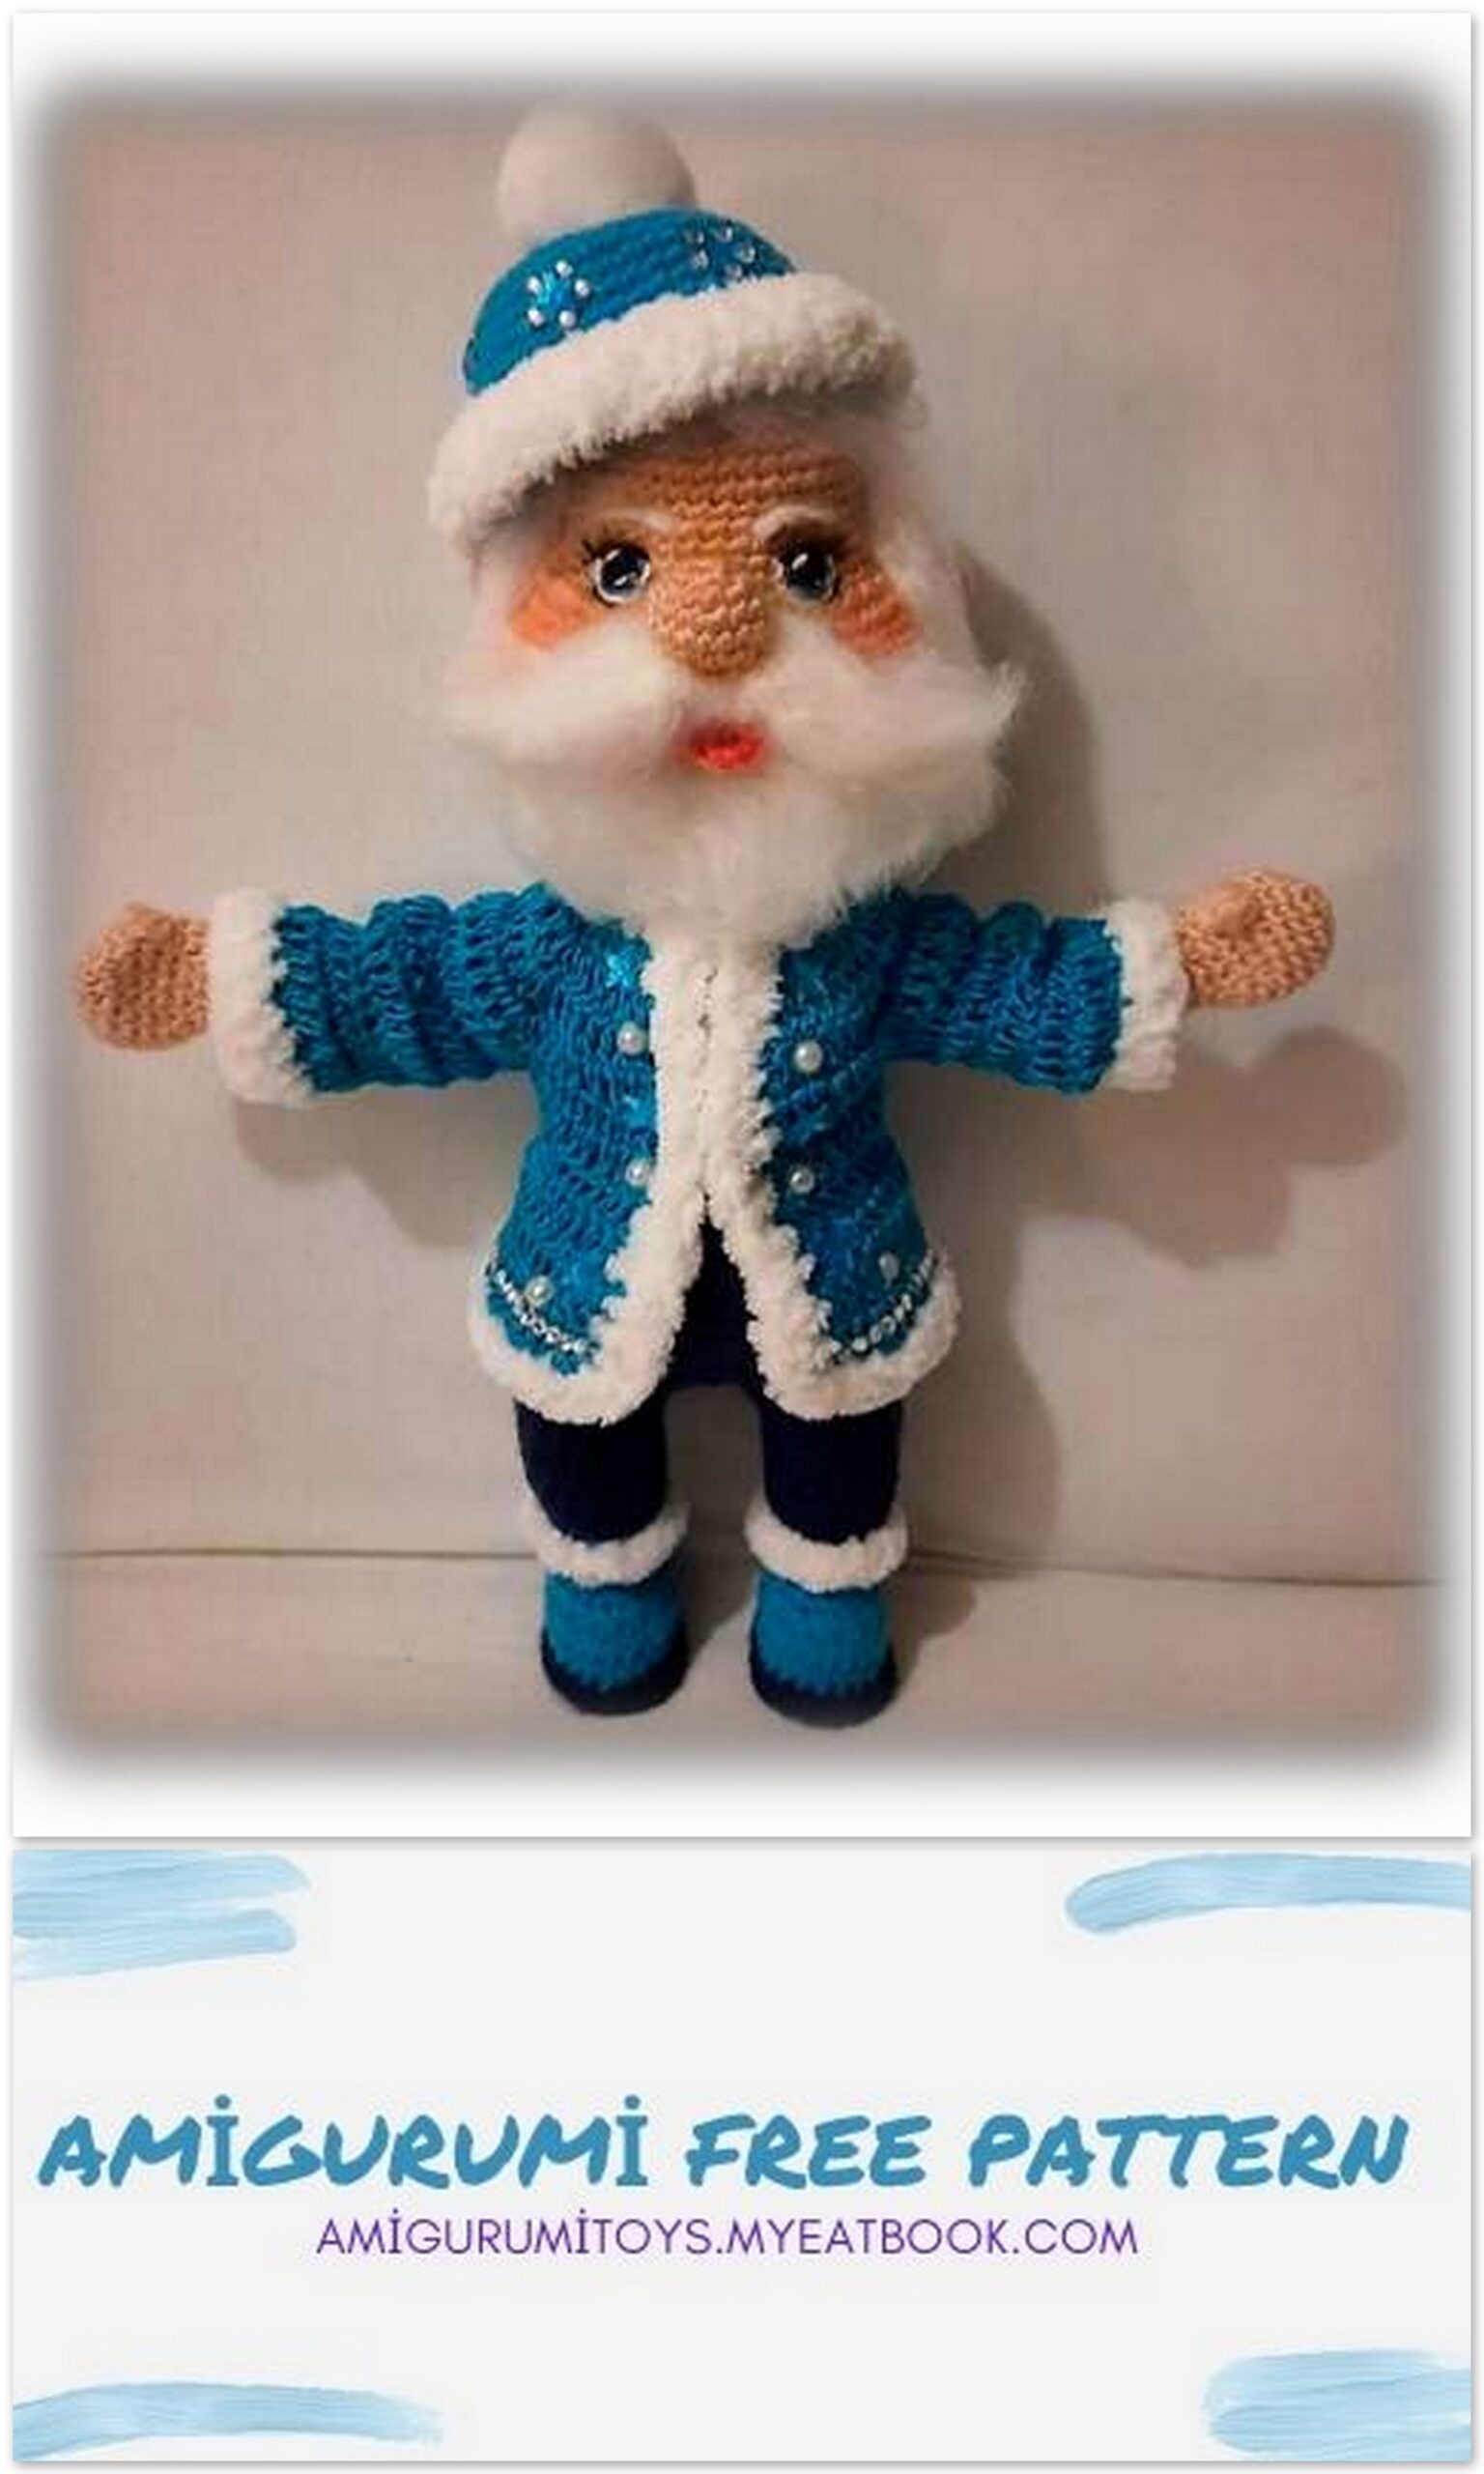
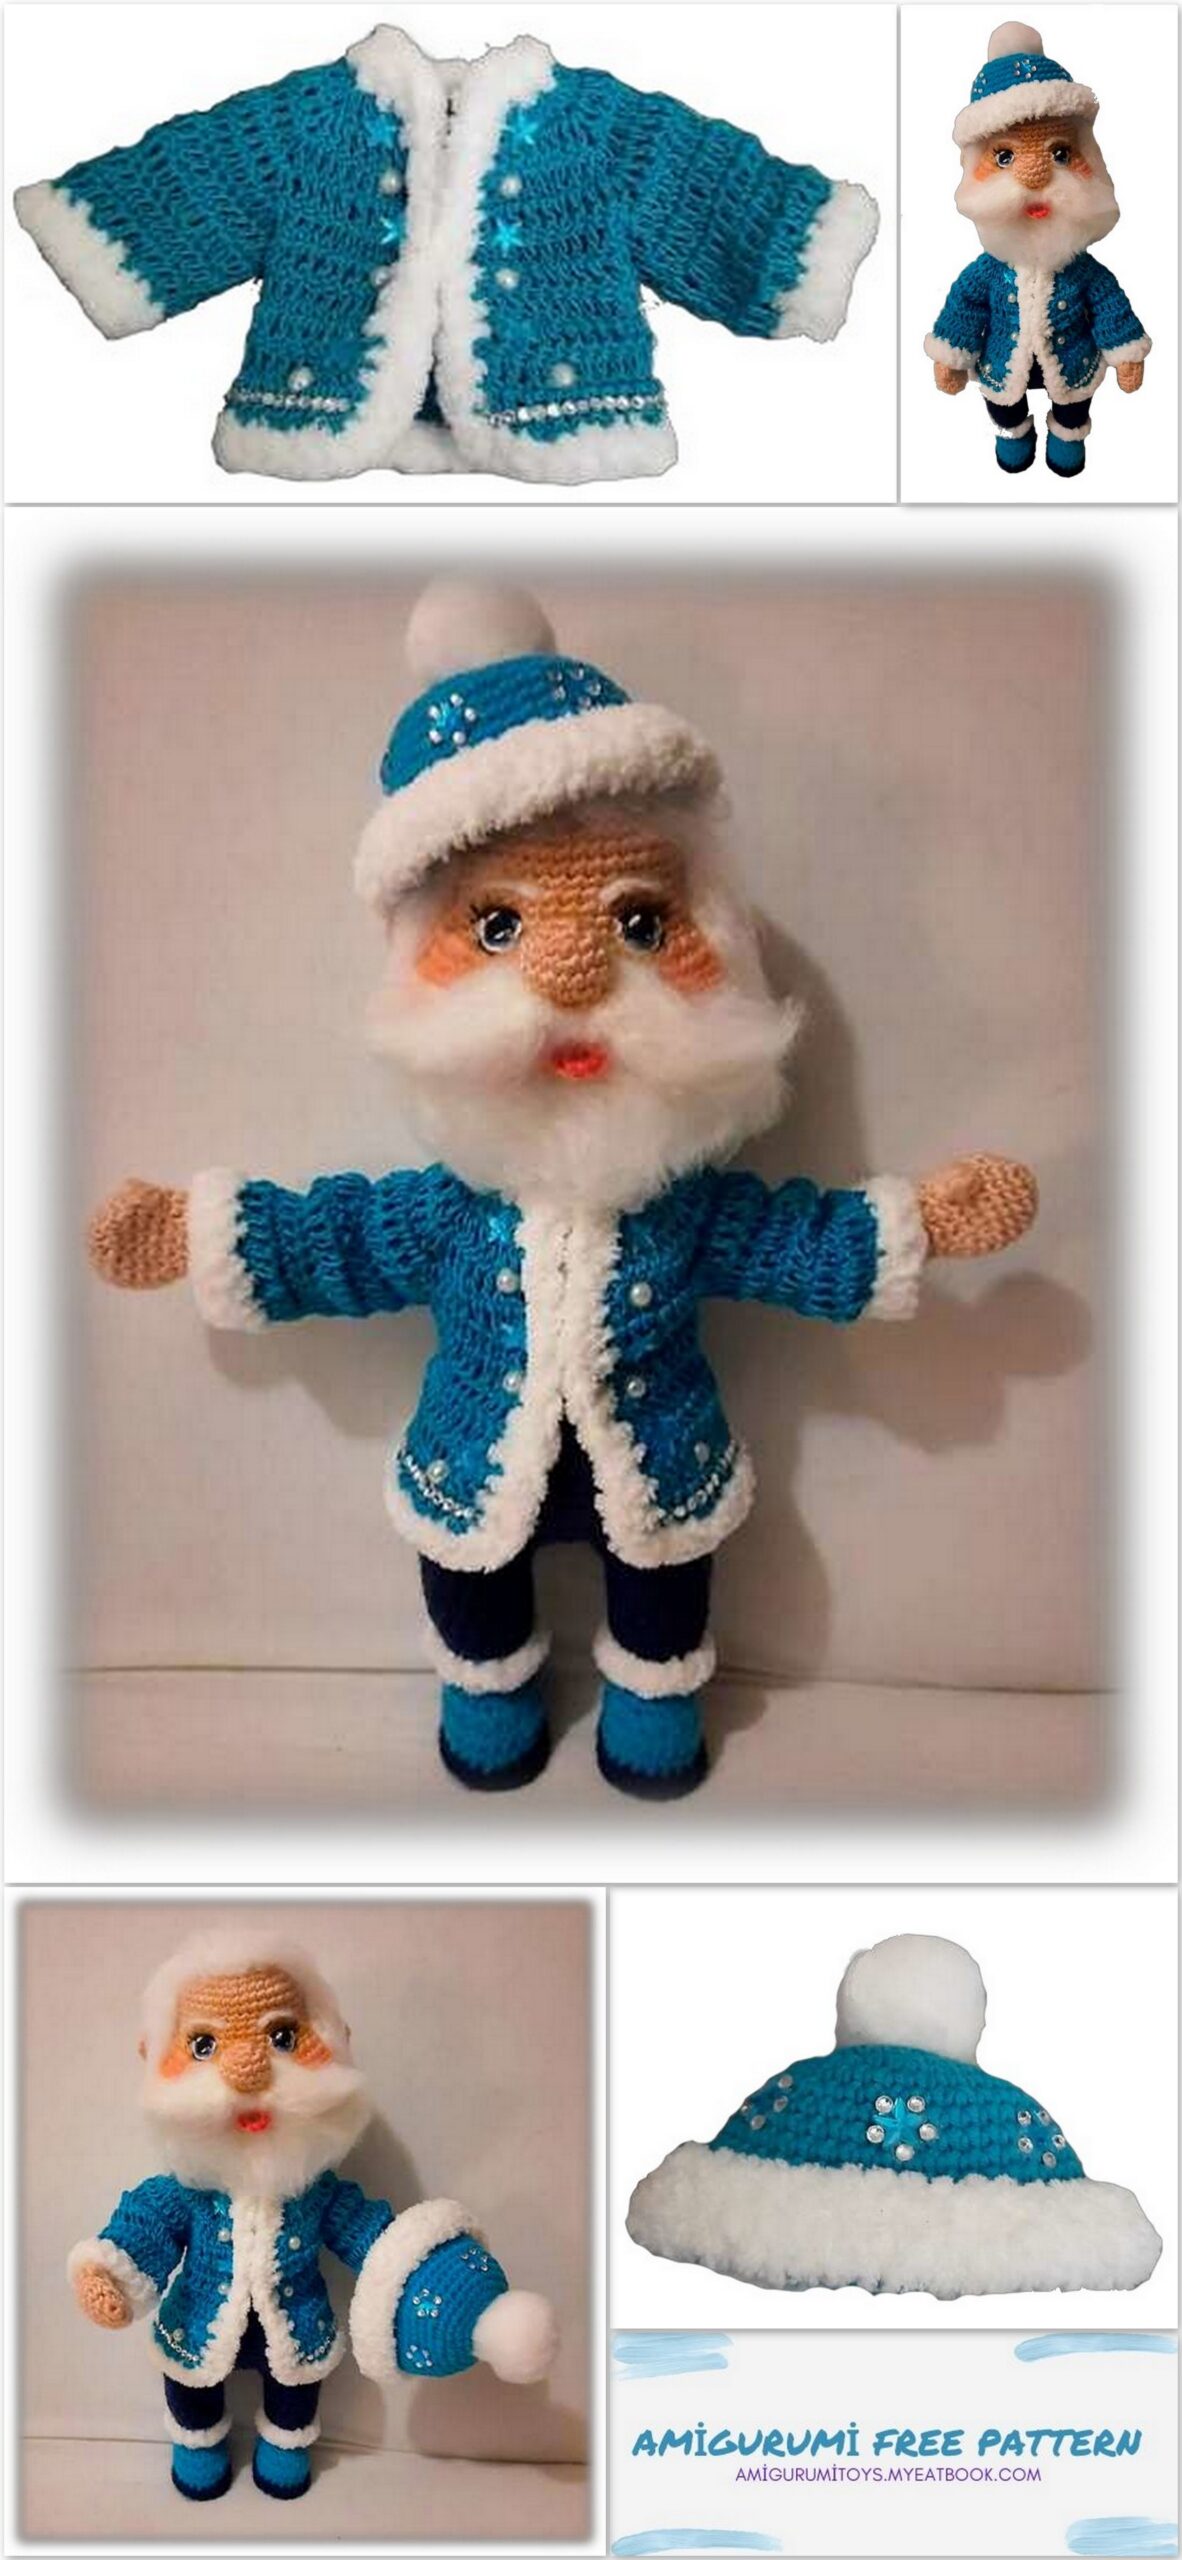
Amigurumi Santa Claus Free Pattern
Santa Claus
Design: Yazhinskaya Galina
Materials:
Nako Paris yarn color white 208 (40% acrylic, 60% polyamide, 245 m / 100g) (beard, mustache, wig)
Lanoso baby dream yarn color smoky pink 937 (100% children’s anti-pilling acrylic, 265 m / 100 g) (head, arms, body)
Yarn Art Jeans color bright turquoise 33 (55% cotton, 45% polyacrylic, 160m / 50g) (hat, boots)
Yarn Art Jeans color dark blue 54 (55% cotton, 45% polyacrylic, 160m / 50g) (sole of boots, pants)
Alizie softy baby color white 55 (100% micropolyester, 115m / 50 g) (strapping of boots, fur coats, hats)
Vita Coco color dark green turquoise 4315 (100% mercierized cotton, 240m / 50g) (for a fur coat)
hook No. 1.6,
scissors,
filler,
pins,
yarn needle,
thick cardboard or thin plastic for insoles,
wire for a frame with a cross section of 1.5 mm about 80 cm without braiding
(2 pieces of 25 cm for legs and two pieces of 15 cm for handles (optional),
adhesive tape for insulating the ends of the wire
stitch marker
thread “iris” for eye embroidery. You can also use any suitable ready-made eyes of your choice.The height of the toy when using materials like the author’s will be 29 cm.
* Legend *
ch – air loop
sl-st – connecting post
sc – single crochet
hdc – half double crochet
c1h – column with 1 crochet
inc – increase
dec – decrease.
We knit in a spiral, unless otherwise indicated. Follow the stitch marker.
* Hands x2 *
Knit with body color. Follow the marker!
Left hand
1) 6 sc into magic ring (6)
2) 6 inc (12)
3) (1 sc, inc) x6 (18)
4-5) 18 sc (2 rows) (18)
6) 1 sc, (4 c1h with a common vertex in one loop of the base) is a thumb, 16 sc (18)
7) 1 sc, (3 sc, dec) х3, 1 sc (15)
8) 5 sc, dec, 8 sc (14) – the decrease is on the palm.
9) 5 sc, 2 dec, 5 sc (12)
10) (2 sc, dec) x3 (9)
11) (2 sc, inc) х3 (12)
12-20) 12 sc (9 rows) (12)
21) 1 sc, 2 dec, 2 sc, 2 inc hdc (this is the elbow), 3 sc (12)
22) 1 sc, 2 inc, 2 sc, 2 dec, 3 sc (12)
23-24) 12 sc (2 rows) (12)
25) (inc, 5 sc) x2 (14)
26-31) 14 sc (6 rows) (14)
Right hand
1) 6 sc into magic ring (6)
2) 6 inc (12)
3) (1 sc, inc) x6 (18)
4-5) 18 sc (2 rows) (18)
6) 16 sc, (4 c1h with a common vertex in one loop of the base) is a thumb, 1 sc (18)
7) 2 sc, (3 sc, dec) х3, 1 sc (15)
8) 8 sc, dec, 5 sc (14)
9) 5 sc, 2 dec, 5 sc (12)
10) (2 sc, dec) x3 (9)
11) (2 sc, inc) х3 (12)
12-20) 12 sc (9 rows) (12)
21) 3 sc, 2 inc hdc (elbow), 2 sc, 2 dec (elbow bend), 1 sc (12)
22) 3 sc, 2 dec, 2 sc, 2 inc, 1 sc (12)
23-24) 12 sc (2 rows) (12)
25) (inc, 5 sc) x2 (14)
26-31) 14 sc (6 rows) (14)
Legs x2
We start with the color of the shoes. The marker goes exactly in the middle of the heel.
Sole
In a dark color of your choice.
1) 5 ch Knit along the chain from the second loop from the hook: 3 sc, 3 sc into the outermost loop. Rotate work.
We knit on the reverse side
chains: 2 sc, inc (10)
2) 1 inc, 2 sc, 3 inc, 2 sc, 2 inc (14)
3) 1 sc, 1 inc, 2 sc, (1 sc, inc) х3, 2 sc, (1 sc, inc) х2 (22)

Leg
1) 5 ch Knit along the chain from the second loop from the hook: 3 sc, 3 sc to the extreme
loop. Rotate work. Knit on the back of the chain: 2 sc, inc (10)
2) 1 inc, 2 sc, 3 inc, 2 sc, 2 inc (14)
3) 1 sc, 1 inc, 2 sc, (1 sc, inc) х3, 2 sc, (1 sc, inc) х2 (22)
On thin plastic or thick cardboard, circle the contour of the resulting part, cut it out. We make two such insoles.
Now we form a sandwich:
outer insole (sole), cardboard or plastic insole, inner insole.
Both insoles are placed on the wrong side of a cardboard or plastic insole.
4) We keep the outer insole towards us. We knit the whole row, capturing the back half-loops of the outer insole and the back half-loops of the inner insole: 22 sc (22)
5) 22 sc (22)
6) 6 sc, 5 dec, 6 sc (17)
7) 5 sc, 3 dec, 4 sc, 1 dec (13)
8-11) 13 sc (4 rows). In the last loop of the 14th row, change the color to the color of the pants. Do not cut the thread. Bring it out to the outside of the canvas. Later (or in the process of work, having knitted several rows, if it is more convenient for you), you should knit sl-st for free half-loops with this thread.
12) Whole row behind back half loops: 13 sc (13)
13) 3 sc, inc, 6 sc, inc, 2 sc (15)
14-18) 15 sc (5 rows) (15)
19) 14 sc, inc (16)
Cut the thread at the first leg. This will be the left leg. At the second we continue knitting. We connect the legs and move on to knitting the body.
*Body*
If you plan to insert the frame, then this should be done before you stuff your toy.
We stuff the legs tightly.
20) Make sure you finish at the middle of the inner thigh. If not, knit a few sc offsets.
3 ch, attach the thread to the middle loop of the inner side of the left leg. 16 sc left
leg, 3 sc along the chain, 16 sc along the right leg, 3 sc along the chain. We put a marker. (38)
21) 3 inc, 12 sc, inc, 3 sc, inc, 12 sc, 6 inc (49)
22) (10 sc, inc) х3, 16 sc (52)
23-25) 52 sc (3 rows)
26) 10 sc, dec, 22 sc, dec, 16 sc (50)
27) 10 sc, dec, 22 sc, dec, 14 sc (48)
28-29) 48 sc (2 rows) (48)
30) (6 sc, dec) x6 (42)
31) 42 sc (42)
Change the thread to body color.
32) Whole row behind back half-loops: (5 sc, dec) x6 (36)
33-35) 36 sc (3 rows) (36)
36) 10 sc, inc, 14 sc, inc, 10 sc (38) – these increments should go to the sides of the body. We follow the marker from this row, it should be strictly in the middle of the back.
37-39) 38 sc (3 rows) (38)
40) 10 sc, inc, 16 sc, inc, 10 sc (40)
41-44) 40 sc (4 rows) (40)
45) We knit hands: 6 sc along the body (part of the back), 7 sc along the canvas of the body and arms together, 14 sc along the body (chest), 7 sc along the canvas of the body and arms together, 6 sc along the body (second part of the back) ( 40)
Important!!! The thumb is facing the body.
46) 6 sc, 7 sc over remaining arm loops, 14 sc, 7 sc over remaining arm loops, 6 sc (40)
47) 5 sc, dec from 1 body loop and 1 arm loop, 5 sc, dec from 1 arm loop and 1 body loop, 12 sc, dec from 1 body loop and 1 arm loop, 5 sc, dec from 1 arm loop and 1 body loops, 5 sc (36)
48-49) 36 sc (2 rows) (36)
50) (4 sc, dec) x6 (30)
51) (3 sc, dec) x6 (24)
52) (2 sc, dec) x6 (18)
53) (dec, 4 sc) x3 (15)
54-58) 15 sc (5 rows) (15)
Finish.
*Head*
Knit with body color
1) 6 sc into magic ring (6)
2) 6 inc (12)
3) (1 sc, inc) x6 (18)
4) (2 sc, inc) x6 (24)
5) (3 sc, inc) x6 (30)
6) 2 sc, inc, (4 sc, inc) х5, 2 sc (36)
7) (5 sc, inc) x6 (42)
8-10) 42 sc (3 rows) (42)
11) 10 sc, dec, 18 sc, dec, 10 sc (40) – these two decreases
are located at the temples, so the forehead takes on a somewhat convex shape.
The marker should go down the center of the back of the head!
12) 40 sc (40)
13) 10 sc, inc, 18 sc, inc, 10 sc (42)
14) (6 sc, inc) x6 (48)
15) 48 sc (48)
16) 14 sc, 6 inc, 8 sc, 6 inc, 14 sc (60) – additions will form the cheeks.
17-18) 60 sc (2 rows) (60)
19) Change the thread to white, move on to knitting a beard. Knit the entire row at the back half loops: 60 sc (60)
20-22) 60 sc (3 rows) (60)
23) (8 sc, dec) x6 (54)
24) 54 sc (54)
25) (7 sc, dec) x6 (48)
26) (6 sc, dec) x6 (42)
27) (5 sc, dec) x6 (36)
28) 2 sc, dec, (4 sc, dec) х5, 2 sc (30)
29) (3 sc, dec) x6 (24)
30) Change the thread to body color. (2 sc, dec) x6 (18)
31) (1 sc, dec) x6 (12)
32-36) 12 sc (5 rows) (12)
Fill the top of the head and cheeks well, do not stuff the beard tightly. Here we will do a mouth tightening.
We stuff the neck after tightening and insert it inside the neck on the body, sew the head to the body.
*Wig*
White.
1) 6 sc into magic ring (6)
2) 6 inc (12)
3) (1 sc, inc) x6 (18)
4) (2 sc, inc) x6 (24)
5) (3 sc, inc) x6 (30)
6) (4 sc, inc) x6 (36)
7) Partial row: 24 sc, 1 ch twist knit.
Next, we knit in rotary rows. At the end of each row we knit 1 ch turn
8-9) inc, 24 sc (23)
10) 26 sc (26)
11) inc, 24 sc, inc (28)
12) 28 sc (28)
Finish.
* Mustache x2 *
White
1) 6 sc into magic ring (6)
2) (1 sc, inc) х3 (9)
3-4) 9 sc (2 rows) (9)
5) dec, 7 sc (8)
6) dec, 6 sc (7)
7) dec, 5 sc (6)
8) dec, 4 sc (5)
9) dec, 3 sc (4)
Finish.

*Nose*
We knit with skin color.
1) 6 sc into magic ring (6)
2) 6 inc (12)
3) (1 sc, inc) x6 (18)
4) 18 sc (18)
5) (1 sc, dec) x6 (12)
Finish.
* Ears x2 *
We knit with skin color. We knit in rotary rows.
1) 6 sc into magic ring. We do not close in a ring. 1 ch turn.
2) (1 sc, inc) х2, 1 sc, 1 sl-st. Cut the thread, fasten.
*Mouth*
1) 8 sc into magic ring.
Tie around the contour with connecting posts.
Cap
Clothing color.
1) 6 sc into magic ring (6)
2) 6 inc (12)
3) (1 sc, inc) x6 (18)
4) (2 sc, inc) x6 (24)
5) (3 sc, inc) x6 (30)
6) 30 sc (30)
7) 2 sc, inc, (4 sc, inc) х5, 2 sc (36)
8) 36 sc (36)
9) (5 sc, inc) x6 (42)
10-12) 42 sc (3 rows) (42)
13) 3 sc, inc, (6 sc, inc) х5, 3 sc (48)
14-16) 48 sc (3 rows) (48)
Fasten and cut the thread.
We attach white yarn, I have it Alizie softy baby, and we knit by the back half-loops of the 16th row:
17) (2 sc, skip one st) xto end of row
18-20) sc whole row (3 rows). Fasten the thread, cut it, hide it. This is the cap lapel.
Pompon
The pom-pom can be purchased ready-made, can be made according to the classical method, or you can knit:
1) 6 sc into magic ring (6)
2) 6 inc (12)
3) (1 sc, inc) x6 (18)
4-6) 18 sc (3 rows) (18)
7) (1 sc, dec) x6 (12)
Fill loose.
8) 6 dec (6). Fasten the thread, leave the end for sewing and sew to the cap in the center of the CA.
We decorate the hat to your liking.
Coat
Vita Coco yarn. Clothing color.
We collect a chain of air loops: 34 + 3 ch lifting. We knit in rotary rows.
3 ch lifts count as the first c1h.
We knit the raglan like this: 1 c1h, 1 ch 1 c1h – in one loop. Hereinafter, this combination is designated by the word “raglan”.
1) We knit in the 4th loop from the hook and then along the chain 5 c1h (shelf), raglan, 5 c1h (sleeve), raglan, 10 c1h (back), raglan, 5 c1h (sleeve), raglan, 5 c1h (shelf).
2) 6 c1h, raglan, 7 c1h (sleeve), raglan, 12 c1h (back), raglan, 7c1h (sleeve), raglan, 6 c1h (shelf)
3) 7 c1h, raglan, 9 c1h, raglan, 14 c1h, raglan, 9 c1h, raglan, 7 c1h
4) 8 c1h, raglan, 11 c1h, raglan, 16 c1h, raglan, 11 c1h, raglan, 8 c1h
5) 9 c1h, skip sleeve stitches (13 c1h), 18 c1h back, skip sleeve stitches (13 c1h), 9 c1h shelf (36)
6) 9 c1h, 1inc c1h, 16 c1h, 1 inc c1h, 9 c1h (38)
7) 38 c1h (38)
8) 10 c1h, 1 inc c1h, 16 c1h, 1 inc c1h,
10 c1h (40)
9) 40 c1h (40)
Trying on a fur coat for grandfather. If the length suits, then we fix the thread and cut it off.
Remember that the fur coat should be tied with two more rows of yarn, the length will add Xia.
Sleeve x2
We knit c1h in a circle
trailing rows of 6 rows.
Each row starts 3 ch of lift instead of the first c1h and ends 1 sl-st in the third ch of lift. We also try on a fur coat for our grandfather and notice the length of the sleeve.
Strapping
We tie the fur coat in white: we attach the thread to the first loop, with which we began to knit the fur coat. We tie it like this: (2 sc in, skip 1 loop)
– to end. In each corner we knit 2 sc in one loop.
We tie 2-3 rows with white yarn, fasten the thread, cut it off, hide the tip of the thread.
We tie the sleeves in the same way.
We tie the boots. We attach a white thread to the half-loops of 4 rows of boots and knit 1 sc by free half-loops in each loop. We fix the thread, cut it, hide the tip.
On the inside of the fur coat, I sewed on a small button, and on the opposite side I made a loop.
Assembly
Sew on the mustache in the center of the face between rows 18 and 19.
We sew a nose on the head. Sew for half loops 18 rows of the head and nose loops at the same time.
Mouth tightening Use strong thread.
Point 1 is in the 17-18 row above the center of the nose.
Point 2 is 2 cm below the nose and whiskers in the center.
Point 3 is two loops away from point 2.
Insert the needle into point 1. and display in v.2.
back off two stitches, insert the needle at point 3,
thread over the work. From volume 3 to volume 2. , from v.2 to v.1. Pull the ends and secure them with a strong knot. Hide the ends in the head.
We carry out a similar tightening on the other side: from point 1 to point 4, from point 4 to point 2, withdraw the needle in point 1, pull, fix, hide the ends in the head.
Sew a mouth in the place of the formed tightening.
Take your time, play with the decoration. Mark the places of each detail, pin with pins. And only when the result suits you, start sewing.
For toning my grandfather, I used watercolor pencils. You don’t need to tint a lot, don’t overdo it.
Sew on the ears. From the center of the indentation to each side 5-6 cm and sew at eye level between 16-18 rows.
We embroider eyes.
Sew a pom-pom to the hat.
We put the wig on, fix it with pins on the head, then sew it with ordinary white sewing threads in two folds.
With a slicker we comb the mustache, beard and wig.
We embroider eyebrows. If you wish, you can knit and sew them: 5-6 ch, we knit in the second loop from the hook and then along the chain 1 sl-st, 4 sc, 1 sl-st.
Decorate the hat, fur coat and boots to your liking.