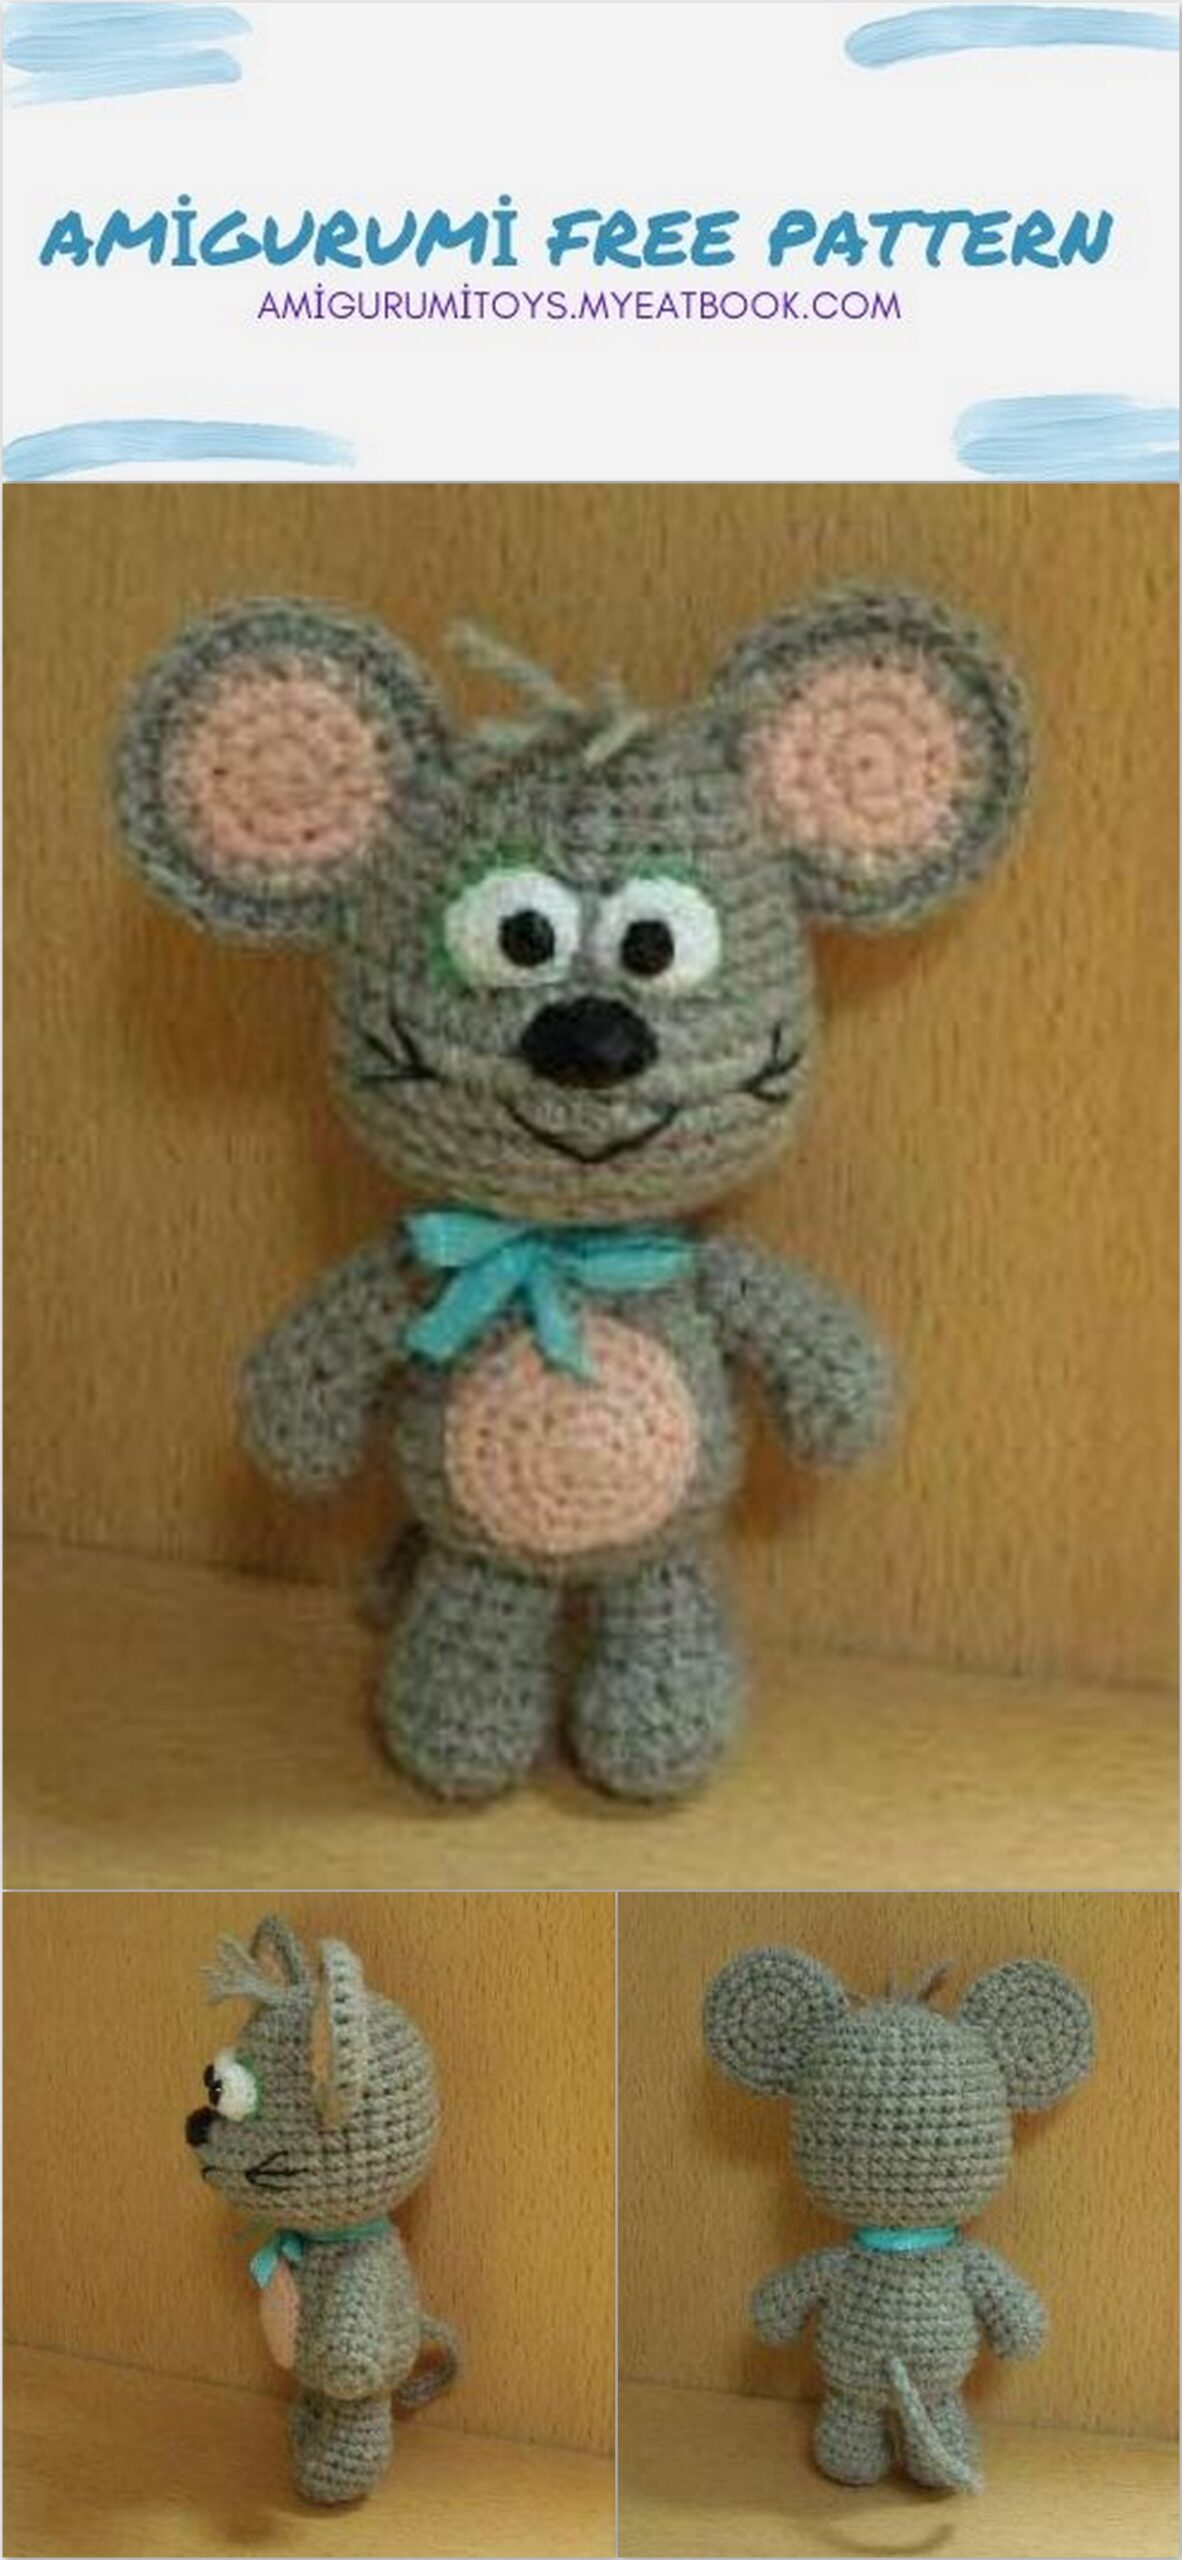
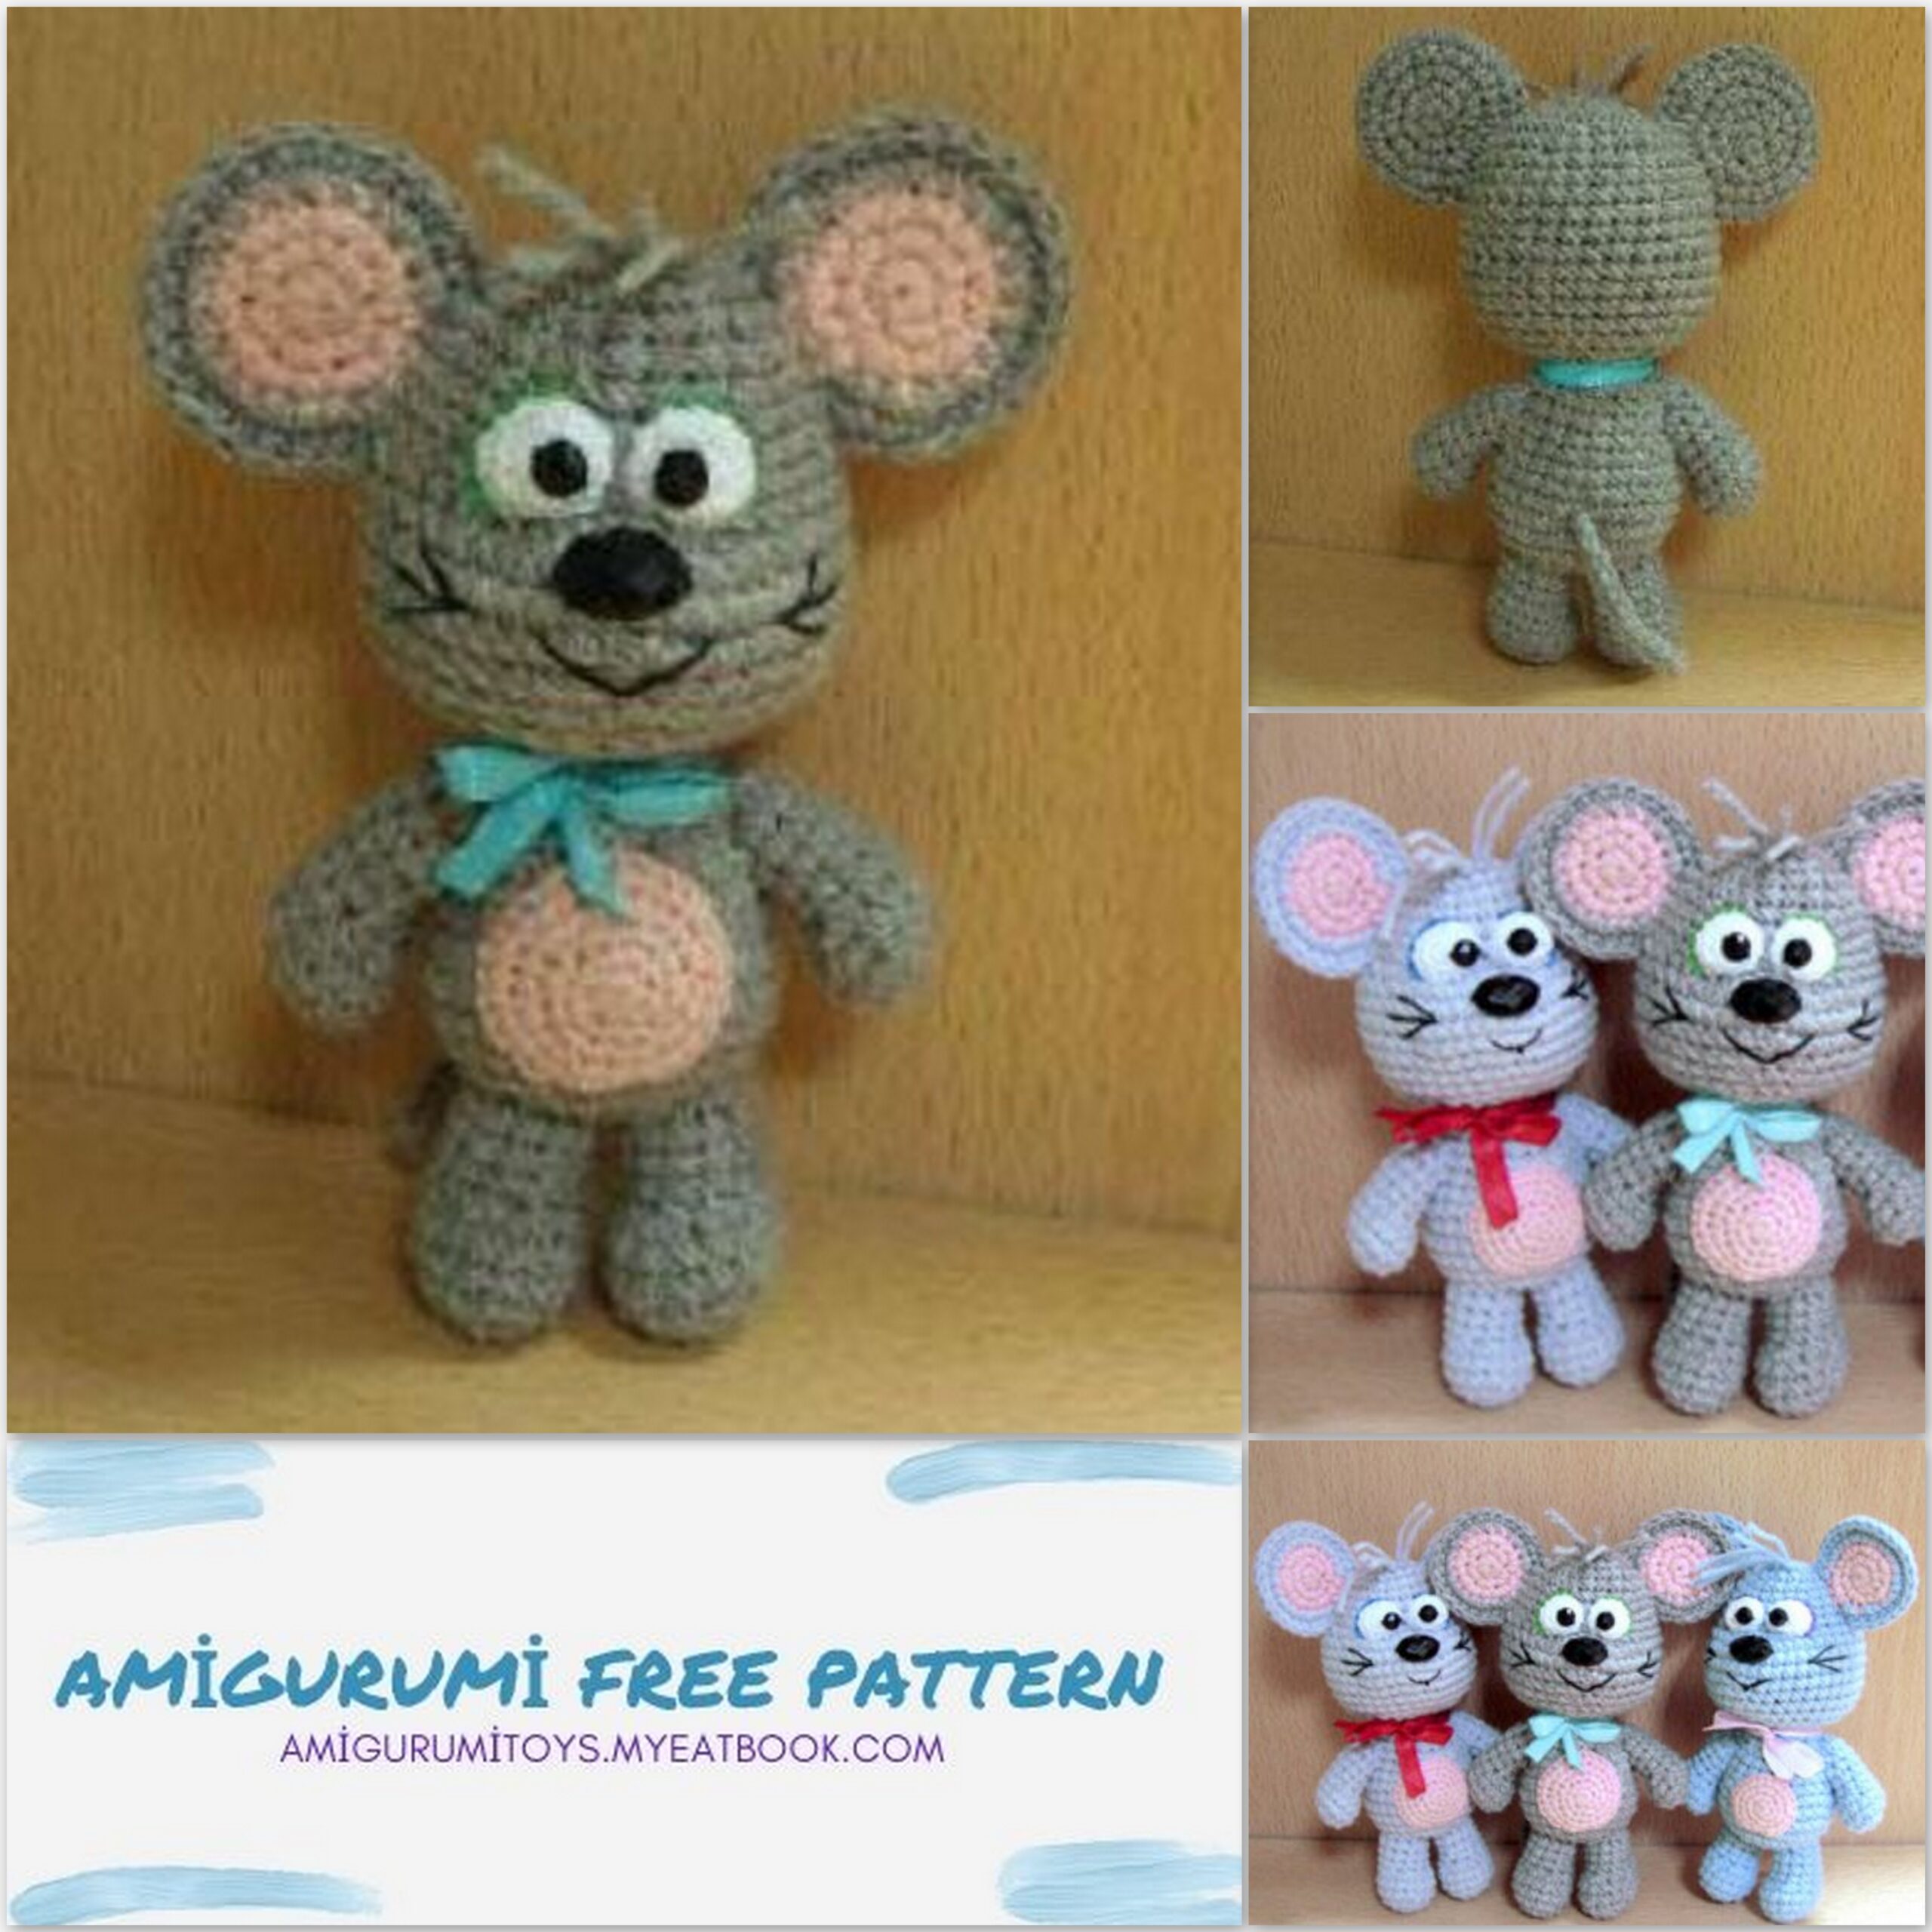
Amigurumi Mouse Free Pattern
Amigurumi Mouse Free Pattern Height 13 cm with ears.
Tools and materials:
- Hook 2.5 or 2 mm. Hook 1.5 or 1.25 for eyes and belly.
- The filler is chlorofiber.
- Yarn ALIZE Cotton Gold, 55% cotton, 45% acrylic, 330 m / 100 g. YarnArt Jeans is an analogue of the indicated yarn.Colors: gray (or another suitable for a mouse), pink.
- A little bit of fine white yarn for the eyes and black for the mouth and mustache embroidery.
- VITA cotton COCO is suitable, another one (at least 200 m / 50 g) is possible. Mouline thread for iris embroidery.
- Sew-on rhinestones d = 6 mm for eyes;
d = 10 * 14 mm for the nose.


Legend:
CH () – air loop
SC () – single crochet
SL-ST () – connecting post
İNC () – increase
DEC () – decrease
İNC 3in1 () – 3 single crochet, knitted in the same column of the previous row.All details, unless otherwise indicated, are knitted in a spiral
Head (gray):
1 p: 6 SC in the amigurumi ring
2 p: 6 İNC = 12 SC
3 p: (İNC, 1 SC) * 6 = 18 SC
4 p: (İNC, 5 SC) * 3 = 21 SC
5 p: (4 SC, İNC, 2 SC) * 3 = 24 SC
6 p: (İNC, 7 SC) * 3 = 27 SC
7 p: (5 SC, İNC, 3 SC) * 3 = 30 SC
8-10 pp: 30 SC
11 p: İNC, 1 SC, 3 İNC 3in1, 1 SC, İNC, 23 = 38 SC
12 p: 7 SC, İNC, 30 SC = 39 SC () * 6 – repeat 6 times We mark the underlined increase in some way, this will be the middle of the muzzle.
13 p: 39 SC
14 p: 7 SC, DEC, 30 SC = 38 SC
15 p: 7 SC, DEC, 29 SC = 37 SC
16 p: 6 SC, DEC, 29 SC = 36 SC
17 p: 6 SC, DEC, 28 SC = 35 SC
18 p: (2 SC, DEC, 1 SC) * 7 = 28 SC
19 p: (DEC, 2 SC) * 7 = 21 SC
Stuff our head
20 p: (1 SC, DEC) * 7 = 14 SC
21 p: 7 DEC = 7 SC
Finish the packing, cut the thread (≈ 20 cm) and tighten the hole.
We thread the tip of the thread into the needle and make a tightening to highlight the nose. Above the place marked in front, we find 3 İNC 3in1, the tightening stitch will be done immediately above them. We make sure that it is even in relation to the marked middle.
We insert the needle in the place where the hole was pulled together, we withdraw the increments on one side, we again introduce it on the other side and finally withdraw it again below, where the hole was pulled together. The thread is tightly but carefully pulled and secured.
Torso (gray):
1 p: 6 SC in the amigurumi ring
2 p: 6 İNC = 12 SC
3 p: (İNC, 1 SC) * 6 = 18 SC
4 p: (2 SC, İNC) * 6 = 24 SC
5 p: (İNC, 3 SC) * 6 = 30 SC
6-8 pp: 30 SC
9 p: (DEC, 8 SC) * 3 = 27 SC
10 p: (4 SC, DEC, 3 SC) * 3 = 24 SC
11 p: (DEC, 6 SC) * 3 = 21 SC
12 p: 21 SC
13 p: (3 SC, DEC, 2 SC) * 3 = 18 SC
14 p: 18 SC
15 p: (DEC, 4 SC) * 3 = 15 SC, SL-ST
We cut the thread, leaving the end for sewing, fasten it.
We fill the body and sew it to the head, covering the place where the tightening thread was taken out.
Legs (gray), 2 pcs:
1 p: 6 SC in the amigurumi ring
2 p: 6 İNC = 12 SC
3 p: (İNC, 3 SC) * 3 = 15 SC
4-5 pp: 15 SC
6 p: 4 DEC, 7 SC = 11 SC
7-9 pp: 11 SC
We make SL-ST, cut the thread, leaving the end for sewing.
We stuff the legs and sew on the bottom of the body close to each other a little clubfoot.
Handles (gray), 2 pcs:
1 p: 6 SC in the amigurumi ring
2 p: 6 İNC = 12 SC
3-4 pp: 12 SC
5 p: 3 DEC, 6 SC = 9 SC
6-9 pp: 9 SC
We fill the handle
10 p: (DEC, 1 SC) * 3 = 6 SC
We finish stuffing, cut the thread, leaving the end for sewing, tighten the hole.
Sew on handles, stepping back 1 row from the head, on the sides, so that the bent part “looks” at the body. We sew not at the very tip, but in a circle, grabbing a little more down so that the legs do not stick out to the sides.
Puziko (pink):
To knit a belly, we take a hook 1.25-1.5 mm, divide the main thread (it is twisted from 4 threads) in half. You can choose a fine yarn that matches the color.
1 p: 6 SC in the amigurumi ring
2 p: 6 İNC = 12 SC
3 p: (İNC, 1 SC) * 6 = 18 SC
4 p: (2 SC, İNC) * 6 = 24 SC
5 p: (İNC, 3 SC) * 6 = 30 SC, SL-ST
We cut the thread, leaving the end for sewing, fasten, sew on the belly.
Ears (pink, gray), 2 pcs:
First we knit the inner (front) part of the ear. We start with a pink thread. We knit according to the scheme / description 1-3 pp, i.e. rows highlighted in red.
On the first column of the 4th row, go to gray, cut off the pink thread.
4 r we knit with a gray thread We knit the outer (back) part of the ear with a completely gray thread, not paying attention to the different colors in the scheme / description. In the same way, we knit an incomplete 4th row. After the last SL-ST, make CH, unfold the knitting with the wrong side facing us, apply the front of the ear and connect the parts, tying them together SC without increments, as shown by the stroke on the diagram.
1 p: 6 SC in the amigurumi ring
2 p: 6 İNC = 12 SC
3 p: İNC 3in1, (1 SC, İNC) * 4, 1 SC, İNC 3in1, 1 SC = 20 SC
4 p: 1 SC, İNC, 1 SC, İNC, (2 SC, İNC) * 4, 1 SC, İNC
(the second column of the increase we knit SL-ST) – an incomplete row Cut and fasten the thread.
We make the first column on the front of the ear in the 2nd loop from the edge, on the back of the ear in the 3rd loop from the hook (the loop on the hook does not count).
The last column of the connecting row is SL-ST. We cut the thread, leaving the end for sewing, fasten it.
Sew the ears on the sides, stepping back 3 (4) rows from the crown. Sew on flat, but separately on each side.
Eyes (white), 2 pcs:
We take a thin thread, hook 1.5
1 p: 6 SC in the amigurumi ring
2 p: 6 İNC = 12 SC
3 p: 12 SC Fastening the thread for sewing.
3 (4) rows
Sew the eyes immediately above the tightening stitch, almost close to each other. If possible, we sew the lower part evenly, the upper one in a semicircle (since it is drawn, of course, it will not work, but we will try). Because the eyes should be convex, it is better to put padding so that the eyes do not stretch when sewing on. We do not sew until the end, we fill the eyes and finish sewing.
Around the eyes with a chain stitch with a colored floss in 3 additions we embroider an iris (so what, what’s outside). We make the seam very, very close to the eye, but not close, otherwise it will be lost behind the eye.
Sew the rhinestone pupils obliquely inward. Sew on 2 stitches with bobbin thread in half, that’s enough. With each stitch, pull the thread tightly (but carefully) so that the strass fits snugly. We draw the thread 2 rows below the eyes and sew the nose in the middle.
With a thin black yarn (you can floss in 6 additions), we embroider the mouth with ordinary stitches.We make a stitch ≈ one row lower and slightly wider than the nose, the thread is output another 1.5 rows lower in the middle.
We pick up the stitch made and take the thread back to the same place from where it was taken out At the level of the corner of the mouth, after 2 columns from it, we draw out the thread and embroider the antennae: the middle one after 4 columns, the upper and lower ones after 3 columns.
Also on the other hand. The thread can be fixed on the neck, there we will close it with a bow.
Tail (gray):
We knit 15 loops with a double chain, attach to the bottom, tie a knot under the tail and remove the ends inward.
Cut off 3 gray threads 10 cm each, attach them in a row just in front of the crown and cut them as you like.
We tie a bow around the neck.
MOUSE READY!